|
|


|
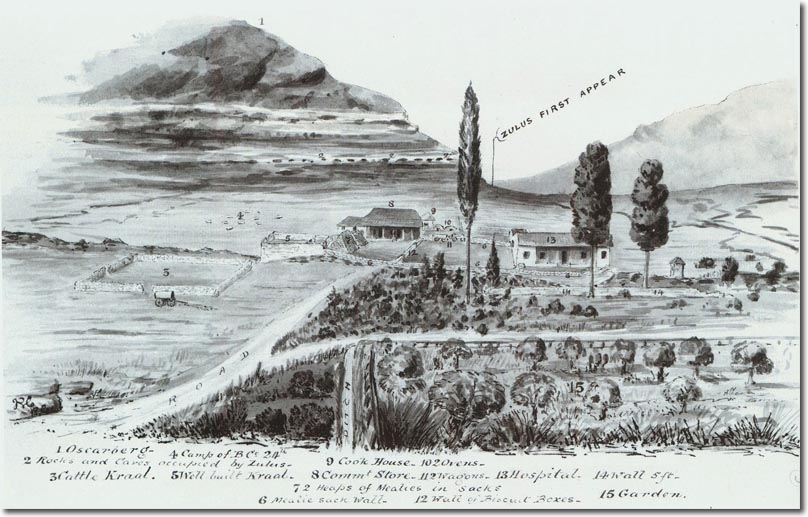
| John Chard, the commander of Rorke's Drift station, provided an account of the siege for Queen Victoria, illustrating it with this watercolour sketch and some maps which traced the progress of the whole episode. This view from the north side shows the Oskarberg Kop at the back with the rocky shelf with caves called the Shiyane where the Zulus fired down on the defenders. The numbers and related key underneath explain each area of the station. Of particular interest is the hospital (13) which was destroyed, and the mealie bag redoubt (7) in front of the storehouse. It will also be seen that the well-built kraal (5) has a high wall at one end which made things difficult for the Zulus in their final assault. The wall at the front (14) and the garden (15) provided cover for the Zulus attacking he north side of the perimeter. |
Armed Forces | Art and Culture | Articles | Biographies | Colonies | Discussion | Glossary | Home | Library | Links | Map Room | Sources and Media | Science and Technology | Search | Student Zone | Timelines | TV & Film | Wargames
