|
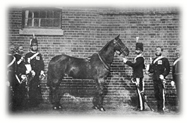
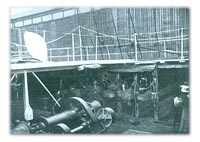
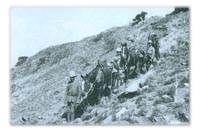
The Voyage to Durban, Nov-Dec 1899
The 13th Hussars were one of the first cavalry regiments to be sent out to the Anglo-Boer War. The regiment was separated so that they embarked at Liverpool on two ships, the Templemore and the Montfort, on the 10th and 11th Nov 1899. Lt-Col Blagrove was in command and they had a strength of 26 officers, one WO and 568 other ranks. D squadron remained behind in Aldershot as a reserve. The Templemore arrived at Cape Town on 2nd Dec but was ordered to continue to Durban and disembarked the troops there on 5th Dec. The Montfort arrived at Durban on 13th Dec. They joined Lord Dundolnald's Brigade on 12th Dec which consisted of the Royal Dragoons, Thorneycroft's Mounted Infantry, Bethune's MI and the South African LH. There was also a composite regiment of Natal Carbineers, KRRC MI, Imperial LH and Natal Police. The 13th provided signallers for the irregular units.
Chieveley
The two parts of the regiment came together at Chieveley and the brigade, poised for the relief of Ladysmith, was engaged in an action at Hlangwani but did not take a direct part in the fighting. There were 8 stretcher bearers of the regiment who were commended for their work in removing wounded men who would otherwise have remained unattended for many hours. After a couple of quiet days a detached post under Lt E W Denny was ambushed on Hussar Hill on 20th Dec, and two men were killed. Their camp, near Chieveley Station was an unhealthy place and many of the men as well as most of the officers were ill, however two squadrons were posted to different divisions.
Venter's Spruit, 19th Jan 1900
Lt Symons of B Squadron, on recce patrol, brought back useful intelligence to Sir Charles Warren, divisional commander, and the the squadron was ordered to escort guns on a hill about a mile and a half northeast of the drift at Venter's Spruit. At 2pm they came under heavy fire from a kopje 800 yards away. Lt Smythe's Troop was obliged to retire and Corporal Coghlan and Private Findlay were both severely wounded. They were reinforced by infantry and were able to withdraw to their bivouac.
Trichaard's Drift, 27th Jan 1900
After the depressing news of the losses at Spion Kop on 24th Jan, C Squadron crossed the Tugela pontoon bridge in heavy rain and waited above Trichaard's Drift. A Squadron was acting as rearguard to the division, a difficult and nasty task at night. They then crossed the river at 6am and the two squadrons returned to Spearman's Camp. The Boers opened fire all along their line and B Squadron had to place single men spaced 100 yards apart along the line of retirement. They crossed the river at 4am and later went on to Springfield Camp. During the retirement Private Judge was badly wounded and taken prisoner. He did not re-surface until the British entered Pretoria.
Vaalkrantz, 6th Feb 1900
In February 1900 the 13th and 14th Hussars together with the Royal Dragoons formed a brigade under Colonel Burn-Murdoch. They were present at the battle of Vaalkrantz on 6th Feb but did not come into action, although a Boer shell from their big gun landed in the middle of A Squadron but miraculously failed to harm man or horse. They then moved back to Spearman's Camp where the difficulties of managing the transport were very great. Lieut F W Jarvis of the Sussex Yeomanry, attached to the 13th, was highly commended for his work as brigade transport officer.
Relief of Ladysmith, 3rd Mar 1900
From the 10th to 21st Feb they were based at Springfield Camp and Burn-Murdoch's brigade became a detached independent force, augmented by 2 naval guns, the York and Lancaster Regiment and the Imperial Light Horse. After the 21st Feb there was much moving around which involved crossing and re-crossing the Tugela with the object of approaching and entering the besieged Ladysmith. Major Williams and A Squadron were able to get in unopposed on 1st Mar, but the regiment as a whole marched in with Buller's army on the 3rd.
Skirmish on 7th March
On the 6th Mar the brigade camped at Elandslaagte and A Squadron was sent on outpost duty to Sunday's River where Lt John Wigan with five men were sent on to reconnoitre towards Meran, 5 miles away. After 3 miles they were fired upon by about 30 Boers concealed in a kraal. Wigan received a severe shoulder wound and Private Rugg was hit in the thigh. Lt Wigan was saved by Private Farrance who came back for him. His wound kept him out of service until April 1901.
Camp at Elandeslaagte
In April two men were captured at Wessel's Nek but one of them, Private Morris, died of his wounds. The 13th and Royals held a line of outposts on Sunday's River which kept the Boers at bay. When irregular troops took over this task they were less diligent and the Boers drove them into their camp and shelled them heavily. The camp at Elandeslaagte was unhealthy and there was much sickness during March, April and May amongst the men and the horses. In May, B Squadron was sent to Modder Spruit to act as divisional cavalry to General Clery and A and C Squadrons became part of the Drakensberg Defence Force under Maj-Gen Downing.
Buffalo River, 21st Aug 1900
When news came that 200 Boers were crossing the Buffalo River at Wool's Drift, Major Smithson took his weakened squadron to a slight rise, since named Smithson's Ridge, about one and a half miles from Wool's Drift. They had to fall back to help A Squadron, and Smithson was shot in both knees. He was taken prisoner but the two Squadrons managed to fend off the enemy attack. In the action, Private Dempsey dismounted and helped a comrade onto his (Dempsey's) horse. He ran alongside but was shot and died later. Lt Charles Jenkins was at the mercy of advancing Boers and was offered help from Private Herbert and Sgt-Farrier Hunt but was injured and captured.
Newcastle
From around August and much of the latter part of 1900 the 13th were operating in the area of Newcastle in northwest Natal. They had to patrol the railway line to prevent enemy sabotage. There was also hard work building defences at Heidelberg where the Army Service Corps had a huge store of supplies. A detachment was at Waterval where, on 18th Oct 1900 a party of Boers attacked one of the posts and two privates were injured. In December the Boers were busy derailing trains and destroying the line near Vlaklaagte. A Patrol under Capt Wiggin arrived just as the enemy vanished but 2 truck-loads of horses were saved and Sergeant Hetherington distinguished himself both on the 8th and the 13th Dec. Also in this month the regiment were issued with rifles to replace the less effective carbines. At the end of the year the regiment had lost 40 men: 2 killed in action, one died of wounds, 27 died of enteric fever, 6 of dysentery, one drowned, and 4 of other causes. 201 men were invalided home. The numbers were made up by drafts from England totalling 221.
B Squadron
B Squadron, commanded by Captain Edgar Wiggin, acted independently from 7th May 1900 when it was assigned to Lt-General Francis Clery's Division. They marched with Buller's army through Newcastle and Standerton, until they joined up with Lord Roberts' Force on 5th July at Vlakfontein. They spent the next three weeks acting as rear-guard to Clery's column between Bethel and Greylingstad and were sniped at continuously. On 19th July they were attacked by Boers near Leeuw and were assisted by the KRRC who lost one man killed. They left the column to garrison Standerton in late August during which time Private Brodrick was wounded in the leg by a sniper. On 28th Oct 1900 half of B Squadron was sent to assist the garrison at Platrand in recce duties. They returned on 2nd Nov but came into contact with the Britz Commando. There was a skirmish in which Private Lewis was wounded and 3 horses hit.
Farm Clearance, 2nd Dec 1900
Capt Wiggin was placed in charge of a force which included his own squadron, 150 MI, 150 Infantry and 2 guns. They were ordered to clear a farm 10 miles east of Standerton and remove the store of mealies. The Boers were there in force to protect the farm and had cut off a section of the MI. Capt Wiggin advanced on the Boer kraal on foot and captured it under cover of his guns. Private Ware was wounded in the face and Sgt Mahon rescued a MI officer but fell heavily onto barbed wire and was incapacitated for 3 months. The farm was cleared, however, and 4 wagon-loads of mealies were brought back. A similar patrol 2 days later had another fight in which 2 gunners were hurt.
Rademeyer's Picquet, 21st Dec 1900
In the early hours of the 21st Dec the Boers attacked Rademeyer's picquet near Standerton in a thick fog. They captured Corporal Willman and 2 men who were patrolling in front of two sangars. After taking their carbines and horses they released the men and attacked the 3 remaining men in the sangars. Privates Pike and Laggett fought them off from one sangar, wounding 2 Boers. The other sangar was occupied by Private Pearson on his own. He fired off all his ammunition and managed to ride off to Standerton to get help. The squadron pursued the Boers but they were too far away and out of range when the 4.7 inch gun was fired at them from the kop.
Bethel, 16th Jan 1901
On 15th and 16th Jan 1901, B Squadron was attached to the column of Colonel A Colville of the Rifle Brigade, and encountered a large force of Boers as they approached Bethel. They were engaged in battle all day and in the afternoon had to advance on foot towards a defensive position on a ridge which the enemy eventually abandoned. Two men and 7 horses were wounded. Privates Cleaver and Snelling were commended for rescuing a dismounted comrade and catching his horse. The column then camped at Van Staden's Dam.
Bosman's Kranz, 17th Jan 1901
The column were ordered to march towards Vlaklaagte on 17th Jan. Col Colville's force was comprised of the 1st Battalion Rifle Brigade, one company of MI, 50 men of the Standerton Police, 4 guns of the 64th Battery RFA and one pom-pom. B Squadron, split in two, formed the rear-guard, Lt Walter Pepys in charge of the right rear half and Lt Ernest Twist, the left rear half. Twist's men began to be pressed by Boers and had to be supported by the MI and pom-pom. There was then a simultaneous attack on both half squadrons. Pepys and his half fell back on a knoll between the infantry and the baggage. Lance-Cpl Harding and two men were cut off and made a stand on a ridge until they managed to gallop back. This delayed the enemy advance for a while giving time for the Rifle Brigade to take up a position on the ridge as the Boers approached the other side. They were fired on and a bayonet charge drove them off. Meanwhile Pepys and his men were still hard pressed on their knoll and Lt Twist, with Capt Wiggins held a small hill which was also attacked with determination. The Boer attacks failed and they withdrew and sniped at the force from a distance. The Boers Commandos, under Christian Botha, numbered 1,500 and had lost 50 killed and wounded. The 13th Hussars suffered no fatalities but two men and 7 horses wounded, while Lt Pepys narrowly avoided death when a bullet passed through his helmet. He and L-Cpl Harding were mentioned in despatches.
Boschman's Kop, 23rd Feb 1901
The Squadron carried out a successful night raid on a farm near Roberts Drift on the Vaal River on 28th Jan, and brought back seven prisoners. The march was over 35 miles and involved the crossing of the river both ways, all completed in 10 hours. Another patrol of an NCO and 6 men on 23rd Feb was fired on near the top of Boschman's Kop and Private Heaps was severely wounded by a party of Boers. The picquet from Rademeyers Farm came to help when they heard the firing and the enemy was forced to retire. An ambulance was sent out from Standerton but Heaps died that evening.
Wagon Convoy, March 1901
B Squadron was ordered to join a column under the command of General Barr Campbell and march to Vrede on 4th March 1901, escorting a convoy of 300 wagons. The other units in the column were the 3rd Grenadier Guards, 4th Imperial Yeomanry, 2nd Leinsters and 4 guns and a pom-pom. The 13th again formed the rear-guard and had to fend off a force of 200 Boers during the march. On 10th Mar they camped at Mooi Bank before crossing the river at Zonderdrift. However, the rain that night was torrential, swelling the river, and the RE and infantry were kept busy repairing the drift. The crossing of the wagons was a difficult operation and it took 30 hours to move the column and the convoy over the river.
On 14th Mar half the squadron was acting as advance guard under Capt Wiggin while Lt Twist took the other half to occupy a ledge of rock to protect the rear of the column. They came under heavy fire from 200-300 Boers for an hour during which time Sergeant W Mahon DCM was shot in the head and died the next day. He was a well respected man in the regiment and greatly missed. They were only able to move from this position under cover of artillery fire. They were then exposed to fire on a grassy slope where one private was wounded. From this half squadron a small party under Sgt Maguire was sent to occupy another hill which was supposed to be held by the Gloucester Yeomanry. When they reached the place Private Parr was wounded by a bullet fired by one of the Yeomanry who were 'in an excited state'. Capt Wiggin with the advance guard were ordered to proceed to the Klip River and cross to the north side at De Lange's Drift, but the river was in flood and the column had to remain on the south side from 15th to 22nd Mar. The wagons were eventually floated across.
Outpost Duty, 28th-30th Mar 1901
Once more under the command of Col Colville of the KRRC, the squadron was detailed for advanced outpost duty watching the drifts over the Waterval and Groot Spruit for the expected attempt by de Wet to cross to the south. They spent two very unpleasant nights along a six mile front so that every man had to be alert. No Boers were seen but everyone was attacked by swarms of ferocious mosquitoes. In April the Squadron returned to Standerton, and Capt Wiggin was given the local rank of Major and put in charge of a battalion of mounted infantry where he came to the attention of Lord Kitchener who mentioned him in glowing terms in his despatch of 8th Aug 1901.
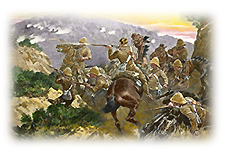
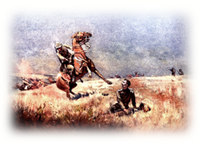
Cavalry Charge at Langzeekoegat, 29th April 1901
'A' Squadron was part of a column that was sent to attack the laager of Hans Botha at Langzeekoegat on 29th April. On reaching their destination the leading section under Corporal Cave charged the Boer outpost in a thick fog while Lt Henry Stern and the rest of the Troop charged the laager. The charge, made with drawn swords, was not effective because the rifles were slung on the offside impeding the right arm. Following this incident the regiment were ordered, on 2nd June 1901, to sling their rifles on the nearside (left) and keep their swords on the offside. The rifles had been issued the previous December to replace the carbines that were carried in a bucket holster (on the offside).
This indicates that during that time, between December and the end of April, the rifles had been slung from the right arm and the swords had not been used. Three men and 4 horses lost their lives in this fight. One of the horses, belonging to Lt Stern, was hit in 5 places. Another private was killed by friendly artillery fire during the retirement to camp. Also on that day a private was killed in a patrol from Greylingstad.
Regiment Reunited, 24th May 1901
Three squadrons, A and B composite squadron and C Squadron were engaged in an assault on a Boer laager positioned on a nek. Lt Pepys leading two Troops went around the hill but they were confronted by the retiring Boers who caused them to take cover and exchange fire. The force, which include a squadron of the 5th Dragoon Guards, returned to De Lange's Drift with 20,000 captured sheep and 1,000 head of cattle. On 24th May the various squadrons made their way to Standerton where the regiment was united for the first time in 13 months. They spent 4 days drawing new equipment and re-fitting. On 29th May the 13th Hussars marched out, probably the strongest and most complete regiment in South Africa. The total strength of the regiment at the beginning of August 1901 was 847 NCOs and men, although 47 were in hospital.
Destruction of Boer Food Supply
The regiment's duties included searching farms and destroying any food stores that were not needed for the British troops. For instance, on 14th June 1901 an order was carried out by 'A' Squadron along with a squadron of 5DG and some infantry to lay waste a 'very fertile valley' at Doornbosch. Most of the cattle and sheep that they came across were herded back to the lines but crops, fruit trees and anything that could sustain the Boers was destroyed. Large areas of the veld were burned which was done to make it difficult for the enemy snipers to hide, and to remove cattle feed.
Change of Command, 1st July 1901
Colonel Henry Blagrove retired from his post as CO on 29th June 1901 and the new commander of the 13th was announced in the London Gazette on 1st July as being Major W C Smithson, promoted to Lieutenant-Colonel. Smithson had been wounded on 22nd August 1900 near Newcastle, and sent back to England but he returned to South Africa a year later on 21st Aug 1901 to take over command. Major Close temporarily commanded the regiment up until then.
Fatalities at Klerksdorp, 15th Sep 1901
The Boers were attacking cattle-guards, those men detailed to guard the large herds brought in to deprive the enemy of their food supply. One of the guards, Private Smith, had been killed on 7th Sep and his mutilated body found later. On 15th Sep, Pte Mackie also was killed, and Pte Tanner was posthumously mentioned in despatches for attempting to rescue a comrade under fire with fatal consequences. Pte Mallard suffered a badly broken leg but his suffering was made worse when the Boers deprived him of water, stripped him and left him on the veldt all night.
Trichaardsfontein, 1st Nov 1901
A column commanded by Brig-Gen Hamilton set off on 31st Oct after a very wet night and reached New Denmark at 11pm. They continued their march throughout the night to Trichaardsfontein and the Boers claimed two casualties, Corporal Mumford and Pte White. White was missing and Civil Surgeon Harding went out to look for him but failed to wear a red cross arm-band so was wounded by an enemy bullet. White died during the night. The rear-guard was attacked by Boers and two men were wounded, Pte Musgrave, and Sergeant Lloyd who, although wounded in the foot, went back to rescue Musgrave under heavy fire and brought him in. This act of heroism ranks with many of the deeds that merited a Victoria Cross but Sgt Lloyd did not even receive a DCM. His gallantry was acknowledged in Regimental Orders of 1st Nov 1901 but he was simply invalided home and in July 1902 discharged as unfit for service. However he did receive a pension which was increased by 6d a day on account of his distinguished conduct.
Capture of Boer Commandants, 5th Jan 1902
The regiment were at Vaal Kop at the beginning of 1902 and on the night of 4th/5th Jan marched out to Bultfontein to search a farm. The farm was unoccupied but a report came in that a nearby farm contained a quantity of cattle. As they approached they could see 80 to 100 Boers leaving the building, and gave chase. They managed to capture 11 prisoners but one man was chased and captured by Capt John Tremayne, who had the best horse. He turned out to be Boer Commandant Breytenbach, a prize catch. One of the other prisoners was ex-Commandant Woolman. Also captured were 600 head of cattle, 30 ponies and 6 Cape carts. The journey home was fraught with difficulty as a party of Boers harried the rear-guard and wounded Sgt Hetherington and Pte Cleaver.
Drives
Drives were introduced into British Army tactics in South Africa. They involved the forward movement of extended lines of men to drive the Boers towards the blockhouses. On 12th March 1902 a drive began in the area of Carolina. As the line was many miles long it was difficult to control. At night they would build trenches and barbed wire entanglements placed in front. This drive produced very little result. Another drive in May followed the railway to the Frankfort and Heilbron line of blockhouses. This line comprised the 13th and 8th Hussars, the 6DG and Johannesburg Mounted Rifles. The JMI went too far ahead and caused the 6DG great difficulties, and a gap appeared between the 13th and 8th Hussars. As a result a Boer Commando under Ross broke through the line. However, this drive netted 87 prisoners. All the drives that year resulted in only 231 prisoners and 11 Boers killed.
Raid on Standerton, May 1902
On 12th May 1902 the army was ordered not to fire at the enemy unless they were attacked. The men speculated excitedly about the end of the war and the return to England. But in the last week of May the Boers, under Commandant Dolf Britz, made a daring and successful raid on the transport cattle at Standerton. A force which contained 70 men of the 13th went out and found the Boers on a kopje 7 mile southeast of the base. They drove them off the hill but the enemy set fire to the grass. A rifleman from the Rifle Brigade lay wounded beyond the fire and was rescued by Corporal Haslam who galloped through the flames to bring him back.
End of the War, 1st June 1902
At 8.30am on 1st June 1902 a telegram from Lord Kitchener announced that peace was declared. This was a great relief to the men and a cause for serious celebration. On 30th June they were in Pretoria and at the end of August they handed over their horses to the 7th and 8th Hussars. They travelled by train from Pretoria to East London and camped on the racecourse. They had to wait for the ship 'The City of Vienna' which was 3 days late. They embarked and sailed on 21st Sep and arrived at Southampton on 20th Oct. From there they took the train to Aldershot where they were installed in the East Cavalry Barracks. The war had cost the regiment the lives of 80 men: 12 killed in action, 5 died of wounds, 3 were drowned and the rest died of dysentery, enteric fever, pneumonia etc. The wounded figures were 4 officers and 46 other ranks. The total number of men of the 13th that served at some time during the South African War was 1,376. The number invalided home was 296 but many returned. Of the original number who sailed out in Nov 1899, 150 returned home in Sep/Oct 1902. The awards included one CB, for Col Blagrove, 4 DSOs and 5 DCMs.
|