|
Independent Companies 1678
|
|
After the Restoration in 1660 the relationship between Scotland and England was strained more by religion than politics. England tried to impose Episcopacy but this was staunchly opposed by the Presbyterian Scots, known as Covenanters. Three Independent Companies of dragoons were raised in 1678 to combat armed Covenanters and act as a police force. They fought as soldiers alongside infantry at Drumclog and the bloody battle of Bothwell Bridge, and in the following year they followed and attacked a party of Covenanters at Airds Moss, Ayrshire. They were called 'companies' rather than 'troops' because dragoons were mounted infantry at that time, expected to ride to the enemy and fight dismounted. The cavalry were organised in troops of Horse and received a higher rate of pay than infantry and dragoons. The word dragoon derived from the type of firearm they carried, known as a dragon, which had a shorter barrel and thus breathed fire as well a smoke.
In 1681 three more companies were raised and it was decided to add them to the original companies to form a regiment. Command was given to Lieutenant-General Sir Thomas Dalzell an experienced soldier who was loyal to the English crown and had fought for the Tzar of Russia. His commission dated from 25 Nov 1681 and the regiment was to be known as The Royal Regiment of Scots Dragoons.
|
|
Second to None
|
|
The Royal Scots Dragoons date from 1681, although some would dispute that date, saying either that they date from the raising of the Independent Companies in 1678, or later, in June 1685 when they first crossed the border into England. The latter date decided their place in the order of precedence; 2nd after the Royal Dragoons who entered England from Tangier in 1684. Being 2nd in the Line Cavalry they adopted the motto Second to None.
|
|
Argyll's Rebellion 1685
|
|
The Scottish equivalent of the Monmouth Rebellion was the uprising led by the Earl of Argyll following the death of King Charles II. Tam Dalzell was a staunch supporter of the English monarchy and his dragoons were employed in the suppression of the rebellion. A troop of the regiment fought a dismounted action against part of Argyll's Army at Stonedyke near Dumbarton. On the same day Argyll was captured and his troops dispersed. The Royal Scots Dragoons were subsequently ordered south to assist the royal army against against Monmouth's rebels, but they were recalled without taking an active part in suppressing it. They returned to Scotland and were used to seek out rebels in various parts of the country, putting them to the sword and destroying property.
|
|
The Glorious Revolution 1688
|
|
On the arrival of William of Orange in England in 1688, King James called upon the loyalty of his Scottish troops and brought them south, being quartered in Salisbury. But James lost heart and left the country so that William came to the throne unopposed. This changed the religion of England from Catholic to Protestant and caused great consternation in the army where loyal Catholic officers had to declare for the exiled King James or swear an oath of allegiance to the Protestant William. Charles Murray, the Earl of Dunmore had to resign along with other Catholics. One of these was Lieutenant John Crighton who wrote of his experiences at that time.He had joined Captain Francis Stuart's Independent Company as an ensign in May 1678. In 1688 he was to be promoted to captain in place of Sir Adam Blair who refused to serve under King William. Sir Thomas Livingston was given command of the regiment in place of Lord Dunmore, and marched the regiment back to Scotland. Crighton wrote:
'From this period my troubles began; for I was then sent up to Edenborough, and there imprisoned in the Tolbooth, together with my Lord Kilsythe, Captain Levingston, Captain Murray, and Lieutenant Murray, each of us in a separate dungeon; with orders that none should be permitted to speak with us, except through the keyhole; and in this miserable condition we lay for two months....The Council, although they could force no confession from me, or my companions, that might affect my Lord Kilsythe, on whose estate their hearts were much set, yet resolved to make a sacrifice of someone among us....the lot fell on me...Lord Dundee, then at Blair castle in Athole, hearing this, wrote to the Council - that if they hanged Captain Creighton, he would cut the Laird of Blair, and the Laird of Pollock, joint by joint, and would send their limbs in hampers to the Council.'
This extract is taken from The History of the Second Dragoons: Royal Scots Greys by Edward Almack. It is not clear from Crighton's story why he was imprisoned, and why the Colonel of the Scots Dragoons was imprisoned along with the former Colonel. But it paints a gloomy picture of the troubled times when loyalties were under scrutiny.
|
|
The Scottish Jacobite Rising 1689-92
|
|
Lord 'Bonnie' Dundee's forthright support for an officer of the Scots Dragoons seems odd in the light of what happened later. In the early part of 1689 the regiment were in pursuit of his followers. At Killiecrankie, where Dundee was killed, they were not directly involved but they were part of the force that pursued the Jacobites, and they took part in the battle at Cromdale on Speyside, in April 1690. The Highlanders were surprised in a night attack and suffered 400 deaths, the rest put to flight. At Abergeldie another group of rebels was attacked by two Troops of dragoons with the same result.
|
|
War of the League of Augburg 1689 - 97
|
|
Flanders 1694-97
In 1692, the title Royal Regiment of Scots Dragoons was confirmed and by the following year they were all mounted on grey horses. In 1694 they were embarked for their first Foreign Service campaign, in Flanders. They were involved in two skirmishes with French cavalry, and in 1695 they were part of the covering force protecting William's army as they besieged Namur. They continued in this role until 1697 when they returned to Scotland. Peacetime economies reduced the regiment to almost half its size, two companies being disbanded and some men, like the Quartermaster being reduced in rank, in his case to sergeant.
|
|
War of the Spanish Succession 1701 - 1715
|
|
Schellenberg, 2 Jul 1704
The war against France was resumed in 1702 and the Greys were brought up to strength again (and hopefully ranks restored). They spent two years in Brabant in John Churchill's army, taking part in the sieges of Venlo, Ruremond and Stevenswaert, and in 1703 the sieges of Bonn, Huy and Limburg. Then Marlborough began his march to the Danube in 1704. The plan was to surprise the Bavarian allies of Louis XVI, and outwit Marlborough's unhelpful Dutch allies. The army arrived at Danauworth on 2 July and prepared to storm the fortified hill next to it, called the Schellenberg. At 6pm the British infantry advanced up the slopes to assault the Bavarian redoubt. The Greys moved forward to support the attack which was carried out with great determination. The battle was showing little sign of progress so the Greys were ordered to dismount and attack as infantry. They obeyed quickly, and under the leadership of their Colonel, Lord John Hay, stormed up and joined in the melee. This was the last straw for the enemy who gave way and began to retreat. The mounted cavalry at the base of the hill were joined by the Greys who mounted up and gave chase. They slashed at the fleeing army up to the banks of the Danube. The Greys lost 8 men killed and 18 wounded.
Blenheim, 13 Aug 1704
On 13 Aug the regiment took part in the battle of Blenheim against the French. They were held in reserve until the French infantry attempted to withdraw from the village. The Greys outflanked them and drove them back in so that the enemy were forced to surrender. The Greys lost no-one in the battle but the regiment were awarded their share of the prize money for Schellenberg and Blenheim; the Colonel received 150 pounds and the troopers 1.50 pounds.
Neer-Hespen and Helixem, Jul 1705
The Greys returned to Holland and spent several months covering the manoeuvres of British troops. In July 1705 they formed part of a force which attacked the French defences at Neer-Hespen and Helixem. Having surprised the defenders the regiment charged along with other cavalry regiments and broke the enemy lines. The French retreated with considerable loss.
Ramillies, 23 May 1706
In 1706 at the battle of Ramillies, in the Spanish Netherlands, the Greys were on the heights of Foulz to the right of the allied line, formed up with two other cavalry regiments, the Queen's Horse (King's Dragoon Guards) and the 5th Royal Irish Dragoons. They spent most of the battle as observers but towards the end Marlborough could see that the Dutch and Danish cavalry were not making headway against the French household troops so ordered his right wing to advance. Three battalions of French infantry were driven into marshy ground which turned the tide of the battle. The three British cavalry regiments then galloped through the morass and up the high ground beyond. From there they attacked the enemy's left, routing the French cavalry and cutting up some battalions of infantry. The Greys charged into the village of Autreglize, attacking infantry there. As they came out of the village they came face to face with the famous French Regiment du Roi who surrendered to them. Colours were siezed and prisoners taken. It is said by some writers that the Greys earned the privilege of wearing the grenadier cap after this accomplishment but most histories of the regiment do not mention it.
Malplaquet, 11 Sep 1709
The greys attended the battle of Oudenarde on 11 July 1708 but it was a mainly infantry affair and they were only used for the pursuit of the retreating enemy. They then helped in covering the army and escorting supplies to the siege of Lisle. The winter of 1708/9 was very harsh, causing the death of men and horses. They started the 1709 campaign with the siege of Tournay and then, on 11 Sep they fought at Malplaquet. Brigaded with the Royal Irish Dragoons under Brigadier-General Sybourg, they were positioned near the centre of the allied line to sustain the attacks of infantry and protect the artillery. Again they were spectators for much of the time as the hard-fought battle raged on. They were at last ordered to file through a wood to their front and make a charge against French cavalry. They were initially successful and scattered their opponents but then came up against household cavalry. They fought bravely against these armour-clad elite troops but were forced back by superior numbers. They received reinforcements and went in again, but it wasn't until the third attempt that they prevailed against the French Royal troops and drove them off. According to Edward Almack's History the battle cost the regiment 30 men killed and wounded.
Douay, Apr-May 1710
Early in the year the Greys were strengthened by a draft of 100 men and horses from Scotland. In late April they covered the siege of Douay a strongly fortified town on the river Scarpe. On 10 May 1710 the enemy made a sortie from Fort Scarpe and captured bread wagons. When they reached Pont-a-Nache they were attacked by a squadron of the Greys and 2 squadrons of the Royal Irish Dragoons. They galloped across the plain and scattered the French horsemen. But they were fired on from the fort and suffered heavy losses including the commander, Lt-Col Caldwell of the Irish Dragoons. After Douay capitulated the regiment were on convoy escort duty and then covered the sieges of Aire and St Venant. In 1711 they were at the siege of Bouchain after which the campaign drew to a close, but they did not return home until 1713 when the Treaty of Utrecht was signed.
First Jacobite Rebellion 1715
The regiment was increased to a strength of 9 companies when they returned to Britain but in 1715 three Troops were drafted into the newly raised 7th Dragoons. The six remaining Troops camped at Stirling, employed in preventing rebels joining the Earl of Mar's Jacobite army. Skirmishes were fought at Kinross and Dunfermline. They spent some weeks in the Lowlands, capturing a ship off Burntisland and coming to blows in Leith.
Sheriffmuir, 13 Nov 1715
At the battle of Sheriffmuir near Dunblane, the regiment were on the right of the Hanoverian line. When the cavalry charged they forced the rebels on the left flank to pull back. But at the other end of the line the royal troops on the left flank were forced back. The battle was inconclusive, but after remaining on the battlefield the Jacobites withdrew during the night, and subsequently dispersed so that the rebellion failed.
Glenshiel, 10 Jun 1719
Britain was at war with Spain during 1718/19 and a Spanish fleet sailed to southwest England to mount an invasion. As a diversion, another Spanish force of around 270 marines landed on the West Highlands to join forces with Jacobite Highlanders. The fleet was decimated in a storm so the invasion of England was called off. But the Highland expedition carried on and, on hearing that a government force under General Wightman approached, they established a defensive position at the pass of Glenshiel. The battle began in the afternoon of 10 June 1719 with a bombardment from four government mortars. Infantry were sent forward to outflank the invaders and rebels, and after 3 hours the Highlanders retreated, leaving the Spanish to fend for themselves. The Scots Greys had 3 Troops at Glenshiel commanded by Major Patrick Robertson. They made a dismounted attack on a Spanish trench and drove out the defenders. The rest of the Spanish marines made a tactical withdrawal but were caught and forced to surrender.
|
|
War of the Austrian Succession 1740-48
|
|
Dettingen, 27 June 1743
The regiment spent the next 23 years stationed around Britain, employed as an aid to the civil power in preventing civil unrest and thwarting smugglers. But when war flared up once more on mainland Europe they were posted to Ghent for a few months in 1742 until the Pragmatic Army marched into Germany in early 1743. The French blocked their route at Dettingen and on 27 June a battle ensued in which the Greys at first provided support for the infantry. They were then ordered to charge the French cuirassiers, an order carried out with great enthusiasm and apparently led by their Colonel Lieutenant-General Sir James Campbell. The fight did not last long and the enemy retreated towards the river, pursued by the victorious Greys. A white standard was captured and brought back in triumph. This contributed to the successful outcome of the battle and the French fled over the river Main.
Fontenoy, 11 May 1745
The regiment were to remain in Europe for the next 5 years, and played a significant part in the disastrous battle of Fontenoy in 1745. They were exposed to canon fire for 3 hours before charging the French and driving them into their camp. However the numbers proved too great and they were forced to retreat. Their Colonel, Sir James Campbell was killed in this battle. The French pursuit of the defeated allies was prevented by the effective cover provided by the British cavalry to the retreating troops.
Lauffeld or Val, 2 July 1747
The regiment had more success at Roucoux in 1746 where they made a charge and followed up with a pursuit. But the French were victorious at this battle, and again at the battle of Lauffeld in the following year where the Greys made multiple charges against the French lines culminating in a charge in which Sir John Ligonier led the British cavalry. This was brilliantly successful but in the pursuit the regiment suffered heavy casualties from the fire of enemy infantry. Ligonier, himself was captured whilst rescuing the Duke of Cumberland. The war ended with the signing of the Treaty of Aix-la-Chapelle in Oct 1748. The regiment were then allowed home.
|
|
Seven Years War 1856-63
|
|
Captain Lindsay's Light Troop 1756-1763
With the prospect of another European War it was decided, in 1756, to create Light Troops within the cavalry regiments. In 1758 an expedition was organised to make a raid on the north cost of France. The Light Troop of the Scots Greys was commanded by Captain Francis Lindsay, one of 9 Troops from various regiments. The officer's uniform is depicted in the Uniform section. The Weekly Journal of 23 May 1758 referred to the new Light Troops as Hussars:
The flower of these Hussars is the troop commanded by Captain Lindsay, quartered at Maidenhead, where they have been practicing the Prussian exercise, and for some days have been digging large trenches and leaping over them, also leaping high hedges with broad ditches on the other side. Their captain on Saturday last, swam with his horse over the Thames and back again; and the whole troop were yesterday to swim the river.
On 5 June 1758 the expedition landed on the coast, 9 miles from St Malo and set fire to shipping there. Having accomplished this task they sailed for home. Another raid was carried out in August against Cherbourg. The Troop did not accompany the regiment to Germany for the battle of Warburg and were disbanded in 1763. It was ordered that 8 men from each Troop in the regiment should be armed and equipped as light dragoons.
Minden, 1 Aug 1759
While the Light Troop who were quartered in towns on the coast of Sussex, the rest of the regiment were sent to Germany to join the army under Prince Ferdinand of Brunswick. The British, commanded by Lord George Sackville, landed at Embden on 20 July 1758. They spent much of the time on the march through various north German provinces. An attempt in 1759 to defeat the French at Bergen failed, and eventually the two armies met at Minden. The Greys supported the infantry but due to the inertia of Lord George Sackville were denied an opportunity to charge the enemy. Minden was an undoubted victory and the Greys pursued the retreating French, harassing them for many miles.
Warburg, 31 July 1760
Whereas Minden had been chiefly an infantry battle, Warburg in 1760 gave the British cavalry the opportunity to attack and rout their French counterparts. The charge is famous for having been led by the Marquess of Granby who lost his hat and wig. The regiment, who were in the second line of the charge with the other dragoons, then assisted in breaking up the French infantry. French casualties were 1,500 killed and wounded with 2,000 taken prisoner. The cavalry regiments in this battle included the Royal Horse Guards, the 1st 2nd and 3rd Dragoon Guards, the 3rd and 4th Irish Horse, the 2nd 6th 10th and 11th Dragoons. The battle honour for WARBURG was not awarded until 1909.
Zierenberg, 22 Aug 1760
There was an action at Zierenberg where the Greys and their old comrades the Inniskilling Dragoons acted in support of the grenadiers who fought a house to house night-time battle with the French. The 600 dragoons and 600 grenadiers and Highlanders were led by the Hereditary Prince of Hesse-Kassel. The dragoons were posted at the entrance to a large wood near Maltzberg to cover a possible retreat of the attacking grenadiers. The approach to the town was a complete surprise to the enemy and the result was a success with prisoners and guns captured and heavy losses on the French side while only ten men were lost to the grenadiers and Highlanders. This narrative is included in this history of the Greys despite their apparent lack of action. In Almack's History it is described in lengthy detail whereas the battles of Minden and Warburg are not mentioned.
The End of the Seven Years War
In 1761 the regiment took part in a number of skirmishes, and in the final year of the war were in action at Groebenstien. There the French were outmanoeuvred and forced to withdraw. In 1763 a treaty was signed and in Feb 1763 the Greys left Germany, marching through Holland and embarking at Williamstadt in North Brabnt. They landed at Gravesend and proceeded to Hereford. Their establishment was reduced to 213 men.
|
|
French Revolutionary Wars
|
|
Willems, 10 May 1794
When war broke out with the revolutionary government of France in 1793 the Greys were in Lancashire. In July 1793 four Troops of the regiment were sent to Ostend while the remaining 5 Troops were increased in strength to 80 men each. The 4 Troops wintered in Ghent until April 1794 when campaigning began. The battle of Willems took place on 10 May and gave the Greys an opportunity to make a name for themselves. The French infantry had formed into squares and one of these was broken almost single-handedly by an officer of the Greys who jumped his horse over three ranks of Frenchmen and began hacking at them so that his men could force their way through. The enemy withdrew but came back with greater numbers and the allied troops had to retreat first to Holland and then Germany. The expedition was abandoned and the Greys returned to England in 1795.
Home Service, 1795 - 1815
The four Troops of the Greys returned to garrison duty in England which lasted until 1807. A detachment attended the funeral of Lord Nelson in 1806. From Jan 1807 they were in Scotland, and then Ireland in 1808 for two years. The Scots Greys took no part in the Peninsula War but their service in Britain was not without purpose. The population of Britain fared badly during the Napoleonic war; it was a time of privation and high taxes. Conscription into the militia and the navy caused discontent and there was no police force to maintain law and order. Added to the policing duties was the constant vigilance in the event of invasion.
|
|
The Waterloo Campaign, April 1815 - Jan 1816
|
|
After the Peninsula campaign ended in 1814 Napoleon had been imprisoned on the island of Elba, off the west coast of Italy, but this wasn't far enough away, and when he escaped it was the signal for the resumption of the war. The Greys felt aggrieved at being kept away from the action and were glad to have their turn in the final Hundred Days. The regiment was increased in strength so that they numbered nearly 1,000 officers and men. There were 10 Troops but only 6 were sent to Belgium, mobilised on 6 April and arriving at Ostend on 19 April. They were brigaded with the 1st Royals and the 6th Inniskilling Dragoons under the command of Major-General Sir William Ponsonby. Only the Royals had seen active service in the Peninsula, the Inniskillings had also missed out on the action and so the majority of the Union Brigade, as it was called, were inexperienced.
Quatre Bras, 16 June 1815
The first contact with Napoleon's troops occurred at Quatre Bras on 16 June but the Greys were with the rest of Lord Uxbridge's cavalry at Nivone so arrived too late for the battle. However, they distinguished themselves in the allied retreat from Quatre Bras. Fortunately Marshal Ney was in no hurry to pursue the defeated allies as the infantry marched off towards Mont St Jean. The cavalry were given the task of covering the retreat, to keep the French cavalry at a safe distance. There was fighting at Genappe involving the 7th Hussars and the Life Guards against the French Lancers but the Greys were part of the protective screen behind the infantry.This aspect of the proceedings has been described at a triumph of skill for the cavalry. The casualty figures for the army show how much fighting was involved in this manoeuvre; 22 killed, 44 wounded and 27 missing. Lord Uxbridge called it 'the prettiest Field Day of Cavalry and Horse Artillery that I ever witnessed'. The numerically superior French cavalry were close on their heels and should have been able to get the better of the heavy cavalry who were performing the function of hussars and light dragoons.
The Battle of Waterloo, 18 June 1815
The torrential rain that fell on the 17th and the night before the battle is well known, and caused much unpleasantness for everyone, trying to sleep in the open. On the morning of the 18th June the ground was extremely boggy, and although the rain had stopped nothing happened until late in the morning. And then the French artillery opened up. Wellington had hidden most of his men on the reverse slopes of the low ridge on his side of the valley. The light cavalry were posted on the flanks of the army but the heavy cavalry were behind the infantry. The Union Brigade were behind Pack's 9th British Brigade, part of Picton's Division, in the centre, just east of the Brussels road. This infantry brigade was made up of the 3rd Bn Royal Scots, 1st Bn Black Watch, 2nd Bn 44th, and the 1st Bn Gordon Highlanders. The Household Cavalry Brigade, including the KDG, were to their right on the other side of the road. The battle continued for about 3 hours while the heavies remained inactive. Wellington was reluctant to use his cavalry unless it was absolutely necessary and usually to pursue retreating enemy soldiers. He had experienced many instances of the cavalry getting carried away with their own success, going too far and getting themselves into trouble. Sadly this is exactly what happened to the inexperienced troopers of the Greys and the Inniskillings.
The infantry to their front faced D'Erlon's 1st Corps, and it was around 1.30pm that the 1st Division under General Bourgeois advanced first against Kempt's British Brigade. But Kempt succeeded in repelling the French without the help of cavalry. It was a different story when the French brigades of Donzelot and Marcognet advanced toward Pack's Brigade. They pushed the infantry back and gained the top of the ridge. It was at this moment that they were about to come face-to-face with the heavy cavalry of the Union Brigade. Lord Uxbridge galloped up and ordered first the Household Brigade and then Ponsonby's heavies to form line for a charge. The Household cavalry set off first with the Blues in reserve, then the Union Brigade positioned themselves with the Inniskillings and Royals in front and the Greys supposedly in reserve, behind and to the left of the line. The Household Cavalry charge was against French Cuirassiers but the Union Brigade charged against infantry.
Most witnesses say that the Greys were in the front line alongside the other dragoons, ignoring the fact that they were supposed to act in support. The start of the charge took them up the reverse slope where they encountered the British infantry that had been forced back. One of the myths of the battle is that the men of the 92nd Gordon Highlanders grabbed the stirrup leathers of the Greys and ran beside them shouting, "Scotland Forever!" But running with a galloping horse cannot be kept up for long. It may have been true while the Greys trotted to the top of the ridge but when they saw the French there they would have spurred their horses forward and left the Gordons behind.
The French infantry of Napoleon always attacked as a column, although in this case the column had a frontage of 150 yards. But because there were so many men crowded into the formation it made it difficult to move once cavalry had penetrated their front line. Colonel Duthilt, leading a regiment in Marcognet's Division wrote this: 'Just as I was pushing one of my men back into the ranks I saw him fall at my feet from a sabre slash. I turned round instantly to see English cavalry forcing their way into our midst and hacking us to pieces. Just as it is difficult, if not impossible, for the best cavalry to break into infantry who are formed into squares and who defend themselves with coolness and daring, so it is true that once the ranks have been penetrated, then resistance is useless and nothing remains for the cavalry to do but to slaughter at almost no risk to themselves....And so we found ourselves defenceless against a relentless enemy who, in the intoxication of battle, sabred even our drummers and fifers without mercy.' The Greys were big men on big horses and their charge into the column was described as 'walking over' the mass of Frenchmen. The enemy suffered many ghastly wounds from the sword cuts, and broken bones from being trampled.
The Capture of the Eagle
The French guarded their Colours with great courage, and as proof of how difficult it was to capture these 'Imperial Eagles' it should be borne in mind that during the whole Peninsula War only 6 Eagles had been taken. One was captured at Barrosa and another at Salamanca; the other four were found abandoned. The Union Brigade were the only unit to capture any Eagles at Waterloo, and they gained two. The Royals took the Eagle of the 105th Regiment in the 1st Division of General Bourgeois, under circumstances which caused much argument. In the case of the Greys' Eagle it was more straightforward. Sergeant Charles Ewart, a big man, after hacking his way through the throng took the Eagle from a soldier of the 45th Regiment and then had to fight off a French Lancer. He wanted to continue on with the others but was ordered by a general officer to take his prize to the rear. The author Ian Fletcher, in his book Galloping at Everything, questions whether the capture of the Eagle too place in the early stage of the charge, or later when the Greys had to fight their way back to the lines, against French Lancers. But the fact that he was keen to carry on with his regiment suggests that they were in the act of charging forward rather than trying to get back.
The Attack on the French Gunners
The two heavy cavalry brigades numbered around 2,300 men, and they had defeated infantry amounting to 15,000. Prisoners had been taken but there was the problem of what to do with them. One squadron of the Inniskillings was sent back with these captives but the other squadrons saw an opportunity. They were now free to carry on and attack the artillery who had fired on them and inflicted heavy casualties as they waited impatiently at the bottom of the ridge. The guns were 300 yards away and the two brigades struggled through the mud to reach them. The CO of the Greys, Lt-Col Hamilton urged his men on and was able to dash forward. Sergeant Major Dickson of the Greys recalled: 'Then we got among the guns, and we had our revenge. Such slaughtering! We sabred the gunners, lamed the horses, and cut their traces and harness. I can hear the Frenchmen yet crying "Diable!" when I struck at them, and the long-drawn hiss through their teeth as my sword went home. Fifteen of their guns could not be fired again that day. The artillery drivers sat on their horses weeping aloud as we went among them; they were mere boys, we thought.'
It must have been a shocking thing to see the slaughter of these gunners and drivers but the retreating French infantry seemed not to notice as they swarmed through the guns, intent on getting away from these red-coated devils. The cavalry themselves were preoccupied with their horrible work and carried on for some time, unaware that they had attracted the attention of French cavalry. They had worn themselves out with the effort of slashing and hacking, and their horses were exhausted too. Two regiments of Lancers, the 3rd and 4th, from Jacquinot's Division approached from one direction while two regiments of cuirassiers, the 5th and 10th under Baron Farine came from La Belle Alliance where Napoleon sat and watched the awful spectacle.
The Fight to Return
The position of both heavy cavalry brigades was now desperate. They were isolated on the French side of the battlefield and about to face four fresh regiments of shock troops, as well as run the gauntlet of numerous infantry. Lt-Col Hamilton of the Greys had been killed. There are stories of him being wounded in both arms and riding with the reins in his teeth, and when his dead body was found both arms were missing. Only eight out of the 23 officers were unwounded at the end of the battle and it would seem that most of these casualties were sustained at this stage, in their fight to get back. The men were not in any formation, so were either lone individuals or in small or large groups. The lancers showed no mercy and killed off any wounded who happened to catch their eye. This accounts for the fact that more men of the Greys were killed than wounded.
Intervention of the Light Cavalry
Most of the horses were too tired to carry their riders at any speed. One redeeming feature of the retreat was that the men of Kempt's Brigade were able to move far enough forward to receive prisoners from the cavalry charge, and could provide some measure of protection to those who were able to make any progress back to the lines. But the most effective support for the beleaguered heavies came from the British light cavalry of Vandeleur's Brigade. Although they were reluctant to make a move without a direct order from Wellington, they had been given more leeway from Lord Uxbridge. They saw the trouble that the heavies were in and the 11th 12th and 16th Light Dragoons were ordered to intervene. As these regiments made their way to where the remnants of the Union Brigade were they crashed through the infantry of the 46th Regiment de Ligne and attacked the French Lancers. They were supported by Dutch cavalry but the 12th Light Dragoons in particular charged too far and suffered heavy casualties from artillery fire and the enemy lancers. Their commander, Frederick Ponsonby, lay desperately wounded on the battlefield all night, as indeed did many others.
Aftermath
The Greys, Inniskilling and Royal Dragoons had been saved by the light cavalry but they counted the heavy cost of their recklessness. The brigade as a whole lost 525 men killed, wounded and missing. Most of the missing were returned dead. The Greys lost 102 men killed and 97 wounded. The Royals lost 97 killed, 89 wounded.The Inniskillings, 73 dead, 116 wounded. The brigade reported 38 men missing but none from the Greys. As to the value of the action, it can be said that the charge, like the actions of the cavalry at Balaklava in 1854, taught the enemy that the British are very brave and a little bit mad, so should be avoided if possible. Certainly the French made no more mass attacks on the left of the battlefield which left Wellington free to concentrate on the assaults on his right and centre.
|
|
The Army of Occupation 1815 - 1816
|
|
The famous Waterloo charge of the Greys did not mean that they were excused duty for the rest of the day. The remnant of the regiment were temporarily brigaded with the Life Guards and repeatedly attacked French infantry positions. When the French began their retreat it was the job of the cavalry, as usual, to pursue the fleeing enemy. The allied army of occupation remained in Paris and Cambrai as well as other parts of France until 1818. The Greys, however, marched to Harfleur in October 1815 and remained there until the Treaty of Paris had been signed on 20 November. They embarked at Calais and left France on 10 January 1816.
|
|
Service in Britain
|
|
The Greys spent 18 months in Canterbury on their return home. In 1817 they went to Edinburgh, then Ireland in July 1818. They spent 3 years there and moved back to England in 1821, where, after a spell in the Midlands they attended the coronation of George IV. The King visited Scotland in 1822 and the Greys were on hand to receive him. They left Scotland in 1823 and moved south by stages with various postings from Carlisle to Ipswich. There was another tour of duty in Ireland from 1827 to 1830, then back to southern England.
|
|
Reform Bill Riots 1832
|
|
When the Reform Bill was passed by the Commons and the Lords in April 1832, it was scuppered at the committee stage. This triggered civil unrest and the Greys who were in Birmingham at the time found themselves caught up in the turmoil. Five thousand people had forced their way into the barracks as a prelude to demonstrations and unrest. The cavalry would be needed to tackle the unruly mobs but soldiers began to write letters to the authorities stating that they would not hurt peaceful citizens. When the politicians lost confidence in the army to keep the peace, the Bill was passed. The Duke of Wellington had a letter published in the Weekly Dispatch denying the army's reluctance to fight the population but this was refuted by a trooper in the Scots Greys, Alexander Somerville, an articulate private soldier who also had his letter published. Although the letter was anonymous the officers of the Greys knew who the author was. Somerville was court-martialled and sentenced by the acting CO, Major Charles Wyndham, to 200 lashes of the cat o'nine tails. Somerville's fame spread and he became a symbol of martyrdom for the rebellious working class.
|
|
England and Ireland 1832 - 1853
|
|
From the Midlands the Greys were posted to York, and from 1834 -35 were in Scotland. In 1836 they went to Ireland where they remained for 7 years until 1843. There were two years spent in England, and in 1846 they returned to Ireland. In 1851 they were back in England, and in 1853 they were posted to Chobham for the summer 'Camp of Exercise' for training. Queen Victoria reviewed the troops there in August 1853. In 1854 the headquarters of the Greys was in Manchester but one squadron at least was in Dublin, at Island Bridge Barracks.
|
|
The Crimean War 1854-6
|
|
Voyage to the Black Sea
At the end of July 1854 the Greys sailed from Liverpool on the Himalaya with 400 horses stowed on two levels. They were the last of the heavy cavalry regiments to leave England but the first to arrive at the Crimea. The other regiments disembarked at Varna in Bulgaria, but cholera weakened the army there and the Greys went via Malta, and Constantinople where they stayed for a few weeks, then across the Black Sea to the Crimea. They arrived 4 days after the battle of the Alma which occurred on 20 Sep 1854 but the cavalry was not needed there so they did not miss any action. Unfortunately they were struck by cholera soon after landing and suffered several deaths. The men were without tents for at least 3 weeks which contributed to their suffering.
Balaklava, 25 Oct 1854
The allies needed somewhere to allow supplies to come in, and captured the port of Balaklava, but this was under threat by a Russian Force which was outside of the besieged city of Sebastopol. The attempts by the Russians to retake Balaklava, or at least cut the allied lines of communication, led to the battle on 25 Oct. An immense force of Russian cavalry and artillery advanced towards Balaklava, occupying the outlying redoubts on the Woronzoff Road. The British cavalry took up positions in the North and South Valleys either side of the Causeway Heights. The Heavy Brigade, of 750 men, were in the South Valley and the Light Brigade, of 636 men, in the North Valley. The five regiments that made up the Heavy Brigade were the Scots Greys, the 6th Inniskilling Dragoons, the 1st Royal Dragoons, the 4th Dragoon Guards and the 5th Dragoon Guards. They advanced eastwards along the lower slopes of the Causeway Heights and halted. They were unaware that the Russian cavalry division was heading towards their front from the top of the Heights. As they came into view of each other there was some shifting of position to prepare for the inevitable clash.
The Russians, instead of taking advantage of their elevated position and charging downhill, remained motionless and fired a volley with their carbines as the Heavies charged up the slope. The greys CO, Lt-Col Henry Darby Griffith, was wounded from one of these bullets. The Greys were in the front rank with the Inniskillings, and Brigadier Scarlett out in front. They headed straight for the centre of the Russian massed cavalry. The enemy moved out to the flanks to encircle the British but they were prevented by the 5th DG coming up on the Greys' left and one squadron of the Inniskillings warding off the threat to the right. The 4th DG and the Royals joined in the frantic melee as swords flailed about, cutting, chopping and slashing at everything. The Heavy Brigade had the advantage of being bigger men on bigger horses so were able to cut downwards. the Horse Artillery fired shells into the enemy flank to increase the enemy's discomfort. The Russians, although vastly outnumbering the British cavalry, started to retreat, having suffered heavy casualties. The Greys casualties were amazingly light at this stage.
Later the brigade was ordered to cover the retreat of the Light Brigade from their charge in the North Valley. And it was here that the regiment suffered their heaviest losses from musket and artillery fire. The Illustrated London News of 25 Nov 1854 devoted a double-page spread to a large illustration of the Greys fighting Russian cavalry. On the previous page is an eye-witness account of the Battle of Balaklava by a soldier of the regiment:
'We charged. Oh God! I cannot describe it; they were so superior in numbers; they 'out-flanked' us, and we were in the middle of them. I never certainly felt less fear in my life than I did at that time; and I hope God will forgive me, for I felt more like a devil than a man. We fought our way out of them as only Englishmen can fight; and the 4th, 5th and 6th were there up with us. I escaped without a scratch, thank God, though I was covered with blood; my horse was not even wounded. But, oh! the work of slaughter that then began - 'twas truly awful, but I suppose it was necessary. We cut them down like sheep, and they did not seem to have power to resist. The plain is covered and covered with dead Russians, and of course we left some of our poor comrades on the field. We only lost two and about seven wounded. Well, when we had finished this lot we thought of going home to breakfast; but no, they (the enemy) had some guns over the hills that Lord Raglan sent word were to be charged and captured at any cost. So off we went again. They received us very quietly into their ground - Lord Lucan leading the Heavies, and Lord Cardigan the Light Brigade. The Light charged first this time, took the guns, cut down the gunners, and then, when they thought all was right, they were met by thousands of cossacks, who had been in ambush. The Royals, the Greys, the 4th, 5th and 6th, now charged again. The butchering was repeated; when suddenly a cross front and rear fire opened upon us from the hills - cannon, rifles, and file firing. I cannot attempt to describe to you the scene that ensued - balls, shells, and rockets whizzing about our ears. The men on the right and left of me were both killed on the spot. We hacked our way out of it as well as we could, but were obliged to leave the guns. Colonel Yorke had his leg broken, and all the officers in the front rank were wounded. The Heavy Brigade have not lost many men; but sad to tell, out of about 600 of the Light Brigade that went into the field, only 400 came out; but this is nothing to what the enemy suffered."
This contemporary account, written days after the event, is puzzling in that it seems to contradict the report that the Heavies covered the retreat of the Light Brigade. He talks of them hacking their way out of this part of the battle but if they were surrounded by the enemy how come they were fired upon so heavily? And they were 'obliged to leave the guns'. This suggests that they charged as far as the Russian artillery, just like the Light Brigade. The description of the furious bombardment that poured onto the cavalry leads us to believe that few men survived but the casualty figures for the Scots Greys at Balaklava was 2 men killed and 57 wounded. Four of the wounded were officers. These were the highest number of casualties out of the 5 regiments in the Heavy Brigade. The next highest were the 5thDG and 6th Inniskilling Dragoons, each regiment losing two men killed and 13 wounded.
Raid on a Village, 16 Feb 1855
The siege of Sevastopol was left to the infantry so the cavalry were almost redundant after Balaklava. But Captain George Buchanan, in his letters to his mother, relates the story of an abortive expedition to capture a Russian village which he unfortunately doesn't name. They were turned out at 11pm with only a few hours notice; a force comprised of all the cavalry, the 93rd and 71st Highlanders, and two batteries of artillery. The plan was to rendevous with 20,000 French at the target village and attack the 3,000 Russians there. It was pitch dark and Buchanan's horse slipped, both falling into a ditch, with the horse on top of him. He was eventually found by his men and rescued. It began to snow at 1am and the cold was unimaginable. Somehow they managed to march all night but the Highlanders became detached from the column in the dark. But at daybreak they were able to come together again. At that stage they had travelled 7 miles, and came to a ruined village called Kamara. There they only found one cossack, who was so surprised that he jumped on his horse and fled without his weapons.
Four more hours of marching through deep snow brought them to their destination. There was a bridge over the river, manned by 8 Russian guns, which the French were supposed to attack, while the British forded the river further up, and attack the position from the rear. But the French were nowhere to be seen. They waited for 9 hours. And then an ADC arrived to say that the French had abandoned the whole expedition because, "..they never thought the English such fools as to venture out on such a fearful night as that." And so, they marched home and reached camp at 2am. Everyone was frozen, and Captain Buchanan had to be lifted off his horse. His frost-bitten ears recovered, but others were not so lucky. One soldier of the Greys lost both feet from frostbite and later died. He is not named but the Captain says of him that he was one of the best and oldest soldiers. It transpired that the expedition was unnecessary because although it was a plan of Lord Raglan's he had ordered a staff officer to cancel it, but that officer had failed to deliver the message. Buchanan's letters reveal his deep contempt for staff officers.
Crimean Casualties
The Crimean War saw many soldiers die of disease as well as battle wounds. It is difficult to find a true figure for the casualties of the Greys. Although they avoided Varna and the ravages of cholera that drastically reduced some regiments like the 4th Dragoon Guards, the regiment suffered when they reached the Crimea. However, the number of deaths is not recorded. Buchanan wrote on 16 Oct 1854, 'I am sorry to say, that cholera had made great ravages in the regiment. My poor friend Freeman died in a few hours, and many of our men. I also lost my good servant, Davidson, a fine strong man...We have moved our ground this last ten days, and we have had only two deaths since that..' On 27 Nov 1854 he wrote, 'I have been the only officer with my Troop for a long time past. Poor Fellows! One sergeant and 22 men are all I can muster out of 65 who left England.' Commenting on the low number of deaths at Balaklava he wrote, 'Upwards of ten have died who were wounded at Balaclava, and three died on board ship on their way there.' And then there were those that died of cold on the abortive raid on the village In February 1855.
The book British Battles and Medals (7th Edition) by John Hayward, Diana Birch and Richard Bishop (Spink 2006) has a list of the casualties of the Scots Greys at the Charge of the Heavy Brigade.
Corporal Andrew P Clifford Killed
Private Henry Campbell Killed
Private William J Allis Severely wounded, died
Private McAdam Galbraith Severely Wounded, died
Private James Hackett severely wounded, died
Private Richard Livingstone severely wounded, died
Private Robert Thompson severely wounded, died
Private Thomas Traill severely wounded, died
The wounded are in three categories: 18 more were severely wounded, 3 were wounded, and 29 slightly wounded.
|
|
44 Years Service in Britain
|
|
The Greys returned from the Crimea in July 1856 and went to Ireland in 1857, remaining there until 1861. Thereafter their postings were:
Scotland 1861 - 1863
England 1863 - 1866
Ireland 1866 - 1872
Edinburgh 1872 -1874
England 1874 -1878
Ireland 1879 - 1884
Scotland 1884 - 1886
Aldershot 1866
Brighton 1866 - 1888
Ireland 1888 - 1894
Hounslow and Aldershot 1895 - 1897
Edinburgh 1898 - 1899
|
|
The Gordon Relief Expedition 1884-85
|
|
The Heavy Camel Regiment
In 1884 the Greys provided a detachment for the Camel Corps organised by Sir Garnet Wolseley to travel up the Nile to Khartoum to save General Gordon from the Mahdists. The Camel Corps was made up of three regiments, and the Greys were to be in the Heavy Camel Regiment with the Household Cavalry, the 2nd, 4th and 5th Dragoon Guards, the 1st Royal Dragoons and the 5th and 16th Lancers. The Greys were under the command of Captain William Hippisley who was later CO of the regiment. There were two other officers, Lieutenant Richard Wolfe and Lt William Middleton, 2 sergeants, 2 corporals and 38 men. These figures are from Stephan Wood's In the Finest Tradition; another source gives 2 officers and 37 men as the number in the detachment.
Abu Klea, 17 Jan 1885
Wolseley's force travelled by boat from Egypt up the Nile. At Korti the river turns north east for 200 miles so while the river column continued, the Camel Corps travelled the 176 miles south across the desert to the rendezvous at Metemmeh, north of Khartoum. The force of 1,800 soldiers set off on 30 Dec 1884 and reached the wells at Gakdul, the half way point, in 3 days. On 14 Jan 1885 they set off again for the wells at Abu Klea 43 miles further on. On 16 Jan a recce party discovered the enemy tribesmen massed near the wells to obstruct the camel column. A zariba was constructed and they spent the night under sporadic fire. At dawn they were in danger of being attacked so a square was formed which advanced to the wells. The men were on foot with the camels and wagons in the middle. The Heavies were at the rear of the square with the Greys and Royals, no.4 Company, on the left.
As it moved forward the square was fired on by the tribesmen so that casualties were suffered and the shape of the square became stretched because of the slower camels and baggage carts in the middle. The enemy moved towards a gap at the rear left corner where some camels and wounded men had been stranded outside the formation. Some men went out to bring them in but came under attack, so Lord Charles Beresford commanding the Naval Brigade took out the Gardner Gun to cover them. The gun fatally jammed after firing 70 rounds and was attacked. The crew were butchered to death although Beresford and one man escaped. A gap opened at the rear to allow survivors and skirmishers to get back in and the tribesmen saw their chance. They stormed into the square at the point where the Greys and Royals were, but became cut off as the men closed up the gap and the rear ranks turned about to fire on them. The battle was short, lasting about 10 minutes, and resulted in the slaughter of 800 Mahdists. The British lost 76 killed and 92 wounded, of which the Greys' number of killed was 11 men and one officer, Lieutenant Richard Wolfe. The expedition was abandoned when the fate of General Gordon became known, and they returned to Korti for embarkation on the boats that would take them back to Egypt.
|
|
Boer War 1899 - 1902
|
|
Mobilisation 1899
From 1895 to 97 the regiment were in Hounslow and Aldershot but spent 1898 to 99 in Edinburgh. The Greys were ordered to mobilise for South Africa on 7 Sep 1899 and they reported that their preparations were complete on 17 Oct. The HQ and B Squadron were the first to embark on 5 Nov, from Glasgow under the command of Lt-Col W P Alexander, while A and C Squadron were delayed because of an outbreak of pink-eye and had to be entirely remounted. C Squadron left Edinburgh on 16 Nov, took over other horses at Aldershot, and sailed from Southampton under Captain C W M Feilden. A Squadron left a day later and took their horses from the 17th Lancers in Ireland under Major Middleton. The regiment was united once more at Cape Town on 8 Dec having lost one man on the voyage; Private Hay died of disease.
1st Cavalry Brigade
The Greys were based around the Orange River station for the first two months, and then in Feb 1900 the cavalry division was organised and the Greys, at Modder River, were brigaded with the Carabiniers, one squadron of the Inniskillings, one squadron of the New South Wales Lancers and T Battery RHA. This was the 1st Cavalry Brigade, commanded by Colonel Porter of the Carabiniers, which together with two other brigades formed General French's Cavalry Division.
Klip Drift, 13 - 15 Feb 1900
The regiment marched from Waterval Drift on 13 Feb and made contact with the enemy who were camped at Klip Drift. This was captured and they bivouacked there. During the fighting the veldt caught fire and hampered the rescue of the wounded. On 15 Feb they marched from Klip Drift and encountered a strong force of Boers who were well entrenched. The enemy shelled the division but the RHA managed to silence their guns. The order was given to charge the Boer positions in lines of brigade which was successful and the enemy were pursued for 4 miles. The front rank of each squadron carried lances and their charge was concealed by a dust cloud. The success of the operation enhanced the reputation of the cavalry and their use of the arm blanche, although later in the war the lance and sword were put aside so that they relied on the rifle and operated as mounted infantry. The advance to Kimberley was then resumed. The Greys suffered two men wounded in his action.
Dronfield, 16 Feb 1900
The regiment was engaged on a reconnaissance on the following day, the 16th Feb and came across Boers in a strong position at Dronfield. B and C Squadrons attacked and sustained heavy casualties. Lance-Corporal Stirrat and two privates were killed, and 2nd Lieut Hon W McClintock-Bunbury was mortally wounded. He died the next day. Two other officers and 4 men were wounded. Corporal Pott was promoted to sergeant for gallantry in the field. Later the regiment were present at the battle of Paardeburg until Cronje surrendered on 27 Feb.
Driefontein and Bloemfontein, Mar 1900
In March 1900 the regiment handed in their lances and they were no longer carried by the Greys on campaign. On 6th March the regiment had a squadron of Australian Horse attached to them, commanded by Captain R Thompson. They marched from Poplar Grove to Wyaaihoek on the 8th, and on the 10th there was an action at Driefontein in which the Boers were defeated, mostly by the infantry. The Greys had two men wounded, Sergeant Trumpeter Inkster and Private Harris. Another battle took place near Bloemfontein on 12 Mar, in which Major Scobell led C Squadron against a strong Boer position, capturing and holding it throughout the night. They had no casualties but several horses were killed. This proved to be the key to the taking of Bloemfontein, the capital of the Orange Free State, which surrendered to Lord Roberts at 10.30am on 13 March 1900.
Evacuation of Wounded at Sannah's Post, 1 Apr 1900
The Greys left Bloemfontein on 18 Mar. The regiment numbered only 76 effectives due to the loss of horses. They took part in the operations at Karee Sidings in which one Australian trooper was killed and another wounded. On 31st they marched to Sannah's Post (Koorn Spruit) to relieve General Broadwood's column. B Squadron located the enemy in force in the Waterworks and on the lines of Modder River. Eighty wounded men of the 2nd Cavalry Brigade (10th Hussars and Household Cavalry) were found in the station buildings and after considerable difficulty were evacuated in ambulance carts, and sent to Bloemfontein. Thirty men of C Squadron under Major Scobell spent the night at Sannah's Post and joined the rest of the regiment at Springfield on 2 April.
Vredes Verdrag, 10 May 1900
On 6 May the regiment marched from Springfield to take part in the general advance to Pretoria. On 10 May, having spent the night at Du Prees Laager they set off and encountered a strong force of Boers at Vredes Verdag at about 11am. A Squadron under Major Middleton together with a squadron of Inniskillings and another of Carabiniers were detached to engage with the enemy. But they were forced to retire. The Greys suffered many casualties in this action, 4 men killed and 8 wounded including an officer of the Australian Horse. One man was taken prisoner and 35 horses killed.
Kalkheuval Pass, 3 June 1900
On 1 June the Greys marched from Klipfontein to Berg Vlei, engaging with small parties of Boers on the way. On the 3rd they came across a Boer force and succeeded in capturing wagons, oxen and some prisoners. The main part of the enemy retired to a strong defensive position at Kalkheuval Pass. The 1st Cavalry Brigade attacked the Pass and the Greys managed, under heavy fire, to establish themselves in a commanding position on the enemy flank. They remained there all night but the Boers retired under darkness. One man was wounded. They went on to Zilikat's Nek and then Hartebeesthook where they bivouacked. Pretoria surrendered on 5 June.
Watervaal, 6 June 1900
The regiment left Hartebeesthook early on 6 June to join the advance guard proceeding to Watervaal where British prisoners were kept. B Squadron and part of A Squadron represented the Greys in this force, Capt Maude commanding. On arrival there the Boers fired a few shots and retired. The wire that surrounded the prison area was cut and the prisoners released. There were 26 officers and 3,500 other ranks. As they all headed off in the direction of Pretoria the Boers shelled them from their positions. One man of the regiment was wounded, along with several horses.
Pinaar's Poort, 11 June 1900
From 8 to 11 June, and from 14 June to 4 July the regiment was at Kameel Drift during which time they were busy with recce and outpost duty. On the 11th they received a report that the enemy were at Pinaar's Poort. They planned to turn the Boer flank and get to the rear of their position. At 6.30am they came under heavy fire from the enemy and this lasted all day. However, they succeeded in turning their flank. Several horses were wounded. They bivouacked at Doornfontein but the Boers shelled their camp with two guns and a pom-pom, so tents were struck and they moved to Diamond Hill, 400 yards away.
Zilikat's Nek, 11 July 1900
The regiment moved to De Onderspoort on 4 July, and on the 7th went on to Hartebeestpoort. C Squadron was detached to form part of a force holding Zilikat's Nek on 8 July. Five Companies of the Lincolnshire Regiment joined them on the 10th. On the 11th a strong party of Boers attacked the Nek at dawn, firing down on them from higher ground. In the early part of the fight the horses were released to rejoin HQ. The battle lasted 12 hours before their ammunition ran out. The Lincolns and C Squadron were forced to surrender on the orders of the CO of the Lincolns. The squadron lost two officers killed, one of whom was an attached officer of the Royals. One private was killed, and one officer, Captain Maxwell, and 16 men wounded. The commander of the squadron, Major Scobell and 69 rank and file were captured. Scobell, however, managed to escape that same evening and walked to Pretoria. The men of C Squadron were later released, on 30 August 1900 and returned to Waterval Onder.
Barberton, 13 Sep 1900
The Greys marched from Hiomohlom on 12 Sep and surprised the Boers as they were about to have breakfast. The enemy left everything and retreated. The rest of the day was spent man-handling artillery guns over difficult country and up steep inclines. The Boers fired on the troops but when the guns were in place they were able to disperse them. SQMS Cairns was wounded in this action. They bivouacked at Nelshoogte Pass but set off again at 3.30am to climb the steep pass and cross more rough country by a small bridle path to Barberton. C Squadron went forward to cut the railway line north of the town. They were assisted by a farrier corporal of the 1st Life Guards who had tools for the job. In Barberton itself the brigade captured several wagons and prisoners. The Landrost of Barberton was one of the prisoners, and cash to the sum of 14,000 pounds was seized. The railway produced an even more valuable prize; 44 engines and rolling-stock to the value of several hundred thousand pounds, as well as large quantities of stores. British prisoners were found and released; 23 officers and 59 other ranks. While the regiment were staying there, Colonel Hon W P Alexander, the CO, was appointed Military Governor of the Town. He relinquished command of the regiment and handed over to Major Scobell who was temporarily in command until 27 Nov 1900 when he was appointed commandant of Brabant's Horse. The regiment awaited the arrival of Lt-Col Hippisley who had earlier been invalided to England. He arrived on 23 Mar 1901.
Ermelo, 19 Oct 1900
The Greys had several skirmishes with the enemy in the latter half of October. On the 16th two men were killed, one being Corporal Porter who received notification of his being commissioned into the Bays two days after he died. On 19 Oct they set off from Ermelo at 5.20am and the rearguard was soon under attack. A post held by an NCO and a few men guarding the oxen was attacked by 50 Boers. They held them off until the arrival of a squadron of Carabiniers but they suffered heavy casualties; one man killed and 5 wounded, as well as several horses.
Nauwpoort Hill, 5 Jan 1901
In early January 1901 the regiment marched from Hartebeestfontein at 4am and made contact with the enemy at Nauwepoort Hill. C Squadron, commanded by Lieutenant Finlay, captured and held a position on a kopje under heavy fire until relieved by the Scots Guards. The Boers retreated and the Greys brought their wounded down. Lieut Finlay was one of the casualties, along with Lance-Corporal Hall, who died four days later, and Private Quinn. The regiment bivouacked at Zandfontein.
Boschman's Kop. 29 Jan 1901
On 26 Jan the Greys handed in their carbines and were issued with Lee-Metford .303 magazine rifles. The next day they marched from Johannesburg where they had been since 14 Jan. They went via Reitfontein to Putfontein to take part in operations in Eastern Transvaal against Botha. Eight columns were organised stretching from Middleburg on the Delagoa Rail line, to Heidelberg on the Natal line. On the 29th the regiment left Putfontein and engaged with the Boers at Boschman's Kop. This was a strongly held position and no headway could be made until the arrival of another column. The enemy then withdrew and were pursued by A Squadron under Capt Feilden. They captured several wagons and prisoners. Two privates were killed and six men wounded.
Mooifontein, 22 Apr 1901
The regiment were now commanded by Lieutenant-Colonel Hippisley who had rejoined the regiment on 23 March. As the column marched from Mooifontein the Greys formed the rearguard which was attacked by a strong force of Boers. The enemy were within 100 yards but were beaten off. Three men were wound in this action. On the following day they were sniped at continuously but managed to avoid casualties. One month later, on 22 May, Lt-Col Hippisley was briefly given command of the column when Colonel Edmund Allenby became ill.
Klipfontein, 30 Dec 1901
The year 1901 had been spent marching from one bivouac to another, rarely spending more than a night at each place. Sniping and random attacks had kept them in a state of constant vigilance. During 1901 they had suffered 16 men dead as a result of fighting, 8 more died of disease and 30 had been wounded. It was unfortunate that up until 30 Dec these figures would have been much lower but on the march from Klipfontein to Bronkhurst Spruit on that day, they came under attack around midday. Six men were killed and eleven wounded.
Springs, Jan 1902
The Greys were at Eland River from 31 Dec 1901 to 3 Jan 1902. On 4 Jan they marched to Springs to refit. They stayed there until 13 Jan and were reorganised to form part of a force under the command of General Gilbert Hamilton. The 5th Dragoon Guards and 66th Battery RA made up the force. They were ordered to operate between the blockhouse line and the railway.
Klippan, 18 Feb 1902
A Squadron suffered a severe setback during a march from Leeuwkop to Nigel on 18 Feb. Advance scouts under Lieutenant McCombie discovered a large force of Boers in a laager at Klippan. General Hamilton should have ordered an immediate attack but his failure to do so allowed the enemy to inspan their animals and take up a strong defensive position. Major Feilden was given the task of leading the attack, with A Squadron and a squadron of 5DG. The attack was unsupported and the 5DG were forced to retire. The Greys who were detached to one flank were cut off and unable to extricate themselves. They fought very courageously and sustained heavy casualties. One officer, Lt Rhodes was killed, Major William Feilden and Adjutant Edward Ussher were mortally wounded. They both died two days later. Sergeant Glen and Private Cruickshank were also killed. Six more men were wounded and many were captured.
The End of the Boer War 1902
The sad affair at Klippan was the last battle for the Greys in the Boer War. The rest of their active service in 1902 was spent in marches from one place to another in the vicinity of Springs, and taking part in drives. Peace was signed on 31 May 1902 and the Greys marched for 4 months by stages to Stellenbosch in Cape Colony, arriving on 6 Oct 1902. They had a new Commanding Officer, Colonel Henry Scobell replacing William Hippisley in August 1902. The casualties for the whole war were 7 officers and 67 men killed or died of wounds or disease, and 4 officers and 82 men wounded. It is difficult to express these figures as a percentage of the regimental strength because new drafts of men were brought in at various stages of the war, and officers and men attached from other units. They remained in garrison in South Africa until 1904 when they sailed for England and were stationed at Norwich.
|
|
World War One 1914-18
|
|
Mobilisation, August 1914
The Scots Greys were stationed around Britain in the period between the South African War and World War One. They were posted to Norwich on their return in 1904, then Edinburgh in 1906. A posting to the cavalry barracks at Tidworth lasted from c1908 to 1913, and then they were sent to York. On 3 Aug 1914 they received notification to mobilise and within 5 days they were ready. Arriving in France on 17 Aug, they were billeted at Beauvais and Maubeuge, brigaded with the 12th Lancers and 20th Hussars. This was the 5th Cavalry Brigade, commanded by Brigadier-General Sir Philip Chetwode who was later appointed Colonel of the Greys. The regiment consisted of 3 squadrons and the headquarters, having a strength of 545 all ranks.The first task of the regiment was to dye their grey horses to avoid regimental identification. They used a chemical preparation of permanganate of potash known as Condy's Fluid which gave the horses a chestnut colour that lasted a month.
Retreat From Mons, August 1914
The Greys were positioned on the extreme right of the BEF between Charleroi and Mons, near Binches on the Belgian border. They advanced for two days to the Mons-Conde Canal, having their first contact with the enemy on 22 Aug. They valiantly held up a German cavalry division for several hours but the pressure was too great and the BEF was ordered to retreat. The enemy advance was so fast that some men of the Greys were captured at Mauberge. The army was pushed back and the cavalry were given the task of covering the retreat. For almost two weeks they fought and marched, holding the Germans at arm's length. There was little time for sleep and the men were dog-tired. The regiment had machine-gun sections which were fully employed to slow the pursuit. On 28 Aug, according to one report, the Greys and 12th Lancers charged German cavalry at St Quentin and routed them. Major Swetenham was the first officer of the Greys to be killed in the war, on 28 Aug at St Quentin.
Battle of the Marne, 7 - 10 Sep 1914
In early September the retreat came to a halt and the British army turned the tide so that it was the Germans who had to withdraw. The Greys captured the village of Rebais on 7 Sep, and by 9 Sep the Marne crossings were secure. One of the casualties on 7 Sep was Lieutenant Sir Gawaine Baillie who was speared by a German Uhlan. On 10 Sep they cleared the village of Gandelu and captured 300 Germans. But patrolling became more extended and dangerous. Lieutenant Compton wrote:
'We had not proceeded far that morning when we came in touch with some mounted Germans. I dismounted my Troop and opened fire on the enemy and our fire was returned by some others further away, but these soon mounted and moved off at a trot down the road. We at once mounted and galloped for a point beyond the village where I guessed we should obtain a good field of fire. In this we were successful, being just in time to get into action and obtain a few seconds rapid fire at them. They were beautifully bunched together and a perfect target, and we killed eight as we afterwards verified.'
Battle of the Aisne, 12 - 15 Sep 1914
The 5th Cavalry Brigade led the British 2nd Army Corps in the advance from the Marne to the Aisne, but here the movement of the two armies came to a standstill. The men were ordered to dig themselves in, but they were ill-equipped to do so not being supplied with shovels and picks. Trenches were shallow at first but the heavy guns and howitzers of the German artillery forced them to dig deeper with whatever tools they could find. At Veilly the Greys, astride the Aisne, suffered heavily, losing 3 officers and 50 other ranks. They were withdrawn from the line shortly after and went into quarters at Courvrelles, remaining there until the end of September.
The Race for the Sea, 17 Sep - 19 Oct 1914
The Germans planned to turn the allied northern flank by reaching the coast and cutting off the BEF from access to the Channel. And so the race to the sea began in October. The 5th Cavalry Brigade led the army in the 100-mile dash to Amiens and then turned north-west until joined in mid-October by the 3rd Cavalry Division who had recently arrived on the Western Front. The Greys, like other cavalry regiments filled the gaps in the defences and had to spend much of their time in trenches towards the end of the month. They fought several local battles at close quarters.
First Battle of Ypres, 19 Oct - 22 Nov 1914
By mid October it was generally accepted that there would be little opportunity for the cavalry to operate as mounted troops. The men were trained in bayonet practice, grenade throwing and trench warfare. They were beginning to organise as battalions and companies rather than squadrons and Troops. Throughout the period of the Battle of Ypres they were continuously in action and had to fight in pouring rain and biting frost. Their last action of note in 1914 was that at Wytschaete, where C Squadron continued in action, pouring volley after volley into the advancing German infantry until the junior officers and sergeants were forcibly restrained and ordered to retire by the CO who was about to hand over the position to the French.
Second Battle of Ypres, 22 Apr - 24 May 1915
After a winter spent mainly in reserve the regiment were moved to Sanctuary Wood, near Merville, which in February 1915 was a quiet sector. They took over trenches along with the 3rd Cavalry Division and had the unpleasant experience of standing in knee-deep water for long periods. In March the Battle of Neuve Chapelle began and the Greys stood by to act in its cavalry role, but were not required. During the second Battle of Ypres which began on 22 April 1915 the regiment spent most of the time in the trenches with the horse-lines nearby, 20 days out of 28 were spent in the front line. They suffered casualties from the shelling but were mercifully unaffected by the chlorine gas that the Germans used for the first time with terrible effect on the French troops.
May - Dec 1915
The regiment spent the rest of the year alternating duty in the trenches with periods in reserve behind the lines. There was even time for the regiment to take part in a horse show held by the 2nd Cavalry Division. The Greys won three first prizes, demonstrating that the First World War was not all mud and bullets. There were other horse shows in 1916 and 1917 where special silver cups were presented to the regiment, still in their possession. On 18th June, at Staple, the officers were able to maintain their tradition of holding a celebratory dinner to commemorate the battle of Waterloo.
Line Company, Jan -Feb 1916
A new system was developed in January 1916 whereby the cavalry regiments provided a company for line service. The Greys were in trenches near Vermelles. For the first two months of the year their Line Company, as part of the 5th Cavalry Brigade Battalion, saw a great deal of fighting, mining and counter-mining, and bombing raids. They suffered 66 casualties in those two months, most of those from a mine exploding under their trench. The year 1916 was dominated by the battle of the Somme which began on 1 July. The Greys were held in reserve but they still had to provide working parties in the trenches and suffer losses as a result. It was in 1916 that the appearance of the British troops changed as they were issued with steel helmets. Trooper McConnachie amused his comrades as he larked about with his new helmet but it saved his life, for in the midst of his performance a piece of shrapnel struck his head full on giving him no more than bad headache. His experience encouraged the others to appreciate the value of the 'tin hat'. The men put a yellow saltire on their helmets as they had in South Africa. In October 1916 the Greys retired first to Morlancourt and then Vacquerie-le-oucq where they stayed until Feb 1917.
Battle of Arras 9 April - 16 May 1917
The British offensive against the Germans around Arras involved the Greys who were in action at Wancourt, fighting in a blinding storm and suffering many casualties under a heavy bombardment. The initial success in the battle gave the cavalry hope that they would be used to follow up in the mounted role, but instead they fought in the trenches or provided machine-gun sections to form squadrons armed with Hotchkiss light machine-guns. However there was some opportunity for the men to be united with their horses. Lieutenant Compton wrote about the brigade when it was ordered to occupy some ground near Wancourt:
'When the brigade came over the high ground, the regiments were opened out into line of troop columns, on their way to new positions, at the gallop. Fortunately, at the moment of the advance, a heavy snowstorm came on which partially concealed from view the swiftly moving masses of men. It was marvellous how the leaders were able to keep their direction at top speed in the blinding storm, and the way that the troops managed to thread their way through the trenches and shell holes.'
Guillemont Raid, 10 June 1917
After a period out of the line the Greys then moved to Hamel in May 1916. They fielded an entire dismounted battalion, three squadrons, each of 100 men. They went into the trenches near Guillemont Farm, and on 10 June a body of volunteers mounted a particularly successful raid on the Germans who were reported to be mining the British trenches. The surprise raid caused many casualties, killing 56 and taking 14 prisoners, as well as gathering important intelligence material. Two Greys were killed and 5 wounded. Two Military Crosses were awarded, and 11 Military Medals.
Cambrai, Nov 1917
For the rest of the summer they were away from the line but a British offensive in November at Cambrai using the new 'Tanks' meant that the Greys were back in the thick of the fight. They were at first held in reserve to exploit a breakthrough and in November they sent a battalion HQ and a dismounted company into a recently captured part of the Hindenburg Line. When they had been established in Bourlon Wood they were attacked by a large force of Germans. They held the line but took many casualties before they were relieved. Further action was seen at Gouzeaucourt later in the month.
The Great German Offensive, Mar - Apr 1918
The Greys were on the St Quentin Canal when the Germans began their great offensive in March 1918. On 22 March the dismounted company manning part of the front line repulsed repeated enemy attacks while covering a withdrawal. As the Germans advanced the need for mounted troops for recce and holding operations to cover gaps and flanks was greater than ever, so the Greys were performing both mounted and dismounted tasks. On 1 April the brigade were ordered to seize the high ground at Moreuil or Rifle Wood. The horses were sent back and the advance continued on foot. They were exposed to heavy machine-gun fire as they moved in the open, and their casualties were severe. However they attained their objective, consolidated it and held it until midnight when they were relieved. After another week the enemy's advance was halted by the allies and the cavalry withdrew to Amiens. From there they went to Abbeville where they were reinforced by 300 men from home. The dismounted company continued to man the trenches in various parts at short notice.
The Allied Offensive, May - Nov 1918
During the period May to July 1918 the regiment was again away from the front. In preparation for the coming allied offensive the Greys were moved in early August with 5th Cavalry Brigade to the Somme near Amiens. When the offensive was launched the cavalry advanced several miles through the German lines, with the regiment leading the brigade. The Greys were then moved to the Arras area as divisional cavalry, supplying detachments to carry out numerous tasks, particularly local attacks to deal quickly with enemy infantry. In the steady allied advance during September and October the regiment was split up and occupied in patrolling and liaison duties. They came together at the beginning of September and took part in the penetration of the Hindenburg Line. The advance continued and on 5 Nov, in their last action of the war, they mounted an attack over the Sambre Canal which resulted in the successful capture of their objective.
The Influenza Pandemic 1918
The outbreak of influenza at the end of the Great War killed as many people as the war itself. It was as quick as it was fatal, and affected people in the 20-40 age range whereas usually it affected infants and the elderly. The troops were just as vulnerable to the disease as civilians, and the Greys were hit hard so that by the end of October 1918 they were reduced to only one effective squadron.
Armistice, Nov 1918
The regiment's last day of action was on 9 Nov. They advance rapidly and were welcomed as they rode through French towns where the populace had been under occupation for 4 years. By the 10th Nov they were at Avesnes, the day before the Armistice. On 1 Dec they entered Germany, marching with the 5th Brigade who headed the march. The Greys had requested that their guidon be sent from York to be carried as they marched in. They were billeted at Neudorf. After three weeks in Germany they returned to Belgium to resume peacetime activities. These involved hunts with packs of hounds, and race meetings. Some men were demobilised and others went on leave. They finally left Antwerp on 22 March 1919, bound for Southampton. The regiment had lost 143 all ranks killed or missing, and 446 wounded. Their horses, apart from officer's chargers, were taken away from them before embarkation and the strength on arrival in England was 7 officers and 126 other ranks.
|
|
Egypt and Palestine 1920 - 1922
|
|
The Greys were in Edinburgh, quartered at Redford Barracks, for a year after coming home from France and Flanders in 1919. But then they were notified of overseas service, the first time for the regiment in peacetime. They left Southampton on 10 Nov 1920, sailing for Egypt. They had to leave their grey horses behind and hand them over to the Kings Dragoon Guards. The irony of this was that in 1920 their title was now The Scots Greys (2nd Dragoons) and they were now required to ride horses of another colour on arrival in Alexandria. In 1921, after a year of little military activity, they moved to Palestine where the British had taken control from the Turks. The Jewish settlers were under constant threat from Arab raiders and it was the task of the Greys to protect the kibbutzim, but poor communications between the settlements and the garrison, as well as a lack of will on the part of the British officers, hindered the regiment's effectiveness. They returned to Egypt in May 1922 and sailed to India in October.
|
|
India 1922 -1927
|
|
The Greys went to India, for the first time in their history, in 1922, sailing from Suez and arriving at Bombay on 17 Oct. They spent a brief period in camp at Deolali and then on to Risalpur. They remained there until 1925, getting back up to strength and training for service on the Northwest Frontier. Summer months were spent in the hill station of Khanspur in the Muree Hills. In 1925 they marched to Meerut, a distance of 610 miles, taking the journey in 48 stages so that it took two months to reach their new home. They spent most of the time performing musical rides at horse shows, playing polo, pig-sticking, boxing and hockey. They left India on 28 Oct 1927 and arrived at Southampton on 18 November. (see Sergeant, Hot Climate Uniform 1928)
|
|
The Highland Ride, July 1934
|
|
The Greys spent four years at Tidworth from 1929 to 1933, in which year they moved to Redford Barracks in Edinburgh. It had become the practice to spend June and July each year at camp and under canvas in order to teach recruits about active service conditions. In 1934 the commanding officer, Lieutenant-Colonel George Pigot Moodie, decided that it was time that the regiment made its presence known throughout Scotland to those Scots who might, under the influence of infantry recruiting publicity, have believed that all Scottish regiments were foot soldiers. The Greys had recruited solely from Scotland for some time, but was in competition for recruits with Highland and Lowland regiments which had specific recruiting areas allocated to them. Col Pigot Moodie managed to persuade the authorities to allow him to take a mounted party of Greys, himself and 20 officers, 250 other ranks and 200 horses, on a tour of Scotland, to 'show the flag'. The march took 23 days and covered 470 miles. Hospitality abounded all the way, and the publicity value of the march was considerable, despite the poor weather. The number of recruits increased by about a third in 1934. During the march they took the opportunity to train in reconnaissance and river crossing as well as exercises with aircraft.
One man, Tarry Shaw who took part later wrote his memories of the Ride: 'The ride became a great thing in the regiment's history, it was rather an embarrassment later for those who had not been on it. The regiment changed very little in those days and most of the sergeants' mess in Normandy in 1944 had ridden on it.'
And he also remembered how uncomfortable the equipment and uniforms were: 'Everything had to be polished, even the saddles, so you rolled about all over the place. The only things you could saddle soap were the surcingle and the inside of the saddle flaps. Only the remount riders and the officers were allowed to wear riding boots; everyone else wore long puttees. We had thick serge tunics that buttoned right up to the neck which you wore with a leather bandolier. It was terribly difficult to be a good horseman in all that. And remember that in those days you wore uniform all the time, not just in barracks. We were allowed to take our bandoliers off when we walked out but even so it was difficult getting cosy with your best girl in the cinema with that lot on.' (see Lance-Corporal 1930)
In September 1994 there was a re-enactment of the ride made by men of the Royal Scots Dragoon Guards. The regiment had long since been mechanised but enough riders were found, and horses borrowed from the Household Cavalry who use greys for their trumpeters and musicians. An article was written in anticipation of this event, in The Field magazine of Sep 1994, by Barnabas 'Barney' White-Spunner, of the Blue and Royals and later a lieutenant-general.
|
|
Not Mechanised 1938
|
|
Even allowing for the advantage of hindsight, it seems strange that despite the lessons of 1914-18, many experienced if diehard commanders continued to believe in horsed cavalry. The advent of aircraft and tanks seems to have had little effect on the traditionally conservative military mind. Thus, horsed cavalry remained a substantial part of the British Army. In 1938, however, there was a threat of mechanisation impending. There must have been differences of opinion within the regiment over the question of horses versus vehicles but most of the Scots Greys had joined the regiment attracted to the idea of riding. Certainly the commanding officer at the time, Lt-Col Cyril Gaisford St Lawrence, was determined to retain the horses. He made it a Scottish national issue by lobbying each of the Scottish MPs to resist the mechanisation of the Scots Greys. He also enlisted the press and soon a public outcry influenced the War Office to back down. The CO was sent a strongly-worded reprimand from the Army Council for his public criticism of Army policy.
|
|
Palestine 1938
|
|
In Oct 1937 the regiment moved from Edinburgh to Hounslow, played a lot of polo, took part in manoeuvres near Basingstoke in Aug 1938, and on 10 Sep was given notice to go to Palestine. Two squadrons and the machine-gun Troop, plus regimental HQ, were to go. C Squadron was to return to Edinburgh to form the beginnings of a mounted depot. At the end of the month, taking their horses, they left Britain and arrived at Haifa 10 days later.
The British had administered Palestine since the defeat of the Ottoman Turks in WW1 and they had inherited a problem; the struggle between Arabs and Jews for a national homeland. The influx of Jews really began with the pogroms in Russia in 1880 which caused great destruction of Jewish communities, and an exodus of the inhabitants. Between 1880 and 1914 over 60,000 Jews emigrated to Palestine inspired by Theodor Hertzl's dream of a Jewish nation in the land of Israel. They bought land from Arab landlords and through hard work and desperation transformed useless malarial swamps into fertile agricultural fields. But the Arab majority feared the expansion of the Jewish population and made repeated attacks on Jewish settlements. In 1920 the Arabs rioted to force the British to limit Jewish immigration. The rise of anti-semitism in Europe due to Hitler's ambitions forced the Jews into a further exodus. The British were under pressure to stem the flow of Jews trying to escape persecution but they were unable to prevent the riots and strikes that occurred in 1936. During that year attacks on Jewish settlements resulted in the deaths of many Jews and the destruction of thousands of citrus groves and vineyards. Arab deaths were mostly due to British police efforts to stop the violence, but also the increase in Jewish retaliation. In 1937 the Peel Commission recommended a two state solution which offered the Jews an area less than half the size offered to the Arabs. The Jews reluctantly accepted but the Arabs rejected it and the fighting continued.
It was into this war-zone that the Scots Greys arrived with their horses in October 1938. Dawn raids on suspected Arab villages were the norm, rarely producing much in the way of illegal caches of arms, but the horse-mounted regiment was capable to a far greater degree of the silent surprise approach to such villages than a motorised column. Its role was in direct support of the Palestine Police Force, and it was stationed for 18 months at Rehovot, 15 miles from Jaffa. In Jan 1939 they spent 3 weeks on manoeuvres with the Trans-Jordan Frontier Force and a selection of British regiments in the Jordon Valley.
|
|
World War Two 1939 - 45
|
|
Detached Duty
When war broke out in September 1939 the Greys depot in Edinburgh received hundreds of reservists who were expected to be sent to the mounted regiment in Palestine. Some of them did, 18 officers and 259 men were sent out to the regiment, but the majority were sent to France, posted to a labour battalion. The regiment continued their duty, dealing with civil disturbances in Palestine, and actually carried out a mounted charge against rioters in Feb 1940. Officers and men were, however, frustrated at not being part of the war against Nazi Germany and the Axis forces. Some officers were sent on detached duty to the newly formed Commandos, most notably Geoffrey Keyes who first joined the Narvik Expedition in Norway, and then the campaign against the Vichy French in Syria. His most famous exploit, which caused his death, and the posthumous award of the VC, was the commando raid on Rommel's HQ in Libya in Nov 1941. Other officers attached to commando units were Michael Borwick who later commanded the Greys in the 1950s, and William McLean who won two DSOs for his bravery in Yugoslavia.
Todcol 1941
Shortly before the Greys were officially mechanised they took part in motorised columns that were organised for special tasks in 1940 and 1941. The Greys were involved in Bluecol, Trotcol, Heyforce, Habforce and finally Todcol. This last named was commanded by the regiment's commanding officer Lt-Col George Todd. It was formed in May 1941 to go into Syria to fight the Vichy French, and consisted of Regimental HQ, the machine-gun Troop and A Squadron. Also part of the column was B Squadron of the Staffordshire Yeomanry. The Greys were operating as lorry- borne infantry, and the column was later reinforced with Australian light tanks, infantry, anti-tank weapons and anti-aircraft guns. They were ordered forward in support of other Australian forces towards Merjayun. After a hard-fought advance against numerically superior French divisions, the brigade, which was spread out on a broad front, was fiercely attacked on 15 June and forced to withdraw in some confusion and after sustaining losses. Eventually, however, the French were forced to withdraw themselves in the face of growing opposition from British, India, Australian and Free French forces. Todcol was disbanded in Aug 1941 and the Greys had earned the battle honour MERJAYUN.
Mechanisation, May 1941
The announcement of the Greys' mechanisation came finally in May 1941 but it was not until September that the horses were handed over. There was a final mounted parade in Nablus in March 1941 and it was not until September that the horses were finally handed over to the remount authorities. A number of American light M3 Stuart tanks ('Honeys') were issued and armour training was conducted during the winter months. In Feb 1942 the Greys rejoined the former 1st Cavalry Division, now the 10th Armoured Division, in Egypt. Some medium M3 Grant tanks were given to them in April 1942, and in mid-June the regiment was ordered to move westward along the coast. One squadron was equipped with Grants and two with Honeys and as such they prepared to defend Mersa Matruh during the British withdrawal from Tobruck. But they had to join the retreat and return to Mareopolis in the Delta. This initial disappointment was made worse when they had to hand over their tanks to the 4th County of London Yeomanry.
Ruweisat Ridge, July 1942
In early July 1942 the Greys were re-equipped with Grants, Stuarts and Lee tanks, few of which were in a good condition. In mid-July they moved forward to the Alamein line and held positions on the Ruweisat Ridge guarding the coastal road and railway. The Germans were preparing for a breakthrough, probing British defences in the south, so there was little activity at the north end of the line where the Greys were. At the end of July they were moved to support the New Zealand Division whose task was to capture the western end of the Ruweisat Ridge. This only involved the regiment in a long range exchange of fire with enemy tanks across a minefield.
Alem el Halfa, 30 - 31 Aug 1942
During August the Greys moved several times, and on 30 Aug the German armour attacked the British positions at Alem el Halfa, in their attempt to reach Cairo, and the regiment experienced it's first tank battle. They quickly formed up in reserve, and were held ready to plug any gaps or mount counter-attacks in the area covered by 7th Armoured brigade. On the afternoon of 31 Aug the Greys motored forward at speed to relieve the Sharpshooters Yeomanry. They lost two Grants but by this action they were able to prevent a breakthrough in the southern part of the line, and the Germans and Italians withdrew. Throughout the rest of September and most of October there was further training and the light tanks were sent out to keep an eye on enemy movements.
El Alamein, 23 Oct -2 Nov 1942
The Greys moved to the concentration area on 22 Aug and received new tanks to bring them up to strength just in time for the big battle at el Alamein. There was a massive artillery barrage against the Germans on the night of 23 Oct and the regiment advanced through a minefield, but found itself in a very exposed position during the day of 24 Oct. There was a second minefield to go through but the breaching party had been unable to complete its task. The CO, Lt-Col Sir Ranulph Twistleton-Wykeham-Fiennes, personally organised the squadrons' defence of the bridgehead covering the gap in the minefield, and sent forward recce parties towards the second minefield. Enemy artillery fire continued throughout the day, and B Squadron was sent to support the British infantry and clear some residual enemy groups. Towards nightfall the regiment fired at a number of German tanks moving south along the edge of the minefield. While the main breakthrough of the allied formations was further north, the Greys continued to keep the enemy occupied in the south, which contributed greatly to the eventual victory.
Fuka, Nov 1942
The Germans were in retreat after el Alamein and the Greys were in pursuit, moving north as the enemy headed towards Tripoli. They made up the right echelon of the 4th Light Armoured Brigade and in early November came under fire from an Italian artillery battery at Fuka. The two squadrons of Grants returned fire with their 75mm guns while B Squadron, comprised of Stuart light tanks and commanded by Major Frank Bowlby, worked around the flank. They made a charge in the old Scots Greys tradition, with all guns firing, and overran the battery. They secured 11 guns, 30 vehicles and captured 300 Italian gunners, at the cost of one tank and no casualties. There were other small engagements during the pursuit of the retreating enemy in which tanks were lost or broke down, so that by mid-November they were given some new tanks from a squadron of the Warwickshire Yeomanry. Amongst these were two Shermans.
Nofilia, 17 Dec 1942
By the end of November 1942 the regiment had relinquished most of its tanks to other units, but then took over those of the 1st RTR, of which a high proportion were Shermans. By 12 Dec its strength was: Regimental HQ, 3 Stuarts and one Grant; A Squadron, one Stuart, 2 Grants and 6 Shermans; B Squadron, 16 Stuarts; C Squadron, one Stuart, one Grant and 11 Shermans. There was an action against the German rearguard just beyond the Gulf of Sitre, then on 17 Dec, at Nofilia they were ordered by General Freyberg to engage the enemy. The CO, Sir Ranulph, led the rapid attack against the German flank which drove into the centre of the enemy position. The element of surprise caught the Germans unprepared and 2 anti-tank batteries were put out of action. There was a fierce fire-fight which lasted all day and resulted in the Greys losing 7 tanks, one officer and 2 men.
Tripoli, Jan 1943
More fighting occurred all the way, and Tripoli was captured before the end of January 1943. The regiment settled for a period of rest and retraining in and around Tripoli. There was a brief period when B Squadron was about to convert to Crusader tanks but by the end of their service in North Africa the Greys were fully equipped with Shermans.
Salerno, 9 -16 Sep 1943
The Greys remained in Tripoli for most of 1943 while the army advanced on Tunis and invaded Sicily. However, the regiment took part in the Allied landings on the west coast of mainland Italy on 9 Sep. For this they were in the 56th British Infantry Division, split up so that A Squadron joined 167th Infantry Brigade, B Squadron 201st Guards Brigade, and C Squadron 169th Infantry Brigade. The regiment left Tripoli on 4 Sep, the landing craft arriving off Salerno on 9 Sep. A and C Squadrons landed in the first wave and were quickly in action against a well-entrenched and highly motivated German defence. The infantry were held up by German tanks and the Greys were unable to come to their aid due to being bogged down. But they were pulled free in time to tackle the opposition and two men especially distinguished themselves in the battle. Sgt McMeekin took out four enemy tanks in quick succession when A Squadron attacked them in a flanking move. Corporal Stamper carried out a recce on foot and found a well concealed enemy tank which could not be by-passed. He brought his tank forward and calculated the direction of fire, destroying the tank with his first shot. He went on to knock out two anti-tank gun crews before his own tank hit a mine. McMeekin and Stamper both received the Military Medal for their good shooting. During the first four days the Greys moved between 5 and 6 miles inland in support of the infantry, gradually establishing a series of strong positions from which to withstand expected German counter-attacks. When these occurred between 13 and 16 Sep they were successfully repelled.
The Advance to the Garigliano, Sep 1943 -Jan 1944
The Greys re-embarked with a brigade to seize Maiori in an amphibious landing called Avalanche on 19 Sep 1943. They seized the Chiunzi Pass and for the next ten days kept the Germans occupied, thus preventing them from attacking the main force in the Vietri Pass. They advanced towards Pompei, dealing with any resistance on the way. They passed by Mount Vesuvius and reached Naples on 1 Oct continuing north towards the River Volturno where the enemy were holding positions. They were ordered to support an assault river crossing but the bridges were destroyed and the river unfordable. The Americans managed to assemble a bridge under fire, and they reached the other side as the enemy retreated. For three weeks they advanced slowly, in support of the infantry in the close and hilly country between the Volturno and the Garigliano. The conditions were unfavourable for tanks and there were many anti-tank weapons to contend with. The period from 24 Nov to 14 Dec 1943 was spent occupying positions near the mouth of the river Garigliano. In mid January 1944 they handed over their tanks to 50th RTR and returned to England by sea so that preparations could be made for the Normandy Invasion.
Normandy Landing, 7 - 9 June 1944
The invasion of north-west Europe was being planned, and when the Greys returned to Scotland on 9 Feb they were sent immediately to Worthing in Sussex. They trained for 5 months and were issued with new tanks, Shermans Mark II with one Firefly (Sherman Vc) to each Troop. They formed part of 4th Armoured Brigade which sailed from Gosport and landed between 7 and 9 June 1944 (D-Day plus 1,2 and 3) on the beaches of Courseulles 12 miles north of Caen. The landing took 48 hours. Their operational role between the landing and the middle of August was to form the left of the British 2nd Army which had landed on D-Day.
Caen, June - July 1944
The task of the 4th Armoured Brigade was to act as a reserve for the 51st Highland Division which was positioned north and west of Caen. A major offensive was mounted against the enemy on 26 June and a successful attack on the 29th involved the Greys supporting infantry battalions. They then defended the town of Cheux during a determined German counter-attack. Gradually the British position grew stronger so that German armour withdrew from other sectors. The Greys were engaged in heavy fighting with the powerful 45-ton Panther tanks and Tigers. In tank duels the Shermans endeavoured to bring their guns to bear on the less protected flank and rear of the Germans. Heavy losses were suffered in men and tanks.
Hill 112, July 1944
The Germans were still holding strong positions west of the River Odon, in particular Hill 112 where several enemy anti-tank guns were well sited in a wood on the reverse slope. When the Greys and infantry advanced, the forward slope was gained quite easily. But a concerted attack had to be mounted against the wood by B Squadron supported by C Sqn, a difficult task for both infantry and armour. A fierce battle ensued with the Greys losing several tanks and the infantry being forced back. It was hard for the tanks to operate among the trees and to see their targets. But eventually the Germans withdrew and the regiment was relieved. On 29 July the regiment passed through Caen in order to support the 2nd Canadian Division fighting south of the city. Over a 3 day period the Greys lost several tanks but the enemy were prevented from mounting a large counter-attack.
Falaise Gap, Aug 1944
They moved west past Bayeux and south to Vire where the brigade supported the 3rd Division. On 9 Aug there was an attack on Vire by the KSLI and there was much confused fighting. However, the 4th Armoured Brigade were withdrawn and sent to the area around Falaise. They were needed to assist in cutting off the German 7th Army. On 18 Aug the regiment took up positions on a ridge covering the Falaise Gap, half way between Falaise and Argentan. For a day and a half they remained there engaged in long-range shooting at enemy columns. They sustained heavy casualties but made a big contribution to the many thousands of Germans killed and hundreds of vehicles put out of action.
Crossing the Somme, Sep 1944
The Greys advanced rapidly from the Falaise area and moved East towards the Low Countries, travelling a hundred miles without sight of the enemy. The brigade reached the Seine on 29 Aug and secured a bridge-head. There were mines and isolated enemy forces to deal with even though the main German army was withdrawing. Many prisoners were captured as the enemy could not believe the speed of the allied advance. On 1 Sep the two leading squadrons reached the high ground over-looking the Somme. B Squadron and the recce Troop then seized the bridge which was discovered to be prepared for demolition. The crossing was made under heavy shellfire and in the teeth of strong resistance. The Germans launched a counter-attack but this was out-flanked and driven off by the Greys.
Avelghem, Sep 1944
They moved forward to St Pol and crossed the Belgian border on 5 Sep taking up positions north of the River Escaut to guard the approach to the bridge over the Scheldt at Avelghem. The Germans attacked the village from the north, and the Greys, with the assistance of the 9th Bn Cameronians fought a four-hour battle and subsequently occupied the whole area. They handed over to the infantry and moved to an area near Antwerp for a short rest. Leave was granted in Brussels at this time. When Operation Market Garden was launched the Greys were in support, posted along the Meuse-Escaut Canal.
Holland, Oct 1944
During October the Greys were engaged in Nijmegen Island for two weeks, where owing to the waterlogged ground in this highly irrigated area, operations with tanks were exceedingly difficult, and faced with a determined enemy, the troops suffered heavy casualties. The regiment later moved off and took part in the liberation of Tilburg. After stiff fighting there, in mid-November, they joined in clearing the area west of the River Maas opposite Roermond. Mines were everywhere, and a constant danger, costing the regiment many tanks. The remaining tanks were in a bad condition and a halt had to be called for repairs and maintenance. For about three months the regiment were guarding part of the river line.
Crossing into Germany, Feb 1945
The Scots Greys supported the allied offensive against the Siegfried Line in Feb 1945. The initial assault was mostly successful and they crossed into Germany on 24 Feb near Cleves. On 26 Feb they were heavily involved in the fighting around Uedem. The battle was as hard for them as anything they had experienced since the Normandy landing. The Germans were first-rate troops and fought stubbornly for every inch of ground. They were in strong positions and well supported by artillery. Working closely with the infantry, the Greys advanced against various objectives in a night attack. For part of the time the Troops of tanks had to work without infantry support, a dangerous undertaking in view of well-sited anti-tank weapons. A few days later the regiment was involved in some heavy fighting on the Siegfried Line, south-west of the Hochwald forest. The enemy mortar, artillery and rocket-fire was often intense, and close protection of infantry was necessary for the tank Troops to operate effectively. The regiment was then withdrawn to prepare for the Rhine crossing.
The Battle of Hopsten, 6 - 7 Apr 1945
The Scots Greys crossed the Rhine by a floating bridge on the night of 25 Mar, and advancing north-east met some resistance which was quickly dealt with. There was some fighting at Bocholt and after 3 days they reached the River Ems. They had to wait for bridges to be constructed and were ordered to clear an enemy stronghold at Ochtrup. Rheine airfield was captured by C Squadron and they came to the Dortmund-Ems Canal. The Germans withdrew to Hopsten and dug in behind a stream. The roads became impassable with broken down vehicles and they were targeted by enemy mortar and anti-tank fire all day. The leading tank Troops could not advance and attempts were made to work around the town to find a less dangerous approach. Crocodile flame-throwing tanks were brought up and, combined with C Squadron and 2 companies of infantry, advanced into the town on 7 April. The fighting lasted until 11am before the town was occupied. Further villages to the east were also captured, and they moved on to the River Aller.
The Advance to Bremen, April 1945
The river line was held by the Germans in great strength, and progress towards the ports of Bremen and Hamburg was slow. German civilians attempted to hinder the advance, some using bazookas. On 14 April the regiment crossed the Aller at Rethem and began clearing enemy positions around the bridge-head. The Greys' next major objective was the village of Kirchboitzen, and it was successfully captured despite heavy opposition. During the following nine days the regiment advanced north-west along the east side of the river with the cooperation of carrier-borne infantry systematically engaging and clearing the enemy. The Germans still had considerable forces in the area including anti-tank weapons and artillery, but could not seriously delay the British advance. The Greys continued to advance on Bremen and supported the 52nd Lowland Division's entry into the city on 24 April.
Wismar, May 1945
By the end of April the Rhine had been taken, one squadron had crossed the Elbe, and the Allied vice was closing on Germany. The eastern jaw of the vice was represented by the Russian Army, already perceived by Westminster, and possibly Washington, as the next potential enemy. Aware that what the Russians took they were likely to keep, if only for bargaining purposes, it rapidly became apparent that some means had to be found of denying them the Danish peninsula and archipelago, and so a combined force of the Scots Greys and the 1st Canadian Parachute Regiment was sent on an eastward dash to seal off Denmark from the advancing Russians. The regiment's tanks left Luneberg on 1 May. C Squadron, which had already crossed the Elbe, was leading, carrying the Canadians on the backs of the tanks, speeding along roads crowded with German refugees fleeing west to get away from the Russians. They reached Wismar on the Baltic at one o'clock in the afternoon of 2 May. The vanguard of the Russian army arrived 8 hours later and did their best to appear pleased to see the Greys and Canadians.
|
|
Post-War Germany, 1945 - 1952
|
|
The Greys were reduced in numbers, having lost 154 officers and men in the war, and with demobilisation, so that at this time, they retained only the HQ Squadron and one sabre squadron. The regiment remained in north Germany for seven years, as their role developed from occupiers to defenders against the Eastern bloc. They had to win the confidence of the defeated Germans and managed to perform at military tattoos and other events. They produced eight troopers dressed in full dress and mounted on Greys to perform a musical ride at Berlin in August 1947. They also developed their pipe band with bag-pipes and drums which continues to this day.
|
|
North Africa, 1952 - 55
|
|
In April 1952, after a short period in Aldershot, the Greys were posted to Cyrenaica on the north-east coast of Libya. Its sabre squadrons had received Centurion tanks by that time. They needed to train in desert conditions, but their presence in the region was necessary in case of emergencies. The regiment disembarked from the troopship Empire Windrush at Tobruk in early May 1952 and moved to its station at Barce, 56 miles north-east of Benghazi. Over the next 2 years its 3 sabre squadrons were detached in turn to serve in either the Suez Canal zone or in Jordan, as political situations demanded. Meanwhile, back in Britain a detachment of volunteers provided a mounted escort for the Queen on her first visit as Sovereign to Edinburgh in June 1953. She also visited the regiment in Libya while on a State Visit in 1954. The Greys returned to Britain in 1955, handing over their tanks to 5th RTR.
|
|
Service in Britain, 1955 - 58
|
|
On arrival in England the Greys squadrons were dispersed; A Sqn to Tilshead in Wiltshire, B Sqn to Castlemartin in Pembrokeshire, C Sqn to Lulworth on Dorset, and HQ Sqn to Crookham in Hampshire. The function of the dispersed squadrons was to conduct training camps and provide the support of regular soldiers for yeomanry and other TA units. This continued until 1956 when the Greys moved to Catterick. Two important ceremonies took place in 1956. The Queen presented a new guidon to the Greys at Holyroodhouse on 5 July 1956, and the Eagle of the 45th that had been captured at Waterloo, was handed over to the regiment at the Royal Hospital, Chelsea on 18 June and placed in Edinburgh Castle at another ceremony on 7 July 1956.
|
|
Germany, 1958 - 62
|
|
The regiment remained at Catterick during 1957 and 1958, training recruits for the RAC. In 1958 they returned to Germany and were posted to Munster. As National Service ended the Scots Greys became the first regiment in the army to achieve an establishment formed entirely of regulars. This was helped by an influx of 200 recruits over the 1959-60 period, boosted by a concerted recruitment drive in Scotland to ensure a greater proportion of Scotsmen in the regiment.
|
|
Aden and Hong Kong, 1962 - 64
|
|
The regiment returned to Britain in 1962 and spent only a fortnight in Edinburgh preparing for overseas service. The bulk of the regiment moved to Aden while C Squadron went out to Hong Kong where they joined up with 48th Gurkha Infantry Brigade. In Aden the two sabre squadrons rotated tours of duty afloat in the Persian Gulf as part of the Amphibious Warfare Squadron of the Royal Navy. Meanwhile, in Dec 1962, the Greys band and Pipes and Drums went on a tour of North America, with the band and Pipes and Drums of the Argyll and Sutherland Highlanders. They played in 65 cities in 78 days in both the USA and Canada.
|
|
Fallingbostel, 1964 - 69
|
|
In Feb 1964 the Greys returned to North Germany, to the vast training area at Fallingbostel, between Hamburg and Hanover. They remained stationed there until Nov 1969. In 1965 they were well placed to join in the celebrations of the 150th anniversary of the Battle of Waterloo. Festivities took place in London, Belgium and Gemany. The main celebration was at Brussels and on the site of the battlefield. Four days of sports, games, balls and dinners were held at Fallingbostel.
|
|
Cyprus 1969 - 70
|
|
The Greys converted from tanks to armoured cars in 1969, becoming an armoured recce regiment with an airportable function. Since 1965 they had a Troop of helicopters and that was expanded to a squadron of six. B Squadron, equipped with Ferret Scout cars, was sent out to Cyprus at the end of 1969. They were stationed at Zygi Camp, east of Limassol. The remainder of the regiment stayed in Edinburgh and carried out training exercises at Otterburn in Northumberland. In June 1970, C Squadron, also equipped with Ferrets, replaced B Sqn in Cyprus. A Squadron, who were in Saladin Armoured Cars, went to Sharjah in the Persian Gulf in July 1970. There they collaborated in exercises with the Scots Guards and Trucial Oman Scouts. At the same time B Squadron were sent to Northern Ireland at 3 days notice but returned 10 days later. They were replaced by C Squadron, fresh from Cyprus. The Duke of Kent commanded the squadron, and they spent a month in Ulster, a part of the world that had become one of the most troubled places.
|
|
Amalgamation, 2 July 1971
|
|
In 1971 the Scots Greys was the last cavalry regiment of the British Army to avoid amalgamation. There had been talk in 1967 of a marriage of the Scots Greys with the 1st Royal Dragoons but the Royals feared a Caledonian takeover, and that they would disappear to become just a badge on the sleeve of the Scots Greys uniform. Ironically the Royals amalgamated with the Blues in 1969 and became a badge (the eagle of the 105th) on their sleeve instead. In 1971 the Greys faced up to joining the 3rd Carabiniers. This regiment was a combination of the 3rd (Prince of Wales's) Dragoon Guards and the 6th Dragoon Guards (Carabiniers). Those two had amalgamated after WW1 and were now to be the 'victims' of a Caledonian takeover. Whichever way it was dressed up the eventual outcome was that the new regiment was still the Scottish cavalry regiment, but promoted from the status of dragoons to dragoon guards.
|
|
|
 |
| Badges
|
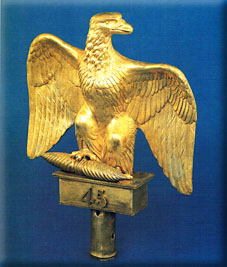 |
| The Eagle of the 45th
|
| Motto
|
| Second to None
|
| Regimental Anniversary
|
| Waterloo Day 18 June
|
| Regimental Marches
|
Trot and Canter
The Keel Row
Bonnie Dundee
Quick
Highland Laddie
Slow and walk
Garb of Old Gaul
|
| Nicknames
|
The Grey Dragoons
The Scots Regiment of White Horses
The Bubbly Jocks
The Bird-Catchers
The Greys
|
| Colonels in Chief
|
| 1681 - 1992
|
| Commanding Officers
|
| 1681 - 1992
|
| Colonels
|
| 1681 - 1992
|
| Soldiers
|
| 1681 - 1992
|
| Uniforms
|
| 1681 - 1992
|
| Band and Trumpeters
|
| 1681 - 1992
|
| Sabretaches and Pouchbelts
|
| 1812 - 1992
|
| Guidons
|
| 1751 - 1992
|
|
War of the Spanish Succession 1701 - 15
BLENHEIM
RAMILLIES
OUDENARDE
MALPLAQUET
War of the Austrian Succession 1740 - 48
DETTINGEN
Seven Years War 1756 - 63
WARBURG
French Revolutionary Wars 1793 - 1802
WILLEMS
Hundred Days 1815
WATERLOO
Crimean War 1854 - 55
BALAKLAVA
SEVASTOPOL
South African War 1899 - 1902
RELIEF OF KIMBERLEY
PAARDEBURG
SOUTH AFRICA 1899 -1902
World War One 1914-18
Emblazoned Battle Honours
RETREAT FROM MONS
MARNE 1914
AISNE 1914
YPRES 1914 1915
ARRAS 1917
AMIENS
SOMME 1918
HINDENBURG LINE
PURSUIT TO MONS
FRANCE AND FLANDERS 1914 -18
World War One 1914-18
Accredited Battle Honours
MONS
MESSINES 1914
GHELUVELT
NEUVE CHAPELLE
ST JULIEN
BELLEWARDE
SCARPE 1917
CAMBRAI 1917 1918
LYS
HAZEBROUCK
ALBERT 1918
ST QUENTIN CANAL
BEAUREVOIR
World War Two
Emblazoned Battle Honours
HILL 112
FALAISE
HOCHWALD
ALLER
BREMEN
MERJAYUN
ALAM
ALAM EL HALFA
EL ALAMEIN
NOFILIA
SALERNO
ITALY 1943
World War Two
Accredited Battle Honours
CAEN
VENLO POCKET
NORTH-WEST EUROPE 1944-5
SYRIA 1941
EL AGHEILA
ADVANCE ON TRIPOLI
NORTH AFRICA 1942-3
BATTIPAGLIA
VOLTURNO CROSSING
|
|
| Titles
|
| 1681 | The Royal Regiment of Scots Dragoons |
| 1707 | Royal North British Dragoons |
| 1751 | The 2nd or Royal North British Dragoons |
| 1866 | 2nd Royal North British Dragoons (Scots Greys) |
| 1877 | The 2nd Dragoons (Royal Scots Greys) |
| 1921 | Royal Scots Greys (2nd Dragoons) |
| 1971 | Royal Scots Dragoon Guards (Carabiniers and Greys) |
|
|
Interview
|
Jim Randall talks about his time as a Trooper in the Royal Scots Greys:
Part One
Part Two
Part Three
|
|
Museum
|
The Royal Scots Greys Room
Scottish United Services Museum
The Castle
Edinburgh
|
|
Suggested Reading
|
The History of the Second Dragoons: Royal Scots Greys
by Edward Almack (London, Alexander Moring 1908)
The Royal Scots Greys
by M Blacklock (Leo Cooper 1971)
Letters of an Officer of The Scots Greys to his Mother During the Crimean War
by Captain George Buchanan (London, Rivingtons 1866)
Second to None: The Royal Scots Greys 1919 - 1945
by Lord Carver (1954)
Historical Record of The Royal Regiment of Scots Dragoons, now The Second or Royal North British Dragoons, commonly called the Scots Greys
by Richard Cannon (London, Longman, Orme 1840)
Charge the Guns!: Wellington's Cavalry at Waterloo
by Paul Dawson
History of the 2nd Dragoons The Royal Scots Greys 1678 -1893
by Percy Groves (Edinburgh, W & A K Johnstone 1893)
Geoffrey Keyes
by Elizabeth Keyes (London, Newnes 1956)
A Memoir of Brigadier General Walter Long (of the Scots Greys)
(London, John Murray 1921)
John Forbes: Scotland, Flanders and the Seven Years' War 1707-1758
by John Oliphant
The 2nd Dragoons: Royal Scots Greys
by Sir James Balfour Paul (Glasgow, James Maclehose 1919)
History of the Royal Scots Greys (The Second Dragoons) August 1914 - March 1919
by R Pomeroy, W F Collins, W M Duguid-McCombie, J S Hardy, A I MacDougall, A D Gibbs (1928)
The Autobiography of a Working Man
by Alexander Somerville (London, Turnstile Press 1951)
In The Finest Tradition: The Royal Scots Dragoon Guards (Carabiniers & Greys)
by Stephen Wood (Mainstream 1988)
|
|


")
")
")
")
")
")
")
")
")
")
")
")
")
")
")
")
")
")
")
")
")
")
")
")
")
")
")