|
Origins of the Regiment
|
|
The Gordon Highlanders was formed from the amalgamation of the 75th and 92nd Regiments in 1881. Although the 75th was the numerically senior regiment, it was the 92nd Gordon Highlanders that predominated.
|
|
Abercromby's Highlanders
|
|
The 75th was raised in Stirling in 1787 by Colonel Robert Abercromby of Tullibody, brother of Sir Ralph Abercromby. Robert was Commander-in-Chief in India from 1793-97, and was Colonel of the 75th for 40 years, from 1787 to 1827. The regiment had been raised for service in India and fought in the 3rd and 4th Mysore Wars, distinguishing themselves against the elite Tiger Battalions of Tippoo Sahib, defeating him at Seringapatam, and then suffering the loss of nearly half their number at the siege of Bhurtpore in 1805. They had been in India from 1788 to 1807 so to mark their good service the battle honour INDIA was awarded to the 75th and perpetuated with the Tiger, worn as a collar badge by the Gordon Highlanders.
|
|
92nd Gordon Highlanders
|
|
The 92nd began life as the 100th Regiment, raised during the French Revolutionary Wars by the Duke of Gordon. He had experience of raising regiments, being responsible for 3 new regiments of Fencibles between 1759 and 1793. But he had difficulty recruiting enough men so his wife took it upon herself to drum up men for enlistment. She rode to country fairs wearing her version of the uniform, offering to kiss any man who joined her husband's regiment. The regiment was brought up to strength, numbering over 1000. They were part of Sir Ralph Abercromby's failed expedition to Holland in 1799. Abercromby's next invasion was in 1901 against the French army in Egypt which resulted in severe losses for the regiment but ultimate victory and the award of the Sphinx battle honour.
|
|
Tel-el-Kebir, 13th Sept 1882
|
|
The revolt of Arabi Pasha in Egypt prompted the British to send Sir Garnet Wolseley with a force of 18,000 troops to restore order. After the cavalry had secured Kassassin Lock on the Sweetwater Canal at the end of August, the main objective was to storm the rebel Egyptian defences at Tel-el-Kebir. The 1st Battalion Gordon Highlanders were in General Hamley's Division, in the 3rd (Highland) Brigade, commanded by Major-General Alison, along with the 1st Black Watch, 1st Cameron Highlanders and the 2nd HLI. The Gordons were commanded by Lieut-Colonel Denzil Hammill.
It was decided to surprise the rebels with a pre-dawn attack. This involved a highly organised night march up to the position marked out for the final assault. The enemy trenches were placed in a 4 mile line running north-south, just north of the railway and canal. The Highland Brigade were in front, and in the centre, with the Gordons between the Black Watch and Cameron Highlanders. The assault required that they cross a deep ditch and clamber over a high redoubt to reach the trenches. The men of the Gordons were mostly over 24 years old with many veterens of the Afghan War and 154 men on Reserve. The Gordons and Camerons had less trouble than the battalions of HLI and Black Watch, and secured the enemy trenches by 5.20am. They continued forward and came under heavy fire on their flanks.
The enemy's second line of defence did not cause them much of a problem as the Egyptians lost heart and tried to retreat. The battle of Tel-el-Kebir was a swift and decisive victory for the British who lost 54 killed and 342 wounded. The 1st Gordon Highlanders lost 5 men killed. They went on to Cairo which was occupied and the remaining Egyptian troops neutralised. The war was officially over by 17th September.
|
|
Sudan 1884
|
|
The 1st Battalion Gordons remained in north-east Africa for the battles in the Sudan. They were in the 2nd Brigade of Sir Gerald Graham's Suakin Field Force, to fight against the Mahdists led by Osman Digna. They were present at the battles of El Teb on 29th Feb 1884, and Tamai on 13th March. In the latter battle the infantry were formed into large squares. The 1st Brigade's square experienced problems when the Black Watch were ordered to charge, allowing the Dervishes to enter the square through the gap. The 2nd Brigade square remained intact and consequently suffered fewer casualties. The field force was successful in routing the enemy but the Mahdists were not finished.
Mounted Infantry 1885
As well as providing a battalion for the 2nd Infantry Brigade in the Suakin Field Force, the Gordons also provided men for the Mounted Infantry Company which was part of the Cavalry Brigade along with the 10th and 19th Hussars. The other components of the MI Company were supplied by the 1st Royal Sussex, 1st Black Watch and the 3rd KRRC. The Gordons had 27 privates, one corporal, one sergeant and their officer, Lieutenant C H Payne. At the battle of Tamai the mounted troops had been sent back to the previous camp but returned at dawn just in time to join the infantry in their advance on the enemy.
Gordon Relief Expedition 1884-85
General Charles Gordon had been sent to Khartoum to oversee the evacuation of the Egyptian troops and disengage the British from the Sudan. But the Mahdi and his fanatical supporters were moving in to capture the city. They laid siege to Khartoum while Gordon organised the defenses, but he was hopelessly outnumbered and in great danger. The British Government once more called on Sir Garnet Wolseley to organise an expedition, this time for the purpose of rescuing Gordon.
The 3000 men at his disposal included the 1st Gordon Highlanders along with seven other infantry battalions. They travelled up river along the Nile from Wadi Halfa to Khartoum, but progress was far too slow. By the time they reached Korti the river had curved round so that they were now heading in a north-easterly direction instead of south to Khartoum. Wolseley decided to form a Camel Corps whose aim was to travel overland, which they did, fighting a successful action at Abu Klea 40 miles from Korti.
The Gordon Highlanders remained with the boats and had the arduous task of hauling boats up the various rapids they encountered. But at least one man from the battalion had close involvement with Khartoum, Private Tim Earle worked as a telegraphist maintaining contact with the garrison in the city. He was the first person outside Khartoum to hear of Gordon's death. The Dervishes stormed the city on 25th Jan 1885 and Gordon was killed at dawn the next day. The Camel Corps reached the city two days later.
|
|
Relief of Chitral 1895
|
|
The 1st Battalion sailed to Malta in 1885 and stayed there until 1888 when they went to Ceylon, then on to India. It was on the North West Frontier that the Gordons proved their value to the British Army. The fort of Chitral was occupied by Indian troops under the command of Captain Charles Townshend who later became known as the man who surrendered to the Turks at Kut in World War 1. But at Chitral he and his garrison managed to hold out against Umra Khan and his army of Afghan tribesmen while two relief columns fought their way through.
The main column contained the Gordons, along with the Buffs, the Beds and Herts, KOSB, East Lancs and the KRRC. Indian troops included the Guides, 4th Sikhs, 4th Gurkhas and others. In the Malakand Pass the Gordons and Kings Own Scottish Borderers scaled a steep hill to fight tribesmen who were pouring rifle fire and boulders down at them.
The column, commanded by Major-General Sir Robert Low reached Chitral on 16th May after a march lasting six weeks, an arduous march that included the crossing of the Swat river and capturing Umra Khan's fort. The other column had already arrived at Fort Chitral on 20th April and the siege was lifted.
|
|
The Second Matabele War, 1896
|
|
The Second Matabele War which broke out in March 1896 prompted the British Government to send troops out to Southern Africa. A Highland Company of Mounted Infantry was sent out, consisting of 4 detachments of 33 men from the 2nd Gordon Highlanders, 2nd Black Watch, 2nd Argyll and Sutherland Highlanders and the 1st Seaforths. Each of certain selected infantry regiments on the British Home Establishment trained and kept in readiness a detachment of Mounted Infantry.
The company was transported on the 'Warwick Castle' from Southampton on the 25th April. Lieutenant the Hon. R F Carnegie commanded the Gordons' detachment and the whole Highland Company was commanded by Captain G R Tod of the Seaforths. The conflict, between white settlers and the Ndebele tribe was settled by October 1896.
|
|
The Tirah Campaign, 1897-8
|
|
In August 1897 there was an uprising of Afridi tribesmen against the British control of the region. The loss of the Khyber Pass on the 27th Aug was a great loss, and the hordes of wild Afghans swept into the Kohat and Kurram Valleys. A force of 34,500 British and Indian troops was assembled, under the command of Lieut-General Lockhart, to be known as the Tirah Field Force. The column required 20,000 non-combatants and 60,000 mules, donkeys, camels, bullocks and elephants, stretching for miles along the road leading into the heart of the country of the Afridis and Oraksais. The 1st Gordons and the KOSB had the benefit of being fit and acclimatised while other regiments, like the Dorsets and Northamptons had been stationed in lowland areas far to the south and some of their number had contracted cholera.
Dargai, 18th Oct 1897
The Heights of Dargai, rising to 6,500 ft, were occupied by Orakzais who were at the summit of a very difficult position to attack. The track leading to the top was a zig-zag path but before that there was a 200 yard 'saddle' of sloping open ground that had to be crossed. There was no cover on this part of the approach except for a a rocky outcrop halfway across. The Field Force made two attacks on the Heights, on the 18th Oct and again on the 20th. The first attack, on the 18th, was made by the 2nd KOSB and the 1st/3rd Gurkhas. It was relatively easy, and successful but the victorious battalions had to vacate the Heights due to lack of water and because Lockhart thought that keeping a force in position there would reveal his intended line of advance.
The withdrawal soon ran into difficulties because the Heights were already being re-occupied by a large force of Afridis and Orakzais. The Gordons were required to take up positions around the open space to provide covering fire, This developed into a fire fight that caused the death of Major Jennings-Bramley and the wounding of 16 men. They were hard pressed but remained calm. The final rearguard of one half-company commanded by Captain Kerr was rushed in a surprise attack. The enemy were only within a few yards of them when they managed to shoot the first six; the remaining tribesmen turned and fled.
Dargai, 20th Oct 1897
Major-General Yeatman-Biggs commanded the force that was ordered to re-take the Dargai Heights. He first sent the 1st Dorsets and 1st/2nd Gurkhas, supported by the 2nd Derbys. Although their attempts at reaching the other side of the open space were extremely brave they were unable to make progress. This attack went on for 4 hours before they admitted failure.
Yeatman-Biggs then ordered the Gordons forward. As they approached to start point they had to pass wounded men being carried away. They must have wondered how much more they would be able to accomplish, but they stepped up manfully and prepared to clamber up the slope, led by Major Macbean and inspired by their commanding officer Lieutenant-Colonel Henry Mathias. The Highlanders were determined to show the English regiments how it should be done.
The artillery pumped shell after shell onto the Heights and the Dorsets and Derbys provided covering fire as the Gordons stood ready to sweep up the slopes with the 3rd Sikhs in support, and the Gurkhas as well. Colonel Mathias said, "Highlanders, the General says the position is to be taken at all costs. The Gordons will take it."
The tribemen poured down a heavy fire on the Gordons as they charged forward across the open space. Lieutenant Lamont was the first officer to be killed, along with two men. Major Macbean was badly wounded and had to remain where he was. Four more officers were wounded, including Lt Dingwall who was rescued by Private Lawson who won a VC that day. The other VC winner was Piper Findlater who was shot through both feet and dragged himself to a rock where he propped himself up to play a stirring tune on his bagpipes.
Previous attacks had been made by smaller groups organised in companies and sections. The Gordons' tactics were to charge as a battalion. The Sikhs and Gurkhas were inspired by the sight of this and followed suit. The survivors of this rush reached the foot of the cliff where the zig-zag path began to climb the cliff. Lieut Tillard of the 3rd Gurkha Scouts had been trapped in the shelter of this position since the previous attack. He described the arrival of the Gordons:
'The scene makes me shake with excitement even now. The Gordons, pipers playing and men cheering, never stopped or wavered although many of them were down. It was one wild continuous rush of men all eager to get to the enemy. The sight was magnificent and the excitement so intense that I for one, although I was shouting at the top of my voice, felt the tears springing up into my eyes and could not keep them back.'
The charge up the path was a mad scramble with men of the Gordons, Sikhs and Gurkhas vying for the honour of getting up there first. If the Afridis had held their nerve they could have inflicted terrible damage on the ascending troops but the sight caused them to lose heart and they fled before the soldiers reached the summit. The Gordons' casualties were surprisingly light for such a high risk attack: one officer and two men killed, 6 officers and 35 men wounded.
|
|
The Boer War 1899-1902
|
|
The 1st Battalion had been abroad since 1882 serving in Egypt, Sudan, Malta, Ceylon and India. In 1898 they were to be sent home from India after 16 years overseas, and replaced by the 2nd Battalion who had remained in the UK since the First Boer War of 1881. When the 2nd arrived in India the two battalions briefly met each other, a rare occurrence, then the 1st headed off to the UK. They were in Edinburgh in Nov 1899 when they were ordered to sail to the Cape, the order being received on the 1st Nov, they sailed on the 'Cheshire' on the 9th Nov.
In Sept 1899 the 2nd Battalion received the order to proceed from Bombay to Durban. Both the battalions were destined to sustain heavy casualties in major battles soon after arriving in South Africa, the 1st at Magersfontein and the 2nd at Elandslaagte.
Elandslaagte 21st Oct 1899
The 2nd Gordons had remained in the shadow of their senior battalion who had gained battle honours in Egypt and the North West Frontier. Now it was their chance for glory in South Africa. From Durban they went by train to Ladysmith to join Sir George White's Natal Field Force.
A force of Boers under General Kock occupied the station at Elandslaagte, 12 miles northeast of Ladysmith, and the heights nearby. When General French's reconnaissance discovered the strength of the enemy, the infantry, under the command of Colonel Ian Hamilton, were called out from Ladysmith. This brigade consisted of a half battalion of Devons, a half battalion of Manchesters and five companies of the Gordons.
The Devons were to advance on the centre of the Boer position while the Manchesters, Gordons and Imperial Light Horse were to attack the left flank. Hamilton instructed his infantry to advance on the hills in extended order, 3 yards apart instead of the usual shoulder to shoulder. The Gordons bore to the right through a cutting in the hills and were pounded by enemy artillery and huge boulders thrown down on them. They then had to climb a steep slope up to the enemy position just as a rain storm broke. They had to contend with rain, Boer bullets and a difficult climb. At this point their brave commander, Lieut-Col Dick-Cunyngham was shot in two places and fainted.
Half the officers were killed or wounded and the assault wavered. At this point Colonel Hamilton took personal charge and ordered fix bayonets. Drum-major Lawrence sounded the charge on his bugle and this was echoed by the buglers of the Devons on the open veldt. The hill was taken in this charge but the Boers counter-attacked and a bitter fight ensued. As it looked like the British had the upper hand there were shouts of Majuba! Majuba! The Gordons were avenging their predecessors, the 92nd, who were forced to surrender or flee on that hill in 1881.
The Boers had fought bravely, especially their gunners, most of whom refused to leave their guns. Those Boers who fled on horseback were charged by the lancers and dragoon guards who for the most part speared them mercilessly with their lances.
There were 3 officers of the Gordons who survived unscathed, the rest were casualties:
Killed
Major H W D Denne
Lieutenant C G Monro
Lieutenant L B Bradbury
2nd Lieut J G D Murray
Wounded
Lieut-Colonel Dick-Cunyngham, severely wounded in the arm
Major Harry Wright, severely wounded in the foot
Captain J Haldane, severe leg wound
Captain Arthur Buchanan, severe wound in right side
Lieutenant M Meiklejohn, severe wound in upper arm
Lieutenant C W Findlay, severe wounds in arm and thigh
2nd Lieut I A Campbell, dangerously wounded in head and chest
Lieutenant A R Hennessey (3rd Batt.) severely wounded in head and chest.
Of the men, there were 27 killed and 83 wounded. Lieut Meiklejohn won the VC but lost his arm. Sergeant-major Robertson also won the VC. Corporal Piper McLeod performed a feat as brave as Piper Findlater at Dargai. He was wounded in the arm and again in the side but carried on playing. He only gave up when his pipes were damaged by bullets.
Magersfontein 11th Dec 1899
The Kimberley Relief Column commanded by Lord Methuen consisted of 3 brigades of British infantry, one of which, the Highland Brigade, was to be sacrificed in a badly planned battle against 8,000 Boers commanded by Cronje and De la Rey. The 1st Gordon Highlanders were not part of General Wauchope's Highland Brigade but were sent later into the battle.
Magersfontein kop is north of the Modder River and 27 km south of Kimberley. De la Rey repeated his tactic of placing the trenches at the foot of the hill rather than on top. This had been successful at the battle of Modder River and was to prove even more successful here. After a fairly fruitless artillery barrage on the 9th and 10th Dec the Highlanders approached the enemy in quarter-column before dawn on the 11th in a thunderstorm. At first light the killing started as the Boers, who were closer than expected, opened up a withering fire on the closely packed Scotsmen. Those that still lived threw themselves down to spend he rest of the day hardly daring to move.
It was into this terrible situation that the Gordons were sent. They did not have the advantage of surprise, or any form of cover. The Boer trenches extended over several kilometres curving round to fire on the British right flank. The Highlanders had been pinned down for 10 hours when the Boers made a push towards them. This caused some of the Seaforths to pull back and the Gordons tried to follow. The CO, Colonel Downman tried to prevent the retirement but was shot and mortally wounded. The Highlanders were in retreat and made themselves easy targets. In all, the British battalions lost 26 officers and 216 men killed, 42 officers and 609 men wounded.
The Casualties among the 1st Battalion Gordons were 3 officers and 4 men killed, 2 officers and 25 men wounded. Lieut-Col Downman, Captain Wingate and 2nd Lt James Campbell were killed. Captain W E Gordon was badly wounded but went on to win the VC the following year. Captain E Towse avoided serious injury and won the VC for rescuing his CO, Col Downman when he was mortally wounded.
Wagon Hill, 6th Jan 1900
The 2nd Gordons were one of the infantry battalions confined in Ladysmith for the duration of the siege from 2nd Nov 1899 to 28th Feb 1900. The town, in Natal, was situated in a loop of the Klip river and the British occupied defensive positions around it. South of the town was C Sector based on two hills called Caesar's Camp and Wagon Hill, also called Platrand Ridge by the Boers. On the night of 5th/6th Jan 1900, a party of naval gunners and sappers with an escort of Gordons were lowering a gun platform into the emplacement on Wagon Hill. The gun itself was still at the bottom of the hill. At 2.40am the Boers attacked both hills and the small party of Gordons along with some men of the KRRC were engaged in a desperate defense of Wagon Hill.
The garrison was alerted to the trouble and one and a half companies of Gordons were sent to reinforce the party on Wagon Hill. Another company, commanded by Captain the Hon. R T Carnegie, were sent to support those fighting at Caesar's Camp. A fierce fight took place on this hill, during which Capt Carnegie and Lieut W Macgregor were badly wounded, and as dawn broke a heavy storm soaked the combatants with rain and hail. This terrible battle lasted until 5pm, but with the help of 52nd and 53rd Field Batteries RA, the Manchesters and the Rifle brigade, the enemy were eventually forced to retreat.
The one and a half companies of the Gordons on Wagon Hill saw the loss of their commanding officer early on. Lieut-Col William Dick-Cunyingham VC was shot and died of his wounds the next day. Major Scott took over command and they managed to hold their ground against a determined attack. But when they were beginning to falter and withdraw, Major Miller-Walnutt rallied the men and they temporarily pushed the Boers back, but a counter-attack led by de Villiers reversed the situation and Miller-Wallnut was killed. An Engineers officer, Lt Digby-Jones then came to the fore and led them in a successful advance. The final victory came after a famous charge by the Devons. This was one of the hardest battles of the war that resulted in heavy casualties on both sides. The Gordons lost 2 officers and 17 men killed and 2 officers and 30 men wounded.
Paardeberg, 22nd Feb 1900
The battle of Paardeberg took place over several days, between the 18th and 27th Feb 1900, and was a much needed victory for the British. Lord Roberts' Force had driven Cronje into his entrenched position along the Modder at Paardeberg. The Gordons were not so involved at first but on the night of the 22nd were ordered to relieve the 2nd Shropshire Light Infantry who had gained 200 yards of ground and dug themselves in. They crawled on their stomachs to reach the position and were soaked by a sudden thunderstorm. On 26th they supported the Canadian Regiment and helped establish a position close to the Boers. The morning of the 27th saw them advancing against heavy rifle fire to within 80 yards which soon caused the enemy to surrender on the same day, 27th Feb, the 9th anniversary of the battle of Majuba in which the Gordon Highlanders had been humiliated by the Boers. At Paardeberg the Gordons had 4 officers and 25 men wounded.
Hout Nek, 30th April 1900
Following the victory at Paardeberg, the 1st Battalion Gordons remained in the Infantry Division temporarily attached to Ian Hamilton's Mounted Infantry Division. They were in the 19th Brigade with the 2nd Duke of Cornwall's LI, the 2nd Shropshire LI and the Canadian Regiment, all commanded by Major-General Smith-Dorrien. This force of two divisions under Hamilton was heading north to Winburg when they came across a Boer army under Louis Botha at Hout Nek. In the battle a small band of 12 Gordons and 10 Kitchener's Horse under the command of Captain Towse VC, gained the summit of Mount Thaba but came face to face with 150 German mercenaries. They refused to surrender and opened fire on the enemy. Towse and his men made a heroic bayonet charge but in the hail of bullets the captain was blinded by a shot across his eyes. Their boldness paid off because the Germans turned and fled. The battle still continued but ended with a victory for Hamilton's men on 1st May.
Doornkop, 29th May 1900
Hamiltons' Divisions crossed the Vaal from Orange Free State into Transvaal on 26th May with the task of smoothing the way for Roberts's Army heading towards Johannesburg. He came across a force of Boers entrenched on Doornkop, the very place where Jameson had surrendered 5 years earlier. A major driving force of the British in the Boer War of 1899-1902 was revenge for the two white flags of Majuba and Doornkop. The victory at Paardeberg had avenged Majuba, now Hamilton took it on himself to avenge Jameson's surrender.
Hamilton's cavalry experienced difficulty with a wide turning movement from the left so it was decided to send in the infantry with a frontal assault. The 1st Gordons and the City Imperial Volunteers were chosen for the task. The 4,000 Boers, led by Viljoen and De la Rey had set fire to the grassland in front of the kopje to blacken the area so that the British dressed in khaki would stand out and make easy targets. The Gordons, on the right advanced so steadily that many observers were astounded by their coolness. The writer March Phillipps had this to say:
"To walk steadily on through a fire of this sort, which gets hotter and better-aimed as he diminishes the distance between himself and the enemy, in expectation every instant of knowing 'what it feels like', is the highest test of courage that a soldier can give...Knowing exactly from experience what lay in front of them, these Gordons were as cool as cucumbers. As they lay among the stones with us before beginning the advance, I spoke to several, answering their questions and pointing them out the lie of the ground and the Boer position. You could not have detected the least trace of anxiety or concern in any of them. The front rank, when the order to advance was given, stepped down with a swing of the kilt and a swagger that only a Highland regiment has. "Steady on the left', they took their dressing as they reached the flat. Someone sang out, 'When under fire wear a cheerful face' And the men laughingly passed the word along.
The Gordons and the CIV charged up the hillside without covering fire or artillery support. It was one of the last set piece battles of the war, magnificent but conducted with drill-book tactics. As they advanced against the rapid Mauser fire men were falling all along the line. The Gordons were ordered to fix bayonets and there was a sharp exchange of shots before the rifle fire died down. They were on the hill and the Boers were fleeing. The CIV had been more careful in their mode of attack, using fire and movement and what cover they could. They suffered far fewer casualties. The Gordons lost one officer and 19 men killed, with 9 officers and 70 men wounded. The officer killed was Captain St John Meyrick son of Sir Thomas Charlton-Meyrick of Apley Castle , Shropshire. Lt-Col H H Burney, Captains G Cameron, P S Allen, Lieut A Cameron were wounded as were Surgeon A H Benson and Dr R Hunter. There was a Volunteer Company of the Gordons that lost 3 officers, Capt J Buchanan and Lieuts Mackinnon and Forbes.
Krugersdorp, 11th July 1900
The 1st Gordons, the Shropshires and some artillery were sent by train to Krugersdorp on the 10th July. On the next day they were engaged against the enemy north-west of the town, at Doomboschfontein. Two of the guns of 78th Battery were stranded too far forward resulting in heavy casualties amongst the gunners. An artillery wagon was retrieved by Captains Younger and Allen then Captain Gordon ran out and tied a rope to one of the guns and with some of his men attempted to pull it back. Three men were shot and Captain Younger was mortally wounded. Both Captain Gordon and Captain Younger received the VC for their bravery.
RooiKopjes, 24th July 1900
Ladysmith was relieved at the end of February and the 2nd Battalion took part in Buller's march to the north. There was an action at Rooikopjes near Amersfoort on 24th July in which the Gordons proved themselves again but lost 3 men killed and 12 wounded. The London Scottish Volunteer Company were prominent and their Captain Rodger was wounded and mentioned by Buller in his despatch.
Van Wyk's Vlei, 21st Aug 1900
The 2nd Battalion was in action more seriously at Van Wyk's Vlie in the Northern Cape on 21st Aug. The Gordons lost 9 killed and 9 wounded on this occasion, and two VCs were won by men of the King's Liverpool regiment.
Spitz Kop, 8th Sep 1900
In late August the 2nd were marching to Lydenburg when they were shelled by a Boer 6 inch gun from a distance of 7 miles. The Volunteer Company suffered badly with 3 killed and 16 wounded. On reaching the Lydenburg district they were sent into battle near Spitz Kop and were heavily engaged, ending up with 21 casualties. General Buller's despatch mentioned 6 officers, 2 NCOs and one private.
Koomati Poort, 30th Sep 1900
The two battalions met at Lydenburg in September. The last time they met was in India in 1898 when the 1st was relieved by the 2nd. On the 30th the 2nd were with Lieut-General Ian Hamilton's march to Koomati Poort when some Boer ammunition exploded and killed one man and injured 20. A few days later on 2nd Nov they were near Belfast fighting a rear-guard action and lost one killed, with one officer and 7 wounded.
Belfast, 7th-8th Jan 1901
The 1st Battalion were garrisoned in Belfast in Jan 1901 when it was attacked on the 7th and 8th. The battalion fought alongside the Royal Irish Regiment and they managed to repulse the Boers led by Vilijoen. The Gordons' casualties were 3 killed and 14 wounded.
Mounted Infantry at Graspan, 6th June 1901
The Mounted Infantry Company of the 1st Gordons was part of a mounted force sent to Graspan to intercept a convoy. They captured a Boer laager and wagons, and took 45 prisoners, but a determined effort was made to recover them by De Wet, De la Rey, Fourie and 500 Boers. After 3 hours of fighting reinforcements arrived and the enemy fled. These reinforcements had been alerted by Lieut Jack White who managed to escape captivity and run six miles. He was the son of Field Marshal Sir George White, and he won the DSO for his effort. Sgt Sutherland was awarded the DCM for preventing the escape of 40 Boer prisoners. The casualties included Lieut Allan Cameron from Devon, who was killed, along with 10 men. Ten more were wounded.
Naboomspuit, 4th July 1901
In March 1901 the 2nd Battalion went to Pietersburg with General Plumer where they operated in the surrounding district until the end of the war. On 4th July a party consisting of one officer, Lt Dunlop Best, and 22 men escorted a train that was attacked and derailed by de Villiers and 150 Boers. Dunlop Best and 9 others were killed, the rest wounded. In August that year De Villiers surrendered at Pretoria and spoke of the bravery of these Gordon Highlanders. Lord Kitchener sent a telegram to King Edward VII on the 10th Aug 1901:
'As Colonel-in-Chief of the Gordon Highlanders your Majesty might be pleased to know that Commandant de Villiers, who was present and has just surrendered, informed me that at the attack on the train on 4th July at Naboomspruit the guard of Gordon Highlanders under Lieutenant Best, who was killed, behaved with utmost gallantry. After the train had been captured by 150 Boers, the last 4 men, though completely surrounded, and with no cover, continued to fire until 3 were killed and the fourth wounded. On the Boers asking the survivor the reason why they had not surrendered, he replied, "Why, man, we are the Gordon Highlanders." '
The King replied on 12th Aug:
'Very pleased to hear of the bravery of the Gordon Highlanders. Proud to be their Colonel-in-Chief.'
|
|
First World War
|
|
Loss of the 1st Battalion, 26th Aug 1914
The 1st Battalion Gordon Highlanders were in the 3rd Division of the BEF and took up positions on the Mons-Conde Canal on 22nd Aug 1914. But due to the withdrawal of the French they were pulled back. They made a stand at Le Cateau on 25th against a strong German advance. The enemy artillery was so overwhelming that they were ordered to retreat, but only A Company received the order. They were left at Caudry with the Royal Irish and some men of the Royal Scots. They marched to Bertry but had to fall back towards Montigny. Near Clary on the 26th they were surrounded and sustained heavy casualties before being captured. Over 700 became prisoners including their CO, Lt-Col W E Gordon VC.
Loss of the 1st Battalion, 26th Aug 1914
First Battle of Ypres, Oct 1914
The 2nd Battalion landed at Zeebrugge from Egypt on 7th Oct 1914. In the First Battle of Ypres they were in action on the Menin Road on 23rd, where Drummer Kenny won the first VC of the war for the regiment. Six days later a massive attack was launched by the Germans which resulted in a day long battle. The battalion mounted a number of effective counter-attacks but had to fall back on Gheluvelt where the second VC was won posthumously by Captain Brooke who recaptured an important trench to prevent the German breakthrough. The 2nd Gordons lost 23 officers and more than 600 killed or wounded.
Neuve Chapelle, Mar 1915
Seven Territorial battalions were raised to augment the two regular battalions and one militia battalion. The 2nd and 6th Battalions were part of the 7th Division push at Neuve Chapelle with the aim of reaching Aubers. This battle began on 10th March and the 2nd advanced 500 yards holding their position in the face of a terrible artillery bombardment. The 6th followed up and a further advance was made before they were checked and pinned down. They had to withdraw under cover of darkness. The 2nd's casualties were 255 killed, missing or wounded and the 6th suffered 270 killed, missing or wounded. Both battalions lost their CO, the 2nd's Lt-Col Henry Uniake and the 6th's Lt-Col Colin McLean. Both died of their wounds on 13th Mar 1915.
Loos, Sept 1915
The major offensive at Loos in late September involved 5 battalions, the 2nd, 6th, 8th, 9th (Pioneers) and 10th. The 2nd advanced nearly a mile across no-man's-land near Hulluch. They captured the front line German trench but met massive resistance in their support trench. They prevailed and took 50 prisoners. Very close behind this trench were German guns placed in gun-pits which they attacked and managed to capture 4 guns. The casualties of the battalion were 81 killed, 117 missing, and 318 wounded.
The 8th Battalion assaulted the Hohenzollern redoubt and advanced beyond it, taking two further objectives. They were forced to withdraw, however, in the face of determined counter-attacks having suffered heavy casualties. On the 27th Sept they had to retake the redoubt. They were joined by the 6th Battalion but ended up surrounded. They fought their way back under heavy fire.
The 10th Battalion captured Loos village with a heroic charge, and captured many prisoners. The 9th Pioneer Battalion helped the Camerons capture Hill 70 but had to retire under pressure. The 1st and 4th Battalion who had fought together at the Second Battle of Ypres in May 1915, were again together in a brigade assault in the Hooge area to divert German attention. They suffered 650 casualties between them.
The Bluff. March 1916
A notable action was fought in March 1916 when the 1st Gordons, leading their brigade, took part in an attack on the Bluff near Ypres. It was a success, but the trenches they captured were fired on by German guns for 24 hours.
The Somme, Mametz, July 1916
The 2nd Battalion went into action opposite Mametz. They went through the German trenches but were held up in a sunken road by devastating machine-gun fire. Eventually they were reinforced and managed to take the village, but at a cost of more than 450 casualties over 7 days. Less than a week later they were in action in Mametz wood and Bezantin-le-Petit.
The cemetery at Mametz can be found at the side of the road towards Peronne. There are 100 men of the Gordon Highlanders buried there, 93 other ranks, 6 subalterns and one piper.
High Wood, July 1916
The 2nd Gordons fought again that month, this time for possession of High Wood. Four platoons advanced but only one could proceed further than the first obstacle. This platoon were almost wiped out by unrelenting fire, five men survived to join up with the others who made several attempts to reach the wood. The casualties were 29 killed and 233 missing or wounded. Later attempts to storm the wood involved the 4th, 5th and 7th Battalions but they were repulsed.
Longueval and Delville Wood, 14th July 1916
The 1st Battalion captured the village of Longueval on 14th July but were trapped in Delville Wood by machine-gun fire and artillery bombardment. They remained for 8 hours but fought on until they were forced to withdraw to hold part of the line for the next week until relieved. They suffered more than 350 casualties.
Beaumont-Hamel, 1916
In the last phase of the battle the 2nd, 4th, 5th, 6th and 7th Battalions all took part in the action at Beaumont Hamel and the 1st Battalion at Serre on the Ancre River. The initial dawn attack by the 7th was highly successful but the enemy had a system of tunnels which they used to harass the British by firing machine guns, disappearing and appearing in a different location. The 4th, 5th and 6th came to their help and were involved in heavy fighting. The 4 battalions sustained more than 700 casualties with the 5th suffering most. The 1st Battalion had great difficulty advancing over heavy mud at Serre but managed to reach the third German line before being checked. The fatalities are buried at Y Ravine Cemetery at Beaumont Hamel. It is a peaceful and beautifully maintained place of rest, in stark contrast to the way it must have been in 1916.
Arras Offensive, April 1917
The 8th and 10th Battalions had amalgamated in 1915 and in January 1917 carried out a successful raid dressed in white to blend in with the snow. This was at the Butte de Warlencourt. In April they were part of the Arras offensive and were pinned down by heavy fire at Railway Triangle just east of the city of Arras. Eventually they battled their way through and defeated the enemy. The 4th and 5th Battalions fought alongside each other to help capture Vimy Ridge, 5 miles north of Arras, after a determined attack by the Canadians and themselves, the 4th suffering particularly badly. The 6th Battalion also suffered heavy casualties but achieved their objective at Rolincourt.
The 9th Pioneer Battalion prepared tracks and constructed great underground networks in this battle. The 1st Battalion went forward, in the lead, very rapidly on the first day and reached their target within 20 mins. Soon after they were again the lead battalion but by the evening were prevented from reaching the enemy trenches by enfilade fire. Two days later they were in action at Guemappe where they sustained heavy casualties.
During the second phase of the battle in the area of the River Scarpe, the 7th Battalion were involved in severe fighting against a force four times it's size. Two companies were wiped out, but the others made gains and took many prisoners. At Roeux, the 4th battalion had another hard encounter and the 6th made progress toward the Rouex Chemical works, in which battle the poet Captain Crombie was killed.
Bullecourt, May 1917
The first battle of Bullecourt was fought on 11th April and involved the Australian troops. They were fighting again in the second battle from 3rd May, but the 2nd Gordons were one of the British units that entered the town of Bullecourt on 11th May and a fierce fight took place, lasting until the Sunday morning of the 13th. The Germans had prepared a system of tunnels under the village which continued to be occupied by them. The next few days were spent in heavy fighting to repel a determined attack by German infantry and artillery. The southern part of the town was defended by the Gordon Highlanders and it was there that the German advance was strongest. But on the 17th the enemy were finally driven off.
Roeux, May 1817
The 5th Battalion were reduced to less than 200 men after defending the positions at Roeux. On 15th May the 6th Battalion were sent to relieve the 5th Seaforths, but when they were joined by the 8th Argylls the 3 battalions fought together through the night and well into the following day before the area was cleared of enemy.
Infantry Hill, June 1917
The hill near Monchy-le-Preux, southeast of Arras , called Infantry Hill, exchanged hands several times. It was captured in May but retaken by the Germans, and captured again by the Royal Newfoundland Regiment. By the middle of June it was once more in German hands, but on the 14th a surprise daylight attack was made by the 1st Gordons and the 1st Essex, without artillery support. Success was achieved very quickly, but the enemy drove them off and the attack had to be made one more time to secure Infantry Hill for the British.
Third Battle of Ypres, Frezenberg, 1st Aug 1917
The 8th/10th combined battalion were fighting in Frezenberg, north east of Ypres, alongside the Cameron Highlanders. They were hard pressed in the area of the Station buildings on August 1st and there was a danger of the Germans breaking through to reach Bellewarde Ridge. A Gordons officer gathered the remnants of his men, and men of the Camerons, and made a bayonet charge down the slope towards the mass of Germans. They fired as they ran and caused the enemy to flee. Artillery shrapnel wrought havoc amongst the retreating Germans. The 8th/10th were later reduced to just a few men after the fighting at Passchendaele.
51st Highland Division at the Steenbeck River
In 1917 the 51st Highland Division was made up of Territorial Battalions as follows:
152nd Brigade. 5th and 6th Seaforths, 6th and 8th/10th Gordons, 6th and 8th Argylls, and 4th Camerons.
153rd Brigade. 6th and 7th Black Watch, 4th, 5th and 7th Gordons and the Shetland Companies (Gordons)
154th Brigade. 9th (Highland Battalion) Royal Scots, 4th Seaforths, 6th, 7th, 8th and 9th Argylls.
The Division performed poorly in 1914 and 1915 but by 1917 they were regarded as one of the foremost fighting divisions in the army. The Germans called them 'The Ladies from Hell'. The Division mounted a major attack on 22nd Aug on the Steenbeck River, a tributary of the Yser, between Langemarck and Zonnebeke, where the 5th Gordons were successful in taking two objectives. They were followed by the 7th Gordons who took 3 objectives in the area of Hindenburg Farm. The 9th pioneer Battalion were also in this battle and used to capture two objectives. The Germans had built a system of blockhouses and the territorial battalions had to attack these when the use of tanks failed.
Poelchapelle, Autumn 1917
The 4th and 7th Battalions advanced towards Rose Farm and Quebec Farm, suffering casualties from an intensive enemy barrage, but returning fire for 4 hours. Their left flank had become exposed so they withdrew to be re-supplied with ammunition. They managed to return to Rose farm from where they launched their attack on Poelchapelle which lasted for a number of days and nights. The 1st and 2nd Battalions also fought nearby, pushing the front towards Passchendaele. The 2nd took objectives in October on the Nordemdhock Ridge in a bold assault under artillery fire. At the end of the month they were in action again at Gheluvelt, further south on the Menin Road, where they were forced to abandon their objective through loss of men. By the end of October they had lost 660 killed and wounded.
Passchendaele, 1917
The 6th Battalion were also fighting on Passchendaele Ridge alongside the Canadians. The battle lasted several months and ended with the capture of the position on the 6th November. The 6th lost lost more than 300 men and Private McIntosh won the VC at the end of July.
Cambrai, 20th-28th November 1917
The 51st Division were heavily involved in the Battle of Cambrai which started on the 20th November. It is regarded primarily as a tank battle and indeed the 6th and 7th Battalions followed behind the tanks to achieve great success in the forward push. The 5th were in action in the area of Flesquieres on the first day partially equipped with armoured cars. They crossed the Grand Ravine and entered Flesquieres before moving on to secure the crossing of the Canal de l'Escaut at Masnieres. The 7th entered the village of Cantaing with the Seaforths and were enthusiastically greeted by the French who felt themselves liberated. The 4th made a bold advance on the second day. The 6th helped capture Fontaine Notre Dame in which battle they experienced determined resistance from the Germans. The initial success of Cambrai was a wonderful morale boost for the British and when news reached the UK the church bells rang throughout the land. But by 28th Nov the Germans had regained the ground with counter-attacks, so thousands of lives had been lost in vain.
Italy, Nov 1917
The 2nd Battalion were part of a force sent to fight alongside the
Italian army against the Austrians. It held a sector of the front
first at Martello in north east Italy, and from April 1918 on the
Asiago Plateau. Although the line was mainly static the battalion
spent much time in raiding and harrassing the enemy. Their most
notable battle was on the Piave River at the end of October 1918,
Their task was the capture of part of an island, and under heavy fire
they successfully captured their two objectives. The Austrians then
began to withdraw hurriedly all along the front, and the 2nd Gordons
pursued them, taking hundreds of prisoners. An armistice came into
effect on 4th November.
The Great German Offensive, March 1918
The German offensive of 21st March 1918, on the Western Front, overran
the 5th Gordons who virtually ceased to exist. They were now in the
61st Division, in the area of Fresnoy-le-Petit which was hardest hit.
After the barrage and infantry attack there were only 30 men left.
The 8th/10th made a brave stand at Monchy near Arras, losing 300 men.
The 1st held their ground for a week, and the 4th, at Demicourt lost
400 after 6 days. The 51st Division was decimated on the River Lys
and the 1st Gordons were moved into their position.
A further offensive came in May and the remnants of the 51st Division
were sent to the French sector on the River Marne. The 4th and 7th
Battalions fought at Boid-de-Courton, the 7th losing over 500 men.
The 6th joined them but were checked in their advance. The 5th
absorbed the 8th/10th and took part in the allied attack at Buzancy.
The 1st were in the attack at Baupaume on 21st Aug and made gradual
but costly progress. The following month they captured Flesquieres and
attacked Rumilly successfully. The 6th and 7th Battalions amalgamated
and were in action, along with the 1st and 4th, up until the
armistace. The Gordon Highlanders gained 65 battle honours in the
Great War and lost 28,000 other ranks killed, and 1,000 officers.
|
|
Inter-War Years
|
|
The 1st Battalion formed part of the army of occupation in Germany
with the 4th and 5th. The 1st was sent back to Scotland and
reconstituted. The 3rd Militia Battalion became the 2nd Battalion as
the regiment reverted to a two battalion unit. They were then
stationed in Ireland. In 1920 the 2nd were on duty in Glasgow during
the coal strike, and the 1st went to Constantinople as part of an
international force to quell a nationalist uprising. Later they had to
patrol a neutral zone on the eastern side of the Dardanelles. When a
peace settlement was reached they went to Egypt and then were posted
to India for duty in Secunderabad, Belgaum, Delhi and the North-West
Frontier. The 2nd went to Gibraltar in 1934, and in 1936 went to
Malaya and Singapore where they stayed until the arrival of the
Japanese in 1942.
|
|
World War 2
|
|
Four Battalions of the Gordons were in the BEF in 1939. The 4th and the 6th were evacuated at Dunkirk while the 1st and 5th were part of the 51st Division that was surrounded and captured at St Valery-en-Caux on 12th June 1940.
Singapore 1942
The 2nd Battalion who had been in Singapore since 1937 moved inland on the Malayan peninsula to meet the Japanese advance in Jan 1942. After some brave engagements with the enemy they pulled back to Singapore island and eventually they surrender was ordered on 15th Feb. They were prisoners of the Japanese and forced to work on the Burma-Siam railway.
North Africa 1941-43
The 1st Battalion and the 5th/7th were part of the reconstituted 51st Highland Division that joined the British front line at El Alamein in August 1942. On 23rd Oct the 5th/7th advanced two miles, but the 1st was held up, initially by a minefield and then enemy machine-gun fire before finally taking their objective on 27th Oct. On 12th Dec both battalions were involved in a fierce engagement near El Agheila, and at Beurat they broke through minefields with the help of armoured support, and forced a German withdrawal. The 1st Gordons were amongst the first troops to enter Tripoli on 23rd Jan 1943.
The enemy formed a new defensive line at Mareth which was attacked by the British with the 5th/7th Gordons in the leading wave. This fight continued for several days until the enemy withdrew on the 27th March. Both the 1st and the 5th/7th entered the seaport of Sfax on 10th April and fought at the German final line of defense east of Enfidaville. On being relieved of this by Free French troops they trained for the landing in Sicily.
Algeria 1943
The 6th Battalion had been fighting against the Germans and Italians in Algeria since 9th March 1943. They launched an attack on the Germans at Point 144 on 21st April but were counter-attacked and bombarded. They held the position for several days under very trying circumstances. Later they assisted the Irish Guards defending Gab Gab Gap.
Sicily, July 1943
The 1st and 5th/7th Battalions were part of the assault landings just south of Cape Passaro in Sicily on 10th July 1943. The landings were unopposed and any Italian troops they encountered, as they advanced, surrendered immediately. The 1st helped capture Vizzini from the Germans and the 5th/7th fought them in a hard struggle to capture bridges over the Gorna Lunga. The next major battle was at Sferro where the 5th/7th had to fight their way across a valley and into the village. They, and the 1st, held their gains for three days under heavy fire and close fighting. The Germans finally withdrew at the end of July. In Sept both battalions were returned to the UK to prepare for the Normandy landings.
Italy, 1943-44
The 6th Battalion left Algeria in Dec 1943 and arrived at Taranto in southern Italy, then embarked again to take part in the American landings at Anzio on 22nd Jan 1944. They advanced 15 miles inland and on the 3rd Feb withstood a major attack by the Germans. Three companies of the battalion were overwhelmed, suffering very heavy casualties. B Company continued to fight alongside other units on the Anzio Line for three months, during which time the battalion was reconstituted with drafts from the UK. They advanced on Rome in June and were in a large scale attack on Mount Gamberaldi. They were involved in further small actions up until Jan 1945 when they were removed to Palestine.
Armoured and Artillery Battalions
The 9th Battalion were in India in mid 1942 when they were converted to an armoured regiment. They became the 116th Regiment (Gordon Highlanders) RAC. It took a year to fit them out completely, by which time they were fighting the Japanese alongside Indian, East African and British troops. They reached Bangkok in May 1945 after a journey of 1,200 miles, of which 800 had been under operational conditions.
The 8th Battalion were converted to become 100th (Gordon Highlanders) Anti-Tank Regiment RA. They fought at Kohima, Assam in April 1944 in a hard fought battle that lasted 3 weeks. They also had to act as infantry in the advance through Burma.
North-West Europe, 1944-45
The 51st Highland Division prepared for the D-Day invasion at Beaconsfield, Buckinghamshire. See Officers in Service Dress 1944. The 1st Battalion and the 5th/7th Battalion, which was commanded by Lt-Col E G Hay, landed at Courseulles on the afternoon of 6th June 1944. After two days they occupied the village of Touffreville and defended it against counter-attack. On 16th June the Germans launched a major assault which was sustained and intense. The 1st Battalion were ordered to seize the Colombelles industrial area of Caen and were pitched against heavy resistance. They had to receive assistance from the brigade.
The 2nd Battalion had been reconstituted after their capture in Singapore. They landed in France on 19th June and fought around Tourville in the attack on Caen. They suffered a 'week of hell' at the end of which they captured Colleville but had lost 267 killed, wounded and missing. After a respite they were in action on the River Odon on 15th July, attacking Evrecy, in which action they destroyed a number of enemy tanks.
The 1st and 5th/7th were required to hold the sector near Caumont until American troops could force a break-out. The 2nd Gordons advanced to the south-east of Caumont and attacked the town with armoured support. They then proceeded south-eastwards to occupy Estry but it was staunchly defended and they had to dig in for a few days.
The 1st and 5th/7th made progress in their advance to Lisieux and captured Grandchamp on the River Vie but it was a hard fight before finally reaching Lisieux on 22nd Aug. The next objective was the crossing of the Seine, but the advance was difficult. The 2nd were also en route for the same objective, from Falaise, and they suffered 90 casualties in their first attempted crossing. Le Havre was captured in hard battle by the 1st and 5th/7th.
The 3 battalions made a rapid advance across Belgium to Holland where the 2nd experienced severe hold-ups at the Scheldt-Maas Canal, Gheel and Best. The 3 battalions reached Tilburg on 26th Oct and helped secure a firm line on the River Maas. The 1st and 5th/7th advanced to Nijmegen to replace American troops. They continued to work with US units in the Ardennes winter fighting, getting as far as the Ourthe Valley south of Liege, then returned to Holland.
Goch, 19th-22nd Feb 1945
The Gordons were part of Operation Veritable in Feb 1945, to clear the German from the western border to the Rhine. The 5th/7th had success but the 1st were delayed in the Reichswald Forest. At the town of Goch, both battalions had a hard street fight that lasted several hours, causing heavy casualties. A and D Companies of the 1st Battalion were sent to Thomashof on the south of the town but were overwhelmed by superior forces. There were few survivors. The fighting continued until 22nd when the Germans withdrew. The 2nd were north of this area, fighting to gain the high ground west of Cleve. They crossed the River Niers and captured Schloss Caldeck, but German resistance was strengthening as they neared the Rhine.
The Rhine, 23rd-27th March 1945
The 5th/7th were in the first wave of the Rhine crossing. They made it to the other side and were ordered to clear the ground for a mile further on. They were fired on continually and were held up trying to cross another river, the Alter Rhine. The 1st followed on and captured the town of Rees, then both battalions reached and occupied Isselburg on 27th March. The 2nd had trouble with their crossing further south but made good progress after that and went north-east with the 15th Scottish Division, towards Osnabruck and Celle.
Final Weeks
The 1st and 5th/7th had a battle at Delmenhorst which was strongly defended, and the 1st made a battalion attack on Barchel against Panzer Grenadiers. The last engagement for the 5th/7th was at Ebersdorf on 2nd May. The 2nd had a hard fight at Uelzen on 15th April and were forced to withdraw. Two weeks later they crossed the Elbe at Artlenburg and clear the woods to the east of the river before going on to Hamburg. When the German surrender came the Gordons moved into Lubeck and Bremerhaven to help establish control over the civilian population.
|
|
After the War
|
|
After the war the 1st Gordons remained in Germany until 1950. The 2nd left for the UK in Sept 1945 and then went to Tripoli until May 1947. In 1948 the 1st and 2nd Battalions amalgamated to form the 1st Battalion Gordon Highlanders at a ceremony in Essen.
Malaya, 1951-52
The Gordons were required to mount operations against terrorists in Malaya in 1951. In Pehang they worked within 20,000 sq miles of territory so had to set up various company bases from which to send out patrols. D Company had a successful operation 'Ness' when they discovered and attacked a large bandit camp. In Feb 1952 A Company, in conjunction with the 2nd/7th Gurkhas surrounded and attacked another camp, killing 8 terrorists.
Cyprus, 1955-56, 1971-72
After a year in Scotland they were posted to Cyprus, only to find that they had to build their own camp, called 'Aberdeen Camp'. The Greek Cypriots had gained a military leader, George Grivas, an officer from Greece who organised the National Organisation of Freedom Fighters (EOKA) to help achieve independence from British rule. The British Army responded quickly and forcefully with riot control, weapons searches and patrols. At the end of the operation the Gordons returned to the UK to be stationed at Dover. They returned to the island in 1971 as part of the UN peace-keeping force based at Episkopi.
Kenya and Borneo, 1962-66
In 1958 the Gordons went to Germany for 3 years and then Kenya following the Mau-Mau troubles. They patrolled in Zanzibar and Swaziland and had to quell a mutiny of the King's African Rifles. They returned to Scotland in 1963 but were sent to Borneo during hostilities with Indonesia. At first they were at Kalabaken then Sarawak.
Northern Ireland
The Gordons had five tours in Ulster. In 1972 they were based in Armagh where they lost 4 soldiers, three of whom died in a booby trapped house. They served a second tour in West Belfast in 1973 which was successful as far as terrorist arrests were concerned but another man was lost to sniper fire. After a spell in Singapore they returned to Fort George in Dec 1975 to train for 10 months and then were placed in Palace Barracks, Holywood near Belfast for an accompanied 18 month tour of duty. They served in Armagh again in 1979, and another 6 month tour in 1985, in Belfast.
Singapore, 1973-75
From November 1973 to December 1975 the Gordons served in 28 ANZUK Brigade in Singapore, and was the last British battalion to serve there when the Defence Agreement ended. See >Colour Party 1974.
Amalgamation 1994
On 17th September 1994, at Dreghorn Barracks, Edinburgh, the Gordon Highlanders were amalgamated with the Queen's Own Highlanders (Seaforths and Camerons) to form The Highlanders (Seaforth, Gordons and Camerons). The Seaforths and Camerons amalgamated in 1961. The Highlanders title remained for 12 years until all the Scottish regiments were amalgamated in 2006 to form the Royal Regiment of Scotland.
|
|
|
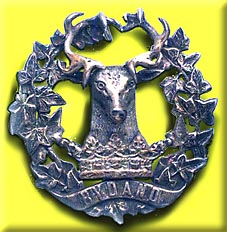 |
| Badges
|
| Motto
|
|
Bydand - Watchful
|
| Uniforms
|
| 1881 - 1994
|
| Colonels in Chief
|
| 1881 - 1994
|
| Colonels
|
| 1881 - 1994
|
| Commanding Officers
|
| 1881 - 1994
|
| Soldiers
|
| 1881 - 1994
|
| Band
|
| 1881 - 1994
|
| Colours
|
| 1881 - 1994
|
| Battle Honours since 1881
|
|
The following Honours appear on the Colours alongside the Royal Tiger superscribed INDIA (authorised to the 75th on 6th July 1807) and the Sphinx superscribed EGYPT (authorised to the 92nd on 6th July 1802).
Third Mysore War 1789-91
MYSORE
Fourth Mysore War 1799
SERINGAPATAM
French Revolutionary Wars 1793-1802
EGMONT-OP-ZEE
MANDORA
CORUNNA
FUENTES D'ONOR
ALMARAZ
VITTORIA
PYRENEES
NIVE
ORTHES
PENINSULA
Hundred Day 1815
WATERLOO
6th Kaffir War 1835
SOUTH AFRICA 1835
Indian Mutiny 1857-8
DELHI
LUCKNOW
2nd Afghan War 1878-80
CHARASIAH
KABUL
KANDAHAR 1880
AFGHANISTAN 1878-80
Revolt of Arabi Pasha 1882
TEL-EL-KEBIR
1st Sudan War 1882-4
EGYPT 1882, 1884
Egyptian Campaign 1885
NILE 1884-5
Chitral Campaign 1895
CHITRAL
Tirah Campaign 1897-98
TIRAH
South African War 1899-1902
DEFENCE OF LADYSMITH
PAARDEBURG
SOUTH AFRICA 1899-1902
World War 1 (Emblazoned)
MONS
LE CATEAU
MARNE 1914, 1918
YPRES 1914, 1915, 1917
LOOS
SOMME 1916, 1918
ANCRE 1916
ARRAS 1917, 1918
CAMBRAI 1917, 1918
VITTORIO VENETO
World War 2 (Emblazoned)
ODON
REICHSWALD
GOCH
RHINE
NORTH-WEST EUROPE 1940, 1944-5
EL ALAMEIN
MARETH
SFERRO
ANZIO
World War 1 (not emblazoned)
RETREAT FROM MONS
AISNE 1914
LA BASSEE 1914
MESSINES 1914
ARMENTIERES 1914
LANGEMARCK 1914
GHELUVELT
NONNE BOSSCHEN
NEUVE CHAPELLE
FREZENBERG
BELLEWAARDE
AUBERS
FESTUBERT 1915
HOOGE 1915
ALBERT 1916, 1918
BAZENTIN
DELVILLE WOOD
POZIERES
GUILLEMONT
FLERS-COURCELETTE
LE TRANSLOY
VIMY 1917
SCARPE 1917, 1918
ARLEUX
BULLECOURT
PILCKEM
MENIN ROAD
POLYGON WOOD
BROODSEINDE
POELCAPELLE
PASSCHENDAELE
ST QUENTIN
BAPAUME 1918
ROSIERES
LYS
ESTAIRES
HAZEBROUCK
BETHUNE
SOISSONAIS-OURCQ
TARDENOIS
HINDENBURG LINE
CANAL DU NORD
SELLE
SAMBRE
PIAVE
ITALY 1917-18
World War 2 (not emblazoned)
WITHDRAWAL TO ESCAUT
YPRES-COMINES CANAL
DUNKIRK 1940
SOMME 1940
ST VALERY-EN-CAUX
LA VIE CROSSING
LOWER MAAS
VENLO POCKET
RHINELAND
CLEVE
ADVANCE ON TRIPOLI
MEDJEZ PLAIN
NORTH AFRICA 1942-43
LANDING IN SICILY
SICILY 1943
ROME
ITALY 1944-5
|
|
| Predecessor Units |
| 75th
|
| 1787 | 75th (Highland) Regiment of Foot |
| 1809 | 75th Regiment of Foot |
| 1862 | 75th (Stirlingshire) Regiment of Foot |
| 1881 | 1st Battalion The Gordon Highlanders |
| 92nd
|
| 1794 | 100th Regiment of Foot |
| 1798 | 92nd (Highland) Regiment of Foot |
| 1861 | 92nd (Gordon Highlanders) Regiment of Foot |
| 1881 | 2nd Battalion The Gordon Highlanders |
| Successor Units |
| 1994 | The Highlanders (Seaforth, Gordons and Camerons) |
| 2006 | The Royal Regiment of Scotland |
|
| Further Reading
|
The Gordon Highlanders
by C Sinclair-Stevenson
(Hamish Hamilton 1968)
Simkin's Soldiers - The British Army in 1890 (Vol II The Infantry)
by Colonel P S Walton
(County Life 1921)
The Life of a Regiment
Vol 1, 1794-1816 by C C Gardyne (Douglas)
Vol 2, 1816-89 (Medici Society)
Vol 3, 1898-1914 by A D G Gardyne (Medici Society)
Vol 4, 1914-19 by C Falls (Aberdeen UP)
Vol 5, 1919-45 by W Miles (Aberdeen UP)
Vol 6, 1954-70
Vol 7, 1970-94
In Good Company: The First World War Letters and Diaries of the Hon. William Fraser, Gordon Highlanders
Edited by David Fraser
(Michael Russell Publishing Ltd 1990)
The Frontier Ablaze. The North-West Frontier Rising 1897-98
by Michael Barthorp
(Windrow & Greene 1996)
|
|


