|
The 1881 Reforms
|
|
The Cardwell Reforms of 1881 brought many amalgamations, however the first 26 regiments escaped this and retained their identity, but not their old numbers which they had been given in 1751. The reforms gave territorial titles to all the regiments to place them, for recruitment purposes, in different parts of Britain.
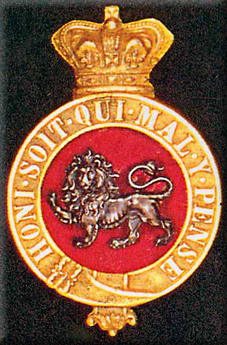
To the existing two battalions of the King's Own were added two battalions of the Royal Lancashire Militia who became the 3rd and 4th (Militia) Battalions. The badge of the Lancashire Militia was the red rose so this was incorporated into the regimental badge to replace the numeral IV.
|
|
Postings Abroad
|
|
The first battalion returned home from the West Indies in 1881 to their new depot at Bowerham Barracks in Lancaster. They were there until 1895 when they were sent to Malta. A few years later they moved on to Hong Kong until the Boer War broke out.
The second battalion which had been formed in 1858, served in the Mediterranean then the West Indies. They fought in the Zulu War of 1879 and then proceeded to India. They returned to the UK in 1896 and were stationed in Fort Tregantle, just outside of Plymouth until December 1899 when they embarked for the war in South Africa.
|
|
Boer War 1899-1900
|
|
During the war the second battalion fought at the disastrous Spion Kop, the Relief of Ladysmith and during the later guerilla phase of the conflict. The 3rd and 4th Militia Battalions also served in South Africa along with two and a half companies of Volunteers. In all, over 3,500 officers and men of the regiment served in the Boer War.
Spion Kop 1900
Spion Kop is regarded as one of the worst disasters that befell the British Army during the Boer War. It was one action of many that took place during the attempted Relief of Ladysmith. The whole expedition was commanded by Sir Redvers Buller. The King's Own were part of Woodgate's Brigade in the 5th Division along with 2nd Lancs Fusiliers, 1st South Lancs and 1st York and Lancs.
The Divisional Commander, General Sir Charles Warren decided that Spion Kop, near the Tugela River, needed to be taken. He chose Colonel Thorneycroft and his mounted infantry, and Colonel Edward Woodgate, an ex-King's Own officer, to lead 3 battalions up Spion Kop, and remove the Boers who were defeding it. Spion Kop is a flat-topped mountain and the troops had to scale the slopes silently in the dark. When the summit was reached they dug in, but as day dawned it became clear that they were not on the summit and had established themselves in a place where Boer artillery and rifle fire could easily be brought to bear.
Woodgate's brigade were pinned down under murderous fire all day from the higher ground, and from surrounding hills. The Boers fought bravely to assault their position. Woodgate himself was mortally wounded by shrapnel over the left eye but continued as long as he could.
Re-inforcements came, the Middlesex. Dorsets and Somersets. But this only made a bigger target for the Boer guns. The trenches were filling up with dead, and men were crazy with thirst. For the men on that hill it must have seemed like hell on earth for the whole day. More re-inforcements came in the form of the Scottish Rifles and the 3rd KRRC. They made more headway against the enemy, and by nightfall it became possible to withdraw the men from Spion Kop. The regiments had become hopelessly mixed up so it took many hours for them to re-group. Out of 1,700 men, more than 1,000 were killed that day.
More than 200 men of the King's Own died. Of the officers that died there was Major Ross, Captain Kirk and Lieutenant Wade. Wounded officers included Captain Sandbach, Lt Dykes, Lt Stephens and 2nd Lt Nixon.
Relief of Ladysmith 1900
Redvers Buller's attempt to relieve Ladysmith continued in February 1900 with three Divisions under Lyttleton, Hart and Warren. The Lancashire regiments were brigaded in Warren's Division, at first under General Wynne but after he was wounded, Kitchener, at that time a colonel, took over. In the Battle of Pieters Hill on the 24th Feb, the Royal Lancasters stormed a Boer position on the heights and swept them off. It was final straw for the Boers who had besieged Ladysmith for 4 months. Many of the regiment were killed. Of the officers Lt Coe and 2nd Lt N J Parker were killed and Major Yeatherd, Lt Martin, Lt Davidson and Lt R G D Parker were wounded. Ladysmith was finally relieved on 28th Feb 1900.
|
|
World War 1
|
|
During the Great War, 2 regular battalions, 3 Territorial and 5 'Kitchener's Army' battalions saw active service. All 10 battalions were involved in the fighting on various fronts, losing 7,000 dead. The regiment was awarded 59 battle honours for this war and many decorations for gallantry were awarded, including eight Victoria Crosses (see Soldiers)
Le Cateau 1914
The 1st Battalion embarked for France in the 12th Brigade, 4th Division BEF.
They were at Harcourt in the Battle of Le Cateau on 26th August. In his book 'The British Army of 1914' R M Barnes says this: The King's Own, for some reason, formed up in quarter-column in rear of a position it was to occupy. They piled arms and officers fell out and formed a group. Fortunately some of them, and most of the men had lain down, when suddenly German machine-guns opened fire. The Colonel was killed and most of those standing up were hit, including one company which was about to move off. The regimental transport which was just arriving with rations, stampeded, knocking down the Brigadier and the Brigade-Major. Rifle fire was quickly opened and silenced the machine-guns. Five minutes later 2 or 3 German batteries poured in a storm of shells causing many further casualties.
Frezenberg 1915
In August 1914 the 2nd Battalion was at Lebong north of Calcutta. They were brought back to England and placed in the 83rd Brigade, 28th Division, then posted to France in January 1815. In May they were almost entirely wiped out at Frezenberg which was part of the 2nd Battle of Ypres. On 8th May they were placed with A and D companies forward and B and C companies in support. The Germans opened fire with high explosive and shrapnel which obliterated the front companies. Many men from C coy tried to escape the onslaught but were cut down. B coy also tried to get away and some of them managed to survive, others were taken prisoner. Out of 1,100 men, only 67 answered the roll call after the battle.
|
|
|
| Badge
|
 |
| Badges
|
| Colonels
|
| 1881 - 1959
|
| Commanding Officers
|
| 1881 - 1899
|
| Soldiers
|
| 1881 - 1899
|
| Uniforms
|
| 1881 - 1959
|
| Colours
|
| 1881 - 1959
|
Battle Honours
Emblazoned
|
NAMUR 1695
Gibraltar 1704-5
GUADALOUPE 1810
ST LUCIA 1778
CORUNNA
BADAJOS
SALAMANCA
VITTORIA
SAN SEBASTIAN
NIVE
PENINSULA
BLADENSBURG
WATERLOO
ALMA
INKERMAN
SEVASTOPOL
ABYSSINIA
SOUTH AFRICA 1879
REIEF OF LADYSMITH
SOUTH AFRICA 1899-1902
World War 1
MARNE 1914
YPRES 1915, 1917
SOMME 1916, 1918
ARRAS 1917, 1918
MESSINES 1917
LYS
FRANCE AND FLANDERS 1914-18
Second World War
DUNKIRK 1940
NORTH-WEST EUROPE 1940
DEFENCE OF HABBINIYA
MERJAYUN
TOBRUK SORTIE
HABBINIYA (1941)
MERJAYUN (1942)
TOBRUK SORTIE (1942)
NORTH AFRICA 1940-2
MONTONE (1944)
LAMONE BRIDGEHEAD (1944)
MALTA 1941-2
CHINDITS 1944
|
|
Battle Honours
Not Emblazoned
|
World War 1
LE CATEAU
RETREAT FROM MONS
AISNE 1914
ARMENTIERES 1914
GRAVENSTAFEL
ST JULIEN
FREZENBERG
BELLEWAARDE
FESTUBERT
LOOS
ALBERT 1916, 1918
BAZENTIN
DELVILLE WOOD
POZIERES
GUILLEMONT
GINCHY
FLERS-COURCELETTE
MORVAL
THIEPVAL
LA TRANSLOY
ANCRE HEIGHTS
ANCRE 1916
SCARPE 1917, 1918
ARLEUX
PILCKEM
MENIN ROAD
POLYGON WOOD
BROODSEINDE
POELCAPELLE
CAMBRAI 1917, 1918
ST QUENTIN
ESTAIRES
HAZEBROUCK
BETHUNE
BAPAUME 1918
DROCOURT-QUEANT
HINDENBERG LINE
CANAL DU NORD
SELLE
VALENCIENNES
SAMBRE
STRUMA
DOIRAN 1917, 1918
SULVA BAIR
EGYPT 1916
TIGRIS 1916
KUT AL AMARA 1917
BAGHDAD
Second World War
ST OMER-LA BASSEE
FALLUJA
IRAQ 1941
JEBEL MAZAR
SYRIA 1941
TOBRUK 1941
CITTA DI CASTELLO
SAN MARTINO SOGLIANO
ITALY 1944-5
BURMA 1944
|
|
| Titles
|
| 1680 | The 2nd Tangier Regiment |
| 1684 | The Duchess of York and Albany's Regiment of Foot |
| 1685 | The Queen's Regiment |
| 1702 | The Queen's Regiment of Marines |
| 1710 | The Queen's Regiment of Foot |
| 1715 | The King's Own Regiment of Foot |
| 1751 | 4th or the King's Own Regiment of Foot |
| 1867 | 4th (The King's Own Royal) Regiment of Foot |
| 1881 | The King's Own (Royal Lancaster Regiment) |
| 1920 | The King's Own Royal Regiment (Lancaster) |
| 1959 | The King's Own Royal Border Regiment - Amalgamated with the Border regiment (34th & 55th Foot) |
| 2006 | The Duke of Lancaster's Regiment (King's, Lancashire & Border)
Amalgamation of:
The King's Own Border Regiment - 4th and 34th/55th
The King's Regiment - 8th and 63rd/96th
The Queen's Lancashire Regiment - 30th/59th, 40th/82nd and 47th/81st |
|
|
Museum
|
Castle Museum
Market Square
Lancaster
Lancashire
LA1 1HT
tel: 01524 64637
open Mon-Sat 10am-5pm
|
|


