|
Introduction
|
|
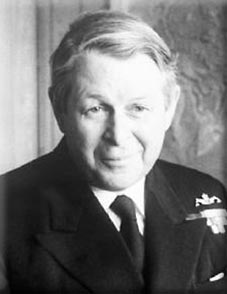
Admiral Sir John Fieldhouse was the Commander in Chief of the Royal Navy at the time of the invasion. He was given ultimate command and control for the retaking of the Falkland Islands but discharged these duties from his Headquarters in Northwood. The Code name that was used for this mission was 'Operation Corporate'.
|
|
Despatch By Admiral Sir John Fieldhouse, G.C.B., G.B.E.,
Commander Of The Task Force Operations In The South Atlantic:
April To June 1982, Published 14th December, 1982
|
|
Operation CORPORATE was the name given to the operation I describe in my Despatch. With hindsight, it was well chosen, for like a body, the harmony of the various limbs and supporting organs was vital to its soundness and efficiency. I ask the reader constantly to bear this in mind. The very nature of the events I describe focuses attention first on one limb, then on another ; the temporary dominance in the narrative of one does not detract from the performance and achievements of another. I list at the end of my Despatch the Royal Navy, Royal Marines, Royal Fleet Auxiliary, Army and Royal Air Force units which took part in the Operation. I also attach a list of those vessels taken up from trade.
The despatch describes briefly the very short period of preparation for sending Task Force 317 to the South Atlantic and, more fully, the operations from 1 April 1982 when units of the Fleet sailed south until 20 June 1982 when the last Argentine forces remaining on British Territory surrendered.
|
|
Background
|
|
On 19 March 1982 it was reported that a party of Argentinian scrap metal workers had landed illegally at Leith in South Georgia, and on 21 March H.M.S. ENDURANCE was sailed towards the island with a detachment of Royal Marines embarked to investigate.
Intense diplomatic activity followed, Her Majesty's Government insisting that the Argentinians had landed illegally and that they should leave either in one of their own ships or in H.M.S. ENDURANCE. On 26 March it was reported to me that although the Argentinian ship BAHIA PARAISO had left Leith, a shore party remained behind. Diplomatic activity continued.
On 25 March when it had appeared that a diplomatic solution to the incident was still likely I had left for Gibraltar to visit ships taking part in Exercise SPRINGTRAIN. By 29 March the situation had worsened to an extent where it was considered sufficiently serious for me to return to my Headquarters at Northwood, Middlesex. Before leaving Gibraltar I ordered Flag Officer First Flotilla, Rear Admiral Sir John WOODWARD, K.C.B., to prepare to detach a suitable group of ships, to store and ammunition and to be ready to proceed to the South Atlantic if required.
Also on 29 March the submarine H.M.S. SPARTAN was detached from Exercise SPRINGTRAIN and ordered
to embark stores and weapons at Gibraltar for deployment to the South Atlantic. Subsequently, on 30 March
H.M.S. SPLENDID was ordered to deploy from Faslane. A third nuclear powered submarine, H.M.S.
CONQUEROR was subsequently sailed a few days later. All were stored for war within 48 hours of order
On 31 March I was instructed to make covert preparations for a Task Force for operations in the South
Atlantic. On 2 April, after the Argentinian invasion, the preparations were allowed to be conducted openly.
Argentinian forces landed in strength on 2 April at Port Stanley and the very heavily outnumbered Royal
Marines of the Garrison resisted, sustaining no casualties but inflicting an unknown number on the invaders.
After some four hours fighting His Excellency the Governor and Commander-m-Chief of the Falkland Islands
and the Dependencies, Sir Rex HUNT, C.M.G., ordered the Marines and the survey party from H.M.S.
ENDURANCE, who had been working on the Islands and who assisted with the defence, to surrender.
The following day Argentinian forces landed at Grytviken in South Georgia. The small Royal Marines
detachment on the Island put up a stout resistance in the face of a considerably stronger invading force, damaging
the corvette GUERRICO and shooting down a Puma helicopter, before they too surrendered.
Meanwhile, on 2 April the aircraft carriers H.M.S. HERMES, H.M.S. INVINCIBLE with the assault ship
H.M.S. FEARLESS, two frigates, two Logistic Landing Ships, 3 Commando Brigade Royal Marines and the
necessary logistic support were ordered to be brought to immediate readiness in United Kingdom ports. H.M.S.
HERMES with 826, part of 846 and 800 Naval Air Squadrons and H.M.S. INVINCIBLE with 820 and 801 Naval
Air Squadrons sailed from Portsmouth on Monday 5 April. Admiral WOODWARD, flying his flag in H.M.S.
ANTRIM, was ordered to sail from the Gibraltar area for Ascension Island with six other destroyers and frigates,
and with R.F.A. support. The flag was transferred to H.M.S. GLAMORGAN on 4 April.
|
|
The Aim
|
|
I was informed that in the current situation the overall aim of Her Majesty's Government was to bring
about the withdrawal of Argentinian forces from the Falkland Islands and the Dependencies and to re-establish the British Administration there as quickly as possible. My mission was to conduct military deployments
and order operations in support of this aim.
|
|
Command and Control
|
|
In my capacity as Commander-in-Chief Fleet I assumed overall command of the operation as Commander
Task Force 317 (all surface ships, land and air forces) and Task Force 324 (submarine forces). This tri-service
command was exercised from my Headquarters at Northwood and I was responsible direct to the Chief of
Defence Staff, Admiral of the Fleet Sir Terence LEWIN, G.C.B., M.V.O., D.S.C. The Air Officer Commanding
18 Group RAF, Air Marshal Sir John CURTISS, K.C.B., K.B.E., C.B.I.M., R.A.F. was appointed as my Air
Commander, and the Major General Royal Marines Commando Forces, Major General Sir Jeremy MOORE,
K.C.B., O.B.E., M.C. and Bar, was initially my Land Forces Deputy. When later General MOORE flew south
to become the Commander Land Forces, Falkland Islands, he was replaced by the Commander South East
District, Lieutenant General Sir Richard TRANT, K.C.B. Submarines were operated under the control of Flag
Officer Submarines, Vice Admiral P. G. M. HERBERT, O.B.E. The command team at Northwood was completed by my Chief of Staff, Vice Admiral Sir David HALLIFAX, K.B.E., who was responsible for the detailed
naval planning and the co-ordination of all staff work. Admiral WOODWARD was appointed Commander of
the Task Groups in the South Atlantic and he transferred his flag to H.M.S, HERMES on 15 April. |
|
Military and Logistic Considerations
|
|
My foremost considerations when planning this operation, were the Argentinian military capabilities and
the proximity of their bases and the comparison with our own situation : especially, the difficulties of transporting troops, aircraft and equipment some 8,000 miles from the United Kingdom to a theatre of operations
within range of aircraft based in mainland Argentina and more than 3,000 miles from my nearest forward
mounting base.
It is always difficult to quantify enemy capabilities. Intelligence and other sources gave the total number
of warships at Argentina's disposal as 73. These included one aircraft carrier, one cruiser, 4 submarines, 2
modern " Type 42 " destroyers, and other older but well equipped frigates and destroyers. Its aircraft included
65 A-4 Variants, 39 Mirage HI/V, 5 Canberra, 60 Pucara, 8 Puma and 2 Lynx helicopters, and 5 Super Etendard
equipped with Exocet sea skimming missiles, together with a small but significant air transport force which
included 2 C130s (Hercules) with air to air refuelling tanker capability. The number of troops on the Islands
was more problematic. Estimates varied from 7,000 to 10,000 well equipped troops. These were supported
by more than 30 light attack aircraft (mainly Pucaras) and about 20 helicopters. It was difficult to assess the
intended role of Argentina's military and civilian manpower reserve, its Merchant Marine and its civilian air
transport. A further factor was the possibility of materiel assistance from other countries.
I did not have within my normal resources the ships necessary for the 7,000 mile transit of the troops,
equipment and logistic support for the size offerees which I considered were required to counter the threat and achieve my mission. It was necessary at an early stage to consider taking up ships from trade. An Order in
Council under the Royal Prerogative to requisition ships was given on the evening of 4 April and announced
in Parliament the following day.
It must be recorded that this operation could not have been mounted without the wholehearted co-operation
of the Department of Trade, the ship owners, the masters and their crews who gave their unstinting support and
worked with enormous energy and enthusiasm. The capabilities of these vessels were enhanced by installing
additional equipment which included the provision of helicopter flight decks, a refuelling at sea capability,
freshwater making plants and communications. These conversions were defined and completed with speed
and efficiency that brings great credit to all the agencies involved.
In expectation of a requirement for additional naval air assets, 4 new Naval Air Squadrons were formed.
These comprised one squadron of Sea Harriers, 2 squadrons of Wessex 5 helicopters and one squadron of Anti
Submarine Sea Kings specially adapted for helicopter support operations. In addition, several new small
flights, consisting mainly of Wasp helicopters, were prepared for the ships taken up from trade and warships
taken from the Sales/Disposal List. These are noteworthy achievements and reflect well on the Naval Air
Command.
The Royal Air Force supported by the British aerospace industry, the Chief Scientist's Department and the
Ministry of Defence Procurement Executive was also quickly modifying Vulcan, Nimrod and Hercules aircraft.
Air to air refuelling capabilities were developed and installed ; anti corrosion measures were adopted for
normally land based Chinook helicopters and R.A.F. Harriers. Additional equipment and weaponry were
fitted to a number of assigned aircraft.
Early on, we established in my Headquarters a Logistic Support Cell. This was a tri-service organisation
headed by the Force Logistic Coordinator whose task was to co-ordinate replenishment planning and all
logistic requirements for the Task Force. I considered it essential that this organisation should be at Northwood to ensure optimum and economical use of sometimes scarce resources and the priority for supply of the
most urgent stores. It was a vital asset and a most successful management tool.
The speed with which the operation was mounted did not allow ships and troops to prepare themselves
before departure from the United Kingdom as adequately as I would have wished. All ships proceeding south
therefore adopted a vigorous training programme at sea. Weapon systems were thoroughly overhauled,
tested and fired : in some cases civilian weapons engineering experts sailed with the ships. Tactical and
communications procedures were intensively rehearsed. Damage control exercises were constantly practised.
Embarked troops carried out fitness and weapon training often in cramped, difficult and, for many, quite unfamiliar conditions. Ships had to prepare themselves for rapid and sometimes unscheduled replenishment
from other ships, tankers and helicopters. Equipments were modified at sea without the usual dockyard
support and ships and aircraft were painted to obliterate pennant numbers and identification markings. Later,
it proved possible to give ships sailed in support of the operation a limited period of specialised sea training
directed at South Atlantic operations, under the auspices of Flag Officer Sea Training at Portland.
The modifications to Royal Air Force aircraft to fit them for South Atlantic operations produced a need
for an intensive programme for both aircrews and support personnel. Additional air to air refuelling instructors had to be trained so that they, in turn, could train the Vulcan, Nimrod and Hercules pilots as these
aircraft acquired airborne refuelling capability. Each new weapons system had to be tested and the crews
trained in its use. Harrier GR3 pilots were also practised in the use of the ski-jump for carrier operations.
|
|
Ascension Island
|
|
A key factor in this operation was Ascension Island, situated over 3,700 nautical miles from the United
Kingdom and 3,300 miles from the Falkland Islands. Ascension Island was essential as a forward mounting
base to replenish the ships of the Task Force and to provide them with stores, equipment and men that could
not be embarked before their hurried departure from the United Kingdom. Air transport routes to the Island
were activated on 2 April.
The Island airfield, Wideawake, was also vital as an airhead for all land based aircraft operating in support
of the Fleet and land forces. However, with only limited facilities and totally inadequate technical and domestic back up, previously manned for and accustomed to dealing with only 3 movements each week, it was
developed into a fully operational military establishment capable of supporting the permanent detachments of
up to 17 Victors, 3 Vulcans, 4 Hercules, 4 Nimrods, 2 air defence aircraft and 2 support helicopters. Additionally, intensive daily air transport movements were accepted. The necessary engineering, freight handling,
weapon loading and administrative support brought the establishment from nothing to over 800 officers and
men of all three services within 3 weeks.
The fundamental importance of Ascension Island to the timely success of the operation meant that its
vulnerability to a clandestine amphibious or audacious air attack, such as the Argentinians later demonstrated
with their bomb carrying Hercules transport aircraft, could not be ignored. Air defence radar was installed to
support the fighter aircraft, which were initially missile armed GR3 Harriers and later Phantoms. A detachment of the Royal Air Force Regiment provided ground defence. Seaward defences were provided by an R.N.
guardship and daily Nimrod patrols of the sea areas out to 400 miles ; a number of Argentinian merchantmen
were detected close to the Island and these were shadowed by air and surface units until clear of the area.
By the fall of Stanley, a total of 535 air movements into the Islands from the United Kingdom had taken
place. These included R.A.F. Hercules and VClOs and some chartered Belfast and Boeing 707 aircraft. They
had brought in 23 helicopters, 5,907 tons of freight and 5,242 passengers. In addition to these freight and
passenger aircraft, ground support personnel also handled all aircraft operating to the south in support of the
Task Force. Nimrods mounted 111 sorties from the Island ; the Hercules made 44 airdops of essential equipment, weapons, personnel and mail to the Fleet and the Victor Tankers flew 375 sorties in support of 67 missions
involving long range operations by probe fitted aircraft.
I would wish to record the unstinting support of the residents of Ascension, particularly that of the Island
Administrator Mr. B. E. PAUNCEFORT, the United States Air Force Officer-in-Charge at Wideawake, Lieutenant
Colonel W. BRYDEN, and the employees of the operating contractor, Pan American Airways. In the last
category, Mr. Donald COFFEY is worthy of special mention.
|
|
Medical Support
|
|
The S.S. UGANDA was taken up from trade and designated a Hospital Ship in accordance with Article 22
of the Geneva Convention, having been fitted out in Gibraltar Dockyard. Accomodation to allow for the
treatment and holding of up to 300 casualties was provided, together with sufficient medical] personnel to cover
all major specialities. A number of Q.A.R.N.N.S. officers and ratings were embarked in the ship as part of
the medical complement. In order to comply fully with the Convention, the ship was declared to the International Committee of the Red Cross (I.C.R.C.) before sailing from Gibraltar, marked as required by the
Convention.
Additionally, three survey ships, H.M. Ships HECLA, HERALD and HYDRA, were designated as casualty
ferries, fitted out and declared as Hospital Ships under the Geneva Convention.
|
|
The Maritime Exclusion Zone
|
|
On 4 April I recommended that a maritime exclusion zone be established around the Falkland Islands in
order to inhibit the Argentinian ability to reinforce their garrison. IHer Majesty's Government announced
on 7 April the establishment of an exclusion zone, 200 nautical miles in radius from the centre of the
Falkland Islands, to be effective for Argentine warships and naval auxiliary ships, ifrom 0400 GMT on 12
April. Initially the exclusion zone was enforced by submarines which were deployed to cover the approaches to
Port Stanley and the entrances to Falkland Sound.
|
|
The Repossession of South Georgia
|
|
On 7 April the Chief of Defence Staff ordered me to plan for the repossession of South Georgia and to
deploy the necessary forces.
Captain B. G. YOUNG, D.S.O. Royal Navy, the Commanding Officer of H.M.S. ANTRIM, was nominated
as the Commander of the Task Group allocated to the task. Other units involved in this phase of the operation
included H.M.S. ENDURANCE, H.M.S. PLYMOUTH, later, H.M.S. BRILLIANT, R.F.A. TIDESPRING, M. Company
Group of 42 Commando Royal Marines, elements of the Special Air Service Regiment (SAS) and the Special
Boat Squadron (S.B.S.). In addition H.M.S. CONQUEROR was ordered to patrol off the island to prevent any
Argentinian reinforcement. R.A.F. Victor Maritime Reconnaissance aircraft supported by Victor Tankers
and Nimrods swept the sea areas from South Georgia to the Argentinian coast between 20 and 25 April to
give early warning of hostile naval movements.
The first phase of the operation was to insert S.A.S. and S.B.S. reconnaisance parties by both helicopter
and small boats. This was started and achieved on 21 April despite appalling weather conditions of intense
cold and winds gusting to 70 knots. Unfortunately after 24 hours of unrelenting blizzard the S.A.S. detachment had to be withdrawn from Fortuna Glacier. Two Wessex helicopters dispatched to effect the withdrawal
crashed in " white out" conditions, the pilots having lost all points of reference and orientation. A third
radar fitted Wessex by a remarkable feat of airmanship succeeded in recovering the entire detachment and the
crews of the crashed helicopters. The S.A.S. were re-inserted on 23 April during a temporary lull in the
blizzard.
By 25 April the weather had improved sufficiently for more reconnaissance parties to be landed and
helicopter sorties to be flown. A helicopter search located the Argentinian submarine SANTA FE on the surface
five miles from Grytviken. She was attacked by helicopters armed with AS 12 missiles and depth charges which
caused her to limp back to Grytviken where she was later beached. The attack not only eliminated a potent
threat to the Task Group but also revealed our presence in the area and it was therefore decided to press home
the advantage without further delay.
Events then moved quickly. Under cover of naval gunfire support directed from ashore by a Royal
Artillery forward observation officer, the assault troops landed at Grytviken by helicopter. Later that afternoon the Argentinian forces surrendered and 170 prisoners were taken. British forces sustained no casualties.
Following the fall of Grytviken, H.M. Ships PLYMOUTH and ENDURANCE were detached to recapture Leith
where there was a detachment of Argentinian marines. After some initial vacillation, the Argentinian force
hoisted the white flag on 26 April.
The surrender document was signed onboard H.M.S. ANTRIM on 26 April and the Union Flag again flew
over South Georgia.
|
|
Extension of the Exclusion Zone
|
|
On 23 April the Argentine Government was warned that any approach on the part of Argentine warships,
including submarines, naval auxiliaries or military aircraft, which could amount to a threat to interfere with
British forces would encounter the appropriate response. Moreover all Argentine aircraft engaging in surveillance of these forces would be regarded as hostile.
The threat posed by the three nuclear submarines had effectively stopped Argentinian reinforcement of the
Islands by sea since 12 April but, with the added aim of stopping resupply by air, a Total Exclusion Zone was
declared by the Government on 30 April on the arrival of the carrier force. This Zone applied not only to
Argentinian warships and naval auxiliaries but also to all other ships and aircraft attempting to support the
illegal occupation of the Islands.
The difficulties of maintaining a total blockade are considerable. It is now known that one Argentinian
resupply ship arrived in the Islands and the Argentinian Air Force managed to maintain a limited air bridge
until shortly before the final surrender. Nevertheless, politically the establishment of the Total Exclusion
Zone was consistent with the Government's efforts to ensure the peaceful withdrawal of the Argentinian forces,
while militarily it inhibited the Argentinian ability to reinforce and resupply their forces and limited their
movement.
Additional measures were also considered appropriate. Accordingly, on 7 May the Government informed
the Argentinian Government that any of their warships or military aircraft found more than 12 miles from their
own coast would be treated as hostile and the appropriate action taken. This move was necessary because of
the threat posed by their carrier-borne aircraft and the ease with which hostile forces could approach the Task
Force, under the cover of bad weather, from mainland bases within 450 miles of the Falkland Islands, a significant factor for a force without the benefit of Airborne Early Warning.
Although not an exclusion zone, on 10 May a 100 nautical mile radius Terminal Control Area around
Ascension Island was instituted and formally notified to the appropriate international authorities: this measure
called for prior notification of flights to and from the island and of overflights, thus aiding the air defence
organisation as well as the control of air traffic.
|
|
The Intensification of Operations
|
|
Early on 1 May an R.A.F. Vulcan flying from Ascension Island opened the action against the Argentinian
forces on the Falklands with a night bombing attack of Port Stanley airfield which cratered the runway. The
16 hour sortie was supported by Victor Tankers and Nimrod aircraft and was the first of five Vulcan missions
directed against the airfield and adjacent radar installations.
Later the same morning Sea Harriers attacked the runway at Port Stanley and also the airstrip at Goose
Green. That night Port Stanley airfield was subjected to Naval Gunfire bombardment by H.M. Ships GLAMORGAN, ARROW and ALACRITY. This was to be the pattern for the next few weeks, with raids on the airfields
at Port Stanley and elsewhere by Harriers and night bombardments by units of the Fleet. These attacks were
designed to deny the use of the airfields to the Argentinian forces and to erode their readiness, morale and state
of alertness. At the beginning of May, the first of many S.A.S. and S.B.S. reconnaissance patrols landed
on the Falklands. These, and those that followed, were variously landed by helicopter, small boats from
surface ships and the submarine, H.M.S. ONYX. During the next 3 weeks, these patrols were able to gather
vital intelligence in preparation for the main landing. Throughout the period, in extremely harsh conditions,
they remained undetected.
On 2 May the Argentinian cruiser, the GENERAL BELGRANO, with two destroyers, was detected south of
the Falklands by H.M.S. CONQUEROR. The enemy force was in a position where it posed a serious
threat to a number of our ships engaged in operations off the Falklands while other Argentinian surface units
were poised to the north. It was a threat that could not be ignored and therefore H.M.S. CONQUEROR was
ordered to attack the GENERAL BELGRANO with torpedoes. Two struck the cruiser which sank some hours
later. For over two hours Argentinian destroyers carried out several unsuccessful depth charge attacks
against H.M.S. CONQUEROR and then retired. Later they returned to rescue survivors. Throughout the
campaign, the cost in human lives was my constant concern and in consequence, I ordered H.M.S. CONQUEROR
not to attack ships involved in rescue operations. The sinking of GENERAL BELGRANO was a clear demonstration of the capability of a nuclear powered submarine and proved to have a major salutary effect on the
conduct of future Argentinian operations. After this attack, Argentinian naval surface forces remained
within 12 nautical miles of their coast for the remainder of the campaign. The nuclear powered submarine's
effectiveness was not confined to the removal of this threat; for additionally they patrolled off the coast of
mainland Argentina and provided invaluable intelligence to our forces in the T.E.Z. of aircraft movement
and likely air attacks.
Later on 3 May, a Sea King helicopter was fired on by an Argentinian patrol craft. Lynx helicopters
armed with Sea Skua missiles subsequently attacked the craft which was hit, blew up and sank. A second
patrol craft was also attacked and damaged by helicopter fired missiles.
These successes were marred on 4 May by the loss of H.M.S. SHEFFIELD. While stationed about 60 miles
from the south east coast of the Falkland Islands on Anti Air Picket Duty, she was attacked by 2 Exocet
missiles released by 2 Super Etendard aircraft. One missile struck her on the starboard side and entered
amidships. After 4# hours during which her Ship's Company fought fierce fires whilst engulfed in thick black acrid smoke, the Commanding Officer reluctantly gave the order to abandon ship. Twenty of her Ship's
Company were killed in the attack but 236 were safely recovered by other ships and helicopters of the Task
Force; the efforts of H.M.S. ARROW in the rescue operation were particularly praiseworthy. H.M.S.
SHEFFIELD finally sank in heavy seas while under tow on 10 May.
In the weeks which preceded the main landing, there was constant activity by ships and aircraft of the
Task Force and on 4 May a second Vulcan raid was carried out against Port Stanley airfield. 3 Sea Harriers
attacked the air strip at Goose Green, inflicting damage but suffering the loss of one aircraft, the first such loss
attributable to enemy action. On 6 May, very regrettably, 2 Sea Harriers from H.M.S. INVINCIBLE were lost
and both pilots were killed. Enemy action was not responsible
Admiral WOODWARD energetically continued to enforce the blockade by attacking enemy surface units:
on 9 May the fishing vessel NARWAL, indisputably acting as an intelligence gathering vessel in the vicinity of
the main part of the Task Force, was strafed by Sea Harriers. She was subsequently abandoned and sank
despite the efforts of a boarding party from H.M.S. INVINCIBLE to save her. Survivors were recovered and
subsequently repatriated.
On the night of 11 May H.M.S. ALACRITY, whilst transitting Falkland Sound, discovered the ISLA DE Los
ESTADOS off Port Howard. She was illuminated by star shell and, having refused to heave to, was engaged by
4 -5 inch gunfire, blew up and sank. She had been carrying fuel to resupply Argentinian garrisons. Five
days later on 16 May, 2 transport ships BAHIA BUEN SUCESO and Rio CARCARANA, were attacked by Sea Harriers,
damaged and immobilised. The Argentinian patrol craft ISLAS MALVTNAS, and the coaster MONSUNEN, which
belonged to the Falkland Islands Company, were also attacked, the latter vessel being subsequently salvaged
and put to use by British forces.
In the air, a Puma helicopter was shot down by a Sea Dart missile from H.M.S. COVENTRY on 9 May.
On 12 May, the first Argentinian air attack on the ships of the Task Force since the sinking of H.M.S. SHEFFIELD
took place. Two waves of A4 (Skyhawk) aircraft attacked H.M. Ships BRILLIANT and GLASGOW. Three
aircraft were destroyed, 2 by H.M.S. BRILLIANT'S Sea Wolf missiles and the third crashing in an attempt to
evade. In the second wave, H.M.S. GLASGOW was hit by a bomb which inflicted damage to her engines
but did not explode.
At Pebble Island on the night of 14/15 May an SAS raiding party, supported by diversionary gunfire
support from H.M.S. GLAMORGAN accurately directed by a Forward Observation Officer of the Royal Artillery,
destroyed an ammunition dump, stores and 11 aircraft including 6 Pucara Ground Attack aircraft. The raiding
party was recovered, having suffered only minor casualties.
y was recovered, having suffered only minor casualties.
Throughout the period I have just described, diplomatic activity in London, Buenos Aires, Washington
and New York continued in an effort to find a solution satisfactory to both the parties. The fundamental
issue, that the people of the Falkland Islands had the right to choose under which government they wished to
live, proved increasingly intractable. Hopes of a compromise solution flickered briefly only to be extinguished
by Argentina's refusal to accept this principle of self determination. It was only as a last resort, when it was
clear that a peaceful solution could not be found, that the decision to retake British sovereign territory by
force of arms was made and I received my instructions to repossess the Falkland Islands.
|
|
Land Forces
|
|
On 2 April, 3 Commando Brigade Royal Marines commanded by Brigadier J. H. A. THOMPSON, C.B.,
O.B.E., A.D.C., was assigned to me for the operation. On 3 April, 3rd Battalion The Parachute Regiment
was added as were 8 light armoured reconnaissance vehicles of the Blues and Royals and T Battery 12 Air
Defence Regiment Royal Artillery, equipped with Rapier missiles
This force of some 5,500 men sailed from the United Kingdom on 6 April in the assault ship H.M.S.
FEARLESS, 4 Logistic Landing Ships, S.S. CANBERRA and M.V. ELK. These ships were later joined at Ascension
Island by the assault ship H.M.S. INTREPID, R.F.A. SIR TRISTRAM, M.V. NORLAND and M.V. EUROPIC FERRY,
with 2nd Battalion The Parachute Regiment and 29 Field Battery Royal Artillery embarked. The inital
landing forces were complete, and all units exercised together for the first time at Ascension Island.
Due to a steady build up of Argentinian occupation troops, after the main force had sailed, it was decided
that additional land forces should be deployed from the United Kingdom. The force chosen, 5th Infantry
Brigade, commanded by Brigadier M. J. A. WILSON, O.B.E., M.C., which had already deployed two of its
organic battalions with 3 Commando Brigade Royal Marines but had retained the 1st Battalion 7th Duke of
Edinburgh's Own Gurkha Rifles, was augmented by 2nd Battalion Scots Guards, 1st Battalion Welsh Guards
and numerous supporting arms and services. After a 2 week period of intensive training in South Wales,
substantial re-equipping and re-organisation, 3,200 men sailed from Southampton on 12 May in R.M.S.
QUEEN ELIZABETH II, the major equipments having sailed on 8 and 9 May in M.V. NORDIC FERRY and M.V.
BALTIC FERRY.
Thus, the grand total of land forces assigned to me for the recapture of the Falkland Islands became
10,500 men.
Four Chinook helicopters, to provide vital mobility for troops and equipment in the land battle, were
prepared for sea transit and embarked in S.S. ATLANTIC CONVEYOR. 6 R.A.F. Harriers of No. 1 Squadron,
for close support of group troops, also joined S.S. ATLANTIC CONVEYOR on 6 May. These Harriers transferred
to H.M.S. HERMES on 18 May. 8 Sea Harriers of 809 Naval Air Squadron were also embarked and transferred to H.M. Ships INVINCIBLE and HERMES between 18-20 May. No. 63 Squadron R.A.F. Regiment (Rapier)
accompanied 5th Infantry Brigade.
|
|
Selection of Beachhead
|
|
It was always accepted that because of its vital role as the seat of government and the only centre of
communication, Port Stanley held the key to victory; he who held Port Stanley, held the Falklands. The aim,
therefore, was to secure the capital as quickly as possible, around which the Argentinians had concentrated
most of their forces.
It was important to select a suitable area for an amphibious assault as near to Port Stanley as possible,
because cross-country movement is very difficult and weather conditions do not favour helicopter operations.
However, the main danger of selecting an assault area too close to the capital was that it might make it too
easy for the Argentinians to launch a counter attack against the beachhead before it could be firmly established.
I had not the necessary forces to conduct an opposed landing.
Although it was not possible to select a site which would be completely immune from air attack, the
troop carriers and their escorts had to be afforded protection at least from Exocet missiles. The missile's
effectiveness is greatly reduced if its intended targets are protected by land. The amphibious force also
required deep water. After assessing all the factors, including the anti submarine advantage, San Carlos
Water was chosen for the amphibious assault. It is surrounded by hills, with a deep, comparatively sheltered
anchorage and with the nearest sizeable enemy force being at Drawin/Goose Green more than 15 miles away.
I was very much aware of the risks which a landing in strength involved. Despite the care with which the
landing area had been chosen, the loss of a prestigious target such as S.S. CANBERRA and her embarked troops
would have jeopardised the entire amphibious assault plan. My commanders therefore had to plan the assault
to reduce the element of risk to the minimum acceptable. This was achieved by a variety of means. The
most careful consideration was given to the disposition of embarked troops and equipment. Cross decking,
the movement of men and material from one ship to another, had already been an essential feature of preparations at sea during the passage south. This procedure was intensified during the week before the landing to
ensure that assets were deployed effectively with as little risk as possible. Despite the intensity of these operations, which were often carried out in very poor weather conditions, there was only one major loss. Tragically,
on 19 May, a Sea King helicopter, while engaged in cross decking, struck a large sea bird and immediately
crashed into the sea. Eighteen S.A.S. and three Royal Marine officers and men were killed.
Further factors essential to the success of the landing were the weather and the stealth of the ships on
passage through the Total Exclusion Zone. Radio silence was imposed throughout this period while, as
forecast, the seas remained calm allowing cross decking to continue, but visibility was restricted to 2 to 3
miles, protecting the force from Argentinian air attack. Finally, it was important to attempt to deceive the
enemy of our true intentions by concentrating activity in areas away from San Carlos Water.
|
|
The Landing
|
|
Thus, in the early hours of 21 May, H.M. Ships FEARLESS and INIREPID, R.F.A.s STROMNESS, Sfli GAI AHAD,
SIR GERAINT, SIR TRISTRAM, SIR LANCELOT and SIR PERCIVAL together with S.S. CANBERRA and M.V. EUROPIC
FERRY, in whom were embarked 3 Commando Brigade Royal Marines, steamed stealthily into Falkland Sound.
At 0340 local time, the landings began, the troops being ferried ashore in the 16 landing craft from the two
assault ships H.M.S. FEARLESS and H.M.S. INTREPID.
Commodore Amphibious Warfare, Commodore M. C. CLAPP, C.B., embarked in H.M.S. FEARLESS, controlled the amphibious operation. Also embarked was Headquarters 3 Commando Brigade Royal Marines.
First ashore were 2nd Battalion The Parachute Regiment and 40 Commando Royal Marines on two beaches
in the San Carlos Settlement Area. 2nd Battalion The Parachute Regiment then turned south and established
a defensive position on the Sussex Mountains effectively blocking the route which any counter attack from the
Darwin area would have to take. Meanwhile, 40 Commando Royal Marines moved east, up onto the Verde
Mountains. Next ashore was 45 Commando Royal Marines, in Ajax Bay, which was to become the main force
logistic area throughout the rest of the campaign. The last assault unit, 3rd Battalion The Parachute Regiment,
went ashore at Port San Carlos to protect the northern flank, leaving 42 Commando Royal Marines afloat as
a reserve. The artillery, 4 light gun batteries and one Rapier missile battery then established themselves
ashore.
At the same time as the main landing took place, a subsidiary operation was launched by S.B.S. supported
by naval gunfire bombardment on Fanning Head and a raid by S.A.S. at Darwin. The aim of these operations
was to convince the enemy that we were following the pattern established by the raid on Pebble Island six days
earlier and to mask the scale of the landings at San Carlos Water.
At dawn, helicopters from the Naval Task Group joined the shuttle, as a constant flow of men and equipment went ashore. By the end of the day more than 3,000 men and almost 1,000 tons of stores and equipments
had been successfully landed. The Medical Squadron of the Commando Logistic Regiment, supported by
Naval surgical teams and elements of 16 Field Ambulance R.A.M.C., set up a main Dressing Station in a
disused refrigeration plant at Ajax Bay.
The aim of achieving surprise had been achieved and, although still in its infancy, the beachhead had been
established virtually unopposed by land or air. 2 Gazelle helicopters were, however, subsequently shot down
by enemy ground fire. During tie afternoon of 21 May, the anticipated Argentinian air raids began. The
warships in the Falkland Sound fought gallantly and took the brunt of the attack in protecting the landing
ships. Around 15 aircraft were shot down by Harriers, and by ships' and ground weapons. One R.A.F.
Harrier was lost and three of the supporting warships were hit. H.M.S. ANTRIM was struck aft by a bomb
which failed to explode: H.M.S. ARGONAUT was hit by 2 bombs which again did not explode but killed 2 of
her Ship's Company and inflicted sufficient damage to deprive her of steaming capability. H.M.S. ARDENT
was less fortunate; she was repeatedly hit aft by bombs which exploded. The damage sustained subsequently
led to her sinking, 22 of her Ships' Company lost their lives; 177 were saved. The ships in San Carlos Water
were largely unscathed and after a hectic day unloading, S.S. CANBERRA was sailed after dark.
|
|
Consolidation
|
|
The following day, the build up and reinforcement of the beachhead continued. The Argentinian air
raids did not. However, on 23 May, the Argentinians again launched heavy air attacks and more ships were
hit, including H.M.S. ANTELOPE. One of the bombs entered her forward, killing one of her Ship's Company
instantly, although it did not explode. Subsequent efforts to defuse it failed and the resulting explosion killed
one of the disposal team and seriously injured the other. The fires generated by the explosion raged out of
control and the ship was abandoned. She later sank but the rest of the Ship's Company survived. A Sea
Harrier was also lost when it exploded shortly after take off from H.M.S. HERMES, killing the pilot. But, on
this day the Argentinians lost at least ten more attacking aircraft.
The build up of men and material continued. The Royal Engineers had worked tirelessly to improve
the access over the beaches and by the end of the third day, 24 May, 5,500 men had been put together with 5,000
tons of ammunition and stores. The supporting role of M.V. ELK deserves particular mention. Throughout
this period she ferried large amounts of ammunition to the landing areas sometimes at considerable but
necessary risk from air attacks. She was quite literally a floating bomb, sometimes carrying as much as 2,500
tons of ammunition onboard.
25 May was Argentina's National Day and a major effort by her Air Force was anticipated. At first,
fears appeared to be groundless; only one raid penetrated to the Falkland Sound area where it inflicted no
damage but one of the aircraft was shot down by a Sea Dart missile. Seven more aircraft were also shot down
by two Sea Dart missiles of H.M.S. COVENTRY, two by Seacat missiles fired by H.M.S. YARMOUTH, and three
by Rapier missiles fired from ashore. In mid afternoon, however, the advanced air defence elements of the
Task Group were targets for a very determined low level air attack. H.M.S. BROADSWORD suffered superficial
damage and H.M.S. COVENTRY was hit by several bombs which exploded in or near the machinery spaces.
She capsized shortly after the attack with the loss of 19 of her Ship's Company. On this day, too, S.S.
ATLANTIC CONVEYOR with a cargo of helicopters, support equipment and stores which included materiel
needed to establish a forward airstrip for helicopters and Harriers, was in company with the main force to
the east of the Falklands en route for San Carlos. One hour before sunset the force received a brief warning
of an attack by Argentinian aircraft armed with Exocet missiles. Ships took appropriate counter measures,
but S.S. ATLANTIC CONVEYOR was hit and set on fire. The fires spread rapidly and one hour after the attack
she was abandoned. 3 Naval ratings and 9 Merchant Navy officers and men, including her Master, Captain
I. NORTH, D.S.C., were killed.
The Argentine Air Force, despite their losses, persisted with their attacks in the San Carlos area but, by
now, the presence of Rapier and Blowpipe missile systems ashore, and effective small arms fire brought to
bear from ships and shore, were a potential counter. Similarly, attacks continued against units at sea. On
30 May, the carrier group having moved closer to the Falkland Islands to cover the approach of 5th Infantry
Brigade troop ships, was attacked by Super Etendards and Skyhawks. A number of Exocet missiles were
launched but were evaded and exploded harmlessly. Three of the Skyhawks were shot down, 2 by Sea Dart
missiles, the third by 4 -5 inch gunfire.
|
|
The Breakout
|
|
On 26/27 May, 3 Commando Brigade Royal Marines began to break out from the beachhead. The overall
plan was to close up to the Port Stanley area as quickly as possible. There was however a significant Argentinian
presence at Darwin and Goose Green. Although not on the direct route to Port Stanley, these troops posed
a threat to the flank and to the beachhead. It was therefore decided that it was essential to neutralise the
Argentinian presence there before the advance on Stanley could be fully developed.
Late on 26 May, 2nd Battalion The Parachute Regiment started its move south. At dawn on 27 May,
45 Commando Royal Marines and 3rd Battalion The Parachute Regiment started to advance along the
northern route from the beachhead, east towards Douglas Settlement and Teal Inlet respectively. Throughout
27 May, while the other two battalions continued their advances, 2nd Battalion The Parachute Regiment laid
up at Camilla Creek House 5 miles north of the Argentinian position, while an artillery troop of 3 light guns
was flown forward to support the attack which began at 0200 on 28 May.
One of the R.A.F. Harriers flying close air support missions assisting the move forward was shot down on
27 May whilst attacking Argentinian positions at Goose Green. The pilot ejected and was later recovered
unharmed by advancing land forces.
By mid-afternoon, Darwin had been captured and the battalion pressed on south down the narrow isthmus
towards Goose Green, some two miles on. They had to cross open ground in broad daylight, and were
opposed by strong defensive positions which were well dug in and sited in depth. Low cloud, strong winds
and driving rain made early air operations in support of the advance impossible.
The battle for Goose Green lasted many hours, frequently at very close quarters, and amongst the casualties
was the Commanding Officer, Lieutenant Colonel H. JONES, V.C., O.B.E., who was killed when charging an
enemy post which was holding up the advance on the left flank. Throughout the course of the battle 16 officers
and men of 2nd Battalion The Parachute Regiment were killed, and one Royal Marines officer was also killed
when his Scout helicopter was shot down by enemy aircraft.
By last light the battalion, supported by 2 further R.A.F. Harrier raids, had surrounded the remaining
garrison in the Goose Green Settlement where 112 civilians were held, having been confined to the Community
Hall for 3 weeks.
During the night the Acting Commanding Officer conducted negotiations with the Argentinians and,
by mid morning on 29 May,, the surrender was accepted. As a result of their gallant action, 2nd Battalion
The Parachute Regiment took over 1,000 prisoners. Subsequently, it was discovered that the original garrison
of some 650 had been reinforced on 28 May by an additional regiment. A large quantity of artillery, air
defence weapons and ammunition was captured. In addition, all the civilians were released unharmed.
|
|
Advance on Port Stanley
|
|
After a remarkable cross country march of 50 miles over very difficult terrain in appalling weather
conditions 45 Commando Royal Marines had reached Teal Inlet, and 3rd Battalion The Parachute Regiment
had reached Estancia House via Teal Inlet. Meanwhile, D Squadron 22 Special Air Service Regiment had
established an operations base in the area of Mount Kent and were carrying out an aggressive patrolling and
intelligence gathering programme. After 3 days, and several attempts at reinforcement which were prevented
by the atrocious weather at night, they were joined by the first half of 42 Commando Royal Marines and a
troop of light guns of 29 Commando Regiment Royal Artillery, who were flown forward by helicopter on
1 June, the remainder joining on 2 June.
On 30 May, General MOORE assumed command of operations ashore and on 1 June was joined by his
Headquarters which was immediately established in H.M.S. FEARLESS at San Carlos Water. Also on 1 June,
5th Infantry Brigade began to disembark at the beachhead. The movements of R.M.S. QUEEN ELIZABETH II
in which they had set sail from Southampton were kept strictly secret. I could not risk such a prestigious
target and her embarked force to the hazards of the Total Exclusion Zone. She had therefore made her way
south well outside the range of Argentinian aircraft to rendezvous with S.S. CANBERRA and M.V. NORLAND in
Cumberland Bay, South Georgia. Here 5th Infantry Brigade and accompanying weapons and equipment
were disembarked by the small ships of 11 Mine Countermeasures Squadron, H.M. Ships CORDELLA, PICT,
NORTHELLA, JUNELLA and FARNELLA. Their transfer to S.S. CANBERRA and M.V. NORLAND was completed
with noteworthy speed on 29 May
After arrival at San Carlos Water on 31 May, M.V. NORLAND disembarked 1st Battalion 7th Duke of
Edinburgh's Own Gurkha Rifles during the morning of 1 June. Later that day, 2nd Battalion Scots Guards
and 1st Battalion Welsh Guards disembarked from S.S. CANBERRA. The 2nd Battalion The Parachute
Regiment was put under the command of 5th Infantry Brigade and moved forward to the Fitzroy and Bluff
Cove areas, and was replaced at Darwin and Goose Green by 1st Battalion 7th Gurkha Rifles.
Whilst 5th Infantry Brigade moved forward in the south, other elements of the Task Force were fully
employed. On land a build up of stores and ammunition in preparation for the final battles took place.
This included the construction of a Harrier Forward Operating Base at Port San Carlos by 11 and 59 Squadrons
of the Royal Engineers. This task was completed in difficult conditions and despite the loss of much of their
equipment in S.S. ATLANTIC CONVEYOR. Helicopters operating in very poor weather conditions ferried vast
amounts of stores and ammunition to forward positions; this included 18,000 rounds of artillery ammunition.
Other stores were moved by Logistic Landing Ships to Teal Inlet. At sea, ships moved close inshore nightly
to conduct bombardments of selected targets on the approaches to and around Port Stanley. 1,300 4 -5 inch
rounds were fired by H.M. Ships CARDIFF, ARROW, YARMOUTH, ACTIVE and AMBUSCADE during the period
5 to 10 June. Argentinian aircraft were also successfully engaged by units of the Fleet. One Canberra was
shot down by a Sea Dart missile fired by H.M.S. EXETER. H.M.S. PLYMOUTH shot down 2 attack aircraft
with Sea Cat missiles. Sea Harriers from H.M.S. INVINCIBLE attacked and brought down an Argentinian
Hercules.
Vulcan attacks against enemy radar installations in the vicinity of Port Stanley were carried out on 31 May
and 3 June. These, and the intensified bombing raids by Harriers, complemented the heavy night bombardment by Task Force ships. A forward air base was established at Port San Carlos on 5 June, from which
combat air patrols and offensive air support missions, as well as helicopter operations were mounted.
By this time too, the air to air refuelled Hercules were conducting regular air drops of important supplies
to ships in the Total Exclusion Zone.
There were losses. A Gazelle helicopter in transit from Darwin to Fitzroy was lost on 6 June with the
2 passengers and the 2 crew. An R.A.F. Harrier crashed into the sea on 30 May after being struck by enemy
ground fire over Port Stanley. A Sea Harrier crashed into the sea on 1 June whilst returning from a combat
air patrol. An accident at Port San Carlos severely damaged an R.A.F. Harrier on 8 June, bringing the total
losses of ground support Harriers to 4. The direct transit of 2 pairs of replacement R.A.F. Harriers from
Ascension Island to H.M.S. HERMES using in flight refuelling on 1 and 8 June was a noteworthy achievement
and a most welcome reinforcement.
Further reinforcement and resupply forward was severely hampered by bad weather which precluded the
use of helicopters for troop movement. It was therefore decided to move 2nd Battalion Scots Guards, 1st
Battalion Welsh Guards and some supporting units and equipment by ship to Fitzroy. This move was conducted as follows: on 6 June 2nd Battalion Scots Guards disembarked from landing craft having transferred
from H.M.S. INTREPID off Lively Island by night. Due to very bad weather only half the 1st Battalion Welsh
Guards landed on a similar operation on 7 June. They had sailed to Lively Island in H.M.S. FEARLESS.
During the night 7/8 June the remainder of the Battalion and some other units were embarked in SIR GALAHAD
and sailed directly to Fitzroy. The weather on 8 June unexpectedly and unfortunately cleared and whilst
SIR GALAHAD and SIR TRISTRAM, the latter having arrived on 7 June, were unloading they were attacked by
Argentinian aircraft before the Rapier battery, which had been landed as soon as possible after arrival, was
fully operational. Both were hit, caught fire and abandoned. This attack led to the heaviest casualties of
the campaign. Forty two Welsh Guardsmen, 3 members of 16 Field Ambulance R.A.M.C. and 5 Royal Fleet
Auxiliary crewmen were killed. In a further air raid, a landing craft was bombed and sank in Choiseul Sound.
6 Royal Marines and 1 Naval Rating were killed.
Weather conditions again deteriorated. It was almost mid-winter, with frequent rain and snow storms
driven horizontal by high winds, and sub-zero temperatures. The battalions who occupied the most exposed
positions were suffering with cases of exposure and trench-foot. General MOORE was thus determined to
launch his bid for Port Stanley with the minimum of delay.
|
|
The Final Battle
|
|
The Argentinians had about 7 battalions together with supporting troops in the Port Stanley area.
Approximately 3 of these battalions were forward on the important features of Mount Longdon, Two Sisters
and Mount Harriet. In addition, there were about 1,000 troops on West Falkland.
General MOORE planned that the attack on Port Stanley should be conducted in 3 phases. The first
phase was scheduled for the night of 11/12 June when 3 Commando Brigade Royal Marines was to capture
the three features of Mount Longdon, Two Sisters and Mount Harriet. The second phase, planned to take
place 24 hours later, required both brigades to capture the next features to the east; these were Wireless Ridge,
Tumbledown Mountain and Mount William. Finally, the 1st Battalion Welsh Guards, with 2 companies of
40 Commando Royal Marines under command, were to capture Sapper Hill.
As scheduled, on 11 June a silent night attack was launched. The enemy was outfought and soon after
dawn all the brigade objectives were firmly held. In the centre, after a hard fight in very difficult mountain
terrain, 45 Commando Royal Marines captured Two Sisters. Further south 42 Commando Royal Marines
made an indirect approach, exploiting a gap in the enemy minefields which had been established as a result of
extremely detailed, skilled and aggressive patrolling, and captured Mount Harriet from behind, taking over 200
prisoners. Meanwhile in the north 3rd Battalion The Parachute Regiment had an extremely tough fight
against one of the enemy's best battalions to capture Mount Longdon. In this action Staff Sgt. I. J. McKAY,
V.C. was killed while leading an advance against a strongly defended and well sited Argentinian position.
During the day of 12 June all these positions came under heavy artillery fire, and further casualties were
sustained.
For this and subsequent attacks, troop movements and assaults ashore were covered by Harrier attacks,
naval gunfire and the support of five field batteries who fired 15,000 rounds. 29 Commando Regiment Royal
Artillery were in continuous action for 12 hours during the first phase, at one point giving supporting fire only
50 metres in front of the advancing infantry. In the second phase 57 missions were fired. The Royal Engineers
who had completed the hazardous task of clearing routes through the minefields provided men with each
of the assaulting units. In addition they carried out many tasks to improve the mobility of the land forces,
including reconstruction of the bridge at Fitzroy.
On 12 June, H.M.S. GLAMORGAN, while leaving her gun support position, was struck aft by a land
launched Exocet missile. Despite the resulting fires, she remained able to steam with gun armament intact.
The fires were eventually brought under control, but 13 of her Ship's Company had been killed in this attack.
Also on 12 June the final Vulcan raid was made on Port Stanley airfield in an attempt to prevent any
further use of the airfield by the Argentinians prior to the final assault.
To allow further time for preparation, Phase 2 was delayed by 24 hours and eventually launched on the
night of 13/14 June. 2nd Battalion The Parachute Regiment, once more under command of 3 Commando Brigade Royal Marines, in a beautifully managed and very skilful attack took Wireless Ridge, whilst on
Tumbledown Mountain, 2nd Battalion Scots Guards had a particularly difficult battle before they overcame
the regular Argentinian marine battalion. Thereafter 1st Battalion 7th Duke of Edinburgh's Own Gurkha
Rifles passed through 2nd Battalion Scots Guards to secure Mount William.
At this stage it became clear that enemy resistance was collapsing. They could be seen retreating towards
Port Stanley from many directions, including Moody Brook and Sapper Hill, neither of which had yet been
attacked. Some, ejected from Tumbledown by 2nd Battalion Scots Guards, realised that they must pass
Mount William, now firmly in Gurkha hands. They chose instead to retrace their steps and surrender to the
Guardsmen.
Phase 3 was never launched. Realising that the Argentinian forces were beaten, General MOORE launched
two battalions in pursuit, to close up to the outskirts of Port Stanley as quickly as possible. This was in line
with General MOORE'S policy throughout the land battle of moving forward energetically and as expeditiously
as possible.
During the afternoon of 14 June, with large numbers of enemy standing about, abandoning their arms
and surrendering, British troops were ordered to fire only in self-defence, and white flags began to appear
over Port Stanley.
That night, after some hours of negotiations, General MOORE flew by helicopter into Port Stanley and took
the formal surrender of all Argentinian forces on the Falkland Islands from General MENENDEZ.
|
|
Recapture of South Thule
|
|
The final step in the eviction of the illegal presence from the South Atlantic Dependencies was the removal
of a small party which the Argentinian Navy .had maintained on South Thule in the South Sandwich Islands
since 1976.
H.M.S. ENDURANCE, commanded by Captaiki N. J. BARKER, C.B.E., Royal Navy, which had played a
vital supporting role in the South Georgia area throughout, led a Task Group which included the frigate
H.M.S. YARMOUTH, R.F.A. OLWEN, and the tug SALVAGEMAN. M Company 42 Commando Royal Marines
formed the bulk of the landing force. The Argentinian party surrendered without resistance on 20 June.
Although it had been claimed that this was a scientific station, ample proof was obtained that it was part of an
Argentinian military meteorological network.
|
|
General Comments
|
|
The preceding paragraphs have recorded the major actions and significant phases of operations in the
South Atlantic. The chronological record has not allowed proper emphasis of those activities whose importance is characterised by their continuous nature.
Attacks on the Task Force by enemy submarines were a significant and ever present threat, which was
recognised by the inclusion of anti-submarine Sea King helicopters in the air order of battle. A number of
torpedo attacks were carried out by these aircraft against underwater contacts classified as possible submarines.
Results of the actions are not known, but the high intensity flying rates of this helicopter force throughout the
operations were an essential part of Fleet anti-submarine warfare defences.
Some of the Harrier operations involving enemy action have already been recorded. However, defence
of the Fleet and, later, close air support of the land forces, required these aircraft to spend many hours at high
alert states or flying defensive combat air patrols. These protective measures were continuously necessary
from the moment the ships entered the Total Exclusion Zone. A total of 23 enemy aircraft were destroyed in
air to air combat, with the Sidewinder missile success rate being particularly noteworthy. It became apparent
in the last few days of the open action that Admiral WOODWARD'S courageously aggressive stance to wreak
attrition on the Argentinian Air Force had accomplished the aim, and to all intents and purposes they were
beaten.
Nimrod aircraft were the first to be based on Ascension Island, on 6 April. They were immediately
involved as communications links for the transitting nuclear submarines and thereafter they continuously
provided direct support and area surveillance to every major element of the Task Force to the limit of the
aircraft's range. All deployments of small aircraft were provided with airborne search and rescue cover and,
after the fitting of refuelling probes, Nimrods converted for air to air refuelling provided long range surveillance
of the sea areas between the Falkland Islands and the Argentinian mainland prior to and during the main
amphibious landing.
Air support of the Task Force from Ascension Island was completely dependent on air to air refuelling. In
performing all refuelling tasks between the United Kingdom and the Total Exclusion Zone, the Victor Tankers
provided continuous and timely support.
With the ships of the Task Force operating so far from Dockyard assistance, much major maintenance
and repair work had to be carried out afloat in very rough seas. The achievements of the maintenance and
repair ship M.V. STENA SEASPREAD were outstanding.
Over the distances involved and in areas so notoriously bad for radio propagation the value of satellite
communications cannot be overstated. The Command and Control of Operation CORPORATE would have
been immeasurably more difficult without this facility.
Logistics were always to the forefront of my mind. Throughout the events I have described, no ship ran
out of fuel, no weapon system of ammunition, despite a supply line of over 7,000 miles and the extreme weather
conditions encountered. This is ample testimony to the excellent work of all members of the logistic support
ships and units of the Task Force.
Major contributory factors to the survival of the wounded were the supreme physical fitness of our troops
and the exemplary medical attention given to casualties of both sides, often under fire and in the most squalid
conditions. First aid matched the professional expertise of the field and afloat medical teams. Equally vital
was the skill of the helicopter pilots in speedily evacuating casualties. Casualties were transferred to the
Hospital Ship S.S. UGANDA. Once fit for further travel, they were transferred to the 3 casualty ferries H.M.
Ships HYDRA, HECLA and HECATE and conveyed to Montevideo for onward aeromedical evacuation to the
United Kingdom by R.A.F. VC10. These operations were all conducted with great efficiency and great
concern for the comfort of the wounded.
|
|
Concluding Remarks
|
|
Operation CORPORATE became necessary because deterrence failed, but in its execution it represented a
triumph of military capability backed by resolute political will. The difficulties of short notice, extreme range
and appalling weather under which this operation was mounted were ail overcome by a single factor, the quality
of our people. The fighting men were magnificent when put to the test and the support they received at every
level, at sea from the Merchant Navy, at Ascension Island and in the United Kingdom was superb. I could
not have been better served.
|
|
 |
| Portrait
|
|
| Falklands War Maps
|
| Timeline
|
|
March 19th, 1982
|
Argentine scrap merchants land on South Georgia and raise flag
|
|
April 2nd
|
Argentine forces invade East
Falkland. After three-hour fight, Royal Marine garrison ordered to
surrender by Governor Hunt
|
|
April 3rd
|
United Nations Security Council passes
Resolution 502, calling on Argentina to
withdraw its troops. Argentine Marines
force surrender of 22-man garrison of
South Georgia, after two Argentine
helicopters shot down and a frigate
badly damaged.
|
|
April 5th
|
First warships of British Task Force sail
from UK. Lord Carrington and two
junior Foreign Office ministers resign.
|
|
April 7th
|
200-mile Exclusion
Zone announced around Falklands
|
|
April 12th
|
Exclusion Zone enforced
|
|
April 25th
|
Argentine submarine Santa Fe damaged
by RN helicopters and forced to beach at
Grytviken, South Georgia.
|
|
April 25th/26th
|
South Georgia recaptured by SAS and RM
|
|
April 30th
|
US diplomatic mediation abandoned;
US government announces unequivocal
support of Britain.
|
|
May 1st
|
RAF Vulcan and Task Force Harriers
attack Stanley airport in first of many
raids.
|
|
May 2nd
|
General Belgrano sunk by RN
submarine.
|
|
May 4th
|
HMS Sheffield hit by
Exocet.
|
|
May 7th
|
Extension of Total
Exclusion Zone to within 12 miles of
Argentine coast.
|
|
May 14th
|
SAS raid Argentine airfield on
Pebble Island.
|
|
May 21st
|
Task Force establishes beachhead at San
Carlos Bay. HMS Ardent
sunk by Argentine air attack. At least 14
Argentine aircraft shot down.
|
|
May 23rd
|
HMS Antelope crippled by air attack,
sinks next day. At least six aircraft shot
down.
|
|
May 24th
|
Air attacks continue; eight aircraft shot
down.
|
|
May 25th
|
HMS Coventry and Atlantic Conveyor sunk
Several Argentine aircraft shot down.
|
|
May 26th
|
British troops move out of beachhead on
two routes.
|
|
May 28th
|
Goose Green attacked by Paratroopers.
|
|
May 29th
|
Argentine garrison at Goose Green surrenders.
|
|
May 31st
|
Royal Marines arrive at
Mt. Kent.
|
|
June 2nd
|
British troops in sight of Stanley.
|
|
June 8th
|
Sir Tristram
and Sir Galahad attacked at Fitzroy
|
|
June 11th/12th
|
Night attacks on high ground west of Stanley; Mt. Longdon, Two
Sisters and Mt. Harriet captured. Land launched
|
|
June 12th
|
Exocet missile strikes HMS
Glamorgan but damage controlled.
|
|
June 13th/14th
|
Tumbledown, Mt. William and Wireless
Ridge captured in night attacks.
|
|
June 14th
|
Unconditional surrender of Argentine
troops on Falklands at 2O59hrs local
time.
|
|
|
Suggested Reading
|
Eyewitness Falklands
Fox, Robert
The Falklands War (Twentieth Century Wars)
by D. George Boyce
Amphibious Assault Falklands The Battle of San Carlos Water
by Michael Clapp
Signals of War: Falklands Conflict of 1982
by Lawrence Freedman and Virginia Gamba-Stonehouse
The Falklands War: Britain Versus the Past in the South Atlantic
by Daniel K. Gibran
Battle for the Falklands (Pan Military Classics)
by Max Hastings
A Close Run Thing: The Navy and the Falklands War
by Richard Freeman
The Official History of the Falklands Campaign, Volume 2: War and Diplomacy: v. 2 (Government Official History Series)
by Lawrence Freedman
Argentine Fight for the Falklands
by Martin Middlebrook
Battle Atlas of the Falklands War 1982 by Land, Sea and Air
by Gordon Smith
The Downing Street Years
by Margaret Thatcher
Nine Battles to Stanley
by Nicholas Van Der Bijl
The Secret War For The Falklands: SAS, MI6 and the War Whitehall Nearly Lost
by Nigel West
|
|



