|
Brief History
|
|
The regiment gained their title in 1881 when the 39th (Dorsetshire) Regiment of Foot was joined to the 54th (West Norfolk) Regiment of Foot. The 39th was the 1st Battalion the Dorsets and the 54th was the 2nd battalion. The 1st battalion was sent on the Egypt expedition of 1885. The regiment then went to Malta in 1888 and then on to India. They were not heavily involved until 1897 when they fought in the Tirah and won distinction on the heights of Dargai. They were in India at least until 1900. In 1914 they were stationed in Belfast.
The 2nd battalion were in India in 1881, then went to Aden until 1886 when they returned to England. In 1897 they were ordered to Malta. In 1898 they sent a detachment of 250 men to Candia (now called Iraklion, Crete) on the outbreak of the insurrection, which resulted in the expulsion of Turkish forces from Crete. The battalion returned home in 1899. In 1914 they were in Poona, India.
|
|
Dargai 1897
|
|
The Dorsetshire Regiment were one of the British units in a force of 35,000 troops sent into the Tirah region on the North-West Frontier. The aim of the force was to establish control over the Afridis and Orakzais, tribesmen who had attacked British and Indian troops in the Khyber Pass and Samana Range. The route chosen by the commander, Lieutenant-General Sir William Lockhart, was to pass below the Dargai Heights. If these heights were held by tribesmen they would constitute a threat to the Moveable Column of men and animals.
There were two separate battles to gain control of these Heights. The first took place on the 18th October 1897 and the other on the 20th Oct. The first scaling of the Heights was relatively easy and accomplished by the 3rd Gurkhas and King's Own Scottish Borderers. But the decision was made, reluctantly, to abandon the mountain as the men were not provisioned to stay there for several days. As soon as the Heights were abandoned, the tribesmen swarmed over the position in great numbers.
So on the 20th it all had to be done again but much harder. The 2nd Gurkhas were to lead the assault with the 1st Battalion the Dorsets in support. The regiment was commanded by Colonel J M Piercy, their Commanding Officer since 1894. The 2nd battalion Sherwood Foresters were in reserve. Both these regiments had been posted in Southern India so were not used to the rigours of mountain warfare. The worst aspect of the climb was an open space that had to be crossed. This was a killing ground for the sharp-shooting tribesmen 200 yards above them. At 10am the Dorsets gave covering fire as the Gurkhas dashed across, sustaining 71 casualties in 10 minutes.
Now it was the Dorset's turn. They were not natural hill men like the Gurkhas or the Afridi tribesmen. They had seen little action up until that day. The first four companies, A-D had been giving covering fire and seen how ineffective it was against well hidden tribesmen. Captain Arnold's E Company was first to go. Arnold was hit at once and most of the leading section went down. A few got across, some reaching the half way rocks. Among them was Private Vickery, a Somerset man, aged 24. Seeing a wounded man lying in the open with bullets hitting the ground around him, he ran back, picked him up and carried him back towards the ledge where the remainder of the regiment were taking cover. He saved the man's life and was unscathed himself.
F and G companies fared little better so that only a few of the Dorsets reached the cover of the low cliff the other side of the space. Every man who attempted that dreadful dash faced almost certain death, making them all potential VC winners. A-D companies who had been giving covering fire were running short of ammunition so the Sherwood Foresters were sent to relieve them. One company of the Sherwood Foresters was to go across the space alongside H Company of the Dorsets but this proved too difficult due to the crowded conditions below the ledge and wounded men being treated. They all went over in small groups which created easy targets for the tribesmen.
The CO of the Dorsets, Col Piercy refused to allow A-D companies to attempt the crossing so there was a pause in the action. At around 2pm the Gordon Highlanders were ordered forward. They were spurred on by the desire to show the English how it should be done and swept up the Heights to take the position.
|
|
Boer War 1899-1901
|
|
The 2nd battalion of the Dorsets was in Sir Redvers Bullers force, in the 5th Division (10th Brigade). At the disastrous battle of Spion Kop in January 1900 they were held in reserve and did not share the suffering of the Lancashire brigade. They did, however, gain glory for themselves at Almond's Nek on 11th June 1900 where they led the assault against the Boers with a spirited bayonet charge which resulted in 10 of them being killed and 40 wounded. The regiment was commanded by Lieutenant-Colonel Cecil Henry Laws who had served in the Dorsets for 30 years.
|
|
World War 1
|
|
The regiment served in France and Flanders, Gallipoli and the Middle East, building up to a strength of 10 battalions as the war progressed. The initial two battalions were as far apart as Belfast and Poona. The second battalion, who were stationed in Poona were placed in the 6th Indian Division commanded by Lieut-General Sir Arthur Barrett. The three infantry brigades were made up of Indian troops with one British battalion in each. The 2nd Dorsets were in the Poona Brigade commanded by Brigadier-General Walter Delamain.
Mesopotamia
The Indian Division was sent to Mesopotamia to protect the oil pipeline that supplied the Royal Navy. The main threat came from the Turkish army of the Ottoman Empire who had declared themselves allied to Germany. The Poona Brigade was in Bahrain so they were the first to arrive on 7th November 1914 at Fort Fao at the mouth of the Shat-el-Arab. The fort was taken without loss of life.
Sahil
The Brigade sailed up river and camped at Sanijeh to await the rest of the Division who were travelling from Bombay. The Turks attacked the camp on the 9th and there were other battles on the 11th and 15th. When the Bombay brigades arrived the Division was ordered to Sahain on 17th November to face the 4,500 strong Turkish army advancing from Basra. Sahain was deserted so they moved on to Sahil. The Turks were entrenched in a date grove with a flat plain before them. The artillery and gun-boats barraged their position before the infantry advanced, with considerable difficulty across the boggy and featureless plain. The Dorsets were at the forefront of the advance and sustained 130 casualties. The battle lasted 3 hours but ended with the retreat of the enemy.
Kut el Amara
The British and Indian force under General Townshend moved North towards Baghdad but had to contend with the Turks entrenched near Kut el Amara on the river Tigris. On the 27th September 1915 the 2nd Dorsets and 117th Mahrattas under General Delamain marched through the night and made a successful frontal attack on trenches placed between two marshes. Following this they were exhausted and thirsty but had to fight off a counter-attack. They were keen to reach the river but were faced with a fresh Turkish force of 5 battalions. The exhausted troops charged at the enemy column with bayonets fixed and routed them with a single violent effort. The final result was disappointing as the troops were too tired to pursue the Turks who withdrew northwards in good order.
Ctesiphon
Just south of Baghdad, Ctesiphon is the site of a palace built by the Persian Emperor Chosroes. This ancient site was chosen by the Turks to dig elaborate trenches and gun emplacements to fortify their 4 divisions against the single Allied 6th Division of 25,000 men. The battle took place on the 22nd November 1915 and resulted in the withdrawal of the Turks. The British hung on to the position until the 24th but due to the heavy losses incurred, were forced to retreat after a counter-attack by the enemy.
Siege of Kut
General Townshend's withdrawal to Kut-el-Amara ended badly for the Dorsets. The town, now garrisoned by British and Indian troops, was besieged for 147 days from December 1915 until Townshend' s surrender on 29th April 1916. The Allied soldiers suffered terribly in captivity, resulting in the death of 70% of the British troops.
An extended account of the Dorset's movements and clashes in Mesopotamia can be accessed at The Regimental Museum's Website
|
|
|
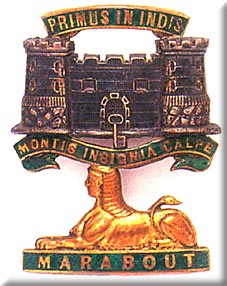 |
| Badges
|
| Motto
|
Primus in Indus - First In India
Montis insignia Calpe (The badge of the Rock of Gibraltar)
|
| Regimental Anniversaries
|
23rd June - Plassey Day
11th Nov - Sarah Sands Day
|
| Marches
|
|
The Maid of Glenconnel
|
| Colours
|
| Corps of Drums and Musicians
|
| Uniforms
|
| 1881 - 1958
|
| Colonels
|
| 1881 - 1958
|
| Commanding Officers
|
| 1881 - 1958
|
| Soldiers
|
| 1881 - 1958
|
Battle Honours since 1881
|
Tirah Campaign 1897-8
TIRAH
South African War 1899-1902
RELIEF OF LADYSMITH
SOUTH AFRICA 1899-1902
Great War
MONS
MARNE 1914
YPRES 1915, 1917
SOMME 1916, 1918
HINDENBURG LINE
SAMBRE
SULVA
SHAIBA
CTESIPHON
KHAN BAGHDADI
Second World War
ST OMER-LA BASSEE
NORMANDY LANDING
CAEN
ARNHEM 1944
AAM
GEILENKIRCHEN
LANDING IN SICILY
MALTA 1940-2
KOHIMA
MANDALAY
|
|
| Titles
|
| Predecessor Units |
| 1702 | 39th (Dorsetshire) Regiment of Foot |
| 1755 | 54th (or the West Norfolk) Regiment of Foot |
|
| Successor Units
|
| 1951 | The Dorset Regiment |
| 1958 | The Devonshire and Dorset Regiment |
| 1968 | In the Prince of Wales's Division |
|
|
| Further Reading
|
|
History of the Dorsetshire Regiment 1914-1919
The Dorset Regiment
by H Popham
(Leo Cooper 1970)
The Dorset Regiment
by by C T Atkinson
(OUP 1947)
|
| Museum
|
The Keep Museum
Bridport Road
Dorchester
Dorset
DT1 1RN
tel: 01305 264066
info@keepmilitarymuseum.org
|
|


