 |
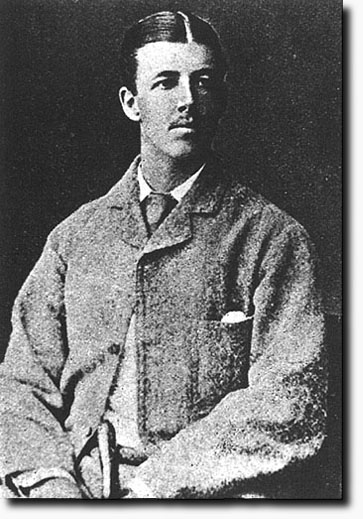
| Hamilton was from Ireland and a great nephew
of General Sir George Pollock who led the Army of Retribution in the First Afghan
War. He joined the 70th (Surrey) Regiment in 1874 and transferred to the Corps
of Guides, one of the most famous and active Indian Army regiments. He won his
VC at Futtehabad where he was obliged to assume command of two squadrons of
Guides Cavalry following the death of Major Battye in a charge against 5000
Afghans who had streamed out of their defensive position behind breastworks at
the top of a steep slope. Hamilton and his intensely loyal men were spurred on
by a sense of revenge for their leader's death and drove the ememy back to the
breastworks and scattered them. In the fight, Hamilton rescued a sowar (Indian
trooper) from three tribesmen. The scene of Hamilton's last stand was the Bala Hissar an enclosure within the city of Kabul. He commanded a small force of 20 Cavalry and 50 Infantry, all from the Corps of Guides, which formed a discreet escort for Sir Louis Cavagnari the Envoy who was to set up the ill-fated residency in Kabul following the Treaty of Gandamak (26 May 1879). This treaty was made with The Amir, Yakub Khan who resided in his palace 250 yards from the British Residency. On 3rd September 1879, one of the Amir's Afghan regiments paraded without rifles to receive arrears of pay. When they realised that they were to receive half what they were expecting, they rioted and killed the Amir's General, Daud Shah. Hamilton and Surgeon Kelly were having breakfast at the time but were rudely interrupted by the mob who entered the residency throwing stones at the troops. The troops fired back, whereupon the rioters withdrew and stormed the arsenal to collect weapons. During this lull in the fight, Hamilton ordered the doors to be baracaded and the roof to be manned. When the Afghans returned they butchered the horses in the stable and fired on Hamilton's men. The Envoy, Cavagnari received a head wound and the troops on the roof were being fired on from a higher building 100 yards away. It became neccessary to go on the offensive and Cavagnari, although wounded, led a sortie that had temporary success although the Envoy was further wounded. Later, Hamilton had to rush to a doorway into the courtyard of the residency with four sepoys (Indian Infantrymen) where the mob was breaking through. Adjoining the courtyard was the officer's mess which had no parapet on the roof and could not be defended from there, so Afghans were able to get on the roof by means of ladders from adjoining buildings. The troops on the barrack roof, which did have a parapet were coming under fire from two field guns which the Afghans had moved into position north-west of the barracks. In all this time, messages had been sent to Yakub Khan appealing for help, but to no avail. The troops in the mess were in danger of being burnt as the building had been set on fire, so they had to get back on to the roof and jump across to the barrack roof. They had to leave Cavagnari behind as he was to ill to move. One of the Afghans' guns was now positioned to blast a hole in the barracks where Hamilton and most of the Guides were. He led a brave attempt to capture the gun but had to fall back after killing the gun crew. Two other attempts involving Surgeon Kelly and the political officer, William Jenkyns, failed causing the deaths of both of them. Lt. Hamilton was the last officer remaining. He led another effort and managed to seize the gun but the other gun was in place. In a last ditch attempt, Hamilton shot and hacked his way through the rebels and placed himself between the gun and them where he finally succumbed to wounds and was cut to pieces. Less than a dozen Guides remained alive under the command of Jemadar Jewand Singh. They were offered terms of surrender but opted to fight to the death. A statue of Walter Richard Pollock Hamilton VC stands in Kildare Street, Dublin. |
Armed Forces | Home | Articles | Introduction | Biography | Discussion | Map Room | Timeline | Art and Culture | Science and Technology | Resources | Index | Glossary | Links | Library | Search |
