|
|


|
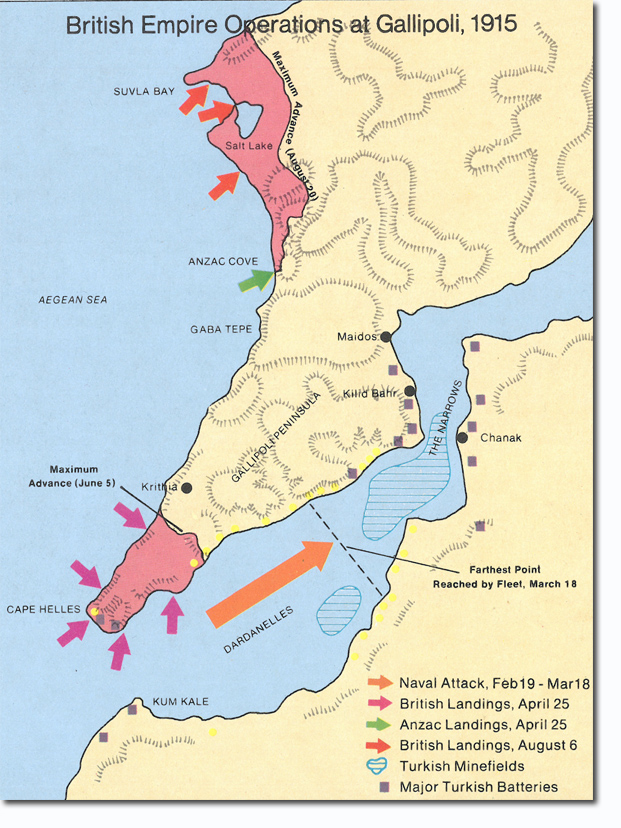
| This map shows how the naval incursion failed to reach its intended target. Consequently, the armies were landed on the Northern stretch with a view to being able to seize and hold at least one side of the Channel to help allow ships through the Narrows and on into the Marmosa Sea. |
Armed Forces | Art and Culture | Articles | Biographies | Colonies | Discussion | Glossary | Home | Library | Links | Map Room | Sources and Media | Science and Technology | Search | Student Zone | Timelines | TV & Film | Wargames