|
|

|
|
The New Zealanders split either side of Rhododendron
Ridge, intending to link up on it for the assault on
Chunuk Bair. But one battalion got lost. Ignoring Birdwood's
order to press on regardless, now-Brigadier General
Johnston now decided to wait for it. Dawn on 7 August
found the rest of his brigade halted on Rhododendron Ridge
a kilometre (0.6 mile) from Chunuk Bair. The stationary
column could be seen from Anzac, where the Australian
light horse sacrificed itself at the Nek in the hope of giving
the New Zealanders a clear run to Chunuk Bair. Still minus
the errant battalion, they did not get moving until 6.30 a.m.,
two hours later, which made the sacrifice futile. At 7.30 a.m.
they came under desultory fire from Chunuk Bair, now
450 metres (500 yards) away, and stopped again.
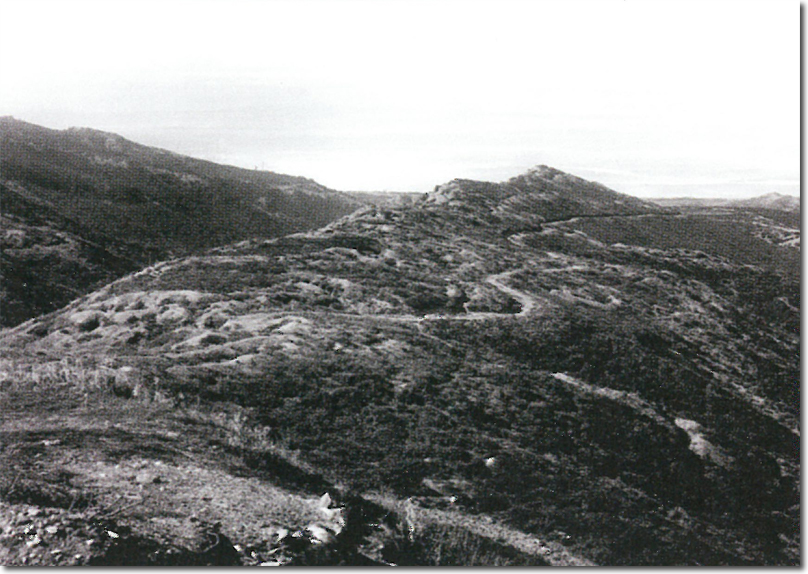
Exactly what followed is uncertain. Reportedly inebriated from swigging rum, Johnston was barely coherent and his brigade-major ran a hurried planning conference. As the fire from Chunuk Bair had increased, it was decided to stay put. The New Zealanders breakfasted, infuriating Godley, who told them to attack. But Turkish reserves that had bypassed Lone Pine on news of the breakout now held Chunuk Bair in strength. They smashed the Auckland Battalion's advance. Godley ordered another attempt early next day as part of a general attack on the Sari Bair crests. Results on 8 August were mixed. The 4th Australian Brigade was almost destroyed on an offshoot of Hill 971; the Gurkhas of the 29th Indian Brigade nearly gained Hill Q. The New Zealanders found Chunuk Bair's crest all but deserted, possibly because the bombardment had cleared it. Led by Lieutenant Colonel William Malone, the Wellington Battalion gazed incredulously at the Narrows and the rear of the Turkish position at Anzac, but relentless Turkish assaults soon forced it back to the reverse slope. Malone led many bayonet charges and Corporal Cyril Bassett braved torrential fire to maintain the rearwards telephone link, winning New Zealand's only Gallipoli VC. When the Wellingtons were relieved after dark - after an epic ranking with Lone Pine - almost 700 of the 760 who attacked were casualties. Malone was dead. Godley let Hill 971 go. On 9 August, the Gurkhas took Hill Q but were blasted off by friendly fire. A composite British brigade tried to seize the crest between Q and Chunuk Bair. Godley wanted it to come up behind Johnston's brigade but did not attend the planning conference. At Johnston's urging, it took an untried route that looked quicker. Ending up lost, it attacked late and was mauled, leaving the Otago Battalion and the Wellington Mounted Rifles isolated on Chunuk Bair. They had lost half their original strength when relieved. On 10 August, a massive Turkish attack overran the two British battalions on Chunuk Bair and the composite brigade on the slope to Hill Q. Chunuk Bair was Turkish thereafter. The final operations, towards the end of August, sought to link Anzac to Suvla by capturing Hill 60 in between. Three assaults, poorly planned and supported, succeeded only in taking a false crest. Fresh from Egypt, troops from the 2nd Australian Division participated. The August offensive cost the ANZAC 8,500 men. Crippled by illness, it had tried to execute, at night and in horrible terrain, a plan that would have tested fit troops. Godley later said as much. He might also have reflected that Chunuk Bair had nonetheless been there for the taking. |
Armed Forces | Art and Culture | Articles | Biographies | Colonies | Discussion | Glossary | Home | Library | Links | Map Room | Sources and Media | Science and Technology | Search | Student Zone | Timelines | TV & Film | Wargames
