|
Brief History
|
|
The Royal Irish Regiment was the only survivor of 19 regiments raised in Ireland from Cromwell's Independent Garrison Companies. It greatly distinguished itself at the siege of Namur where their bravery earned them the gratitude of King William III. He granted the arms of Nassau to them as an emblem to be borne on their Colours, and the motto. They fought in many other major campaigns and were ranked 18th in the line of infantry regiments. In 1922 Eire became a republic and 5 famous Irish regiments had to be disbanded, the Royal Irish included.
|
|
Raising of the Regiment, 1st April 1684
|
|
The regiment was raised in the reign of Charles II from the independent companies of foot regimented on the Irish Establishment. The Colonel given the task was Arthur Forbes, 1st Lord Granard. They were sent to England to fight against the Monmouth rebellion but did not attend the battle of Sedgemoor. They returned to Ireland where they faced one of their severest challenges.
|
|
James II's Purges
|
|
When James II took the throne he set about purging the army of all Protestants. To this end he ordered Lord Tyrconnell to weed out such men and officers from the Irish regiments. Tyrconnell had unlimited power and he demobilised thousands of soldiers from the Irish regiments. Two officers were sacked, John St Lager and Frederick Hamilton who later became Colonel of the regiment. Many good soldiers and sergeants lost their place in the regiment and were caste off to fend for themselves as civilians. Lord Granard the Colonel resigned in disgust and was replaced by his son who did his best to find a way round these draconian measures.
|
|
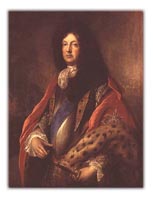
William of Orange
|
|
In 1688 the regiment was ordered to England to prepare to protect James from the invasion of William of Orange. The regiment was 770 strong due to the efforts of the Colonel, Arthur Forbes. However they did not fight against William because James fled the country. The regiment was once again the subject of a purge, this time the Catholics had to be weeded out. The regiment was reduced to 130 men plus officers and sergeants.
The Regiment is Tested 1689
During 1689 when Sir John Edgeworth was Colonel for the two brief months of March and April, there was a scare in England that the soldiers in the Irish regiments were Catholics and thus a threat to King and Country. Sir John Edgeworth brought his regiment within the safety of a walled compound to protect them from the mob. He called for a Protestant cleric to come in and test the men to see if they were indeed Protestants. He asked them to recite prayers that were only to be found in the Protestant liturgy and they were able to do so and prove to him that they were certainly not Catholics. The cleric returned to the mob and was able to persuade them that Edgeworth's Regiment were to be trusted.
|
|
Williamite War in Ireland 1689-91
|
|
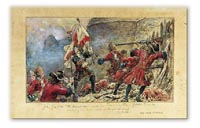
Siege of Limerick, August 1690
The regiment, now called Meath's was considered the best British regiment in the army under Marshal Schomberg, the commander sent by King William, in 1689, to deal with James's incursion into Ireland. They wintered at Lisburn and in the spring of 1690 recruited enough men to reach a strength of 678. When William took the army to the Boyne, Meath's did not play a prominent role in the battle but when the Jacobites installed themselves in Limerick, without James, who had fled abroad once more, the siege began on 9th August. Hampered by lack of artillery the siege proceeded slowly, but a breach was made near St John's Gate on 20th Aug and the grenadiers were sent in.
Danish grenadiers formed the backbone of the attack with grenadier companies from every infantry regiment, including Meath's taking part. They had prepared themselves with fascines to overcome a deep trench prepared by the defenders. However they were forced to withdraw and return to the trenches where they endured several days of heavy rain. Sickness claimed many lives in this period but on 27th Aug, William ordered a renewal of the attack. This was again led by the grenadiers who gained control of a covered way and forced the defenders back. But once inside the city they found that the streets were blocked and they were caught in a trap. They were fired on, and every kind of missile was thrown at them by the civilians. The reinforcements did not arrive due to a failure of communication and the grenadiers lost hundreds of men. Meath's regiment lost 100 men in killed and wounded. Six officers were killed and 8 wounded including their Colonel, the Earl of Meath. Limerick held out until 3rd Oct 1691.
Battle of Aughrim, 12th Jul 1691
William's forces were now commanded by Dutch General Godert de Ginkell. His army numbered around 20,000 when they confronted the French commander the Marquis de St Ruth with a Jacobite army of about the same number. St Ruth prepared the ground at Ballinasloe with his line stretching from Aughrim Castle to Urachree. Meath's regiment were in support of the first wave that had to negotiate a bog to reach the enemy. They had been ordered to wait on the other side for the support troops to cross the marshy ground, but they steamed ahead leaving Meath's and others to re-organise themselves. They were targeted by sharp-shooters and were in disarray when St Ruth's cavalry charged at them. However, after some heavy fighting in which Ginkell's cavalry held off the enemy horsemen, the battle was beginning to be more of an even match. There was a strong reserve of Jacobite cavalry under Sarsfield but although this was the best time to use it, it did not happen for the simple reason that he was under strict orders not to attack unless ordered by St Ruth himself. But St Ruth had been decapitated by a cannonball so was unable to give any orders. The enemy lost heart with the death of their commander and they fled the field, dropping their weapons as they went. They were killed as they ran and their dead bodies littering the hillside looked like a huge flock of sheep from a distance. This battle marked the end of the Jacobite army in Ireland. Casualties were put as high as 7,000 and Meath's regiment suffered one officer, Captain Butler, killed and 4 wounded. Of the NCOs and men, 7 were killed and 8 wounded.
|
|
War of the League of Augsburg 1689-1697
|
|
The regiment wintered in Waterford at the end of the war in Ireland and in the spring of 1692 were sent to Portsmouth as part of the military defence of the south coast of England against French invasion. They were going to take part in a raid on the French coast but they were re-directed to Ostend. From there they marched to Furnes and then to Dixmude where they experienced a sudden violent shaking of the ground which was thought to be the French exploding a mine under the town. But it turned out to be an earthquake. Their stay in Flanders only lasted a few weeks before they returned to England. In May 1693 they were then given Marine duty for which they had to serve on board ships in a fleet commanded by Sir George Rooke. This lasted no more than two months.
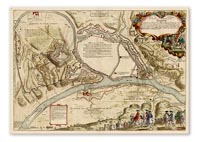
Namur, 20th Aug 1695
In December 1693 they were back in Ostend at the start of William's continental campaign against Louis XIV. The regiment was now commanded by Frederick Hamilton who had been ousted from the regiment in 1689 in King James's purge. They numbered between 500 and 600 and were part of an allied force of British, Dutch, Danish and some German states, amounting to 124,000. The first real action that involved Hamilton's regiment was at Namur, a heavily fortified town at the confluence of the Sambre and Meuse. Marshal de Boufflers commanded the French garrison but there was also a French army commanded by de Villeroi that needed to be kept away so that it did not interfere with the business of the siege. The man selected to fend off Villeroi was the Prince de Vaudemont, who was given a force of 20,000. Hamilton's were in this force and they were required to march many miles to lead the French away from Namur.
They drew them off to Ghent, then Dixmude and finally Brussels where they shared the terrible experience of the French bombardment of that city. Villeroi was prepared to allow himself to be led away as Namur was considered to be impregnable. Bouffler's fortress had been strengthened by the Dutch engineer Baron van Coehoorn and again by French engineer Sebastien de Vauban, and was well equipped with ordnance and men so that when William arrived on 23rd June he was not unduly worried. The trenches of the besiegers were constructed by 28th June and the bombardment began. By 24th July, however, Boufflers surrendered the greater part of the city and moved his army into the citadel which was much easier to defend. William continued to pound the defences with 136 heavy guns and 58 mortars.
Assault on Namur Citadel, 20th Aug 1695
On 10th Aug the regiment had returned from Brussels and were back in the trenches, and by the 19th William was ready to send in the assault parties. The trenches were filled with infantrymen on that night. Two breaches were to be tackled, the Coehoorn, to be attacked by the Bavarians and Terra Nova to be attacked by the British. Lord 'Salamander' Cutts led 700 grenadiers and 4 regiments, one of which was Hamilton's, which was not in the first wave but the reserve. At 10am on 20th an explosion signalled the start of the attack and the grenadiers stormed up Terra Nova, but were cut down severely and had to pull back. Lord Cutts and many others were wounded. It was now the turn of Hamilton's. They struggled over the many dead bodies of the grenadiers, and beyond, suffering many casualties as they went. Through sheer determination they reached the top of the breach and planted their Colours. But when they were there they could see another defensive breastwork that was undamaged. They made a suicidal attempt to storm it and many of those killed that day were victims in that part of the assault. They were forced to give up and retreat. A counter attack by the French pushed them well back.
Meanwhile the Bavarians at the Coehoorn breach had fared badly and were desperately in need of reinforcement. Lord Cutts, although injured called for a forlorn hope detachment and gathered 200 men for a do-or-die charge to relieve their allies. The regiment joined this attack and again lost many lives but it was a success and the citadel was now in their hands.
It was a brilliant but hard won victory but it gained glory for the survivors of Hamilton's regiment. William had watched the regiment's progress and conferred the title Royal Regiment of Ireland as well as the arms of Nassau and the motto VIRTUTIS NAURCENCIS PRAEMIUM. They were also allowed to use the Harp of Ireland as their badge. The casualties were 10 officers killed, 3 more died of wounds and 12 were wounded. The casualties for the other ranks were estimated at 86 killed and 185 wounded. The Royal Regiment of Ireland stayed in Flanders until peace was declared in 1697 and they sailed home in December.
|
|
War of the Spanish Succession 1701-1715
|
|
In June 1701 the Royal Irish went to Holland with 11 other regiments under the Duke of Marlborough. Their first battle was the siege of Venloo in 1702 which caused nearly 300 British casualties. Then came the 9 day siege of Ruremonde and the 18 day siege of Liege which surrendered on 23rd Oct 1702. There was little in the way of action in 1703 but 1704 was a very important year in British military history.
The Schellenberg, 1st July 1704
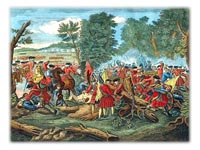
The Duke of Marlborough had disagreements with his allies and was forced to trick the Dutch and conceal his intentions. They did not want Holland left undefended but The Duke knew that he had to take the fight to Germany to defeat the newly allied French and Bavarians. His famous March to the Danube began on March 19th and his army reached Donauworth at the end of June. On 1st July the advance guard set off to attack the enemy on top of the Schellenberg. The Royal Irish contributed 130 men to this force. They advanced to the hill with fascines to fill a defensive ditch but when they came across a sunken road the fascines were thrown down by mistake so that when they reached the ditch they had no way of crossing and were exposed to enemy fire. The infantry would have retreated but for the steadiness of the Guards, the Royal Scots and the Welsh Fusiliers. There was a desperate two hour battle in which the attackers were beaten back several times but the French and Bavarians were eventually forced off the hill and fled across the Danube. They lost 9,000 in casualties while the Allies suffered 5,000 killed and wounded. The Royal Irish detachment of 130 men lost 40 per cent: 5 officers wounded, one sergeant and eleven men killed, and 3 sergeants and 32 men wounded.
Blenheim, 13th Aug 1704
On 12th Aug the enemy were found to be at Hochstadt with a front that stretched from Blenheim village on the Danube to Lutzingen protected by a smaller river, the Nebel, in front of the line. There was boggy land on the banks of the Nebel which had to be crossed by Marlborough's men. Eugene of Savoy was charged with the right of the Allied line and it was his slowness that held up Marlborough's side. The British regiments were 14 in number, commanded again by Lord Cutts. They had the job of attacking Blenheim which was packed with French soldiers. The assault of the fences round the village was made without a shot being fired. The French held their fire until the last minute but their devastating volley did not stop the advance. The British had a very hard fight but there was a breakthrough further down the line when Allied cavalry pushed Tallard's cavalry back so that they retreated through their own men causing panic. The British had the worst of the fight at Blenheim but the defenders had to give up and become prisoners while the remainder joined the general flight across the Danube where many drowned. The enemy losses were great; 40,000, of whom 11,000 were prisoners including the arrogant Marshal Tallard. Total Allied losses were 12,500, the British losing 2,324. The Royal Irish, commanded by Robert Stearne had 166 casualties; 4 officers killed, 9 wounded, 5 sergeants killed and 9 wounded, 52 privates killed and 87 wounded.
Ramillies, 23rd May 1706
After the battles of the Schellenberg and Blenheim the British infantry regiments were sadly depleted and after a 10 day trip down the Rhine in river boats to Nimegen they wintered in Ruremonde and received new recruits from Britain and Ireland. The following year was spent in hard marching but no battles. But in 1706 the Duke brought his army back to the Nederlands to face Villeroi and his army of 60,000. Marlborough managed to trick Villeroi into marching off towards Namur and the armies met at Ramillies on 22nd May. Villeroi was drawn up in an arc with his right wing on Taviers and his left on Autre-Eglise. It was mostly a cavalry battle and the Royal Irish, along with most of the British infantry, had little fighting to do on the 23rd when the battle took place. Villeroi was very wary of the British contingent and the Duke knew this so the infantry was positioned and re-positioned to force the French-Bavarians to race around, re-siting their cavalry and infantry. The Dutch and Danish troops suffered the most casualties out of the allied figure of 3,700. And it was a battle in which Marlborough himself came close to being killed when he was thrown from his horse. But the result was another stunning victory for the Allies and the Royal Irish gained the battle honour RAMILLIES.
Menin, Aug 1706
Malborough followed up this victory with the capture of French occupied cities, Antwerp in June, Dunkirk in July and Menin in August. It was at Menin that the Royal Irish suffered many casualties as a result of indiscipline. They were part of a 20,000 force besieging the fortress of Menin which had been built by de Vauban. On 7th Aug the glacis had to be climbed before trenches could be built by the besiegers. While these were constructed the British infantry had taken cover behind woolpacks and fascines as the defenders fired on them. But without being given orders the Royal Irish and another regiment fired back thus revealing their positions, and became the focus of the French artillery and muskets. The casualty figures vary but the CO, Robert Stearne, writing his history of the regiment, stated that 6 officers and 80 other ranks were killed or wounded. The siege lasted 31 days and ended with the French surrender on 22nd Aug having lost 1,100 killed and wounded while the allies lost 2,600 killed and wounded.
Oudenarde, 11th July 1708
The winter of 1706-7 was spent in Ghent and although there was no battle in 1707 the marching proved deadly for many of the soldiers. Heavy rain turned the roads into quagmires and chasing the French army meant that the ground was well trodden and extremely boggy. The French were now commanded by the very capable Duc de Vendome but at the battle of Oudenarde his strategies were frustrated by his superior commander the young Duke of Burgandy, grandson of Louis XIV. Marlborough stole a march on the French by pushing his army to Oudenarde, a fortified town garrisoned by the allies, on the river Scheldt. The astonished Vendome realised that the British had cut off his route to France and planned to draw up his army on the west bank of the Scheldt to deal with the allies as they crossed over on pontoons. But Burgandy scuppered this idea and ordered the army to form up further back. This allowed the allies to cross the river and engage the French in isolated areas rather than one pitched battle. The Royal Irish were one of the first in action, at the village of Eyne which contained French troops cut off by Burgandy's re-siting of the army. They put up a fight but realised they were outnumbered and tried to retreat. They were pursued into a marsh by Hanoverian cavalry led by the Electoral Prince George (later George II of Britain). The battle was a long hard struggle mostly around the villages of Diepenbeke and Groenewald in which the Dutch infantry lost 1,500 men. As night fell Marlborough told his men to halt where they were, and continue the battle in the morning, but at daybreak there were no French to be seen. Burgandy had urged the army to run away, which they were happy to do, but Vendome managed to salvage a disciplined force to act as rearguard and prevent a massacre. Overall the French suffered 6,000 killed and wounded and lost 9,000 as prisoners. The Allied casualties were 3,000 killed and wounded. The British losses were relatively light: 53 killed and 177 wounded, of which the Royal Irish lost one officer and 8 other ranks killed, and 12 wounded.
The Siege of Lille 1708
The siege of Lille was undertaken by Eugene of Savoy, Malborough's ally in the war. The allies were divided and Eugene surrounded Lille while Marlborough pursued the French elsewhere. Five British regiments were assigned to the siege and the Royal Irish was among them. During an assault on 7th Sept there were 3,000 casualties on the allied side, 350 British among them. On 22nd Oct the French defenders abandoned the town and retired to the citadel but the siege came to an end on 9th Dec 1708 when Boufflers and his garrison surrendered. Over the period of the siege the regiment lost 5 officers killed and 200 other ranks killed or wounded.
Siege of Tournai 1709
The French commander, de Villars, built the defensive Lines of La Bassee from Lys to Douai and Marlborough spent most of the year attacking Tournai. The Royal Irish were sent off with an expedition to reduce some smaller forts in the defensive line and were then marched back to Tournai where they were just in time to help combat a sortie sent out by the defenders. The siege lasted from July to early September and involved much tunneling and mining in the underground defences of the citadel. Both sides attempted to place explosives in the other's tunnels and in some cases they met for subterranean skirmishes involving bayonets and pistols. One encounter led to a platoon of grenadiers succumbing to smoke inhalation when the French created a fire. The siege ended with the French capitulation on 3rd Sep having suffered 3,000 casualties. The besiegers lost 5,233 killed and wounded although the British losses were 178 killed and 521 wounded. The figures for the Royal Irish are not known.
Malplaquet, 11th Sept 1709
During of the siege of Tournai Marlborough took a large section of the allied army off to Mons and de Villars set up an elaborate defensive position at Malplaquet. The area was heavily wooded and the line stretched from La Folie on the left to the Woods of Lainieres on the left. The Duke planned to attack the two flanks simultaneously in the hope that de Villars would take men away from the centre to reinforce one or other of the flanks. He was then going to send in concealed British regiments to seize the depleted trenches and send his cavalry through. The Dutch lost many men in the tough fight against the French right wing, but Eugene of Savoy made steady progress on the French left and it was here that the Royal Irish had their battle. They were one of the last regiments to join the allies at Malplaquet. Having completed the siege of Tournai the besiegers headed off to where the Duke was waiting to begin the battle. The Royal Irish found themselves almost isolated in the Wood of Blaugies where they came face to face with the Jacobite Irish Brigade who were fighting on the side of Louis XIV. They exchanged musket fire in a disciplined fire fight and their opponents were the first to give way. The Irish Brigade retreated leaving their dead and wounded. One of the wounded was a Lieutenant O'Sullivan and it was from him that the regiment found out who they had been up against. In this skirmish the regiment lost two officers wounded, 4 men killed and 6 wounded. These figures show that the regiment suffered lightly compared with other units. The allies lost 20,000 casualties that day out of 95,000. The Dutch came off worst with 8,680, the Hanoverians with 2,219, the Prussians 1,694 and the British overall losing 1,783. Despite the heavy casualties the French, who suffered 13,000 casualties, were forced to retreat after a brave fight. The allies were too exhausted to pursue them. It was Marlborough's least successful victory.
Siege of Aire 1710
In 1710 the towns of Douai, St Venaut, Bethune and Aire were captured. The Royal Irish were part of the siege of Aire which lasted 10 weeks and resulted in the French losing 7,000 men in killed and wounded. The Allies lost 1,400 and the Royal Irish Regiment fared worse than at the battle of Malplaquet. They lost 3 officers killed, 5 wounded and 80 other ranks killed and wounded.
Siege of Bouchain 1711
Marlborough cleverly lured Villars away from Arleux and force marched his army to that city and by outwitting the French was able to penetrate the defensive line. The 13 day march was so arduous that many soldiers died. The Royal Irish were a hardy regiment and suffered less than most. In one 18 hour period they covered 40 miles. The siege itself resulted in the loss of 40 men of their men killed and wounded, and 4 officers wounded.
Ghent 1711 - 1715
After winning such great military victories over the course of 10 years it would be expected that the Duke of Marlborough would be given a hero's welcome back in London, but instead he was rebuked and reviled. The British army was now commanded by the Duke of Ormond and there was a peace made with the French that was independent of the other allies. So the army was regarded with disdain by the Dutch and there was an atmosphere of bad-feeling. At one point there was a general mutiny of the army and they were sent home to England. The Royal Irish Regiment and one other regiment remained in Ghent until 1715. They had earned themselves a reputation for valour and determination but it was not until 1882 when the battle honours for BLENHEIM RAMILLIES OUDENARDE and MALPLAQUET were officially sanctioned.
|
|
Service in England 1715-17
|
|
The regiment returned to England at the beginning of the reign of George I, and were stationed in Oxford in 1715 where they came to blows with the students at the university. On the birthday of the Prince of Wales, 9th November, the officers made a bonfire outside in the street and went inside to celebrate the royal birthday. Students threw stones through the windows, at which the men of the regiment came out and rampaged through the town breaking every window where they thought the Prince's birthday was not being celebrated. An enquiry decided in favour of the Royal Irish Regiment.
|
|
Siege of Gibraltar 1727
|
|
The regiment were sent out to Minorca in 1718 and were stationed there for the next 24 years, until 1742. In 1727 the Spanish threatened the garrison at Gibraltar and a force of British troops was sent from Minorca in February, but the Royal Irish was not with them. However, a detachment of the regiment was sent to Gibraltar on 7th April after the siege had been in progress for six weeks. They were part of a reinforcement of 500 men commanded by Brigadier-General Cosby who was Colonel of the regiment. There was a further draft of men at the beginning of May, bringing the garrison up to 5,500 men. In the first week of May the Spaniards started a serious bombardment of the British defences which continued unabated for 14 days. It was said that in the course of an hour, 700 projectiles were fired at the shell-shocked troops so that they "seemed to live in flames". This subsided after 20th May and the British began to rebuild their walls. They set up 13 new guns and 100 mortars to repay the besiegers, and pounded their trenches. More guns were put in place and the Spanish suffered many more deaths than the British had done. The casualties of the Royal Irish are not known but the British officers suffered 5 killed or wounded, the other ranks lost 69 killed, 49 died of wounds or sickness and 207 were wounded.
|
|
Minorca 1718-1742
|
|
Britain had control of Minorca for most of the 18th century and the Royal Irish were posted there before and after the siege of Gibraltar. They relied on recruits sent out from Britain and there is some interesting correspondence between the commanding officer on Minorca, Major Gillman, and the Colonel, John Armstrong. Gillman complained about some of his NCOs and asked for two sergeants of good quality for which he would willingly pay for out of his own pocket. He also had something to say after being in receipt of a draft of 16 new recruits: 'They are the worst I ever saw. Two of them the officers would not draw for: one of them wanting above half his right foot, the other having his backbone and ribs of both sides distorted in a prodigious manner, by which means he is an object of compassion. Both men are to be sent back to England at the expense of the person that recruited them.' Two other men of the regiment are worthy of mention in this period; Sergeant John Millner proved to be such a useful soldier that Major Gillman, in 1736, recommended him for a commission and the position of adjutant. In January 1737 Lieutenant John Dalbos died 'of a tedious and lingering disorder attended with the gout', at the age of 75.
|
|
War of the Austrian Succession 1740-48
|
|
Ostend 1745
After returning to England in 1742 the regiment were posted at first to the west of England and then at Fareham to guard prisoners of war. They were sent off to the continent to join the Duke of Cumberland in the aftermath of the battle of Fontenoy which took place on 11th May 1745. The French then threatened Ostend so the Royal Irish were sent there to reinforce the allied garrison, made up of Austrian, Dutch and British troops. The British were contemptuous of their allies because of the debacle at Fontenoy and this caused low morale, also the fortifications were in ruins due to poor management by the Dutch, and after a few days they capitulated. The terms of surrender were badly worded so that when the French promised to give the garrison a safe passage to Austria, they were able to take them as far as St Gillain and abandon them to the mercy of another French army posted near Mons. It was only through careful movement by night, in silence, that they managed to reach Mons, but once there they were confined for 3 miserable weeks until it was safe enough to reach Brussels.
The Jacobite Rebellion 1745
They returned to Britain in Nov 1745 and were shipped to Scotland along with the 12th 16th and 24th regiments but a scare report of French ships forced the fleet to shelter in the Humber, thus delaying them and causing them to be too late for the battle of Culloden. But the regiment spent two years in Scotland, building roads, after which they were sent to Ireland. While there they were re-titled and numbered, in 1751, The 18th Royal Irish Regiment of Foot. They were prepared for the Seven Years War when in 1755 their strength per company was increased from 29 men to 78, but they were not to see any action.
|
|
War of American Independence
|
|
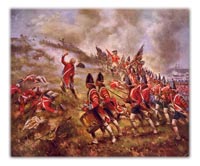
Lexington and Concord, 19th April 1775
The Royal Irish were sent to North America in 1767 and were stationed in Philadelphia. In 1774 they were posted to Boston but by this time their strength was low due to lack of recruits from Britain. On 18th April a force of 1,800 men was sent to Concord at night to destroy a store of weapons belonging to the militia raised by the colonists. This force was made up of grenadier and light companies from the regiments in Boston. They reached Concord after a brief firefight at Lexington but there they were surrounded by Americans who drove them back to Lexington where they were at first saved from destruction by another British force, but they too had to retreat back to Boston. The loss to the force was 19 officers killed or wounded, and 250 other ranks killed or wounded. The Royal Irish lost two killed and 4 wounded, from flank companies already severely reduced in strength.
Bunker Hill, 17th June 1775
The British were short of rations in Boston, and ships sent from Britain to relieve their plight were either swept off course or captured by the Americans. Disease and starvation reduced their numbers and morale was very low so that by June when the colonists seized Bunker Hill there was at least the chance of a fight to stiffen their resolve. The force sent to assault the hill included the 5th 38th 43rd 52nd and the Marines as well as 20 flank companies from other regiments. The Royal Irish contributed what was left of its light and grenadier companies. The first assault was devastated by a controlled volley from the colonists who waited until the last minute to open fire. The attackers were sent reeling back and were strongly encouraged to try again. The same result was achieved with the second assault, but with the third assault the colonists ran out of ammunition and were routed with the bayonet. The battle was won at a high price: the British lost 1,054 killed and wounded, the Royal Irish lost 3 killed with one officer and 7 wounded.
Siege of Boston
George Washington was in command of the American forces and managed to capture ships, artillery and ammunition with which to bombard the besieged British in Boston. By March 1776 the position of the British had become untenable and General Howe arranged for the evacuation of the army. They were allowed safe passage to Halifax in Nova Scotia in return for not burning Boston to the ground. The 18th Royal Irish, very reduced in numbers, were allowed, in the summer of 1776, to return to England to recruit and come up to effective strength.
|
|
Guernsey 1783
|
|
From 1776 to 1783 the regiment was stationed in England and the Channel Islands. It was on Guernsey that a mutiny took place which was suppressed by the 18th and other units. One of the regiments, the 104th Foot which was made up of many Irishmen, behaved in a very insubordinate way and shot at their officers through the windows of their mess. The 18th surrounded the building where the mutineers took up a defensive position and forced them to surrender. The governor of Guernsey gave 100 pounds to the NCOs and men of the 18th to show the island's appreciation.
|
|
French Revolutionary Wars 1793-1802
|
|
Siege of Toulon 27th Aug -18th Dec 1793
The 18th were posted to Gibraltar from 1783 to 1793. When the French Revolutionary War broke out there were pro-royalist areas of France that did not support the Republic and Toulon was such a place. The city was handed over to British control and on 27th Aug Admiral Lord Hood took charge and sent away those Frenchmen with revolutionary sympathies. Reinforcements were sent for but the British response was lack-lustre and on 27th Oct only 750 men, including the 18th Royal Irish, were sent, from Gibraltar, to bring the garrison up to 2,000 British, 6,500 Spanish, 4,700 Neapolitans, 1,500 Piedmontese and 1,500 French.
On 30th Nov there was a sortie organised to neutralise a battery being set up by Napoleon Bonaparte himself on the Aresnes heights. The force chosen was led by General O'Hara and consisted of 400 British, 300 Piedmontese, 600 Neapolitans, 600 Spanish and 400 French. The assault of the heights was successful but instead of remaining there in possession of the guns, they pursued the enemy too far and came under attack themselves. O'Hara was captured along with most of the others. Many were killed, and the 18th suffered 24 wounded. On 16th Dec another battle took place at Fort Mulgrave, an outpost of the city. The 18th were responsible for the south side but had to defend the whole fort after the Spanish were driven off the north side. Captain Connelly distinguished himself with a small party of men against a determined assault. Another fight took place at Mount Faron which was under-manned because the approach was regarded as too difficult for an attacking force. It was in this battle that Napoleon suffered a bayonet wound in the leg inflicted by a sergeant of the Royal Irish Regiment.
On the 17th and 18th Dec it was decided that Toulon had to be evacuated. The outposts were emptied and the arsenals and French ships destroyed. This work was carried out by men of the 18th under Ensign W Iremonger and proved to be a dangerous undertaking; they were fired on constantly. The regimental casualty list for the siege includes 3 sergeants, one corporal and 34 privates killed; and one officer, 2 sergeants, 2 drummers, one corporal and 32 privates missing. These figures are from the regimental history which usually provides figures for killed and wounded. No wounded figure is given here, only an unexplained number of missing personnel. When the Revolutionaries took control of the city they exacted a cruel revenge on the royalist sympathisers and prisoners. Perhaps the missing men were among the 2,000 unfortunates who were executed by the French.
Calvi, 6th July-10th Aug 1794
The British sailed east to Corsica and threatened Bastia, on the northeast of the island, which soon surrendered. The army disembarked and the Royal Irish were left to garrison the town. When the fleet moved around to the west of the island, they found that Calvi was a more difficult nut to crack. The regiment was summoned from Bastia and on 6th July 1794 they were ordered to make a feigned attack on Monteciesco while Sir John Moore's light infantry and grenadiers set up a battery to bombard Fort Mozzello. The assault of the Mozzello was made on the 18th July and the Royal Irish under Lt-Col Wemyss attacked and captured the Fountain Battery. They entrenched themselves in great haste so that when the French counter-bombardment rained down on them they did not suffer too badly. The siege went on until the 10th Aug 1794 when the French capitulated and were allowed to return home.
Sickness in Calvi
The casualties for the Royal Irish Regiment were 5 soldiers killed, two officers, one sergeant and 7 men wounded. When they marched into Calvi they were greatly reduced by sickness so that their effectives were only 2 officers, 4 sergeants and 71 men. Over the course of 9 months they suffered so badly from malaria that 4 officers, 9 sergeants, 6 corporals and 155 privates died. The worst month was August in which 70 men died. The British had temporary control of Corsica from 1794 to 1796 and appointed a Viceroy, Sir Gilbert Elliott. One of the officers of the Royal Irish, Major Montresor, governed Calvi and was put in charge of a battalion of Corsicans raised by Elliott.
Elba 1796-7
But by Oct 1796 the Corsicans decided to support their compatriot, Napoleon, and wanted the British off their island. The decision was made to evacuate and on the 14th Nelson's fleet arrived at Bastia to take them to Elba, 40 miles to the east. The French were in Tuscany by this time and were reported to be at Leghorn (Livorno). On 18th Oct the British reached Elba, but they could not support their army from the island's resources. To secure their contact with the mainland a force was organised, commanded by Colonel Wemyss and consisting of the Royal Irish Regiment, now under Lt-Col H T Montresor, 2 companies of de Roll's Swiss Emigres and some artillery. They were sent over, on 7th Nov, to capture Piombino, the nearest town but the countryside was flooded so a detachment marched north through the floodwater to Campiglia. Montresor was in command of the 500 men who captured this town, by surprising the French guards.
The army on Elba was under the command of General John de Burgh and it was he who refused to evacuate the troops when Britain decided to withdraw from the Mediterranean. Nelson brought the fleet to Elba at the end of Dec 1796 but there were no evacuation orders for de Burgh. When Nelson advised him to embark for Gibraltar he decided to keep the army, along with the Royal Irish, where they were. The fleet left and fought the Spanish at Cape St Vincent off southwest Portugal on 14th Feb 1797. It was not until the end of April that they returned to Elba and the regiment was finally taken off.
Gibraltar 1797-1800
The regiment spent the next two years in Gibraltar and became part of Sir Ralph Abercromby's army which was shunted around, at first towards Genoa, but they had to change course to Minorca where they trained for a few weeks. They returned to Gibraltar in Sep 1800 and were reinforced by another 3,800 men brought there by General Sir James Pulteney (formerly Murray) who had been Colonel of the 18th since 1794. There was a planned raid on Cadiz but that was aborted at the last minute and they returned to Gibraltar once more. That trip was fraught with discomfort and sickness because of stormy seas, lack of food and overcrowding on the ships.
Aboukir Bay, 8th Mar 1801
The fleet gathered in Malta and departed on 20th Dec 1800 for the Bay of Marmorice, an excellent harbour on the coast of Caramania, southwest Turkey. The Sultan had given permission for the British to use it as a base where they spent 6 weeks training intensively for the landing and consequent campaigning in Egypt. Firewood was gathered and sledges built to transport supplies across the desert sand. On 22nd Feb they set sail and anchored off Aboukir Bay eight days later. The 18th RIR (523 men) were in the 2nd Brigade commanded by Major-General Cradock, with the 90th (850 men) the 13th (750 men) and the 8th (538 men). The 18th, commanded by Lt-Col Montresor, had one major, 5 captains, 16 subalterns, 5 staff (adjutant, surgeon, paymaster etc), 32 sergeants, 14 drummers and 449 rank and file. Most of the army were taken ashore by sailors in flat bottom boats where they sustained serious casualties from the French defenders. The 18th was fortunate to avoid the heavy fighting and were transported in small Greek ships with a shallow draught.
Battle of Mandara, 13th Mar 1801
Abercromby's men proceeded towards Alexandria but were faced with the French army at a line of sandhills near Mandara (or Mandora) on 13th March. In this battle the 90th regiment suffered very heavy losses and the 18th saw some action when the French cavalry rode along the front of one of the brigades without being fired upon because their green uniforms caused them to be mistaken for Hompesch's Cavalry. When they tried to ride through a gap in the line they were fired on by the light company of the 18th and then by the whole regiment. This stopped them and proved to be an important point in the battle. The cavalry unit was in fact the 18th Regiment of French Dragoons. The casualties were heavy compared to Aboukir Bay: one officer killed and 3 wounded, one sergeant and 45 men killed or wounded.
Alexandria, 21st Mar 1801
The battle of Alexandria was the most important of the campaign and is remembered mostly as the day that Sir Ralph Abercromby was mortally wounded. The French infantry was making little headway in the battle so the French commander Menou sent his massed cavalry through. However they came to grief in the British camp where they were fired on by the men guarding the baggage. Their retreat caused the whole of the French army to retire with the loss of 2,000 men. Their casualties would have been worse but for the Royal Artillery's lack of ammunition. The 18th on the left flank of Cradock's Brigade were not seriously engaged and got off lightly with only 2 men wounded.
End of the Campaign, Mar-Aug 1801
When Rosetta was captured the 18th were sent to reinforce the British garrison there. The CO Lt-Col Montresor was chosen as governor of the town. After his death Abercromby was replaced by General John Hely-Hutchinson who later became Colonel of the regiment. There was little fighting after 21st March and the French surrendered Cairo on 27th June, and Alexandria on 31st Aug. The casualties of the 18th in the Egypt campaign were: one officer, Captain-Lieutenant G Jones, killed and 4 other officers wounded. 56 men died of wounds or disease and in July it was reported that 200 men of the regiment were suffering from ophthalmia. The Sultan issued a gold medal to all the officers in the army, but the British government did not follow suit until 1847 when the few officers still living received the Military General Service medal with the EGYPT bar. All the regiments that took part were awarded the battle honour EGYPT and allowed to have the Sphinx as their badge.
|
|
Napoleonic Wars 1803-1815
|
|
2nd Battalion 1803-1814
When the war with Revolutionary France was resumed the army was built up once again and the Royal Irish raised a second battalion in Ireland in 1803. This unit served in Scotland until 1804 and then both battalions were sent to Barham Down in England. After a few months the 2nd Battalion went to Jersey and then in 1807, with an establishment of 726 men, they were shipped off to the West Indies to Curacoa. The battalion was depleted over time with sickness, death and transfer to their sister battalion in Jamaica. They were finally disbanded in 1814.
Jamaica 1805-1817
After their service in Egypt the 18th returned home to Ireland via Malta and Elba, arriving in Cork in August 1802 to face reduction following the Peace of Amiens. But in 1804 they went to England with their new sister battalion and after a few months sailed, in Jan 1805, to the West Indies, arriving there in April. They were stationed in Jamaica for 12 years and saw little action apart from an expedition to San Domingo in 1809 when they had an arduous march to some French forts which surrendered without a fight. The regiment was commanded by Major R Campbell at this time and although they did not sustain any casualties in battle they certainly suffered in other ways. They experienced earthquakes, tidal waves, floods, fire, and mutiny amongst the locally raised units. But worst of all was the sickness. During their 12 years in the region the two battalions lost 52 officers and 1,777 men. In one period, from Dec 1st 1805 to Jan 25th 1806 they lost 140 men.
|
|
Service 1817-1837
|
|
The regiment was now only one battalion and with great relief sailed home, landing at Portsmouth in March 1817. They went to Ireland but in 1821 were stationed in Malta for 3 years, and then the Ionian Isles for 8 years. In March 1832 they returned to England and stayed in the north where they were on riot-control duty. They helped to quell riots in Sheffield, Bolton and Preston. On 8th May 1834 they had a new experience; railway travel. They 'proceeded by railway conveyance' to Liverpool and then on to Dublin. On 20th Dec 1834 the Adjutant-General reported that their 'excellent state of discipline is highly creditable to Colonel Burrell'.
|
|
First China War 1839-1842
|
|
Chusan, 6th July 1840
The regiment were sent to Ceylon in April and May 1837, but in 1840 they were ordered to China with a strength of 667 all ranks, accompanied by the 26th Foot, the 49th Foot, and the 37th Madras Native Infantry. They sailed past Canton and stopped at Chusan (Zhoushan) on an island at the mouth of the Hangzhou Wan. The 18th, now commanded by Lt-Col Henry Adams, attacked the fort there and captured it without much loss. However, during the several months spent in that unhealthy place, with poor food and accommodation, they lost 2 officers and 50 other ranks through sickness, although the 26th Regiment fared worse, having their strength reduced from 900 to 291.
Canton, 25th May 1841
A treaty was signed with the Chinese that ceded Hong Kong to the British but which required the relinquishing of Chusan. The army were only too pleased to leave there but the British government sacked the plenipotentiary Charles Elliot for this decision and replaced him with Sir Hugh Gough. The Chinese reneged on the treaty and the British force of 2,800 directed its efforts against Canton. The heights behind the city were strategically important and to that end Gough took the bulk of the army on a circuitous route to reach them. The 18th were now down to 25 officers and 495 men. They, along with the 49th, the 37th Madras NI, Marines and Naval Brigade went by boat up river to a village called Tingpoo. On 25th May a small detachment of the RIR were left with the boats while the remainder headed for the forts on the heights. The detachment of 30 men was commanded by Lieut Cockburn and they were attacked by a large force of Chinese, but they put up a strong defence and their brave action was highly commended. In the advance on the forts the artillery was brought forward and a bombardment exchanged with the defenders. The 18th were ordered to drive the enemy from the hills near the east forts and they moved forward in extended order accompanied by Brigadier Burrell their former CO. They won this fight but were now threatened by fire from an entrenched camp. The 49th were sent to clear a village nearby and the 18th along with a company of Marines had to dash along a causeway that was the only route across a paddy field. The assault was led by Captain John Grattan who later commanded the regiment. His bravery was rewarded by Gough who appointed him the bearer of dispatches. They captured the camp, destroyed the enemy arsenal and burned their tents. The battle had cost the regiment 3 officers wounded and 5 other ranks killed or wounded.
Amoy, 26th Aug 1841
The regiment suffered badly with malaria, at one time having 136 men in hospital. Three officers died as well as 75 of the rank and file. The numbers were made up with a draft of 2 sergeants and 305 men from Britain so that by 1st Aug 1841 the strength was 747 men. Amoy was a seaport, 300 miles up the coast from Hong Kong. Lord Gough took the 18th, the 49th and the Marines to attack and capture the fortified town there. The walls were heavily protected by Chinese artillery, The men were put into boats at midday and towed by the steamship Nemesis. The grenadier and light companies were led by Major Tomlinson in an attack on the flanking wall which was easily stormed on 26th Aug. The rest of them attacked frontally and got over the walls by stepping on each others backs. The Chinese scattered in all directions and the battle was won with very little problem. 500 enemy guns were captured.
Tinghae, 1st Oct 1841
Lt-Col Adams led 300 of the 18th Regiment along with the newly arrived 55th in this attack. There were 30 casualties of whom the 18th suffered only a sergeant and 6 men wounded.
Chinhai, 10th Oct 1841
In this battle the 18th were faced with the obstacle of an unfordable canal. On the other side were the Chinese defences from where artillery and rockets were fired on them. The only way of crossing was by means of a bridge which had a narrow archway on it. The men could only get through one at a time and then only if they took off their greatcoats. They had a large drum that went with them into battle and this was too big to go through so the drummer, Called McGiff and his drum were put on a boat in which he was to cross over by himself. The Chinese thought the drum was a special weapon and directed their fire towards McGiff and his boat. Luckily he managed to make it to the other side with his drum only slightly damaged. Once over the regiment soon put the enemy to flight, sustaining one man killed and 4 wounded.
Ningpo
They marched unopposed into Ningpo on 13th Oct but they had to stay there for a few months. The soldiers were surprised at the attitude of the local people. The Chinese soldiers mostly ran away and had to be pursued and killed to deter the rest from putting up any resistance. The populace stood by and watched the fighting without getting involved. The regimental history says:
'The attitude of most of the Chinese throughout the campaign, indeed, was one of complete apathy; they looked upon the war as an annoying but unavoidable interruption to their daily life, and finding that their conquerors treated them well, acquiesced in their presence, and made as much money out of them as possible.'
Chapoo
The aim at Chapoo was to destroy the Chinese arsenal before the fleet sailed up the Yangtse. 300 Tartars took refuge in a stone building and laid a trap for the British. They made it very dark inside and difficult to penetrate so that soldiers entering could be shot before they became accustomed to the gloom. The 18th hesitated to go in and decided to wait for the artillery, but when men of the 49th realised what was going on they made comments that stung the CO, Lieut-Colonel Nick Tomlinson. He immediately organised a detail of men to follow him in and face whatever danger they found. The result was the death of Tomlinson, a sergeant and 3 men. Thirty others were wounded. The building was eventually torched and most of the Tartars who wore cotton padded uniforms, burned to death.
Chinkiang Fu, 21st July 1842
On 19th June the regiment marched inland for 14 miles to Shanghai and destroyed the arsenal there. They returned to Woosung where Major Jerimiah Cowper took command and they were united with a company that had been left at Chinhai. The British were also reinforced by the addition of the 98th Foot and some more Madras NI battalions. The decision was made to proceed up-river to Nankin but on the way they had to attack the fortified town at Chinkiang Fu, 50 miles from Nankin.
On 21st July they were in Brigadier Bastley's brigade which was ordered to attack the West wall. The regimental history states that the 18th were the last to go ashore at 7am at which time it was already so hot that the regiment were ordered to remove their greatcoats and stocks from around their necks. It was the first time that they had fought without greatcoats, which seems extraordinary as this was their third summer in China. They were told that they would be provided with fur coats from a store where the wealthy Chinese put their winter clothing. The regiment was called to the Western Gate where they were met by Gough. The other regiments were suffering from heat exhaustion so the 18th were ordered to place themselves near the gate and deal with the Chinese gunners. They did this from the cover of houses near the gates, and the engineers were able to place enough explosives to blow the gate.
The 18th then stormed through in a thick cloud of smoke, stumbling over a pile of sandbags. They found themselves in a courtyard with another gate ahead of them. This they battered at to find a way through until a voice the other side said "Hold on, we'll open it for you!" It was the 55th regiment who had stormed another wall and penetrated further. The 18th moved off 'Left in Front' and proceeded along a narrow rampart three abreast. Some Tartars were spotted coming out of a building ahead but the CO insisted that they were coolies and of no consequence. However, these Tartars set themselves up behind a low wall and fired on the the leading men, killing Captain Collinson of the Light Company, and others. The Light Company dashed down a ramp and routed the enemy snipers, but one large Tartar with a sword in each hand stood his ground. His bravery impressed the officers who signalled him to run away but instead he hurled himself at them and was shot dead.
The Grenadier Company, led by Captain Wigston, were threatened by some Tartars who lined up a short distance away. Lt Venour and 12 men were sent off to deal with them but they put up a stubborn resistance. Another section, of 14 men led by Lt Hewitt were ordered to help, and a hand-to-hand fight ensued, in which Pte McCarthy lost a thumb whilst fending off an attack on Hewitt. There were some houses occupied by the enemy so some men were left to watch and wait for them to come out. One man did rush out and stabbed a soldier so it was decided to burn the houses.
The population of Chinkiang Fu had been led to believe that the British were barbarians who would torture them so panic set in and many committed suicide. The Tartar General killed himself in a burning house rather than be captured. At the end of the battle the army had lost 2 officers and 30 killed, 11 officers and 98 other ranks wounded, and 3 missing. The Royal Irish lost one officer and 2 men killed, one officer, 2 sergeants and 15 wounded.
Cholera on Kalangsu
The siege of Nankin never happened because the Chinese sued for peace and signed a treaty in August 1842. After the trials and tribulations of the last three years the regiment was looking forward to leaving China for good, but worse was to come. Four companies were stationed at the unhealthy Chushan and the rest of the regiment were ordered to the island of Kalangsu. On reaching there they found the detachment that had been posted there for some months in 'a deplorable condition'. All the officers were sick and the men hardly fit for duty. After a short time the rest of the regiment fell ill with cholera and fever. Many died, and the coffin-makers could not work fast enough. To compound the problem a draft of 300 fresh troops came out from England with some wives and children. They soon succumbed to the sickness. The deaths on the island of Kalangsu amounted to 136 before the regiment was shipped off, first to Chushan and then Hong Kong.
Canton 2nd April 1847
The people of Canton started to attack the British merchants in early 1847 so the Plenipotentiary, Sir John Davis, took action to prevent further trouble. He was a believer in 'A word and a blow; a blow first.' So the Royal Irish (509 men) under the command of Lt-Col Cowper and the 42nd Madras NI (399 men) were landed near the Chinese artillery batteries to put them out of action. They spiked the guns but left enough in good order to be able to use them against other fortifications. Soldiers occupied the factories and used them as a base to storm the town. However, the Chinese gave up and promised to keep the peace. There were no casualties in this the last action of the 18th's tour of duty in China.
Departure from China, 20th Nov 1847
As usual the number of men who lost their lives through sickness and wounds far exceeded those who died in battle. Two officers died in action, Lieut-Col N R Tomlinson and Captain C J R Collinson while eleven died of sickness; Major R Hammill, Lieutenants H Vavasour, A Wilson, F Swinburn, D Edwardes, J Cochrane, G W Davis, S Haly, the Hon C H Stratford, Ensign M Humphries and Assistant-Surgeon J Baker. Six wounded officers recovered. Of the other ranks, 9 were killed in action and 77 wounded. 214 died of sickness or wounds. The regiment received the thanks of Parliament and were awarded the battle honour CHINA with the emblem of the Dragon. CBs were awarded to Colonel George Burrell, Lt-Col H W Adams, Lt-Col J Cowper and Captain John Grattan.
|
|
India 1848
|
|
The regiment left China in Nov 1847 and arrived at Fort William on 10th Jan 1848 under the command of Major W F Dillon. There were 24 officers, 42 sergeants, 15 drummers and 595 rank and file. A fresh draft from Britain of 7 officers, one drummer and 334 rank and file brought the total strength up to 1,018. They were sent to Umballa in March 1949 when trouble flared up in the Punjab, but they were not required to fight. At the end of the year they were posted to Meerut where a further 220 recruits were added to their strength. The Viceroy, Lord Dalhousie made a trip to Lahore in the recently conquered province and was escorted by the flank companies of the Royal Irish. This detail was commanded by Captain C A Edwards and they acted as his personal bodyguard night and day. They also guarded their prize prisoner Duleep Singh on the trip back to Meerut.
|
|
Loss of the Buckinghamshire, 3rd Mar 1851
|
|
In 1851 the regiment was ordered back to England and some of the officers sailed off on the 'Buckinghamshire', but on the 3rd March the ship caught fire and the officers had to abandon ship but were saved. The mess silver was lost although one of the officers managed to retrieve a gold snuff box.
|
|
The Second Burma War 1852
|
|
Martaban, 5th April 1852
The regiment did not return to England as planned, instead they were sent to Burma to uphold British rule against 'outrages and insults' encouraged by the King of Burma. The regiment travelled in two halves, the right wing (444 men) under Lt-Col Reignolds left Calcutta on the 19th Jan 1852 and the left wing (518 men) followed a few weeks later under Lt-Col C J Coote. The total number of officers was 43 plus the Paymaster, QM and 3 doctors. The right wing arrived at the mouth of the Irrawaddy in early April and on the 5th came to Martaban, a series of hills protected by a high wooded stockade. The 18th were sent in to storm the wall and the first man over was Captain Gillespie. Once over the wall the Burmese took up positions on top of the hills. The main focus of attack was a pagoda that was defended by a large force that charged down when they saw the soldiers stop to prepare for the assault. The two sides ran at each other and the defenders turned round and fled. Seven men were wounded and many suffered sunstroke.
Rangoon, 12th-14th April 1852
Having ensured the safety of Moulmein, on the other side of the river, from the troublesome Burmese in Martaban a small garrison was left behind while General Godwin took the force down-river to meet the left wing of the Royal Irish and the Madras Contingent. On 10th April they sailed up to Rangoon and the ships bombarded the landing places so that an advance party could secure them for the general disembarkation. This started on the 11th and by early on the 12th April the 18th 51st and 40th Bengal NI proceeded towards White House stockade. The 51st were sent in to storm the stockade but the 18th were delayed when scaling ladders were brought up. Some of the 18th were in the storming party; of four men assigned to one ladder three were wounded. During the day the most dangerous aspect of the battle was heat and sunstroke which sometimes proved fatal. Godwin was forced to bivouac the men for 40 hours near a watering place as there was a long delay in bringing forward the four 8-inch howitzers. Some Burmese fired on the camp from a nearby pagoda which had to be attacked by the 18th. Colour Sergeant Kelly was killed and several wounded in this attack.
The Great Pagoda, 14th April
At 5am on 14th April they moved on with the 18th in the lead this time, having to cut paths through the jungle for the big guns. As they approached the Great Pagoda, the Shwe Dagon, they were fired on by Burmese artillery placed on the huge terraces. The gate in the eastern wall was chosen as the way in and the men had to form up on the difficult ground nearby. This made them an easy target for artillery and rifle fire. The gate suddenly opened for some reason and a storming party led by Lt-Col Coote advanced steadily over a half-mile wide valley and up the terraces. The enemy were un-nerved by the disciplined ranks of red-coated soldiers, and deserted the Pagoda. The grenadier company cut off the fleeing Burmese in the flank and Rangoon was captured. The casualties of the 18th were four killed, including the adjutant Lieutenant R Doran, a sergeant and two privates. Three officers, a sergeant, a drummer and 37 men were wounded.
Prome, Aug-Oct 1852
The 18th spent the summer months in Rangoon where cholera took hold. There was, on average one death a day while they were there so it must have been with great relief that in August they were sent 200 miles up the Irrawaddy to Prome in a column commanded by Sir John Cheape. On 9th Oct they entered Prome unopposed and garrisoned the place. They suffered no casualties except for a soldier on outpost duty who was caught and decapitated so that his his head could be delivered to the Burmese King. An expedition was sent to capture Pegu but the Royal Irish were not involved, however, in November, they found themselves under siege in Prome and had to make a sortie to a stockade built by their attackers. Later that month two companies were sent out to the districts of Klangheim and Padaung under Major Edwards, a future CO of the regiment. They cornered the enemy at Tomah and waited until March 1853 for reinforcements.
Expedition to Tonghoo Pass, March 1853
A shipment of 148 elephants was expected in early 1853 and a party was sent to the Tonghoo Pass over the Yo Ma mountain range to meet them. Major Edwards was again in charge and took with him 100 men each from the 18th and 80th Regiments, and 200 Sikhs. There were 3,000 coolies to carry their provisions but these absconded when they reached the steep mountain slopes. The men were only able to carry minimal supplies and hunger became a problem especially for the Sikhs who were not prepared to eat meat from the cattle they had with them. They spent 19 days hacking through jungle and sleeping in wet clothes until they reached the rendevous. There was rice there, although they had to wait for the elephants. When they eventually arrived a few days later there was a good supply of food for them and they returned to Padaung in a quarter of the time that it took them on the journey out.
Expedition Against Myat Toon, March 1853
While Edwards was bringing back the elephants, another expedition was organised to catch a bandit chief called Myat Toon who was disrupting the lines of communication. He was believed to be at Donobyu, 50 miles north of Rangoon. The force was commanded by Sir John Cheape and included four companies of the Royal Irish as well as 4 companies of the 51st, the 80th, 200 Sikhs, the 67th Bengal NI and artillery etc. Major Wigston of the 18th commanded the right wing of the column. They moored some 30 miles from Donobyu but discovered that Toon had fled from there. On 7th March they made an attempt to track him through the jungle although there was still much sickness amongst the men, and were forced to halt for 4 days to wait for more supplies to be brought up. By 17th March there were traces of Toon's movement and they came across a stockade which was attacked but as usual the enemy fled. One man was captured by an officer and they extracted valuable information from him. In this action one officer and 5 men were wounded.
Attack on Myat Toon's Stronghold, 19th March 1853
On 19th March they came across a fortified village where Myat Toon was based with 4,000 men. It was well defended with a stockade and moat. A frontal attack was made and a long exchange of fire ensued. On the right of the enemy's position a track across the water was found but it was blocked with felled trees. The 80th tried to cross this but had to withdraw. The 18th then made the attempt with the Sikhs. At first the task proved too difficult until the artillery brought up a gun. Private Connors of the 18th distinguished himself by helping bring the gun forward despite a broken arm. The path was cleared with the gun, and covering fire was provided while the attack went in. During this assault future Field Marshal Garnet Wolseley of the 80th Regiment was wounded. However, the attack was successful and they gained access to the village to rout the bandits. Myat Toon escaped with his life but was deprived of his weapons and resources.
End of the Burma Campaign, Nov 1853
The casualties in this battle for the whole force were 11 killed and 84 wounded. Most of the killed were from the Royal Irish, including Lt W F Cockburn who died of injuries. Major Wigston was badly wounded, a sergeant and 26 men were also wounded. The deaths from Cholera were very much more than the battle casualties, 100 deaths in all. The Burma campaign had cost the regiment 365 men in all, and as with China, they were glad to leave and head back to Calcutta. They arrived there in November 1853 and were shipped back to England a few weeks later. The men were awarded a clasp for PEGU on their India General Service medal although they did not fight in that particular action.
|
|
Crimean War 1854-1856
|
|
The Royal Irish Regiment arrived back in Britain in June 1854 after a 6 month voyage from Calcutta, and a detachment was posted to Windsor where they caught the attention of the Queen. The prospect of a European war against Russia was rousing the nation and the British army, which had been neglected and greatly reduced in strength since the Napoleonic wars was now very much needed. The officers and men were keen to be sent to the Crimea but were not included in the initial embarkation. They were under strength, having only 400 effectives, but because of their recent active service experience it was decided to send them out, after drafts from other regiments had been added. Another 400 men came from the 94th and 150 from the 51st. So with a strength of 848 commanded by Colonel Thomas Reinolds they sailed from Portsmouth on 8th Dec 1854 on the SS Magdelene, arriving at Balaclava on 30th Dec.
Sebastopol 1855
men of the regiment were appalled at the state of the army in the Crimea. The winter had brought great suffering to the poorly equipped soldiers and sailors, and the Royal Irish found themselves to be the only fit regiment. They were initially employed in Balaclava harbour but were later marched to the uplands south of Sebastopol to join Sir William Eyre's Brigade in the 3rd Division. Their march was through a bitterly cold blizzard and, when they finally received their own tents took the precaution of digging out the floor of the tent and banking the earth around the outside to block the cold wind. The experience of the older soldiers who had seen service in east Asia helped the regiment from being as badly affected as other units by frostbite and disease. In March the command of the regiment changed from Colonel Reinolds, who was promoted, to Lt-Col Clement Edwards. The men served in the trenches, protected from the cold with greatcoats and fur caps. Their old percussion Brown Bess muskets were replaced by Minie Rifles.
Casualties
On 9th April there was a heavy bombardment by the British and French artillery, to shatter the defences of the Sebastopol, which lasted ten days and nights. The regiment were worked hard, carrying supplies and digging 'parallels'. They were subjected to constant fire from the Russians so that between 6th Feb to 17th June they had 6 men killed and 36 wounded. To give an idea of the danger they faced, one party of 10 men on their way to the trenches was hit by a mortar. Seven of them lost at least one leg each, two lost arms and one lost only a hand.
The Redan, 18th June 1854
The Russian defences included two fortresses, the Malakoff and the Redan which were the focus of attack after the capture of the Quarries. The French were to concentrate on the Malakoff and the British were to attack the Redan. On the 17th a heavy bombardment reduced the defences of the fort. After dark the guns fell silent and the Russians hastily repaired the damage throughout the night. It was intended that another two hour bombardment would take place at dawn but the French commander Pelissier changed the order so that the infantry attack went ahead without any further cannonade. General Eyre's brigade, consisting of the 18th 9th 28th 38th and 44th regiments (1,000 men in all) made their way through the ravine to Dockyard Creek.
At this time the infantry was still organised so that one grenadier company (right of the line) was made up of tall strong men and a light company (left of the line) was made up of more intelligent men who could operate as skirmishers. Colonel Edwards decided that it would be better to put his light company men to the front during the night march to the Redan. This was contrary to the long established practice of marching off 'Right in Front' with the grenadiers in the lead. When it was realised that the companies of the Royal Irish were not correctly positioned the brigade was halted while they had to counter-march so that the light company were in the rear. When they reached an area where they could form up General Eyre addressed the Royal Irish and finished by stressing the need for silence to maximise the element of surprise. But one man heard him wrong and raised three cheers for the General. The regiment broke out into a noisy cheer and Eyre dejectedly told Colonel Edwards to send them into action straight away.
The 18th managed to occupy a cemetery and had to advance over stone walls to an area of houses and gardens near the Redan. On reaching one of the stone walls, instead of breaking it down, two officers decided to jump over. Whilst in the process of jumping, one of the officers, Lieutenant Meurant, was shot dead by a Russian marksman.
Overall the British effort was unsuccessful but Eyre's brigade did better than most. They managed to reach the ruined houses under the walls of the Redan and although covered by fire from the cemetery were unable to make any progress from there. There were many acts of bravery during this battle including Sergeant John Grant who delivered messages although badly wounded, and refusing to retire for treatment. Captain Dillon ( later CO from 1873-78) rescued 7 men under fire, and Captain Thomas Esmonde was awarded a VC for his bravery. The Russians were able to fire incendiary bombs at the houses and the attack was called off at 3pm. But because they had about 20 wounded men it was not until 9pm that the Royal Irish were able to bring their last men out of that difficult situation.
The casualties for 18th June were 1,500 British, 3,500 French (at Malakoff) and 5,400 Russians. Eyre's brigade suffered 562 killed and wounded, of which the Royal Irish casualties amounted to 259: One officer killed (Lt Meurant) and 10 wounded, 57 other ranks killed, 16 dangerously wounded, 87 severely wounded and 88 not-so-severely wounded.
Destruction of the Docks
The regiment did not take part in any more major actions. There was another attack on the Redan and Malakoff in September after a three day continuous bombardment. The Malakoff attack was successful and this was the beginning of the end of the war. The Royal Irish were sent to the docks to carry out the heavy work of demolishing the Russian Naval Dockyard. This job was performed during the winter of 1855/6 and was not without danger as the Russians were still able to use their artillery. They were supervised by the Royal Engineers, of which one officer, Charles Gordon, who later achieved fame at Khartoum, wrote in 1882:
".... they were a favourite regiment with the RE for work, both in the trenches and in the destruction of the docks, from the energy and pluck of the officers and men, and it was then that I formed my opinion of Irishmen being of a different nature than other Britishers inasmuch as they required a certain management and consideration, which if given them would enable you, so to speak, to hold their lives in your hand. The officers liked the men and the men liked the officers; they were a jovial lot altogether, but they would do anything if you spoke and treated them as if you liked them, which I certainly did. You know what great hardships they went through in the docks in working at the shafts which, 30 ft deep, were full of water if left unpumped out for 12 hours. Poor devils! Wet, bedraggled, in their low ammunition boots, I used to feel much for them, for the Generals used to be down on them because they were troublesome, which they were when people did not know how to manage them."
End of the Crimean War
A peace treaty was signed on 30th Mar 1856 but the Royal Irish remained in the Crimea until 20th June. The casualty figures for the 18 months tour of duty were: One officer killed and one died of disease. Ten officers wounded. 41 other ranks killed, 44 died of wounds and 70 died of disease or accident. 275 recovered from wounds although many were maimed. They had received reinforcements of 289 officers and men whilst there and finished up with a strength of 724. The regiment earned the battle honour SEBASTOPOL. The voyage home lasted a month and was cramped and unpleasant, one complaint being that the bulwarks were too high to lean over for those suffering sea-sickness. They docked at Portsmouth on 18th July 1856.
|
|
Indian Mutiny 1858-9
|
|
The regiment were stationed in Dublin from July 1856 and when the Indian Mutiny broke out they were ordered to prepare themselves for service abroad. Three companies (208 men) sailed on 24th Sep 1857 followed by 666 two months later. The regiment had 44 officers, including 4 doctors, a QM and paymaster. The CO was Lt-Col Clement Edwards. They arrived in Feb 1858 at Bombay and were sent to Poona to prevent any outbreak of rebellion there. In April they were split into detachments and dispersed throughout various districts, employed in road cutting through jungle and forced marches but did not engage in any fighting. The second in command, Lt-Col Frederick Call, led a group detailed to pursue Rohilla freebooters, or robbers, in the Jaulna district, without success. After 3 or 4 months the regiment were at Sholapur from where they marched to Hyderabad, and then sailed back to Britain on 21st June 1859. There were no battle casualties but 3 officers and 27 men had died of disease.
|
|
Second Battalion Re-raised, 25th Mar 1858
|
|
Many regiments gained a second battalion at this time and, soon after the first battalion had sailed off to India, the Royal Irish Regiment re-raised theirs on 25th March 1858, forty-four years after the previous incarnation was disbanded. A hundred men had remained in Ireland to form the nucleus of the new battalion and the rest were recruited from the Dublin Militia and other sources. For the first few weeks they were commanded by Major Armstrong but then Lt-Col Archibald Campbell commanded for a year followed by Alfred Chapman. They were in England for 2 years and then the Channel Islands where they were split between Jersey, Guernsey and Alderney. The Alderney detachment distinguished themselves when they put out a raging fire and earned the thanks of the island authorities.
|
|
Maori War 1863-66
|
|
Journey to New Zealand
The 2nd Battalion were ordered to New Zealand in 1863 to relieve the garrison there, so the three detachments came together at Parkhurst IOW and were inspected by Major-General Lord William Paulet. On 2nd April 1863 the HQ and 8 companies under Lt-Col Chapman set off on the sailing ship Elizabeth Anne Bright and reached Auckland, North Island NZ on 4th July after 94 days. Two service companies under Brevet Col G J Carey followed 3 weeks later on the Norwood, while a depot company was established at Buttevant, North Co Cork. On arrival the regiment were told that the third Maori War had broken out.
Organisation
A Maori ruler of the Waikato tribe had set up a base at Ngaruawahia in the lowland region south of Auckland from where attacks were made against settlers. The battalion was camped at Otahuhu and issued with blue serge 'jumpers' and blankets with waterproof groundsheets which were rolled and slung over the left shoulder. They were armed with Enfield rifles which could only fire two rounds a minute but sighted up to 1,200 yards. However the Maori Wars were mostly fought in dense forest so long range was not an advantage. The battalion was one of 7 under the command of General Duncan Cameron. The other regiments were; 12th 14th 40th 57th 65th and 70th. Later they were joined by the 43rd 50th and 68th.
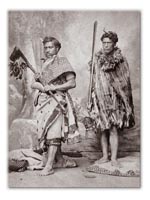
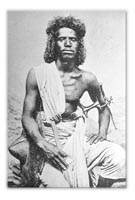
The Maoris
On 12th July their first action was on the heights of Kokeroa above the Maugatawhari creek where they dislodged a band of natives. The Maoris were clever fighters who had honed their skills on inter-tribal warfare. They built strong defensive positions with pallisades and ditches called pahs but failed to provide a supply of water for themselves which often caused them to surrender or escape within a day or two of a siege situation. They did not have bows and arrows or boomerangs but they captured rifles and used them well, as long as the ammunition lasted. Another group of insurgents were holding a place called Meri-Meri and 500 men were sent along the river to capture the place. The soldiers were short of food and this became known to the Maoris so they sent canoes laden with fruit, potatoes and milk-goats as they regarded it as dishonourable to fight a hungry enemy.
Fort-Building
In November several companies of 2/18th were sent off under the command of Brevet-Colonel Carey to establish control of an area between the Waikato and the Thames rivers, building forts, or redoubts, and to provide defence for small garrisons. They also worked on improving tracks through the forest, protecting settlers, escorting convoys and fighting skirmishes with roving Maoris. A battle was fought at Rangiriri on 20th Nov which resulted in 132 British casualties but only a few men of the battalion were involved, including Captain Sir Henry Havelock VC who had won his medal in the Indian Mutiny serving with the 10th Regiment. By the 9th Dec they had occupied the Maori base at Ngaruawahia.
Captain Ring
Captain J T Ring was an officer who inspired great loyalty in his men and he was involved in various small battles before he was finally killed in March 1864. In July 1863 he and Ensign Bicknall, with 2 sergeants and 47 men, were escorting a convoy to Drury when it was attacked by 140 Maoris. They were surrounded and had to retire to a farmstead after losing 4 men killed and 10 wounded. On 22nd July news of two settlers having been murdered reached his base at Keri-Keri. He set off with 3 officers and 100 men in the direction of Pukekewereke from where shots were heard. A section of local volunteer fighters were under attack but when the 18th appeared the Maoris moved downhill to the forest. In the skirmish that followed, one of Ring's men was killed and his rifle and bayonet snatched. The Maoris tried to seize the body to get at the ammunition but no-one could go near it for fear of being shot. There was a stalemate until the 65th Regiment arrived and the enemy retreated or were captured. Four other men were wounded but Ring was promoted to Brevet-Major for his leadership.
Pokeno, Sep 1863
The HQ was moved to Drury in September and 2 companies were left at the Queen's Redoubt under Captain Noblett. A detachment of 62 men under Ensign Dawson were half a mile from Pokeno when they encountered a group of Maoris which were chased down a gully. Other Maoris appeared and Dawson's men were confined to an area from which it was difficult to retreat. They were rescued by the 40th regiment and an escort under Captain Noblett.
Massacre at Otau, 17th Sep 1863
One of the forts on the Wairoa road was the Galloway Redoubt garrisoned by men of the battalion under the command of Major Lyons an ex-Imperial officer. This fort came under attack on 15th Sep, but the Maoris were beaten off after a brave defence. Two days later they were reinforced by more men under Lt Russell. They decided to go on the offensive and approached the village of Otau at night. They found the village on the other side of a river and Lyons took his group along the bank to find a bridge while Russell's men fired on the huts. It was known that these huts housed not only local people but insurgents and it seems that they were caught unawares because the place was found to be full of dead bodies by the time Lyons' men reached the huts.
Battalion Strength, Dec 1863
At the end of the year the strength of the battalion was 10 companies made up of 2 field officers, 9 captains 20 subalterns 5 staff 47 sergeants 22 drummers 763 rank and file fit for duty, and 24 sick. By Jan 1864 a chain of redoubts had been established by Brevet-Col Carey between the Waikato river and the Thames estuary. The men were kept busy manning the redoubts and guarding the line of communication from Queen's Redoubt to Ngaruawahia. Duties included making improvements to the defences, sinking wells, destroying villages that housed troublesome natives, building roads and bridges.
Battle of Orakau, 31st Mar 1864
At the end of January, General Cameron advanced south and although the Maoris had been driven inland towards the mountains the army could get no further than Te Rore. There were no roads and the rivers were difficult to cross. A new road had to be cut to the coast at Raglan to receive supplies. A post was established at Pukerima, manned by men of the 2/18th who had been at Ngaruawahia. However, news came that there was a large force of the enemy on the Waikato plain who had built a defensive 'pah' at Orakau. Carey organised a recce made up of 3 columns numbering 728, 250 and 100. The 2/18th contributed 140, commanded by Brevet-Major Ring, to the larger column and were ordered to attack the enemy pah, supported by the 40th regiment. When Ring returned from the briefing on the 30th March he looked shaken and distraught. He maintained that he had felt a premonition of his own death. He had received many such orders in the past but this one had brought on an overwhelming sense of doom.
At dawn on the 31st they attacked the stockade in skirmishing order but were driven back by the firing of the Maori defenders. The second attack was just as unsuccessful but this time Brevet-Major Ring was mortally wounded. In the third attempt they were successful and the pah was surrounded by British soldiers which prevented Maoris from outside reinforcing their comrades. On 1st April the British force was strengthened by the arrival of Capt Inman with 110 men of the battalion as well as 70 men of the 70th who had marched all night. They had brought grenades and a 6-pounder Armstrong gun to break the deadlock. A breach was made, but General Cameron arrived on the scene and called a halt to the attack. He wanted the Maoris to send out the women and children to save them from further harm. It was known that the Maoris had no water and only raw potatoes to eat, and little ammunition, so surrender terms were offered. But the proud natives sent back a message saying that they would 'fight for ever and ever' and that the women and children would stay with them in the pah.
The battle was resumed and an unscheduled attack by Private Hannon and 20 men ended disastrously with many deaths and injuries. There was a stand-off during which the soldiers listened as the Maoris sang songs to keep up their spirits. They were encouraged by shouts from their compatriots outside the battle area. At last the gate opened and the soldiers watched in astonishment as the chief, Rewi, led his people out of the stockade and through the British lines. Then the pursuit began and many were captured or killed. There were instances of Maori bravery, one account tells of a young man helping a group of women and children. In the pursuit he would turn, kneel down and aim his rifle at the soldiers. This kept the pursuers at bay for a short while and he would repeat it later but eventually he was killed and his rifle was found to be unloaded. During the battle an officer had shot at a tattooed head that showed itself over the wall. When the fighting was over, the man's body was found with a bound-up leg. He had been fighting for many hours with a broken leg. The British losses were 16 killed and 52 wounded. The 2/18th lost Captain Ring and 8 killed, and 9 men wounded. Captain Inman had distinguished himself and was commended by Brigadier Carey.
Operations Against the Hau-Hau
The following 3 months were spent at Ngaruawahia and then Otahuhu camp until the end of the year. In 1865 the battalion were sent to the western extremity of North Island and were split, one half to be incorporated into one of two columns that were to start from Taranaki (New Plymouth) and Wanganui and advance towards each other along the coast. The objective was to search and destroy a fanatical religious sect called Hau-Haus. They were cannibalistic, semi-Christian Maoris who believed that they would live a prosperous life, guarded by angels, if the British were driven from their country. Col Waddy of the 50th Regiment commanded the regulars in Wanganui which included 7 companies of 2/18th (500 men). Lt-Col Chapman remained at Otahuhu with the remainder. Col Waddy's column started out on 24th Jan and moved up the coast to the Waitotara River until they came to Nukumaru village where they pitched camp close to the nearby lake.
Nukumaru, 24th Jan 1865
Picqets were sent out to give early warning of an attack on the camp. One of these picquets, commanded by Capt Hugh Shaw, was ordered to post themselves half a mile from the camp, and as they approached a thicket near the village they were ambushed by Maoris. They retreated to the nearest cover which was a ditch, but one of their number fell wounded out in the open. Shaw asked for volunteers to help him bring the man in and four men went out with him, under fire, hoisted the wounded man onto Shaw's back and brought him to safety. Thankfully none of them was hit. The shooting brought Major Rocke and 100 men from the camp and the rebels were forced to flee. Shaw was recommended for the VC and Privates John Brandon, James Kearnes and George Clampit were awarded a silver medal for bravery.
Captain Noblett's Skirmish, 25th Jan 1865
The day after Shaw's act of valour, his picquet was relieved by a larger force under Captain Noblett. This force consisted of 75 Royal Irish and 25 of the 50th. They hid themselves by a stream, the banks of which were lined with flax. Another detachment of the 50th was on the other bank. The Maoris, when they appeared, were in greater numbers than before, 600 or so, and were able to drive the soldiers away. But reinforcements from the camp encouraged Noblett to go on the offensive and they were able to disperse the enemy. Four men were killed in this action, and 11 wounded. The Maoris left 22 dead and 2 wounded but managed to carry 70 dead or wounded with them.
Wereroa
It was discovered that the Hau-Hau were at Wereoa but General Cameron decided not to attack. The battalion were stationed at Patea at this time and on 20th July Cameron resigned in protest at proposed cuts in his forces. Major-General Trevor Chute was summoned from Australia to replace him. Before he arrived, the Governor, Sir George Grey, took it upon himself to organise the attack on the fortified pah at Wereroa. With 100 men of the 18th and 100 of the 14th plus 470 colonists and natives, a circuitous route was taken through difficult country to approach the pah from an unexpected direction. The Maoris were taken by surprise and deserted the pah with the loss of 50 of their number, and inflicting no casualties on the British and colonials.
General Chute's March, Jan 1866
For the remainder of 1865 the battalion HQ was at Platea, under the command of Major Rocke who took over from Lt-Col Chapman when he was invalided home in June. Maj-Gen Chute arrived and planned his expedition to finish off the Hau-Haus. Major Rocke provided 100 men, the 14th had 139 and the 50th a 100. There were 45 Forest Rangers and 300 Native Auxillieres. On 7th Jan 1866 at Putahi they stormed a strongly fortified pah on a 500 foot high hill. This was after a 4 hour march around the base of the hill through almost impenetrable jungle. They charged the walls and broke them down with their axes. There were 200 of the enemy but they put up very little resistance and were dispersed. The 2/18th suffered no casualties although 2 men were killed and 10 wounded from the other units. For some reason the 18th were ordered back to Patea while the rest of the column continued to capture and destroy more Maori settlements.
Papoia, 18th Oct 1866
The British Army left New Zealand after the campaign against the Hau-Haus, but the 2/18th remained as the last regular regiment. They were posted around the Patea-Wanganui district which was still being harassed by insurgents. Troubles reached such a pitch by October that the governor called upon Major Rocke, the senior officer, to confront the rebels in force. The battalion turned out 300 men to fight alongside 300 of the militia. At Papoia, a fortified village they had to approach by difficult narrow paths through the night of the 17th/18th Oct. A storming party was given the dangerous task of charging a barricade that had been set up across the steep track. As they approached, the enemy opened fire causing them to pause momentarily. But Pringle decided that boldness was called for and led his men headlong towards the obstacle. They smashed their way through and caused the Maoris to retreat. The rest of Rocke's force poured through the opening and scattered the Hau-Hau insurgents. They followed this up with a three week march through 'impassable' forest, attacking fortified villages and forcing the rebels into submission. In the Governor's report, Lieutenant F J S Pringle was singled out for high praise and two Privates, Acton and Hennigan were awarded the DCM.
End of the 3rd Maori War
They remained posted at points between Patea and Wanganui until March 1867 and were then brought together at Wanganui until the end of the year. They then were split; HQ and 6 companies to Auckland, 2 to Napier and 2 to Taganaki. In January 1868 they were introduced to their commanding officer, George Augustus Elliot who had taken over from Alfred Chapman in 1866 but had now arrived from England. At this time the strength of the battalion was 861 and in the year 1868 they were issued with the Snider breech-loading rifle to replace the old Enfields.
|
|
Australia, Jan 1870
|
|
The colonists were very reluctant to part company with the Royal Irish, the last British regiment to serve in NZ but they were ordered to Australia in 1869 to relieve the 50th Regiment. Amidst official expressions of sorrow and gratitude they departed, in Jan 1870, for various locations in Australia; HQ and 4 companies to Sydney and 2 companies each to Melbourne, Adelaide, and Hobart in Tasmania. They remained until August then embarked for England. On 21st Aug the Silver Eagle set sail from Sydney with Lt-Col Elliot, 7 officers and 135 other ranks. The Corona left Melbourne with Brevet Lt-Col Rocke, 16 officers and 246 other ranks, docking in Plymouth on 16th Nov. The Silver Eagle was late and presumed sunk but finally arrived on 5th Dec. The total number of the battalion was now 406. The remaining 455 men had been discharged in Australasia to make new lives for themselves.
|
|
First Battalion
|
|
In 1865 the 1st Battalion was ordered home from India. They had served abroad for the best part of 28 years, apart from 6 months in England in 1854. In Feb 1866 Two ships brought home 29 officers, 450 other ranks, 44 women and 72 children. 381 men were voluntarily discharged and remained behind in India. The ships arrived home in June and 2 years later the battalion was in Ireland. In 1871 they were warned that they would soon serve abroad again but it was not until 18th Jan 1872 that they sailed to Malta. They spent 3 years there, with a strength of 26 officers and 606 other ranks. |
|
2nd Afghan War 1878-1880
|
|
In 1875 the 1st Battalion sailed from Malta to India, now with an increased strength of 917, and reached Bareilly in December. They spent 4 years there during which time they were visited by the Prince of Wales. He rode along a road lined with men of the battalion, to visit the Nawab of Rampore. In Feb 1878 they were moved to Ferozepore and when the war broke out against the Amir of Afghanistan they marched to Peshawar to join the Reserve Division of the Field Force. They did not become involved in the fighting in this war but were posted to the Khyber Pass in May 1880 at Lundi Kotal and later one company was at Ali Musjid. Their duties included escorting convoys and picqueting the neighbouring hills. In the summer of that year they fell foul of Cholera and lost 60 men including the Quartermaster Richard Barrett who had served 26 years with the regiment. They returned to India in March 1881 and remained there until 1884 when they were sent to Egypt.
|
|
Revolt of Arabi Pasha 1882
|
|
Kassasin, 9th Sep 1882
The 2nd Battalion fought at the battles of Kassasin and Tel-El-Kebir in this short war in Egypt.They had been in England and Ireland since their return from Australia, and sailed from Plymouth on 8th August 1882. Their appointed destination was Alexandria but Sir Garnet Wolseley's elaborate plans to deceive Arabi Pasha, the leader of the military revolt, meant that the army landed at Ismailia. The 2/18th (771 men) were in the brigade of Major-General G Graham along with a battalion of Royal Marine LI, 2nd Yorks and Lancs and 1st Royal Irish Fusiliers. After four days of unloading stores and equipment they endured a difficult march to Kassasin. They were relying on the water from the sweet-water canal but it was poisoned by dead bodies. They reached there on 8th Sep and the next day were under attack from the Egyptians. The battle of Kassasin is well known for the cavalry action but the Royal Irish Regiment were ordered at first to escort the artillery and then to advance in line towards the enemy infantry. The British guns caused the Egyptians to pull back and they retreated to their defensive position at Tel-el-Kebir. The battalion suffered only two men wounded as well as Captain Edwardes who was attached to them from the Royal Welsh Fusiliers.
Tel-el-Kebir, 13th Sep 1882
In order to surprise the Egyptians in their fortified redoubt at Tel-el-Kebir, Sir Garnet Wolseley organised a night-time march of 4 miles over the desert in the pitch black starting at 1am. All sound was muffled and talking was forbidden. The element of surprise was achieved and the attack began just before dawn. The 2/18th had to charge their apportioned section of trenches as soon as they finished the march. C and D Companies were in front, B and E in support with the remainder in reserve. Almost without firing a shot they swept forward and stormed the trenches with the bayonet. They were subjected to badly aimed fire and at one point were shot at from the flank. Two men, for some unaccountable reason dashed forward into the mass of the enemy behind the first line of defence, and were overwhelmed by the Egyptians. They were Corporal Devine and Private Milligan. Another account tells of a soldier who lay with 8 bullet wounds but insisted "Don't mind me, look after others worse hurt." He died when the wounded men reached Plymouth. The Egyptians were driven back, and fled from the second line of defence. The pursuit continued for a while but was called off so that they could re-form for any further action.
Cairo
The Egyptians had suffered many more casualties than the British/Indian force; 2000 killed and thousands more wounded. The British lost 9 officers and 48 other ranks killed, 27 officers and 355 wounded, with 30 missing. The battalion lost one officer and 7 men killed, 2 officers and 14 wounded. Arabi Pasha surrendered in Cairo and most of the British army were sent there to ensure that the city was not destroyed. The 2/18th however remained in Tel-el-Kebir for a week and then took the train to Cairo where they were installed in barracks that were so filthy that soldiers writing of the experience years later said that they could not get the smell out of their nostrils. On 29th Sep there was a huge explosion in the railway yard when a truck full of unexploded shells, powder and ammunition caught fire. The battalion was sent to the scene at 6.30pm and was kept busy stopping traffic and dealing with looters. This kept them busy until 1am. On 11th Oct they were sent to Alexandria which was remembered for its virulent mosquitoes. They had to stay there until Feb 1883 when, on the 1st Feb, they were presented with their Egypt medals, which had a clasp for TEL-EL-KEBIR. A few days later they were shipped to Malta for 3 months then back to England. They landed at Plymouth on 30th May 1883 and were granted the battle honours EGYPT 1882 and TEL-EL-KEBIR.
|
|
Nile Expedition 1884-85
|
|
Cairo 1884
The 1st Battalion were stationed in Meerut when they were ordered to Egypt in August 1884. They were to take part in one of the most arduous organised expeditions ever undertaken by the British Army; the Gordon Relief. They were to join an 11,000 strong force sent up the Nile to rescue General Charles Gordon in Khartoum, who was in danger from the Sudanese army of the Mahdi. But before it began they were to make a name for themselves at the Cairo annual gymkhana where the Royal Garrison Artillery had won the tug-of-war year after year and were considered unbeatable. The contest was made more interesting by placing the teams either side of a water-filled trench. The Royal Irish were expected to lose and be dragged into the pit, but they proved themselves the stronger team and the first two artillerymen were given a soaking. The rest of the RGA team let go the rope to avoid the same fate.
Journey up the Nile
On 12th Nov 1884 the battalion were sent 229 miles by train to Asyut, under the command of Lieut-Col Hugh Shaw VC. The strength of the battalion was 746 officers and men. From Asyut they were then towed in barges another 318 miles to Aswan at the foot of the 1st Cataract. At Shellal they boarded sailing boats on 24th Nov for a further 210 miles to Wadi Halfa in Sudan. The 2nd Cataract started here and the battalion camped for two weeks while a reconnaissance was made which established the 33 mile length of the cataract and the availability of the whale boats at the end of it. On 16th Dec a detachment of B and E Companies under Lieut-Col Wray went by rail to Gemai, at the end of the cataract, to take charge of boats and stores. At Sarras, 30 miles further on, they were joined by skilled boatmen from Canada called voyageurs, two being appointed to each company. At this point Sir Garnet Wolseley offered a 100 pound prize to the NCOs and men of the first battalion to reach Ed Debba.
The Difficulties of Rowing Upstream, Jan 1885
The river from Sarras is very difficult to navigate because of narrow channels where the water is forced through, and because of rocks just below the surface. One stretch of rapids, 5 miles in length, took 10 hours of incessant hard labour. In some places the boats had to be dragged along the bank. At Dal the cataract was too difficult and the stores had to be unloaded and carried 3 to 4 miles, but after that the river was easier for 100 miles. The main areas of difficulty were at Semneh, Ambako, Tanjur, Dal, Kaiber and Hannek. A diary was kept by some of the officers including Captain John Burton Foster who later commanded the regiment and became Colonel in 1918. He wrote of the hardship of loading and unloading the stores which were arranged like a Chinese Puzzle to fit them in, of how the whole day was taken up with strenuous rowing or punting or 'tracking' (pulling the boat over dry land). The men worked in only their greatcoats so that they could easily slip naked into the water to push the boat off the rocks. Wounds and scratches never healed because of the wet conditions and at night the boats had to be repaired before they could fall exhausted to sleep where they fell. All ranks had to work hard including the RC Chaplain, Robert Brindle, and the CO Hugh Shaw who nearly drowned but was saved by three NCOs. The Royal Irish were the first to reach Ed Debba and the men won Wolseley's prize. They reached Korti between 23rd and 27th Jan, the point designated for the concentration of troops. There had been no contact, so far, with the enemy but there was a 15 per cent loss through sickness.
Desert Marching
The day after the battalion had all reached Korti they had a different hardship to contend with; desert marching. A camel-mounted column under Maj-Gen Herbert Stewart had set off on 8th Jan, establishing bases at Gadkul and at Abu Klea where a battle was successfully fought on 17th Jan, and again at Abu Kru. Wolseley decided to send the Royal Irish Regiment to reinforce this column, but they were on foot with camels used for carrying stores. In a column led by Sir Redvers Buller they made good progress to Gadkul, marching 98 miles in 108 hours but there they heard the news that Khartoum had fallen and Gordon was dead. Now that they were no longer able to achieve their objective the aim of the expedition was in question. Maj-Gen Stewart had been wounded and his column, now under General Wilson was in difficulties on the river journey back to Gubat. They were rescued and the Gubat garrison now began to evacuate. Three companies of the Royal Irish escorted the sick and wounded column until it was thought to be out of danger, but after returning to Gubat half the battalion under Lt-Col Shaw was sent out again when a report was received that a large force of the enemy was poised to attack the sick and wounded column. As it turned out Shaw's men arrived just as the enemy were retreating from another column sent from Gakdul. They had to return to Gubat and spend the next day destroying stores and throwing ammunition into the Nile because the camels were so weak that they were unable to be used as transport animals.
Abu Klea, 16th Feb 1885
On 14th Feb the column of 1,700 men started out from Gubat with the Royal Irish acting as rearguard. They halted at Au Klea, the scene of a famous battle fought by the Mounted Camel Regiment a month previously. They were re-united with the 2 companies that had been left to carry out work on the defences of the wells and on 16th the regiment set up defensive positions on the hills around Abu Klea where they came under attack from the Mahdists. They opened fire in return and used a Gardner gun and screw guns which held the enemy in check. The firing went on all night and next day the regiment came under fire from a field piece. Heavier guns were needed to counter this and 2 seven-pounders were brought up to drive the dervishes away. The enemy left many dead but in the Royal Irish Regiment the Quartermaster and 13 men were wounded.
Marching back to Korti
Wolseley was encouraged by the government to avenge Gordon and a plan was made to attack Abu Hamed and Berber. But the camels were on the point of collapse and the men's boots were worn out so the field force had to abandon the expedition. Buller's column left Abu Klea for the return to Korti. The wells had been filled with scrub to make it difficult for the enemy to draw water and on 20th Feb a column of 1,740 men set off while 4,000 Mahdists watched from a distance. They reached Gakdul on 26th and were able to eat, drink and clean their clothes, which they had not taken off for 10 days. On 3rd March they set off again with water in short supply, and reached Korti on 14th. They looked like tramps when they marched in, ragged clothes, almost no boots at all, dusty and very thirsty. Wolseley inspected them two days later and praising them and thanking them for their hard work. They were then assigned to a moveable column under Brig-Gen Brackenbury, stationed at Kurot village near Ed Debbeh until 11th May when they were embarked on whale-boats once more, to be taken down river. At Alexandria they were reinforced by a draft of 179 men from the 2nd Battalion based in Malta. But 58 of these men, under Lieut D G Gregorie, were assigned to the Mounted Infantry and sent to Suakin.
Awards
The men were given the Egypt medal with a clasp for THE NILE 1884-85, and the Khedive's Star. The regiment also gained the battle honour NILE 1884-85. They embarked on 24th Aug 1885 and sailed from Alexandria on the SS Stirling Castle reaching Plymouth on 9th Sep.
|
|
Black Mountain Expedition 1888
|
|
Postings in India 1885-88
While the 1st Battalion were in the Sudan the 2nd Battalion were fighting the fierce tribesmen on the Northwest Frontier of India. In 1884 the battalion were stationed in Malta but a detachment was sent to reinforce the depleted 1st Battalion in Alexandria in early 1885, while the remainder reached Umballa in February. They numbered 652 all ranks and their first duty was to attend a durbar in Rawalpindi. They travelled by train which unfortunately became derailed causing the deaths of 3 bandsmen and the serious wounding of Lieut-Col Dawson. After the durbar they were stationed in Subathu until Nov 1887 and then Nowshera, with detachments at Fort Attock and Cherat. On the march there they were constantly pestered by thieves who were trying to steal their rifles.
Active Service in Hazara
On 22nd July 1888 the Co, Lt-Col Wray suddenly died of heart disease and was replaced by G W N Rogers. Two months later, in September the battalion was ordered to take part in a punitive expedition in Hazara on the left bank of the Indus, 80 mile east of Peshawar. Some troublesome tribes, the Akazais, the Khan Khel of the Hassanzais and the Alaiwals had been raiding and looting villages, and had attacked and killed a surveying party of Gurkhas and officers on the Black Mountain. The force was commanded by Brigadier-General J W McQueen and included 1st Suffolks, 2nd Northumberland Fusiliers, 2nd Sussex and 2nd Royal Irish Regiment, along with 9 battalions of Native Infantry, Sappers an Artillery. The force,12,554 strong, was divided into 4 columns, the Royal Irish being the backbone of the 4th column that was to approach from a different direction than the other three. The 4th Column was under the command of Brigadier Galbraith and had a strength of 2,465 officers and men. The aim of the expedition was to punish and neutralize the Khan Khel and Akazais who lived on the range of mountains, rising to 9,000 feet, between the Indus and the Agror valley. Galbraith's column was to set off from Durband and travel north up the left bank of the Indus. On 22nd Oct they advanced 7 miles and camped for a day at Chamb. They cleared the enemy from the surrounding hills and improved the tracks.
Battle at Kotkai, 4th Oct 1888
On 4th Oct the advance guard under Capt Lysaght came under fire from the village of Shingri when they descended into a gorge, but were able to deal with the trouble. One mile on they encountered a line of tribesmen stretching for 1,200 yards across the valley between the villages of Towara and Kotkai. On a spur behind this line were more tribesmen fortified behind stone sangars. In the eastern hills were more sharpshooters which were fired on by Galbraith's artillery. He sent two Native infantry battalions, the 34th Pioneers and the 4th Punjab Infantry to deal with tribesmen on the hills either side, and retained the Royal Irish to face the enemy in front. They moved forward 300 yards which caused the enemy to start to fall back. An unauthorised shout of 'Charge' set the men off and they raced forward until the sudden appearance of some determined swordsmen caused them a momentary halt, but they fired and began to bayonet their opponents. They ran towards the 34th Pioneers but the RI caught up and killed many. Lieut Gloster and 2 other men captured a standard which hung in the officer's mess for many years.
Galbraith's Escape
After the battle Brigadier Galbraith took two friendly Afghans and walked through the bodies to identify which tribes were involved in the fight. Suddenly he was fired on and pursued by two of the enemy. He ran towards the Royal Irish but he was in the line of fire so the soldiers were unable to shoot his pursuers. However, he tripped and fell so providing them with the opportunity. Unfortunately the soldiers were unable to distinguish between the friendlies and the attackers so all four were shot dead.
The Tribesmen Surrender
The advance was resumed and covering fire was given while half the battalion, and the 29th Punjabis, climbed the ridge and entered Kotkai. The village was free of enemy since they had fled to Kunhar a few miles up river. The march continued and was accompanied by sniper-fire but they managed to take convoys of sick soldiers to Chamb, carry stores over ground too rough for the mules and escort the General on his visits to tribal leaders to establish their neutrality. On 13th Oct they were transported over the river and marched through deserted villages before arriving at Maidan where they demolished the hill fortress with explosives. This had the effect of disheartening the tribesmen and hostilities ceased. The Hassanzais and the Akazais surrendered although the leaders of these tribes tried to retain a measure of self-respect by spitting on the ground in front of the Galbraith and other insulting acts. This was finally dealt with by an no-nonsense officer who arranged for them to be punched and kicked by the soldiers as they were thrown out of the meeting-hut.
Awards and Praise
On 28th Oct they were visited and inspected by Sir Frederick Roberts, Commander-in-Chief of India, and on 23rd Nov they returned to Nowshera. Brigadier-General Galbraith thanked them and praised the Royal Irish Regiment for their 'exemplary behaviour and unvarying good discipline.' Maj R K Brereton and Lieut W Gloster were mentioned in despatches, and RC Chaplain Father Francis Van Mansfield who, at the Battle of Kotkai carried water to wounded men under fire. The casualties for the campaign were 2 killed and 3 wounded in battle, and 2 men fatally injured after falling down a precipice. All ranks were awarded the India General Service medal with a clasp for HAZARA 1888. The regiment remained in Nowshera for a year, then Peshawar, and in April 1890 the HQ and 4 companies went to Cherat. From Dec 1890 to Nov 94 they were stationed at Lucknow and then they spent 5 weeks at Jubbelpore where the officers engaged in tiger-hunting.
|
|
Tirah Campaign 1897
|
|
In 1897 there were outbreaks of trouble in the Swat Valley and Malakand so the battalion was mobilised on 13th Aug. They were sent by rail to Rawalpindi but after a journey fraught with difficulty they spent a day at Khasalghur, where the rail ended, and had to unload and load stores in extreme heat. They then were force-marched to escort a 5 mile convoy for 26 miles over rugged country. They joined Major-General Yeatman-Biggs in the Miranzai Valley and were placed in camp at Hangu near the Samana Ridge. This was an unhealthy place for the battalion and sickness was rife. Malaria struck down 455 men, so that there were only 295 fit for duty when they were ordered to go to the assistance of the 36th Sikhs in Fort Gulistan. This fort was garrisoned by the Royal Irish and the sick from Hangu camp were brought up there to improve their health.
The Battalion Recalled, 30th Sep 1897
Yeatman-Biggs sent in a report that the Royal Irish were riddled with malaria and unfit for duty. As a result of this they were ordered back to Rawalpindi for garrison duty even though the health of the battalion was now greatly improved since their removal from Hangu. They had been carrying out their duties of reconnaissance and road-making with enthusiasm so it was a stinging blow to morale for all ranks. The CO, Colonel Lawrence, called for a medical board to inspect the men, and the result was favourable. But on 30th Sep Major-General Yeatman-Biggs ordered them out of the Tirah, to be replaced by the 2nd Derbyshires. Newspaper reports compounded the problem by showing the battalion in a very poor light. The Colonel of the Regiment, Lieut-Gen Sir Henry Havelock-Allan, sailed out from England and urged General Lockhart to send the regiment back to the Tirah, but he died soon afterwards in the Khyber Pass in December. Col Lawrence was recalled to Britain and the efforts to re-instate the honour of the regiment fell to Lt-Col John Burton Foster.
The Battalion Re-instated, 9th Feb 1898
Foster's demand for a board of inquiry was turned down by the authorities in Simla, but General Lockhart saw the battalion at Havelock-Allan's funeral and ordered that they be sent back to the Tirah. This was a great relief to the officers and men who had felt themselves dishonoured. They arrived at Barkai where they were given a warm welcome, but the war was practically finished so they were not involved in any action. Army HQ in Simla draughted a letter exonerating the battalion but it was confidential and not allowed to be published. Colonel Lawrence fought hard to have the restriction lifted and his efforts were finally rewarded. Everyone could now read that: 'A grave injustice was done to the 2nd Battalion Royal Irish Regiment when it was recalled from field service.' The Queen was asked to confer an honour on the regiment to give her seal of approval and make up in some way for the shame that had befallen them. In response she appointed Field Marshal Sir Garnet Wolseley as Colonel-in-Chief of the Royal Irish on 20th July 1898.
|
|
Regimental Treasures Destroyed by Fire
|
|
After arriving back from Egypt in Sep 1885 the 1st Battalion spent four years in that area of England, Plymouth and Devonport. In 1889 they were ordered to Colchester, with a strength of 699 all ranks but they suffered the misfortunes of two fires, one that destroyed the sergeant's mess in the autumn of 1889 and another that burnt down the officer's mess on 31st July 1891. The Colours were ruined and the only treasures to be saved were a silver whale-boat model and the snuff-box from the wreck of the Buckinghamshire back in 1851.
|
|
Mounted Infantry in Mashonaland 1896
|
|
The battalion moved to Ireland in the autumn of 1891, stationed at Curragh for 3 years and Limerick from 1894 to 1898. Whilst there they were ordered to form a Mounted Infantry platoon consisting of 30 NCOs and men under the command of Lieutenant S G French. They were to be part of a composite Irish Company under Lieut-Col Alderson, and sailed to Cape Town on 2nd May 1896. At first they camped at Wynberg then sailed to Beira for the march to Rhodesia. This was a new territory at that time and Salisbury was the principal British settlement. The objective of the Mounted Infantry was to pacify the area of northern Mashonaland. The main action in this campaign was at Makia's Kraal on 30th Aug when the Royal Irish were praised for their bravery in traversing a large area of open ground under fire.
|
|
Limerick 1897
|
|
The men of the battalion, posted in Ireland, were very popular with the majority of the people of Limerick but there was an incident during the celebrations for Queen Victoria's Diamond Jubilee in 1897. A republican faction hoisted a black flag on a rocky island in the River Shannon as part of an anti-British protest. Private Cullen swam out to the island and tore the flag down. When he reached the bank of the river he had to be escorted by police to prevent him from being stoned by a large crowd of women.
|
|
South African War 1899-1902
|
|
Voyage to Port Elizabeth
The 1st Battalion served in the Boer War while the most of the 2nd remained in India, although a draft of 150 men were sent from the 2nd Battalion. The first men to go were a Mounted Infantry detachment which sailed out on 24th Nov 1899, consisting of 3 officers and 67 men under Captain St Leger. On 2nd Dec the battalion received their eagerly awaited orders to prepare for embarkation on 16th Dec. Lt-Col W Guinness with 13 officers, one WO and 672 NCOs and men, with the Wiltshire Regiment, left Southampton on the SS Gascon. Many of the officers were already out in South Africa having volunteered to be attached to other regiments or on staff duty. The battalion arrived at Cape Town on 6th Jan 1900 but had to remain on board for 3 days. They were then re-routed to Port Elizabeth and landed on 12th Jan. They were in the 12th Brigade along with the 2nd Battalions of the Bedfordshire, Worcestershire and Wiltshire regiments.
The Orange River Railway
On 13th Jan they boarded a train to take them up country to reinforce General French whose column was defending the western portion of the De Aar-Naauwpoort-Stormberg railway, south of the Orange River. The enemy controlled the eastern part of the railway so Naauwpoort Junction, 33 mile south of Boer-held Colesberg, was of strategic importance. The Royal Irish travelled in open stock wagons, but only as far as Rensberg which they reached on 15th Jan. The 12th Brigade was placed on the right of the line at Slingersfontein where, a little earlier, the NZ Mounted Rifles had fought off a determined Boer attack. There were two 400 ft high kopjes between the brigade and the enemy position and the Royal Irish were ordered to occupy them.
Colesberg
Three companies were sent up the kopjies and spent 2 or 3 weeks on outpost duty while the rest of the battalion worked as picquets. French was ordered by Lord Roberts to vacate the Colesberg area and leave Major-General Ralph Clements in charge of a much smaller force with effect from 6th Feb. This force included the 12th Brigade, 650 Australians, 450 Mounted Infantry, 2 squadrons of cavalry, and some artillery. The Boers had 11,000 men and artillery that included a 40-pounder. The battalion were busy building defensive fortresses but had to take cover when the big gun was used on them. The enemy were aware of the withdrawal of French's brigades and increased the pressure on Clements's men. At first the Worcesters on the right managed to hold their position but were shelled heavily and had to withdraw. On the left the defenders of Hobkirk's Farm were driven back. Clements decided to pull his force back to Rensberg.
Arundel
This withdrawal was done with as much secrecy as possible to deceive the Boers but when they reached Rensberg it was found that the hills along the railway were occupied by the enemy and that further withdrawal was necessary. They reached Arundel on 14th Feb and maintained a defensive position, with 4 companies of the Royal Irish defending a large kopjie to the left rear of the village and the rest on outpost and fatigue duty. There was a concerted attack on them on 20th Feb but the battalion suffered no casualties. Reinforcements arrived and Clements was able to make some progress so that by 28th Feb they were able to re-occupy Colesberg. This was partly due to the Boers losing heart after the set-back at Paardeberg. The Mounted Infantry of the Royal Irish had been present at the surrender of Cronje on 27th Feb. The Boers retreated along the Orange River, causing as much damage to the railway as they could. Clements's troops pursued and repaired the line as they went.
Norval's Pont
On 8th March they were on the banks of the Orange at Norval's Pont. The railway bridge had been destroyed by the Boers a week earlier and there was no way of crossing the flooded river until pontoons could be brought up. The Royal Irish were heavily involved with the building of the 250 yard long pontoon bridge and it was eventually completed on 15th March. The troops were now able to enter the Orange Free State and reached Bloemfontein on 4th April. Whilst there they were reinforced by 100 men from the militia reserve, 100 men from the home depot, and a company of volunteers - 3 officers and 109 other ranks of 5th (Irish) Battalion King's Liverpool Regiment. But Bloemfontein was not a healthy place; many soldiers died of enteric fever.
Winburg
On 17th May the 12th Brigade was ordered to take the train to Winburg. On arrival they were set to work building sangars around the town but were soon on the move again, on 26th May, to Senekal. They stayed there for a month providing escorts for convoys to Winburg.
The March to Bethlehem
Flying columns were formed to penetrate enemy held territory in the Free State. Clements' brigade and the 20th Brigade were to form a 5,000 strong column to head towards Bethlehem. The column set off on 28th June marching in a huge hollow square formation. Their first action was at Klipplaat Drift where they were fired upon by Boer artillery and rifles. There were further skirmishes before they reached Bethlehem but when they arrived they found a town located in an oasis of civilisation occupied by Christian De Wet and his burghers. Clements sent a message demanding their surrender but De Wet refused and the attack plan was put into effect. The 20th Brigade was to attack Volhuter's Kop to the north and the 12th brigade to capture Vogelsfontein in the south.
The Battle of Bethlehem, 6th July 1900
The Royal Irish were on the right of the line as the 12th brigade deployed at 1pm. They were widely extended in two lines, with 200 yds between each line. They were fired on by artillery at a range of 5,000 yds, but a field battery positioned itself on a ridge and distracted the Boer shells away from the infantry. When they came within range of the enemy trenches the battalion halted and exchanged fire. One company had to withdraw to a donga to avoid rifle and maxim fire. This continued until nightfall when they bivouaced out of range. Little had been achieved but, amazingly, only two men were wounded and Clements had a better idea of De Wet's dispositions.
The Bethlehem Kopjie, 7th July 1900
The main focus of the British attack on the second day was a kopjie half a mile northwest of the town. It was this hill from which most of the gunfire came causing so much trouble for the infantry the day before. The Royal Irish were ordered to take it, with 3 companies of the Wiltshires in support. The kopjie was well defended and had been reinforced with two guns during the night. A long gentle slope, bare of cover, was the only way up. At dawn the Royal Artillery opened fire on the Boers to give cover to the advance. Lt-Col Guinness formed the battalion in 3 lines, with B Company leading. A fierce fire-fight ensued and half of H Company under Capt Daniell came forward to help B Coy who were under great pressure. Slowly the supporting companies edged up to the front line and ammunition was replenished by brave carriers of whom Capt Daniell later wrote: '[they] walked about, backwards and forwards, up and down the firing line without the slightest fear. I specially noticed a lad named Hanrehan and Lance-Corporal Ryan, the company tailor.'
The only way to advance was for two men at a time to dash forward about 30yds and cover the next two men. The officers found no trouble in getting the men to do this, the only difficulty was restraining them from going too far forward. Everyone performed as if on a training exercise and their discipline must have un-nerved the enemy. But there was a belt of burnt grass which the Boers had prepared so that the khaki uniforms would be an easier target against a black background. Another obstacle was a deep Donga that could not be crossed. This was circumvented during which movement the RA increased their bombardment of the Boer trenches. By the time the battalion had repositioned themselves the enemy were starting to retreat. They tried to remove their guns but the Royal Irish charged them with fixed bayonets and they had to leave one of the guns behind, a 15-pounder that had been captured from the 77th Battery RA at Stormberg.
With the capture of he kopjie the battle was over because the town capitulated. De Wet was worried about another column under Sir Archibald Hunter approaching the area and ordered a retreat. Clements did not order a pursuit because of the inexperience of his mounted troops and because the Boers were very efficient at fighting rearguard actions. The 12th Brigade and auxiliary troops had suffered 106 killed and wounded. The Royal Irish accounted for half of these; Capt Alderson and 6 other ranks were killed and 47 wounded. The survivors settled down to cook a meal for themselves. The regimental history describes the town of Bethlehem:
'In the middle of an unpaved, undrained and evil-smelling market square was a large church, built at the expense of the congregation by an architect who apparently took a barn as his model of ecclesiastical architecture. The square was fringed with the most important buildings in the place - the government offices, the bank, the stores, and the hotels - not standing side by side, but apparently dropped down from the sky at random, with great gaps between them, where loose cattle roamed at will. The dwelling-houses were scattered along the roads leading from the church to the open veld. Those belonging to British traders and to burghers who had acquired a veneer of European civilisation stood in pretty gardens, gay with flowers and planted with trees, and looked like small "villa residences" transported from a London suburb to the wilds of South Africa. The abodes of the old-fashioned Boers, on the other hand, were nothing but cottages built of sun-dried bricks, without a tree, a flower, or a blade of grass to mitigate their hideousness.'
Slabbert's Nek, 23rd July 1900
General Hunter took command of all troops in the eastern Free State and decided to drive the Boers from the Brandwater Basin. Clements' Brigade was ordered to attack the Boers who were holding one of the passes out of the basin, Slabbert's Nek. The brigade had been reduced to two battalions, the Royal Irish and the Wiltshires, with artillery and the mounted soldiers of Brabant's Horse. The RI had been reinforced by a draft of 100 men who had a rough introduction to field service when they were soaked by a storm on the night of the 22nd July. They marched to the Nek which was defended by Boers entrenched on a smooth-sided knoll that partially blocked the pass. This pass was half a mile wide and flanked by high precipitous mountains. The mountain on the right was higher but was the only one that could be climbed. Five great spurs projected from it with a series of ledges above. The top was 2,000 above the plain and snow-capped. There were Boers all over the lower slopes of this formidable feature but Clements realised that by placing men above the enemy he had a chance of forcing them out of their positions.
Brabant's Horse was sent to one of the spurs but they soon encountered difficulty from enemy fire coming from the higher ledges. Two companies of Wiltshires were sent to their help and The Royal Irish were ordered to send two more companies. The CO chose G Company under Captain W Gloster, and H Company under Captain Daniell with instructions to occupy one of the spurs. They linked up with Brabant's Horse but were now in a dangerous place, easily targeted by Boer marksmen. The two companies moved forward covering each other so that Gloster and half his company were furthest forward. When Daniell reached them he found that Gloster was dying from a chest wound. The men were on a ledge that was under heavy fire so that their options were severely limited. Meanwhile the rest of the battalion moved to the foot of the spur and two companies, D Coy under Capt Milner, and F under Capt White were diverted towards the knoll in the pass. D Company came under a storm of enemy bullets and Milner was seriously wounded. But both companies pressed on until they were 900 yards from the trenches. Two other companies were positioned near the spur but were unable to move. The Boers had a pom-pom gun which caused little harm apart from destroying the battalion big drum.
24th July 1900
As the first day of this battle came to an end Clements knew that he had to out-flank the Boers by getting some men on the top of the high mountain. Luckily an officer of Brabant's Horse had discovered a goat track up the mountain and during the night a squadron of Brabant's and half the Royal Irish were ordered to ascend to the top. Lt-Col Guinness took his men up what Clements described as 'an almost unclimbable hill' starting at 4am and reaching the highest crest at 8am. The men who accomplished this task were A D and F Companies, the Volunteers, and two companies of the Wiltshires. Those troops at the bottom, or half way up gave a great cheer when they saw their comrades on the summit. Boer morale plummeted and they began to retreat. By 11am the battle was over. The 5 inch gun and a Hotchkiss were used to fire on the retreating Boers which caused them many casualties and the Royal Irish were left to count their own losses. Apart from Captain Gloster there were 9 other ranks killed and 7 wounded. General Clements praised several men of the battalion in his report; Col Guinness, Capt Daniell, Lt Kelly, Lance-Cpls P Doyle, M Tytherleigh and R Rathbone, Privates Baker, Ryan and Dumphy, and Private J Kavanagh 'who showed remarkable courage and coolness..., was wounded while carrying a message across ground heavily swept by fire'.
The Brandwater Basin
The brigade marched towards Fouriesburg, the chief town of the Brandwater Basin but halted short of it until 27th July when the town was entered with little opposition. On 28th the Royal Irish fought the Boers near Slaap Kranz ridge. The enemy position was a strong one and the battle lasted all day. Col Guinness asked if his men could be allowed to seize a knoll on the left of the Boer line but Clements considered that the battalion had done enough and gave the task to the Scots Guards who had recently arrived. This was carried out at midnight but the position had been abandoned. The Boers were outnumbered and had retreated. The brigade lost 34 killed and wounded, the RI losing one man killed and 5 wounded. Soon after this there was a general surrender of the Boers in the Brandwater Basin, 4,140 burghers under Prinsloo laid down their arms on 30th July 1900. Along with 3 guns, two of which were RHA guns lost at Sannah's Post. Four thousand horses also fell into the hands of the British, a large number of rifles, and a million rounds of ammunition. The Boer prisoners were objects of fascination to the soldiers. Seeing them close up for the first time revealed that they were just civilians, some of them quite old men, and some very young boys.
Bergendel
The Royal Irish were taken away from General Clements' command and placed in the 19th Brigade under Major-General Smith-Dorrien along with the Royal Scots and Gordon Highlanders. This was part of a column commanded by Ian Hamilton. The battalion was sent to Belfast on the Komati-Poort railway line and was not actively engaged in the battle of Bergendel on 27th August although some companies on outpost came under artillery fire.
Paardeplaatz, 8th Sep 1900
On 3rd Sep they were marched off to reinforce Redvers Buller facing Louis Botha's Boers at Badfontein, but the enemy withdrew to Paardeplaatz. On 7th Sep the battalion were in bivouac at Lydenburg when shells from Boer 6-inch guns fell among them, killing two and badly injuring another. The next day they were to take part in the battle of Paardeplaatz where the Boers held a steep horse-shoe shaped hill 1,500 ft high. Hamilton's division was to attack frontally and turn the Boer left flank while Buller approached round the right of the line. Although the turning movements involved several hours of hard marching and scrambling, the frontal and flank attacks were delivered simultaneously, and carried the position with a rush. Half the battalion, consisting of F G H Companies and the volunteers, under Major Hatchell, were the first troops to reach the topmost ridge which was only escape route for the retreating Boers. It was a narrow causeway with a precipitous drop either side. This track was crowded with Boers dragging their two 6-inch guns away. They presented an easy target for the Royal Irish, but then a mist fell on them, completely obscuring them from view. All the British could do was fire unaimed shots in their direction. The Boer casualties are unknown but the battalion got off lightly with only one man wounded.
The March to Komati Poort, Sep 1900
Hamilton took his men back to the railway, on a very difficult march eastwards towards Komati Poort on the border of Transvaal. Some of the hills were extremely steep and at one point reaching 2,200 ft. The wagons had to be lightened and the men carried their extra blanket. On the ascent the wagons were hauled up, and on the descent they had to be held back with drag ropes. Crossing railway bridges was hazardous as there was no room to stand if a train passed. Men would have to hang from the sleepers unless the train obligingly stopped for them. They arrived at Komati Poort on 25th Sep but by this time the official Boer War was over. General Hamilton thanked his men for their efforts and General Smith-Dorrien stated that of all the troops which came under his orders in South Africa, 'none served me more loyally or gave me less trouble than the Royal Irish; I have nothing but pleasant associations to remember with regard to the time I had the honour of having the battalion under my command.' However, Smith-Dorrien had not seen the last of the battalion as the war dragged on for almost two more years.
Rail Journey Back to Belfast
The trains that had not been wrecked by the Boers had to be driven by amateur volunteers. Lieutenant Dease of the Royal Irish had some mechanical knowledge and was aided by a fireman from the Royal Scots who had 'been on a traction engine at home'. At one point he had to stop suddenly to prevent a collision with the train in front which, being driven by another amateur, had run dry of water and was now useless. Unfortunately there was a train coming up behind which did not stop in time owing to the fact that it was dark and Dease's train had no tail lights, and ploughed into the rear carriages. No-one was killed but 30 or 40 men were hurt. The rest of the night and most of the next morning were spent carrying out the heavy work of clearing the wreckage and preventing further trains from colliding with the first three. They carried on westwards to Krokodil Poort and eventually reached Belfast on 4th Oct.
Monument Hill, 7th-8th Jan 1901
Belfast was a primary target for the Boers in the second, guerilla, stage of the war. It had a huge store of supplies and ammunition, and was guarded by The Shropshire Light Infantry, the Gordon Highlanders and the Royal Irish Regiment who totalled 1,300 men. There were also the 5th Lancers (280 men), Mounted Infantry (80 men), a battery of Field Artillery and two 4.7 inch guns. The RI were responsible for Monument Hill, a kopjie 2 miles northeast of the town, and had one of the 4.7 inch guns. This gun was removed at nightfall and brought back to the RA lines. At around midnight of the 7th/8th Jan the fog was thick on Monument Hill and a sentry challenged when he heard someone approach. He was shot dead by one of the thousands of Boer guerillas who had surrounded Belfast, under the command of Louis Botha.
The cover of the fog allowed a party of Boers, commanded by Viljoen, to scale the northern slope of the hill to gain a position on the top plateau. Lt Dease and Capt Fosbery rushed to the empty stone sangar where the 4.7 inch gun had been. This now had about 18 men within the wall, some of which were trying, without success, to get their Maxim gun to work. There was a desperate hand-to-hand fight and the Boers were at first driven off. The fight now continued in the open ground of the plateau and the soldiers who had driven off the Boers in the sangar felt emboldened to jump out and continue the struggle. Then after half an hour there was a renewed attack on the sangar with more success. The Maxim gun had to be abandoned but needed to be de-activated. Private John Barry grabbed a pick axe and forced his was through the Boers who were surrounding the gun. He managed to bash the gun where the barrel met the breech, rendering it useless. It was the last thing he ever did because a dozen burghers who surrounded him on all sides shot him like a firing squad at point blank range. Barry was posthumously awarded the VC.
Capt Fosbery shouted for the survivors in the sangar to make a dash to a blockhouse on the slopes of the hill. Only Fosbery, Dease and Corporal Gorman were in a fit state to run but Fosbery was mortally wounded and Dease and Gorman were captured. Elsewhere the tents had been cut down and the occupants clubbed with rifle butts. Those men who were in trenches defended them bravely but they were death traps so many of them allowed themselves to be captured. Lance-Corporal Dowie, a veteran of the Egypt campaign refused to surrender and was killed in his trench as were many others. Of the 93 men who manned the defences on Monument Hill only seven escaped back to the town. One officer, Captain Fosbery and 13 other ranks were killed, 22 were wounded and 51 taken prisoner. Captain Milner and Lieutenant Dease were wounded and taken prisoner. The Boers lost 14 men killed. They did not remain on the hill, as the 4.7 inch gun, which they were hoping to capture, was not there.
Krugerspost, 14th March 1901
Three companies of the battalion were sent to Lydenburg, F G and H, and were part of a force sent out to Krugerspost where a commando of 70 Boers had established a laager. The other units were made up of 3 companies each, of the Rifle Brigade and the Devonshires, all under the command of Lt-Col Park of the Devonshires. They travelled on the night of 13th March and were split into three columns to approach the laager separately and surround it. The march was difficult as the surface of the veld was seamed with spruits, pitted with bogs and covered with high grass. The guide for the Royal Irish lost his way and H Company under Lt Panter-Downes was sent off to link up with the Devonshires while F and G, under Captain White, moved left to find the Rifle Brigade. The link-ups were made but there was a gap in the line which could not be plugged because of the broken ground. The Boers were alarmed and able to find the gap so enabling half their number to escape. The Royal Irish would have shot many of the escaping enemy but they were mistaken for women because they were wearing 'night-drawers'. However they took 37 prisoners and captured tents, wagons, horses and much grain. The battalion suffered 5 men wounded, the only British casualties in this skirmish.
Lydenburg
The three companies rejoined the battalion for operations in the northern Transvaal. By 11th April the Royal Irish were based in Lydenburg and carried out arduous work ensuring that the Boer guerillas did not break through the enclosing net. There were also forced marches by day and by night to attempt a surprise attack on Boer camps. These marches were 'in most difficult country over almost impossible roads' and usually ended with the discovery that the enemy had gone. During this period they were joined, on 20th May 1901, by a platoon of volunteers from the 5th (Irish Volunteer Battalion) of the King's Liverpool Regiment to replace the volunteers who had been returned to England in Oct 1900.
Capture of Viljoen, 25th Jan 1902
Viljoen carelessly talked about going to Pilgrim's Rest on a 25th Jan and an African servant relayed the information to his father who happened to work for the British. Major Orr, 5 officers and 120 men of the battalion, were sent to two drifts to watch for Viljoen's expected arrival. Men were also posted in a farmhouse a few hundred yards away. At 10pm the men in the farmhouse opened fire on a party of Boers, driving them towards Major Orr's party. As the leading horses came close Colour-Sergeant Boulger shouted "Hands up" but they Boers galloped on. Boulger shot at the horses and ordered the men to do the same. The fallen animals pinned their riders to the ground, Viljoen and his staff officer, Bester. Two Boers were killed and ten escaped, but the objective of capturing Viljoen had been accomplished. It was Viljoen who commanded the Boer attack on Monument Hill so it was with great satisfaction that he was brought back as prisoner. He was well treated, in recognition of the way he looked after British prisoners of war after the battle of Belfast. Col-Sgt Boulger was later promoted to Battalion Sergeant-Major.
Ben Tor Blockhouse, 19th March 1902
Sergeant McGrath and 9 men were posted at a blockhouse on a hill near Lydenburg in March 1902. The building was made of stone with a flat corrugated iron roof. At 2am on 19th a bomb was thrown onto the roof which destroyed the blockhouse and badly injured everyone inside. The only unhurt man was the sentry outside who had alerted McGrath but to no avail. The Boers inspected the damage but failed to find boxes of ammunition. They sent the sentry off to Lydenburg to fetch medical help for the wounded. One officer who arrived on the scene wrote; 'the place was like a shambles - too horrible to describe.' The blockhouse was rebuilt and hopefully covered with a pitched roof instead of the former flat roof which enabled the bomb to remain in place.
Mounted Infantry in the Boer War
When the South African War broke out it became apparent that more mounted troops were needed to cover the great distances. The infantry regiments were asked to provide men to train as mounted infantry. The value of these troops had been proved in Mashonaland in 1896 and the MI commander in that campaign, Col E A H Anderson, was called upon to command the 1st Regiment of MI in the Boer War. Captain S E St Leger was chosen from the Royal Irish to command a company of men from various regiments, and a section of 37 men from the 1st Battalion RI, under Lieutenant P U Vigors, formed part of the company. They arrived at Cape Town in Nov 1899 and were sent up country to the railway junction at De Aar. Early in Feb 1900 the regiment was placed in the 1st Brigade MI which was commanded by Col O C Hannay, along with the 3rd 5th and 7th Regiments of MI and some Australian and South African units. The 5th Regiment was commanded by Major Hatchell of the RI and also had a Royal Irish company making up a quarter of the regiment.
1st Regiment of Mounted Infantry
The RI section of St Lager's Cork company charged with the cavalry at Klip Drift and took part in the relief of Kimberley. They reached Paardeberg some days before Cronje's surrender and shared in the actions at Poplar Grove and Driefontein. In the operations outside Bloemfontein on 12th Mar 1900 the company occupied an important kopjie to thwart the enemy.
Sennah's Post, 31st Mar 1900
Captain Stratford St Leger distinguished himself at the battle of Sennah's Post when he rescued Corporal Parker of the 1st Life Guards who had lost his horse and was fleeing from the enemy. As he was calling to him St Leger saw Parker hit by a bullet in the shoulder. He went back to help him but because Parker was a big man he was unable to get him onto his horse. They struggled on together on foot but the Boers were closing on them. St Leger must have had a charmed life because he survived a hail of bullets and was unscathed. He could see some men of Robert's Horse further on and tried to reach them but they didn't see him and moved off. Luckily one of the troopers saw them and came back to them leading a spare horse. Together they hoisted Parker onto the horse and galloped off. Parker recovered from his wound, and the trooper and St Leger avoided the bullets. On the same day, Lance-Corporal Hall noticed a wounded gunner staggering along in the retreat. He rode back to him and put him on his own horse. And later that day Hall saved a trooper of Robert's Horse when he caught a stray horse and took it to the dismounted man. He was not wounded in these acts of heroism.
The Cork company were heavily involved in the pursuit of De Wet when he made a dash for the Cape Colony in December 1900. They were then diverted onto the pursuit of Kritzinger and Hetzog who were carrying out raids in the Colony. When De Wet made a further attempt to break through to the Colony in Feb 1901 the Mounted Infantry drove him back.
Between March and November 1901 they were in the south of Orange Free State where on one occasion Private W Sweeney was surrounded by 4 Boers who called on him to surrender but he fired from the saddle and managed to make his escape. Unfortunately, later in the war he fell down a well and his body was not discovered for several days. The 1st Regiment MI were awarded medals for the war with clasps for Relief of Kimberley, Paardeberg, Driefontein, Johannesburg, Diamond Hill and Bergendal.
5th Regiment of Mounted Infantry
The 5th Regiment, also in Colonel Hannay's brigade, contained 36 men of the Royal Irish commanded by Captain R A Smyth. They landed in Cape Town on 31st Jan 1900 and were in action on 11th Feb when they were guarding a convoy between Ramah and Roodipan. During a skirmish Private M Maher volunteered to deliver a message to a detachment which involved crossing a stretch of ground swept by enemy fire. He walked across, and back to report that the message had been delivered, but was unhurt. In another skirmish near Jacobsdal the commanding officer, Major Hatchell of the RI was wounded. On the 14th/15th Feb the company marched all night to Klip Drift on the Modder River but were too late to take part in French's charge through the Boer position, but took part in the final advance on Kimberley.
Paardeberg, 18th-27th Feb 1900
The Royal Irish were sent on outpost duty straight away and on 16th the 5th Regiment MI were ordered to head east to Klipkraal Drift where Cronje's retreating men were expected to cross. The RI company was busy all day and one of the wounded was Sergeant Peebles who was shot through both thighs and left for dead by the Boers who first stripped him naked. He was found late in the evening by men of his company. On the evening of the 17th they bivouaced at Paardeberg Drift. In the battle which started on 18th Feb the Royal Irish company were engaged all day, and in the ill-fated charge led by Col Hannay against the northeast face of Cronje's laager there were two RI officers, Captain R A Smyth and Lieutenant E C Lloyd, and 14 other ranks of whom several were wounded.
The company took part in the action at Poplar Grove and rode into Bloemfontein on 16th March with Tucker's Column. At the end of April they joined Ian Hamilton's force through Israel's Poort and driving the Boers from Thabanchu where Smyth and a private were wounded. They were in the right flank guard of Lord Roberts' main column in the advance to the Transvaal, entering Pretoria on 4th June. On 20th May there was an action fought somewhere between Heilbron and Lindley. The Boers managed to cut off the right flank guard from the main column. The fighting brought the two sides together in a confused mass during which Capt Smyth had a narrow escape after giving up his horse to a wounded private. He was charged by a Boer but dodged him and killed him with a well-aimed shot. Lt Welch and several men were wounded in this fight.
The company also took part in the battle of Diamond Hill, and fought their way from Heidelberg to the Brandwater Basin. At Naauwpoort Nek Corporal Hogan was blown to pieces by a shell. At the end of August they were sent to help a small force of militia and volunteers in the Doornberg Range near Winburg, who were surrounded by a larger force of Boers. In this operation Capt Smyth was badly injured in a fall and was hospitalised. The company was commanded by Captain Brush and now reduced to 30 men.
Bothaville, 6th Nov 1900
While the 5th MI were at Bloemfontein they relieved Ladybrand and spent many weeks hunting Boer commandos in the Free State. This was mostly without success but on 6th Nov they surprised Christian De Wet's strong force at Bothaville. The regiment, now commanded by Major Lean of the Warwickshires, fought from dawn until midday when they were reinforced. De Wet and his men retreated but a detachment of Boers remained until a bayonet charge forced their surrender. Much in the way of guns, supplies, horses and prisoners were captured. The Royal Irish fought well in this battle; Privates Radigan and Maher were mentioned by Maj-Gen Knox for protecting a gun, and Private Murphy who dragged a wounded officer away from danger whilst under fire.
Tabaksberg, 29th Jan 1901
After the MI were re-fitted at Kroonstad they spent some months fruitlessly chasing De Wet in the Free State but at the end of Jan 1901 they caught up with the Boer rear-guard at the Tabaksberg. The Royal Irish made a charge against a kopjie which they captured and held against heavy odds. After this the 5th MI were ordered to Bloemfontein and sent to the northwest where they moved around so much that many of the horses were rendered useless. Private Maher again distinguished himself when he volunteered to cross a river to find out if the enemy occupied the far bank.
For the rest of the war the 5th Regiment MI were involved in escorting convoys and clearing farms. But there were also skirmishes to break the monotony. On 17th Oct 1901 a detachment of the RI company was surrounded by a large force of Boers, and after a fight in which the officer and 3 men were wounded, were compelled to surrender. This was an unfitting end to the RI's part in the Mounted Infantry campaigning in South Africa. Those men of the 5th MI who survived to the end of the war were awarded the South Africa medal with clasps for the Relief of Kimberley, Paardeberg, Johannesburg, Diamond Hill and Wittebergen.
Casualty Figures and Awards
The officers of the 1st Battalion lost 6 killed or died and 6 wounded. There were 2 officers lost from the volunteers and two wounded. In the other ranks 109 men died; 27 killed, 15 died of wounds, 6 died from accidents and 61 died from disease. Two men were severely wounded while 128 had lesser wounds.
The Royal Irish Regiment now had the battle honour SOUTH AFRICA 1900-02 to add to their Colours. The DSO was awarded to Majors Hatchell, Orr, Doran, Downing, Captain Daniell and Lieutenant Kelly. Six officers were mentioned in despatches. The Victoria Cross was won by 3733 private John Barry and the Distinguished Conduct Medal awarded to Sgt-Maj J Bergin, Sgts J O'Connor, H Loney, T Connelly, Lance-Cpls P Doyle,E Lovely, P Dumphy, W Tytherleigh, Privates T Baker, W Sweeney, M Maher, J Murphy and J Radigan. Out of the other ranks 21 were mentioned in despatches.
|
|
First World War
|
|
Ist Battalion at St Eloi, 1915
In August 1914 the 1st Battalion was in Nasiribad but returned to England, landing at Devonport on 18th Nov 1914. They were placed in the 82nd Brigade, 27th Division, and after re-forming at Winchester, they landed at Le Havre just before Christmas 1914. They were in action very soon at St Eloi in early 1915. In spite of the adverse climatic conditions to which it and the other two Irish regiments, namely the 2nd Royal Irish Fusiliers and the 1st Leinster Regiment, had been accustomed, these 3 battalions advanced in a driving sleet over a squelching morass and captured a formidable line of entrenchments under the famous Mound of Death. This was after a fierce hand-to-hand encounter with the Bavarian defenders. The CO of the battlion, Lt-Col G F R Forbes, was killed in this action. He was a descendant of the first Colonel of the regiment, Arthur Forbes, Earl of Granard. The 1st Battalion RI left France in 1915 and were sent to the Middle East where they served in Salonika, Egypt and Palestine.
2nd Battalion at La Bassee, 20th Oct 1914
The 2nd battalion, stationed at Devonport in August 1914, were in the 8th Brigade of the 3rd Division. They landed at Boulogne on 14th Aug and were to spend the whole war in France and Flanders. The battalion was virtually destroyed near Le Pilly during the battle of La Bassee on 20th Oct 1914. Many of them were taken prisoner but a German officer later reported that hardly an unwounded man of the 2nd Royal Irish survived, whilst several hundred, all dead, were found in the main trench. Those that survived were transferred as Army Troops to Lines of Communication. The reconstituted battalion was put into the 12th Brigade of the 4th Division in March 1915, then the 11th Brigade, 4th Div, then the 22nd brigade, 7th Div and finally in Oct 1916, the 49th Brigade of the 16th Div.
St Quentin, 21st Mar 1918
In March 1918 the 16th division was responsible for defending the northern side of the Cologne Valley, north of St Quentin, and was deployed along a ridge centred on Ronssoy. The 2nd battalion RI was in the forward sector of defence, based on the village of Lempire. To their front was a network of machine-gun emplacements. On the morning of 21st March 1918, when the German offensive began, there was a thick mist and the machine-guns were ineffective. A heavy artillery bombardment caused severe losses on the right flank of 49th Brigade, exposing that flank when the enemy advanced at about 9am. As the right flank collapsed the battalion was exposed with the enemy surrounding them on 3 sides. Led by Major Harrison, they refused to give up and fought from one defensive position to another until their ammunition ran out. They fought their way out to safety in the evening when the 6th Battalion Connaught Rangers counter-attacked. Within an hour and a half the 49th Brigade had been virtually destroyed. The 2nd Battalion RI recorded 78 men killed outright, and by 30th March 1918 the battalion had been reduced to 1 officer and 31 other ranks.
Nine Battalions
With the outbreak of war a further 7 battalions were raised to add to the two regular battalions. The 7th Battalion was made up of the 1st and 2nd South Irish Horse on 1st Sep 1917 and in October ranked in the 49th Brigade, 16th Irish Division along with the 2nd Bn. The 5th Bn was in the 10th Irish Division and landed at Sulva Bay on 7th Aug 1915. The 6th Bn was raised following Kitchener's New Army appeal and was placed in the 16th Irish Division. They landed at Le Havre in Dec 1915, and were disbanded in France on 6th Feb 1918.
|
|
Easter Rising 1916
|
|
The Royal Irish were the first British troops to confront the Irish Rebels in Dublin during the Easter rising of 1916. They lost 8 men killed and 16 wounded.
|
|
Disbandment, 31st July 1922
|
|
After the war the 1st Battalion was in Germany and by January 1920 had been redirected to Allenstein in East Prussia to help maintain order whilst the plebiscite was taken. The 2nd Battalion was in Delhi, moving to Dehra Dun in 1922. Because of defence cuts, and the establishment of the Irish Free State in 1922 it was agreed that 6 Southern Irish regiments should be disbanded, including the Royal Irish Regiment. On 12th June five regimental Colours were laid up in a ceremony in St George's Hall, Windsor, in the presence of King George V. The South Irish Horse chose to lay it's Colours in St Patrick's Cathedral, Dublin. The six regiments were officially disbanded on 31st July 1922. The officers and men mostly joined the National Army of the Irish Free State.
|
|
The Present Day Royal Irish Regiment
|
|
Although it shares the same name, the Royal Irish Regiment that exists today is not a descendant of the 18th. 'It is an amalgamation of those Irish regiments that recruited men from the six counties of Northern Ireland. They were:
The Royal Inniskilling Fusiliers (27th and 108th)
The Royal Irish Rifles (83rd and 86th) (became the Royal Ulster Rifles in 1922)
The Royal Irish Fusiliers (87th and 89th)
The Ulster Defence Regiment
In 1968 the Royal Inniskilling Fusiliers, the Royal Ulster Rifles and the Royal Irish Fusiliers amalgamated to form the Royal Irish Rangers (27th [Inniskilling] 83rd and 87th) in the King's Division. This unit then amalgamated with the Ulster Defence Regiment (UDR) on 1st July 1992.
The Colours of the modern Royal Irish Regiment have the battle honours of these regiments and do not include those gained by the old 18th.'
|
|
|
 |
| Badges
|
| Motto
|
Virtutis Namurcensis Praemium
(The reward of Valour at Namur)
|
| Nicknames
|
Paddy's Blackguards
The Namurs
|
| Uniforms
|
| 1684 - 1922
|
| Colonels in Chief
|
| Field Marshal Sir Garnet Joseph Wolseley, 1st Viscount Wolseley KP GCB OM GCMG
Field Marshal Sir John French, KP GCB OM GCVO KCMG
|
| Commanding Officers
|
| 1684 - 1922
|
| Colonels
|
| 1684 - 1922
|
| Soldiers
|
| 1684 - 1922
|
| Colours
|
| 1684 - 1922
|
| Band
|
| 1684 - 1922
|
Battle Honours
|
War of the League of Augsburg
(1689-97)
NAMUR 1695
War of Spanish Succession (1701-15)
BLENHEIM
RAMILLIES
OUDENARDE
MALPAQUET
French Revolutionary Wars (1793-1802)
EGYPT
First China War (1839-1842)
CHINA
Second Burma War (1852-3)
PEGU
Crimean War (1854-5)
SEVASTOPOL
First Maori War (1846-7)
NEW ZEALAND
Second Afghan War (1878-80)
AFGHANISTAN 1879-80
Revolt of Arabi Pasha 1882
TEL-EL-KEBIR
First Sudan War (1882-4)
EGYPT 1882
Egyptian Campaign (1885)
NILE 1884-5
South African War 1899-1902
SOUTH AFRICA 1900-02
World War One
MONS
LE CATEAU
RETREAT FROM MONS
MARNE 1914
AISNE 1914
LA BASSEE 1914
YPRES 1915 1917 1918
GRAVENSTAFEL
ST JULIEN
FREZENBERG
BULLEWAARDE
SOMME 1916 1918
ALBERT 1916 1918
BAZENTIN
DELVILLE WOOD
GUILLEMONT
GINCHY
MESSINES 1917
PILCKEM
LANGEMARCK 1917
ST QUENTIN
ROSIERES
ARRAS 1918
DROCOURT-QUEANT
HINDENBURG LINE
CANAL DU NORD
ST QUENTIN CANAL
BEAUREVOIR
CAMBRAI 1918
COURTAI
FRANCE AND FLANDERS 1914-18
STRUMA
MACEDONIA 1915-17
SULVA
LANDING AT SULVA
GALLIPOLI 1915
GAZA
JERUSALEM
TELL 'ASUR
MEGIDDO
NABLUS
PALESTINE 1917-18
|
|
| Titles of the Regiment
|
| 1684 | Granard's Regiment |
| 1695 | The Royal Regiment of Ireland |
| 1751 | The 18th (The Royal Irish) Regiment of Foot |
| 1881 | The Royal Irish Regiment |
| 1922 | Disbanded |
|
| Further Reading
|
The Campaigns and History of the Royal Irish Regiment from 1684 to 1902
by Lt-Col G Le Mesurier Gretton
(W Blackwood & Sons 1911)
The Irish Regiments, a Pictorial History 1683-1987
by R G Harris
(Nutshell Publishing 1989)
War Sketches in Colour
by S E St Leger
(London 1903)
|
| Regimental Museum
|
Stephens Barracks
Kilkenny
3rd Infantry Battalion of the Irish Defence Forces
First and Last website
|
|