British Empire Title

The Westcountry Walker: Hiking Through History

Seeking Cool Paths from the River Bovey to Pethybridge and Lustleigh


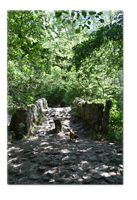
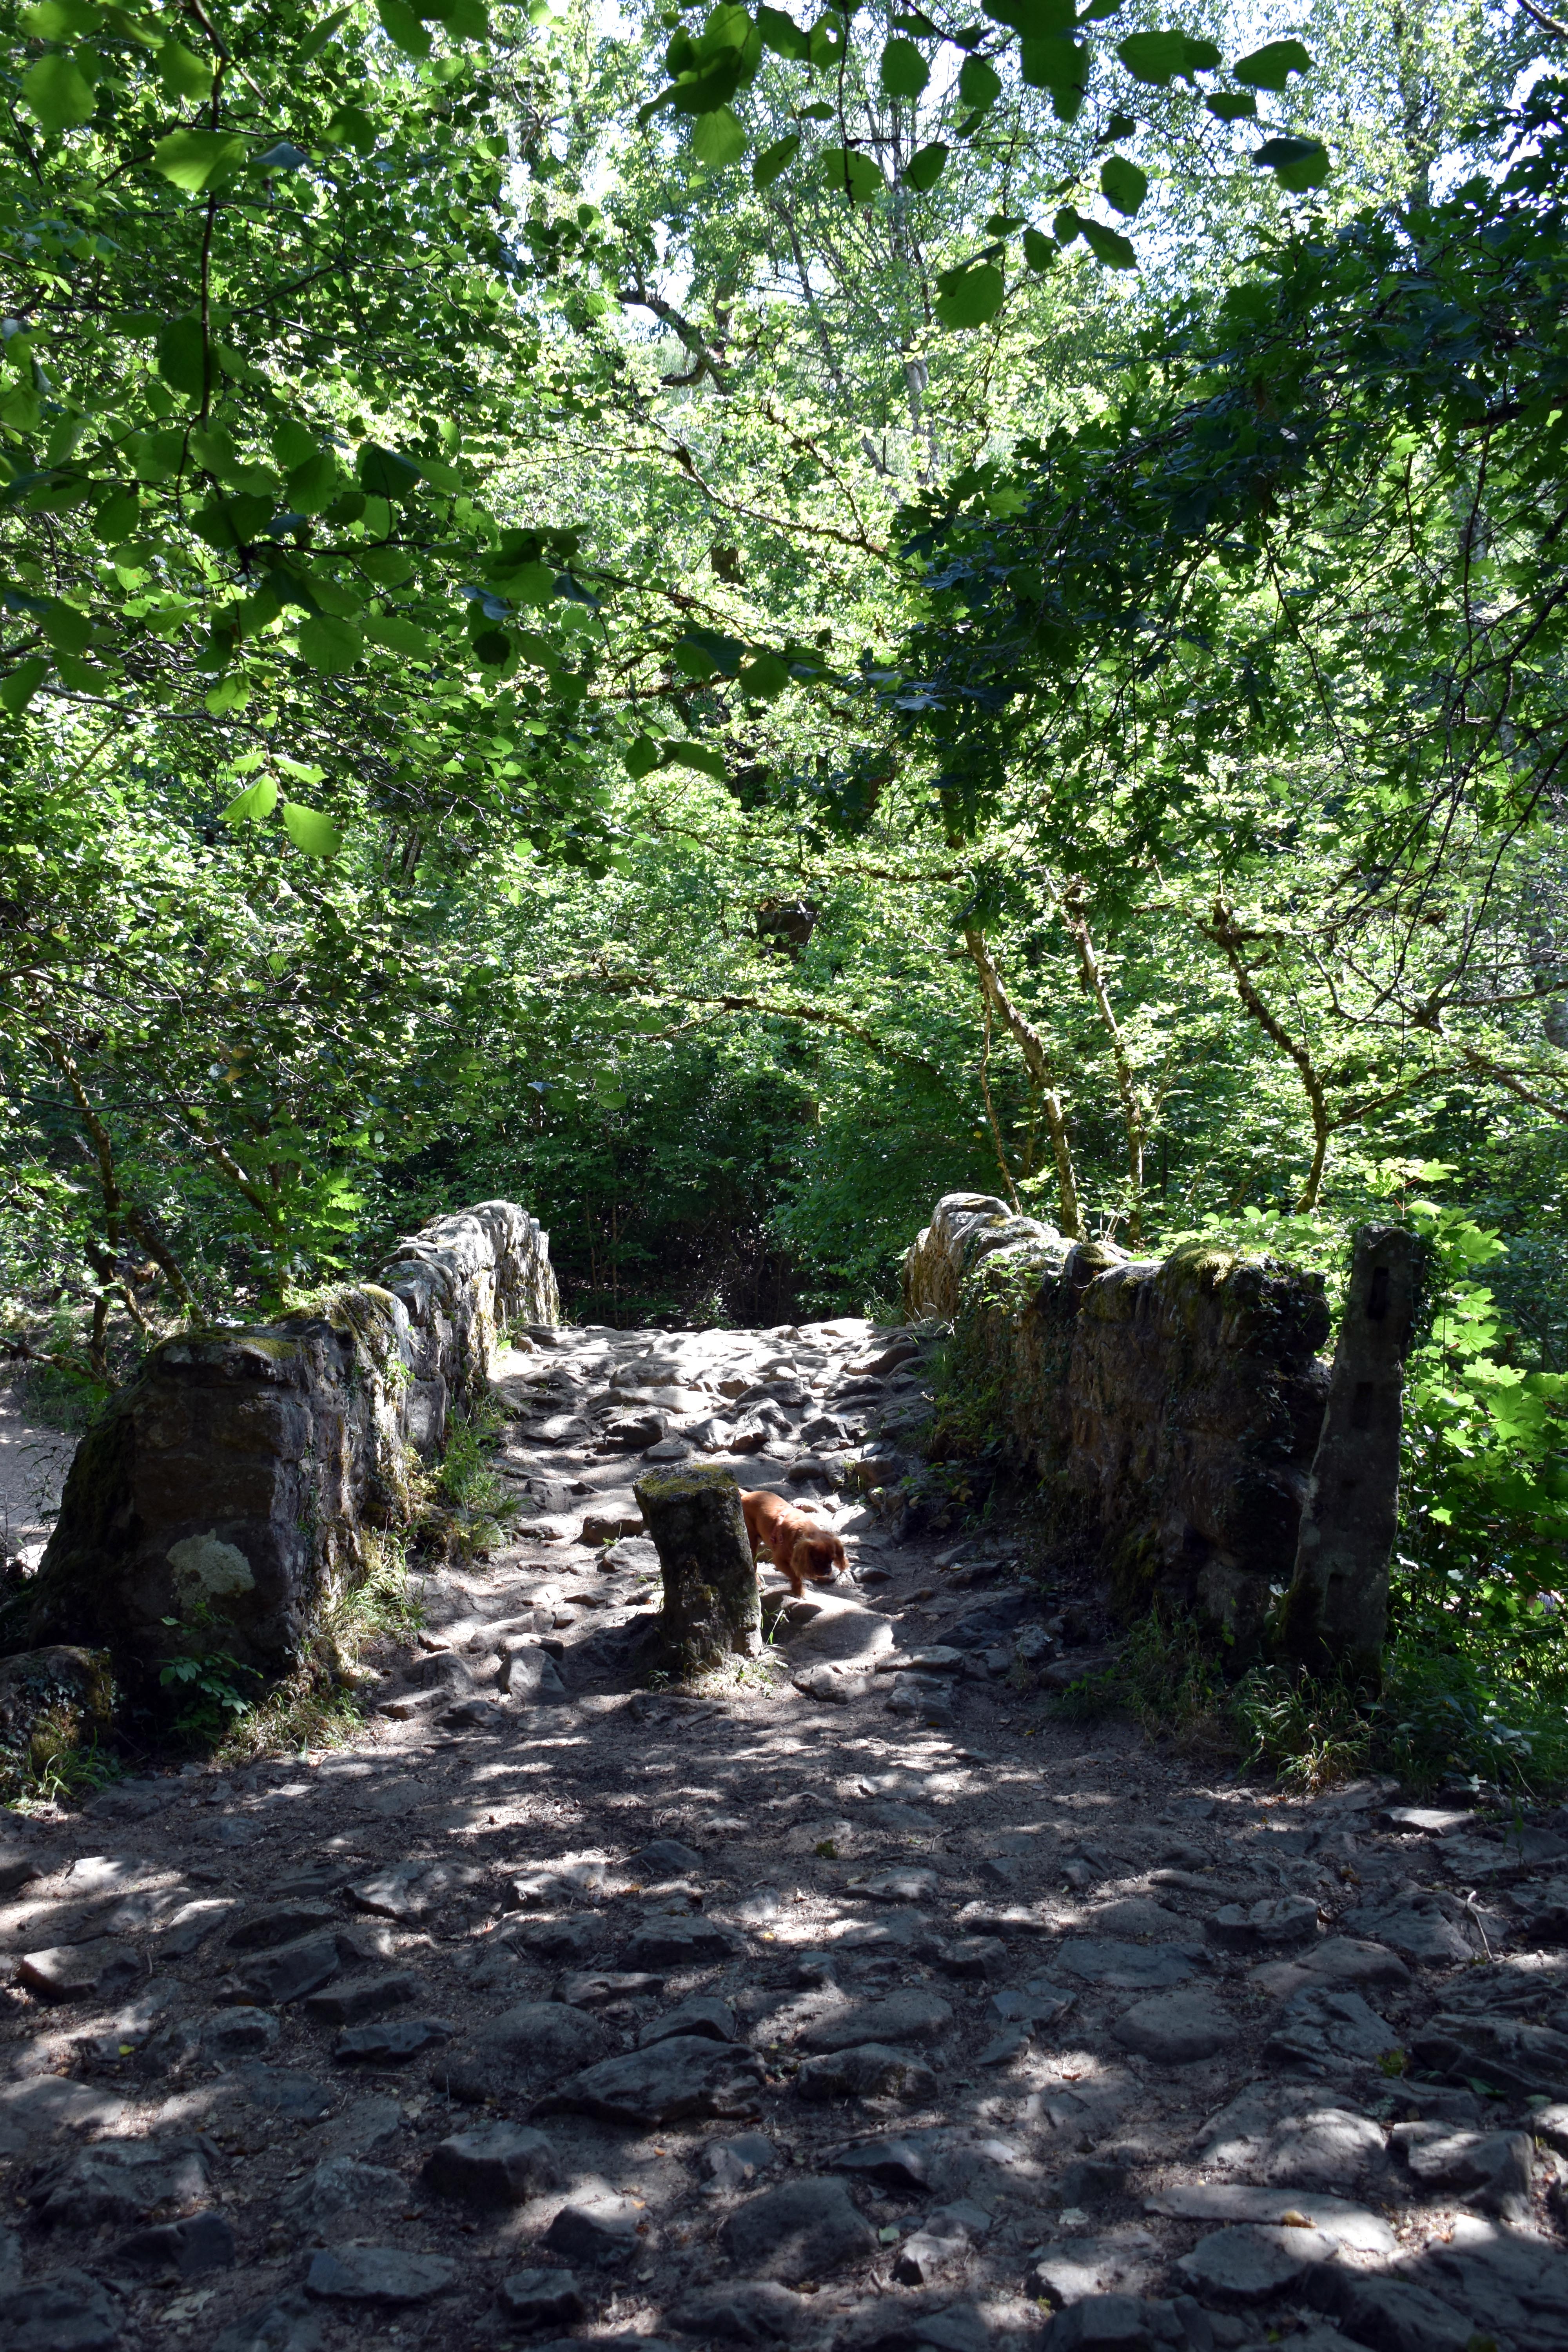
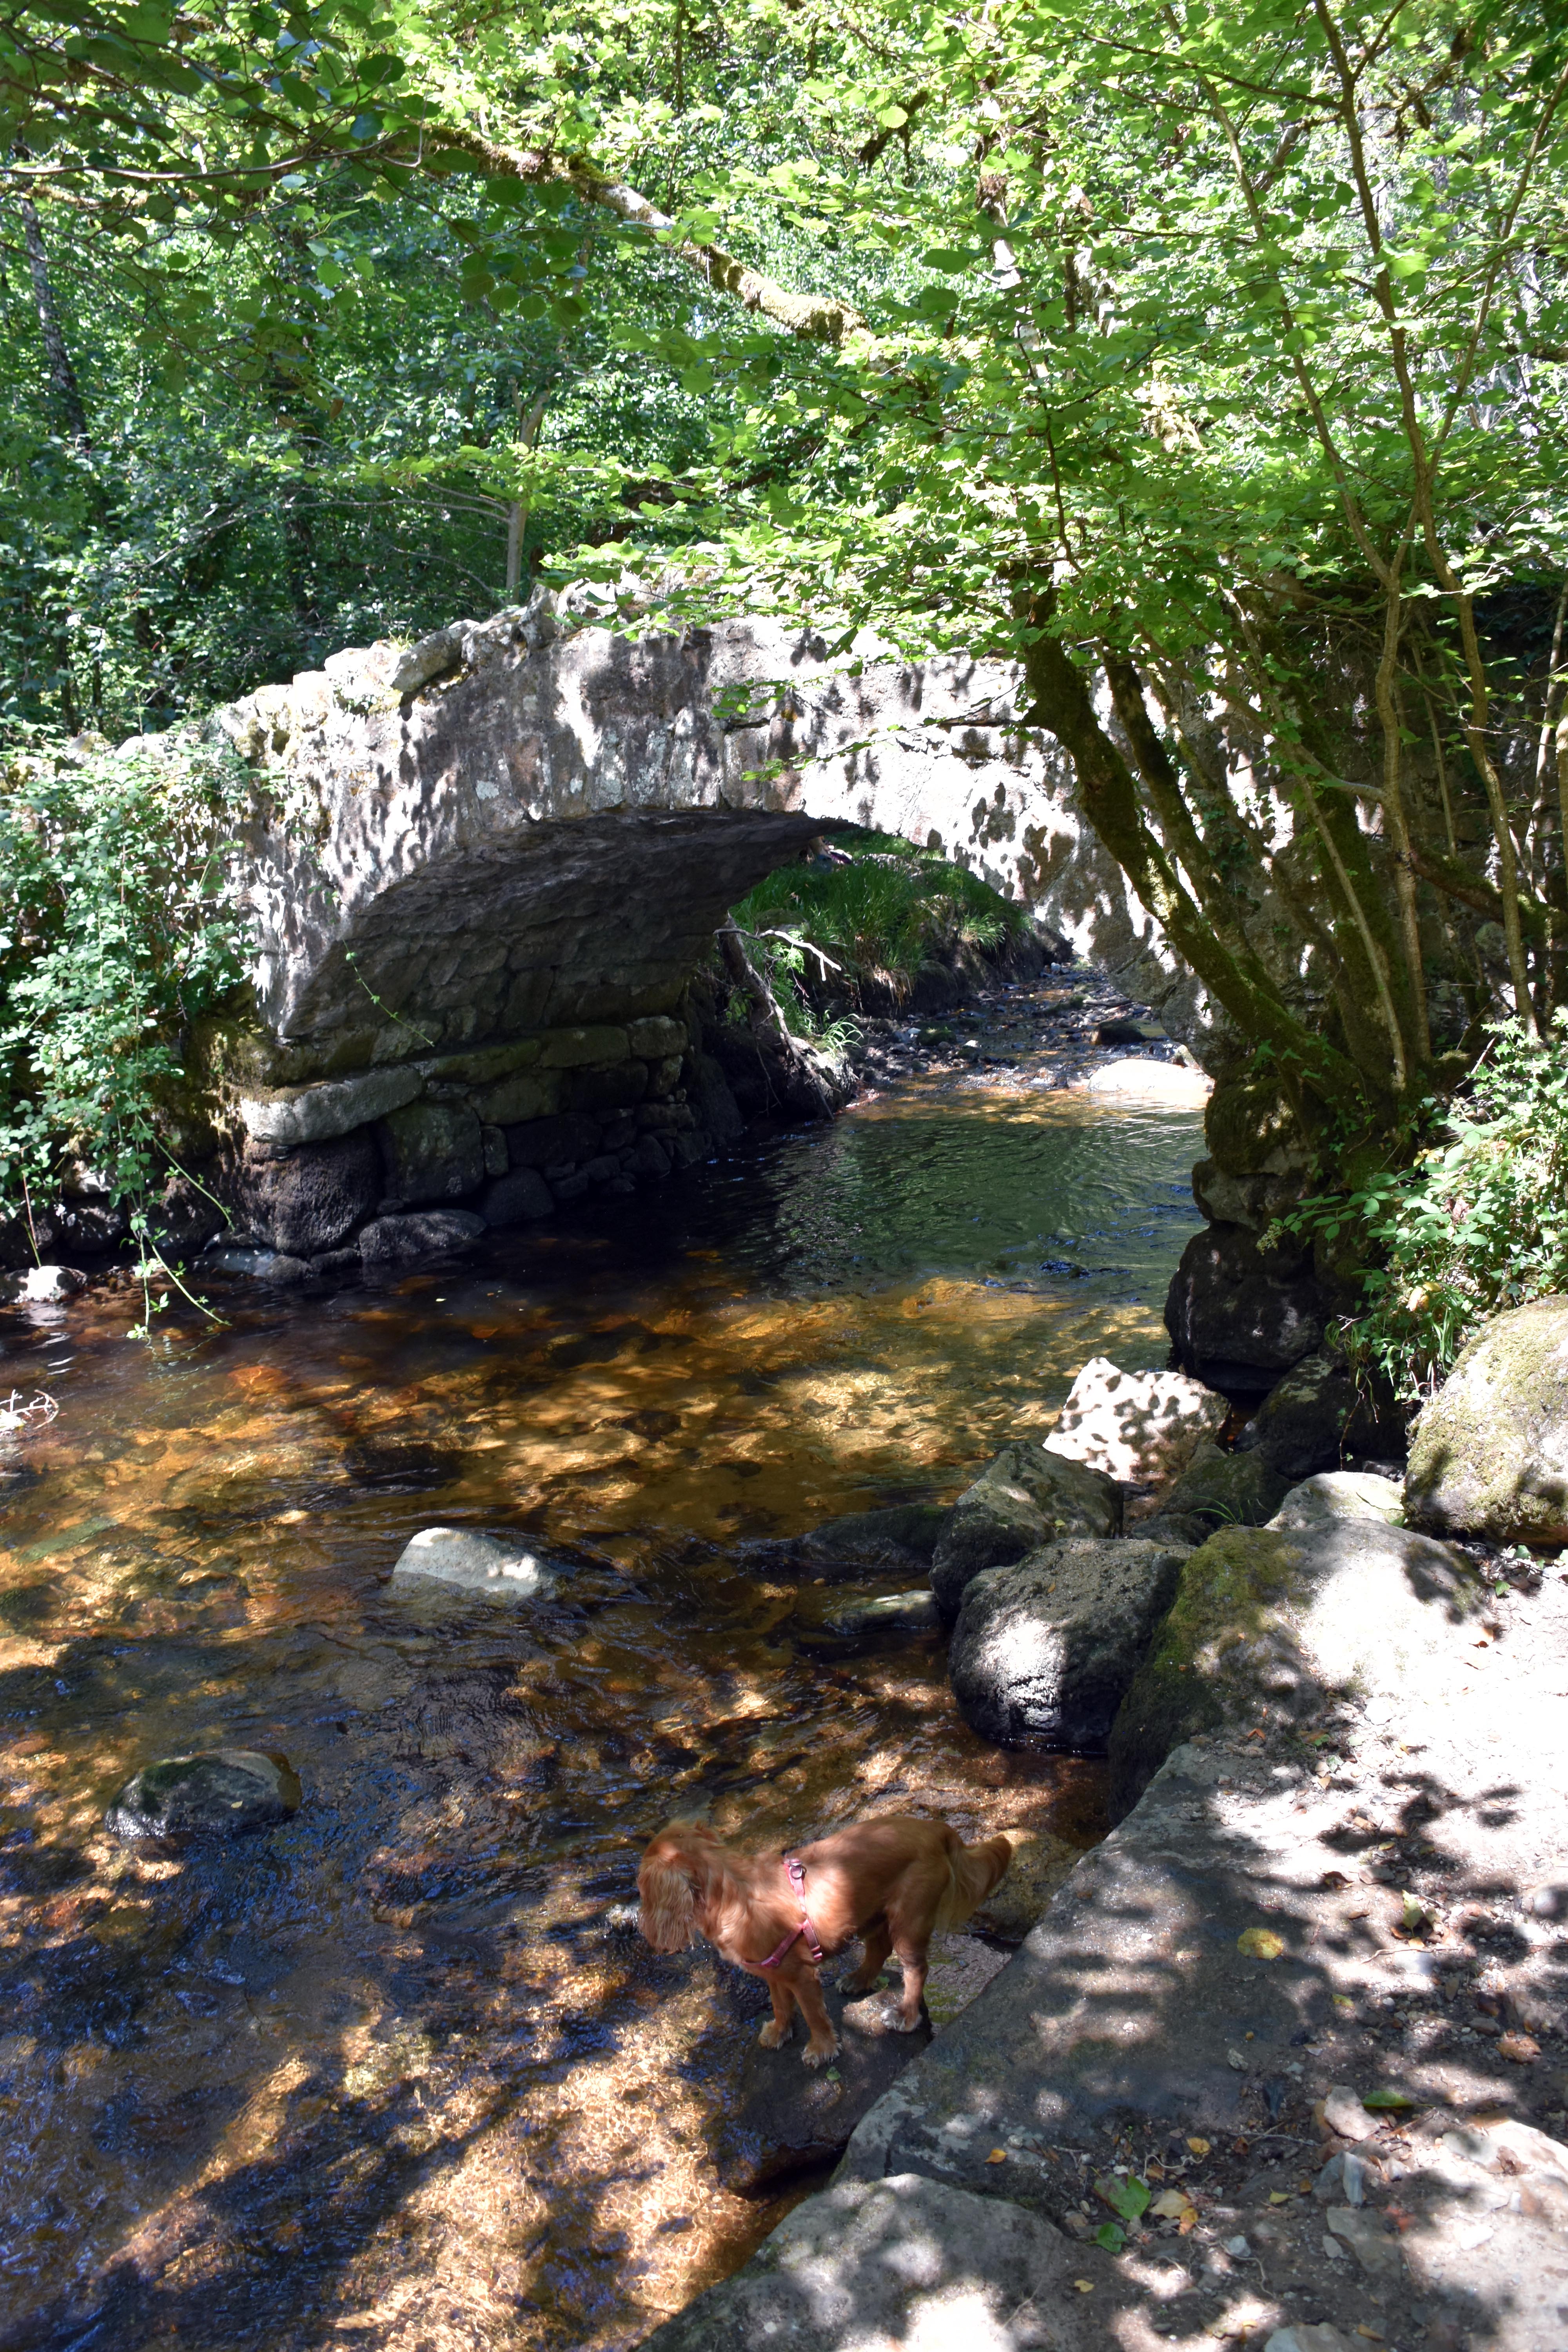
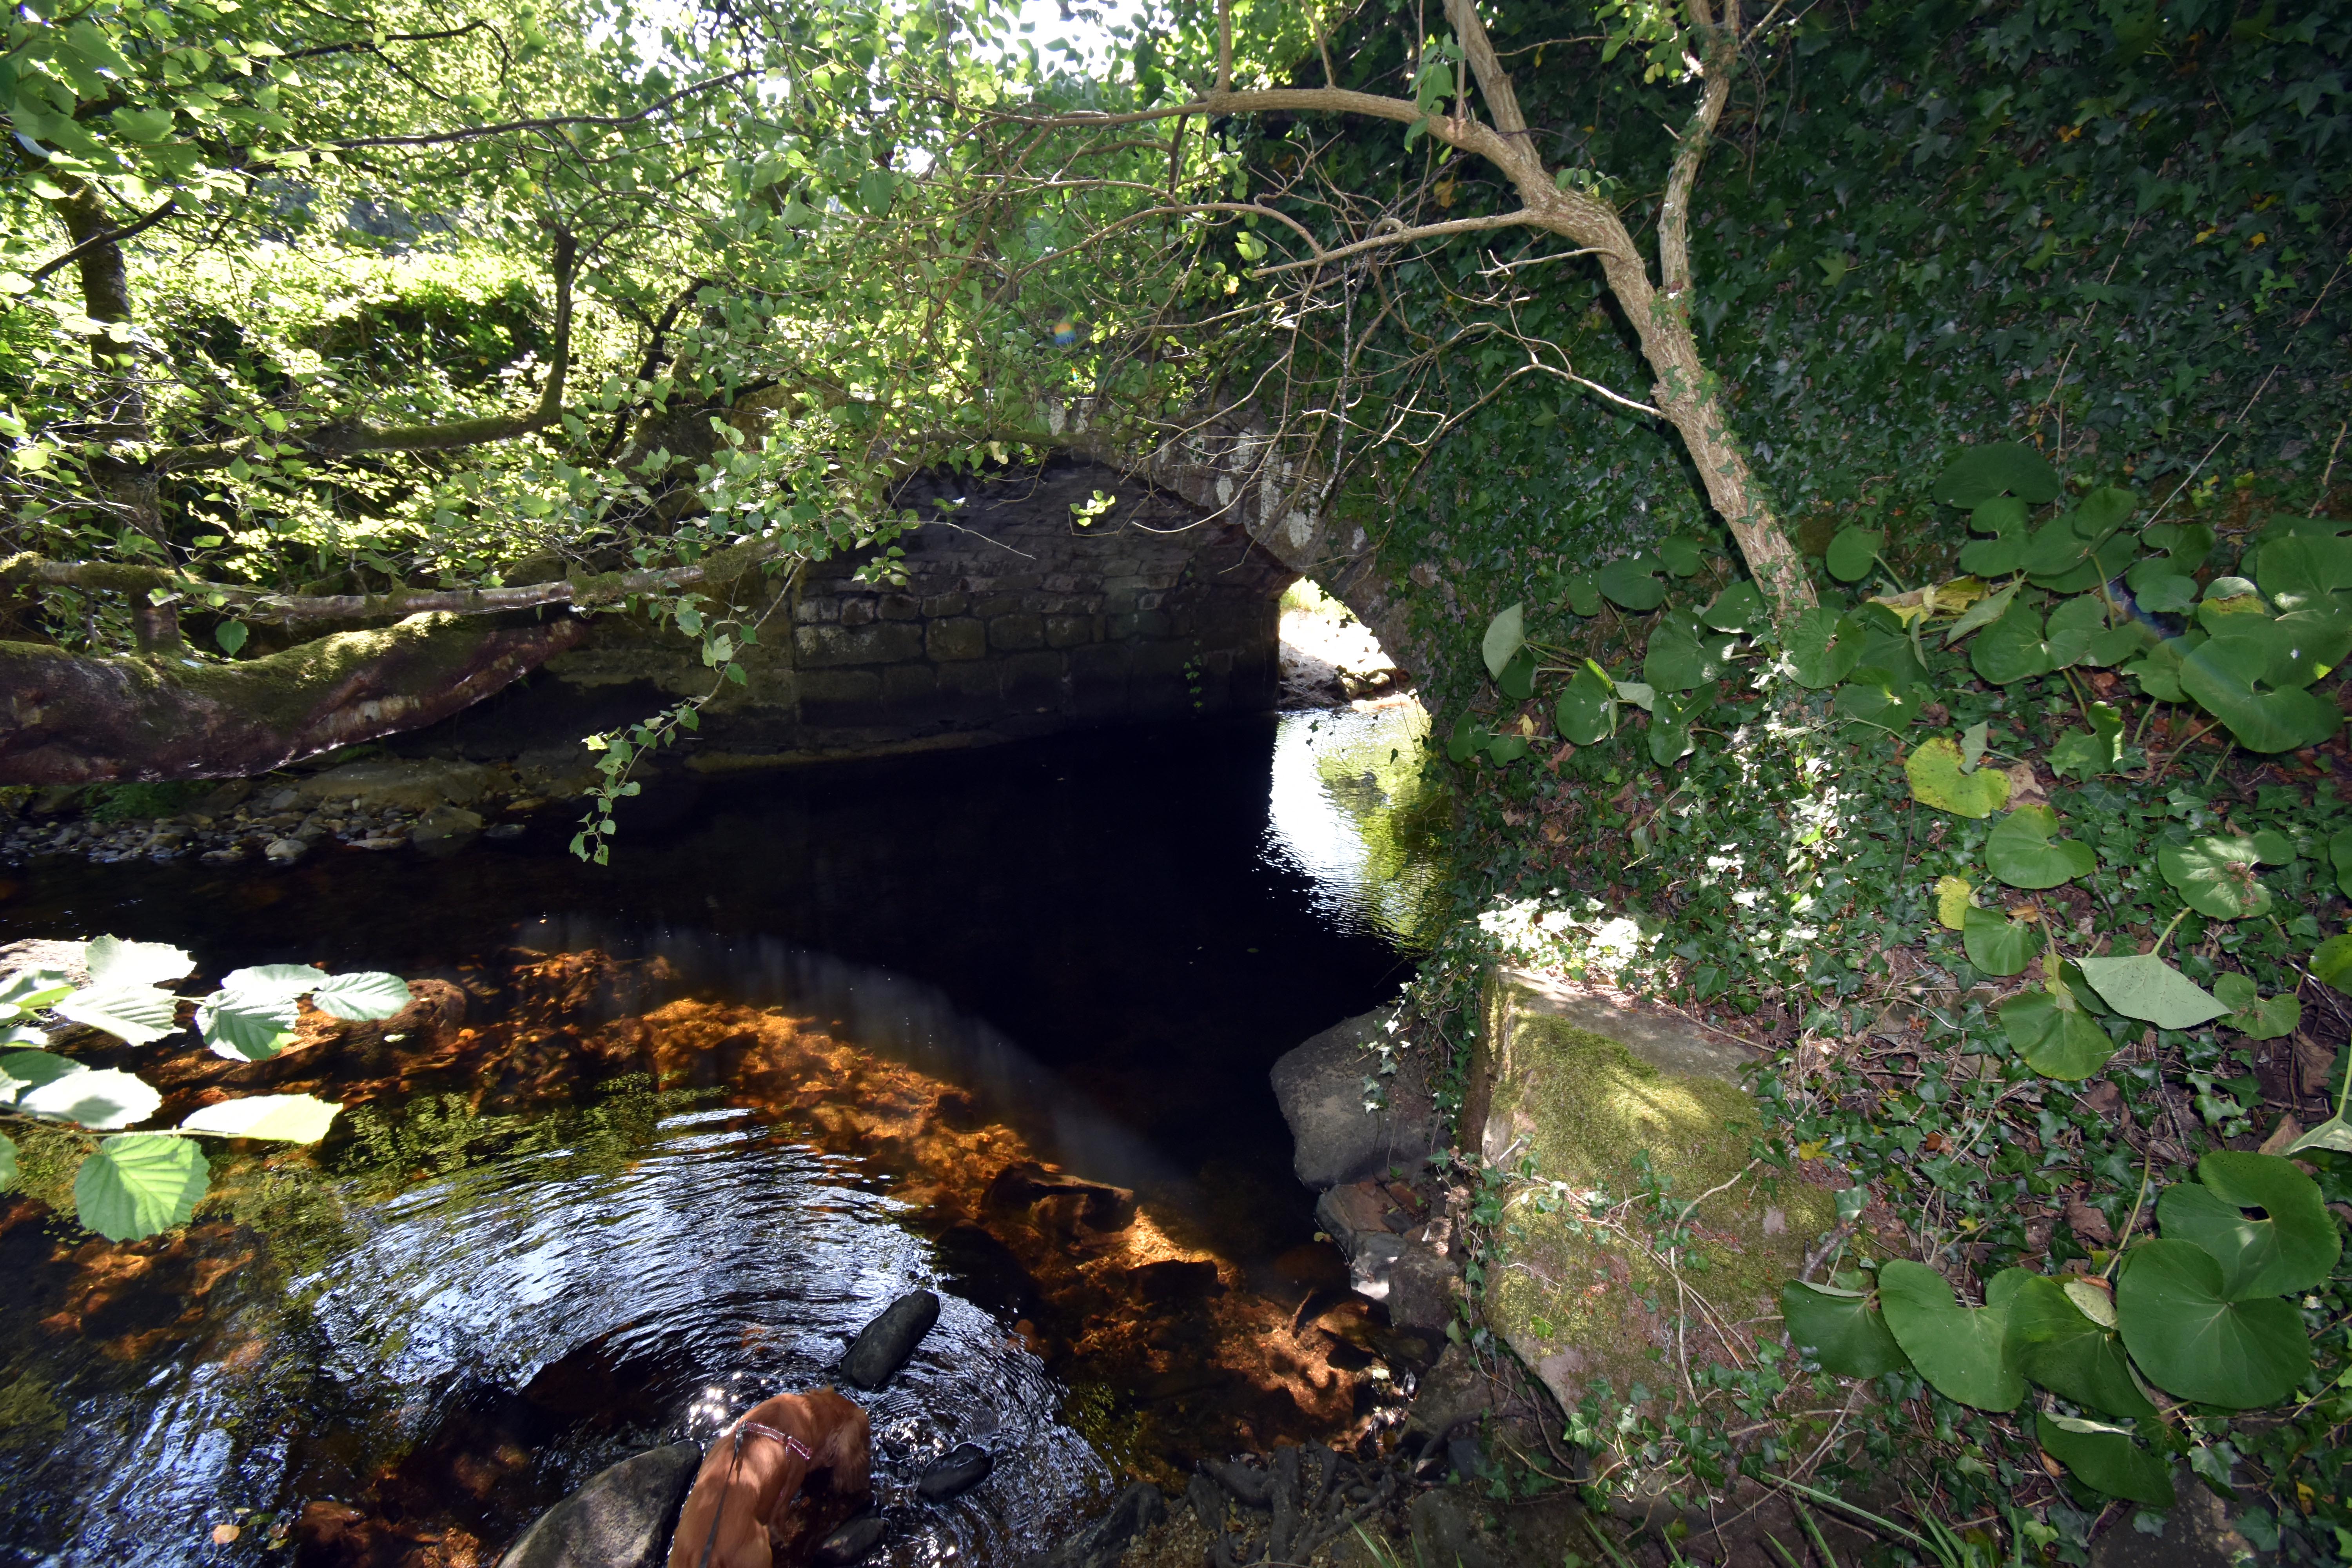
Hisley Packhorse Bridge

With a week of blisteringly hot temperatures, Rupert and I decided to head to some tree‑lined paths on the edge of East Dartmoor along the River Bovey and then descend into the perfect picture‑postcard villages of Pethybridge and Lustleigh. If anyone was to imagine the quintessential Devon villages, I would guess many would conjure up images of what we were to see on this beautiful July day.

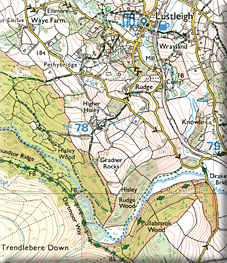
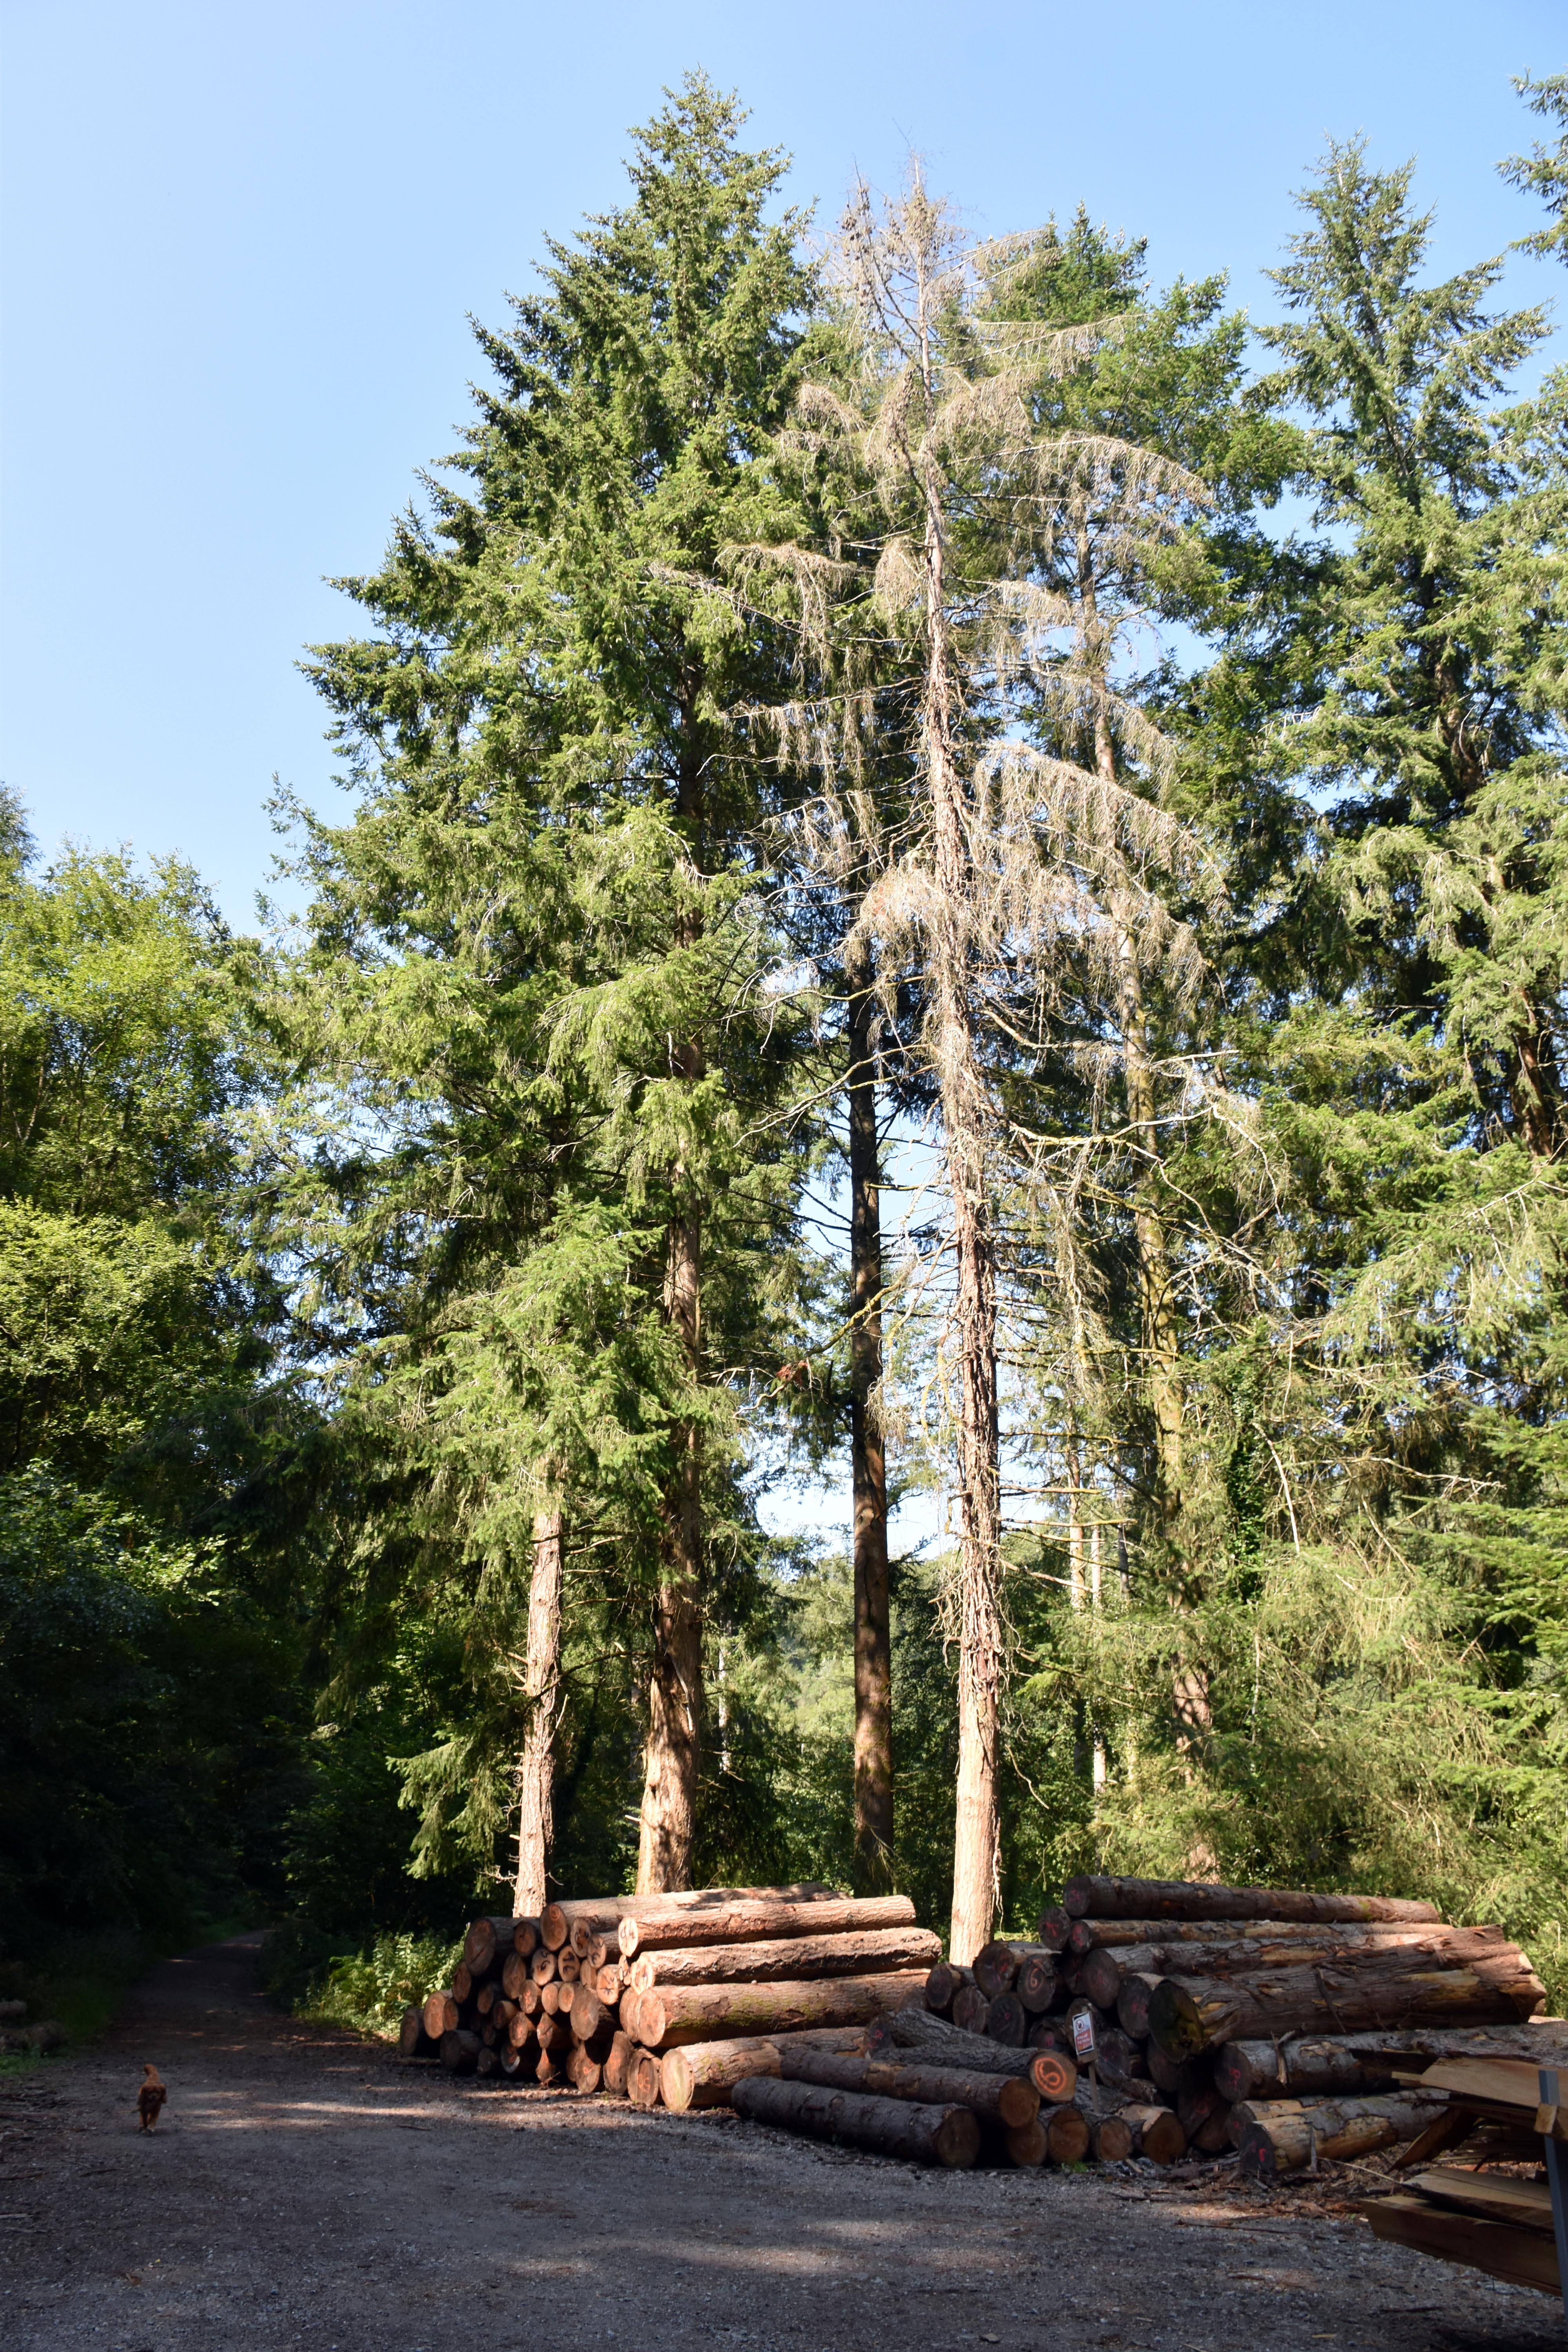
We parked at Pullabrook Wood just to the south of Lustleigh close to Yarner Wood and under the shadow of Black Hill. From here we started walking upstream into Pullabrook Wood which is very much an active area for the timber industry. This had the added benefit of actually being able to find a functioning portaloo in tip‑top condition. You rarely find such toiletry delights on our journeys! I took full advantage of the facilities before carrying on climbing towards the Dartmoor Way.

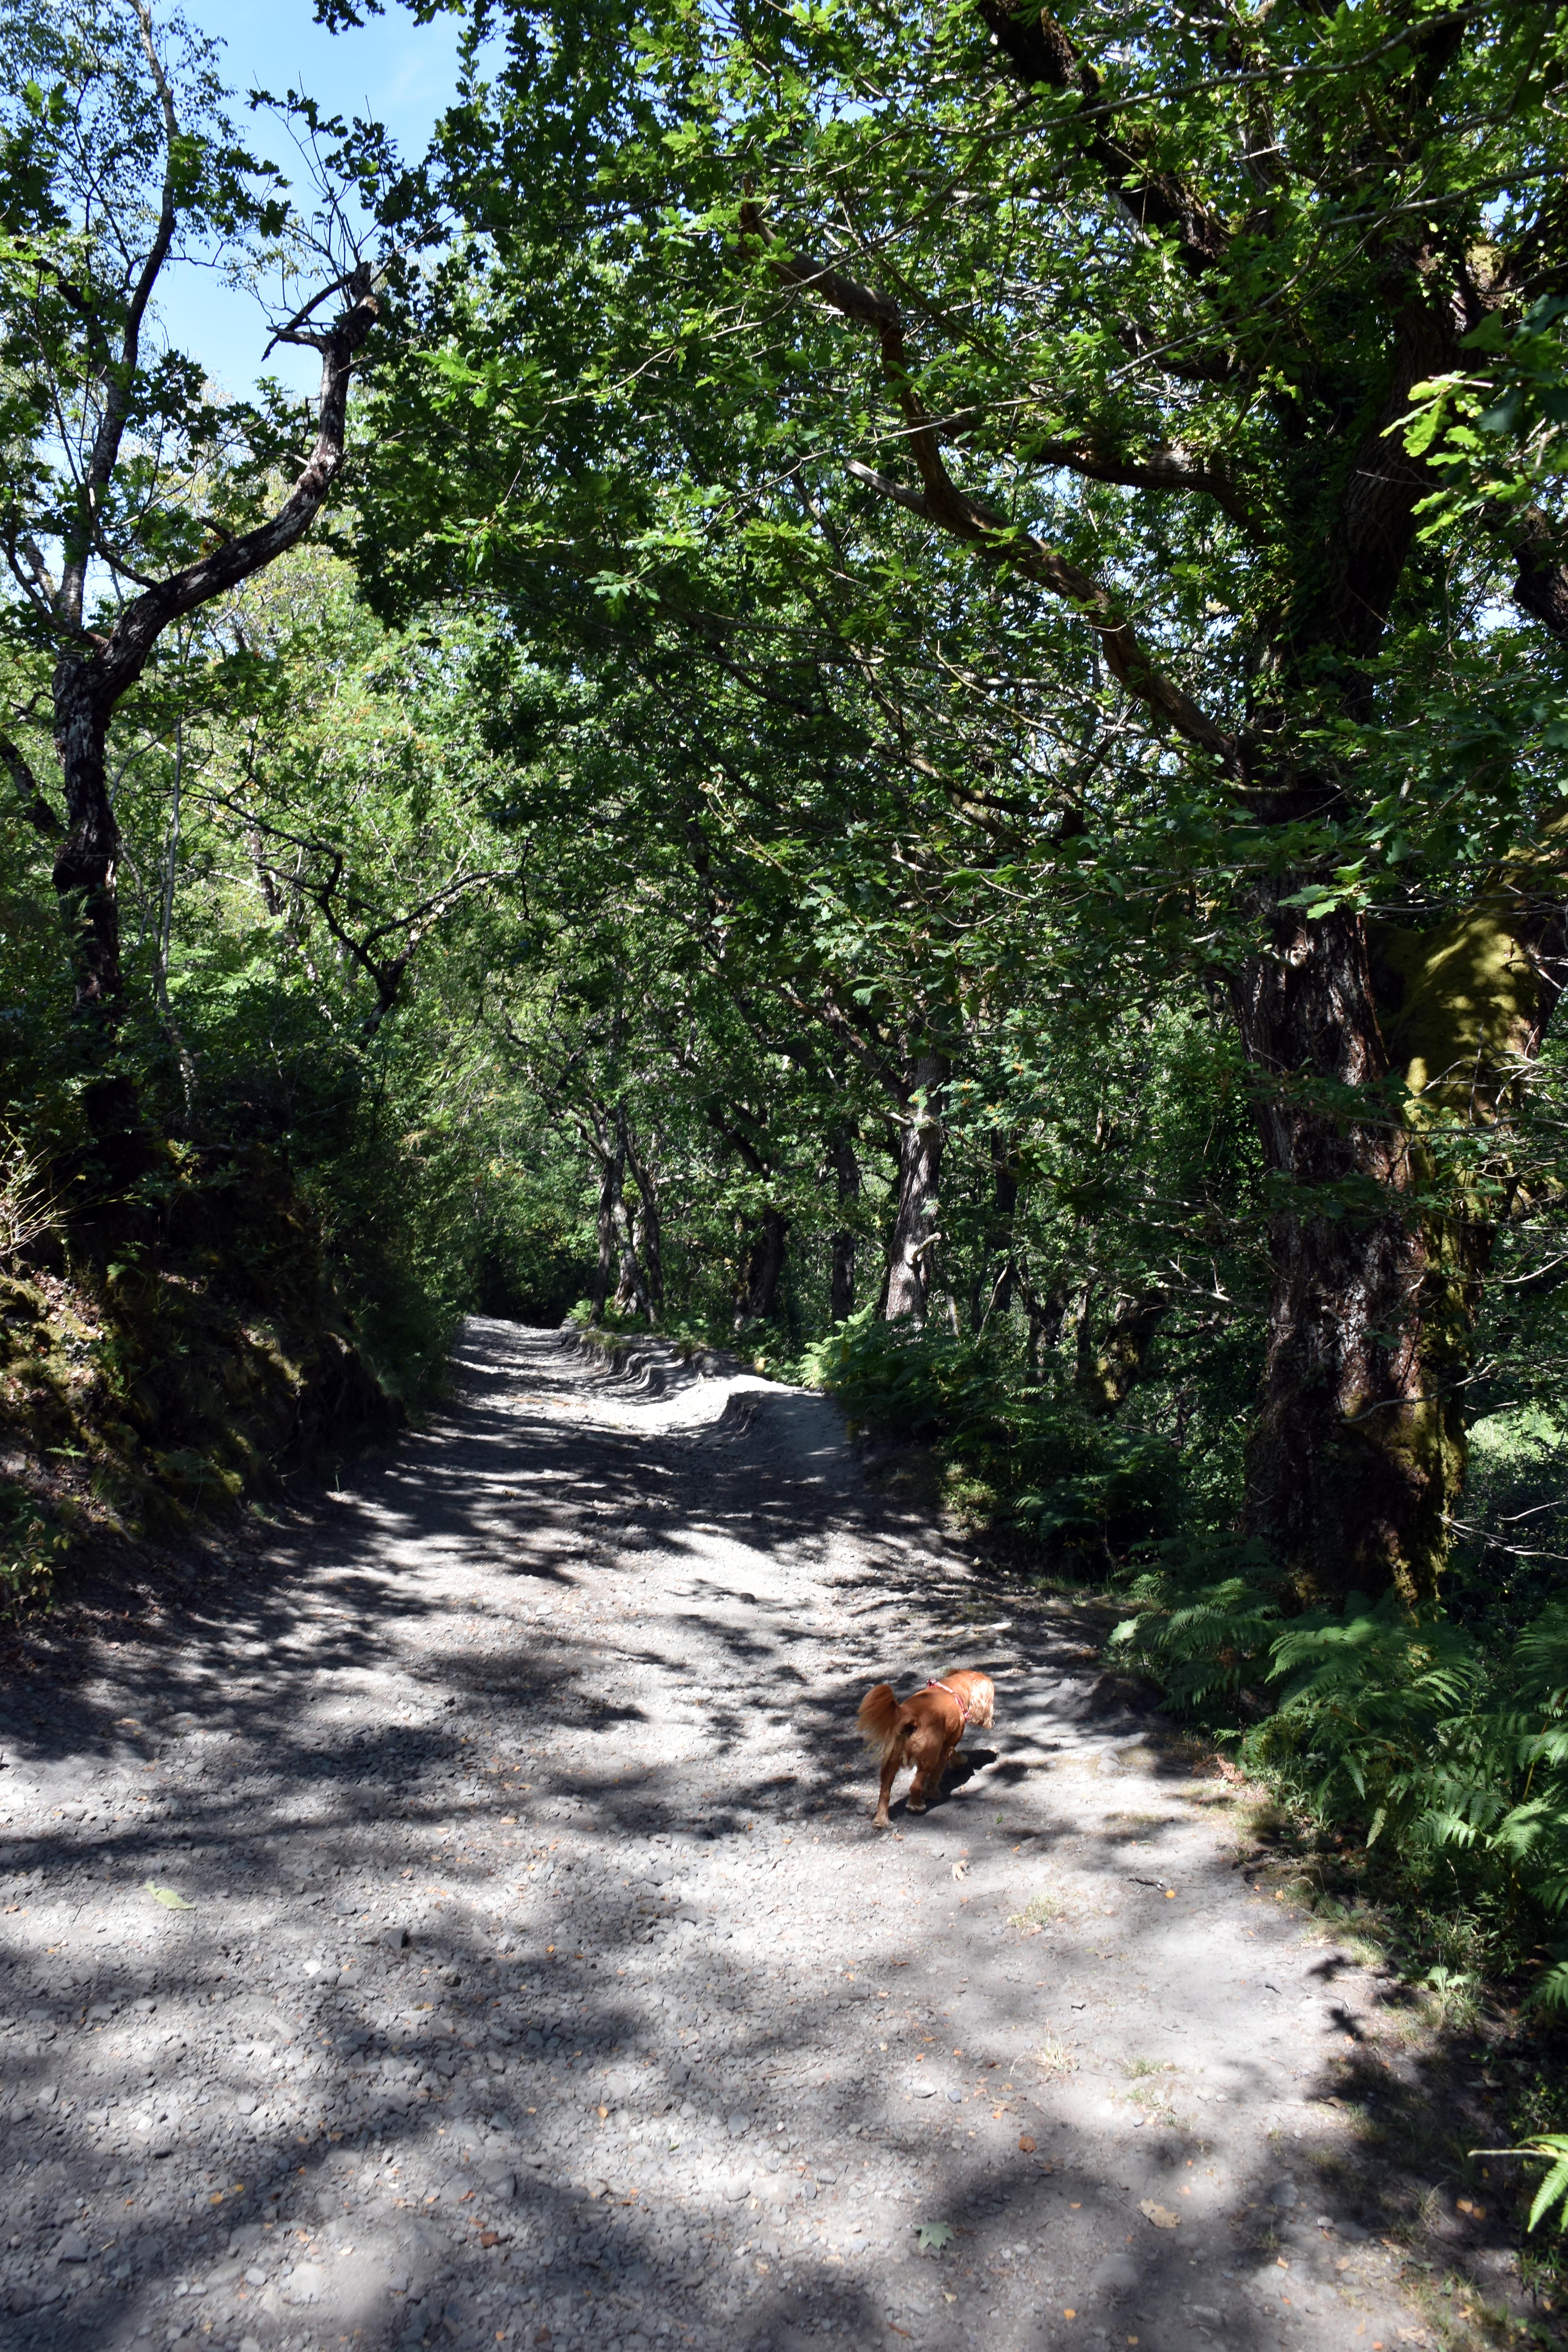
The bend in the Bovey turns north‑westwards and we descended down the all‑important tree‑lined pathway. The sun has been blisteringly hot of late; the shade was most welcome. Eventually we turned off the Dartmoor Way to head to the picturesque Hisley Packhorse Bridge. Given the steep terrain in this area, only packhorses would be able to traverse this terrain, hence this unusually sharp bridge that no wagon or carriage could ever have traversed. Local farmers and merchants would use it to move livestock or goods between Lustleigh and Manaton and surrounding farms. This idyllic location made it very popular whilst we were there. Lots of families and walkers were enjoying the beautiful location.

After Rupert refreshed himself we headed up the hill into Hisley Wood – still with the all‑important shade from the trees for most of the way. We were heading to a bridle path towards Pethybridge but a split in the path not marked on the Ordnance Survey Map and without any signposts flummoxed us a little. We kept to the right thinking that was the way to Pethybridge in general, but it just seemed to be taking us back towards our car park! Fortunately, just before we considered turning around and retracing our steps it kindly provided the necessary U‑bend to allow us to head back to the way we wanted to go. Eventually it brought us back out at the bridle path – but for such a big path to be omitted from the maps seemed a little incongruous.
Pethybridge and Lustleigh

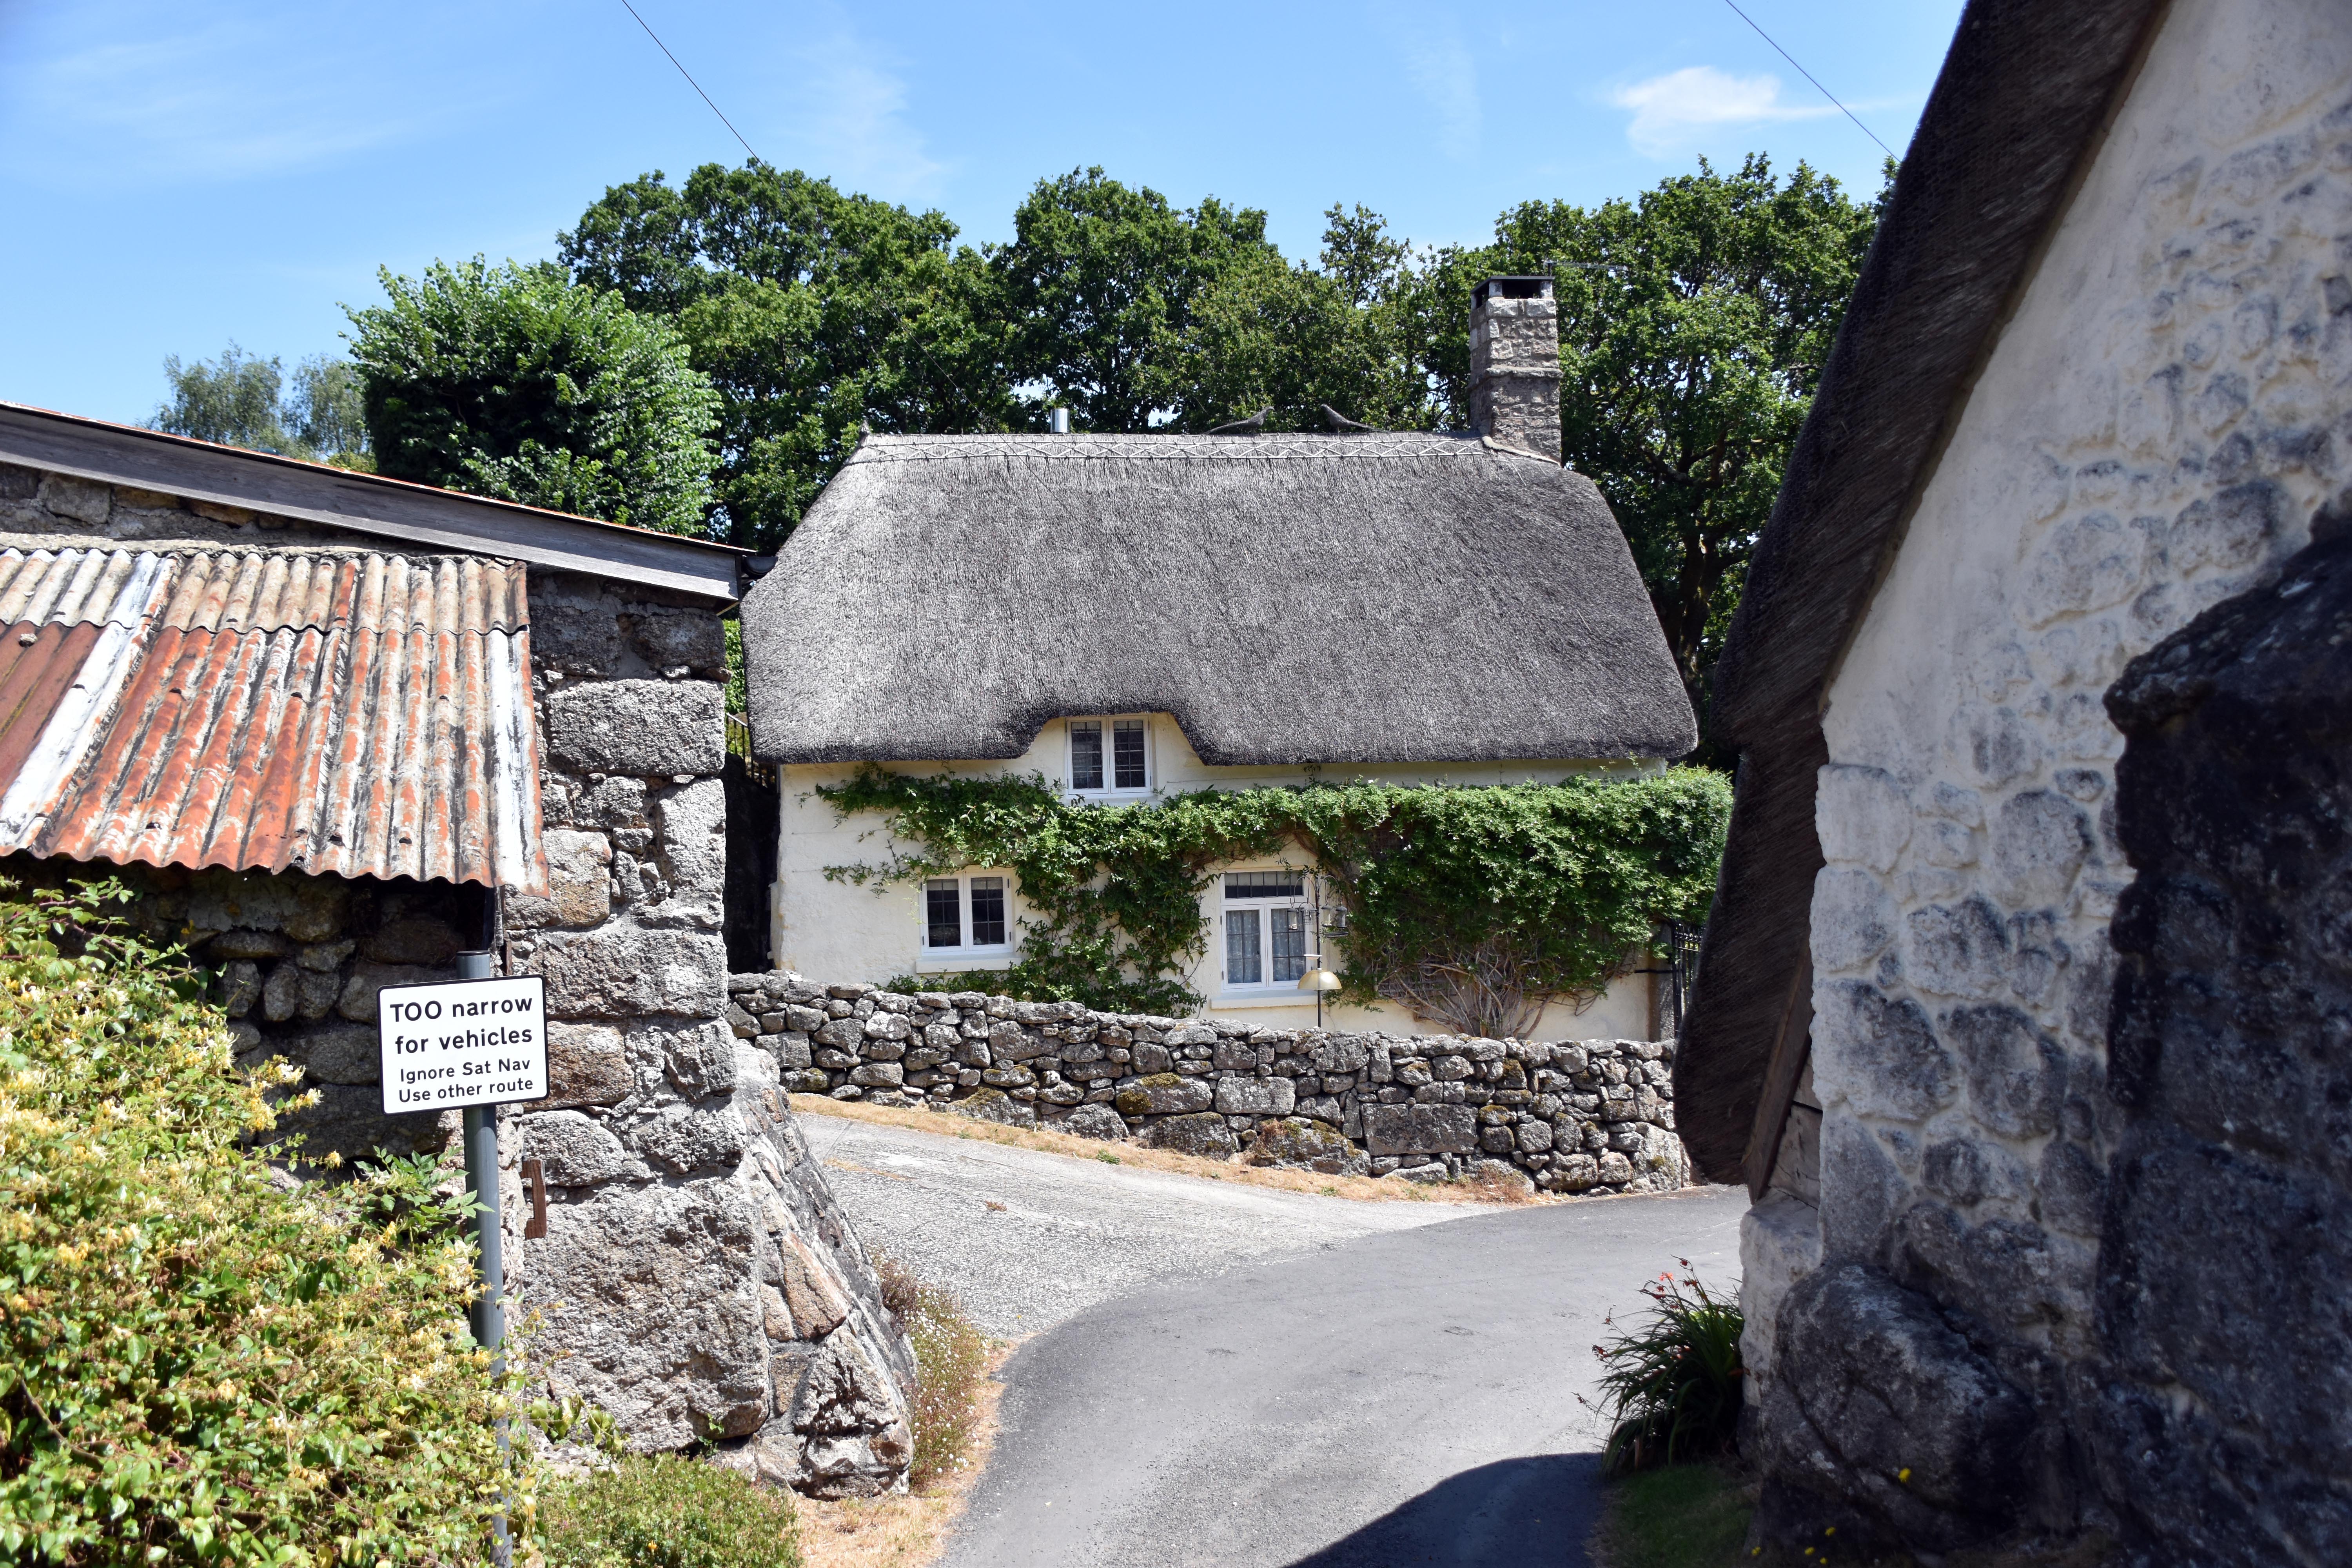
We eventually climbed to the top of the ridge and were treated to glorious views to the west and to the east. We started to lose the shade from the trees although substantial hedges provided some cover as we began our descent towards Pethybridge. Not before too long we reached some tarmac for the incredibly narrow lanes around here. We veered left down into Pethybridge along roads that warned cars very much not to even consider driving along these roads. The proliferation of these funny signs made us think that visitors and perhaps especially delivery drivers were frequently led astray by their naughty satnavs and fooled into thinking that their car might squeeze through if they breathed in enough.

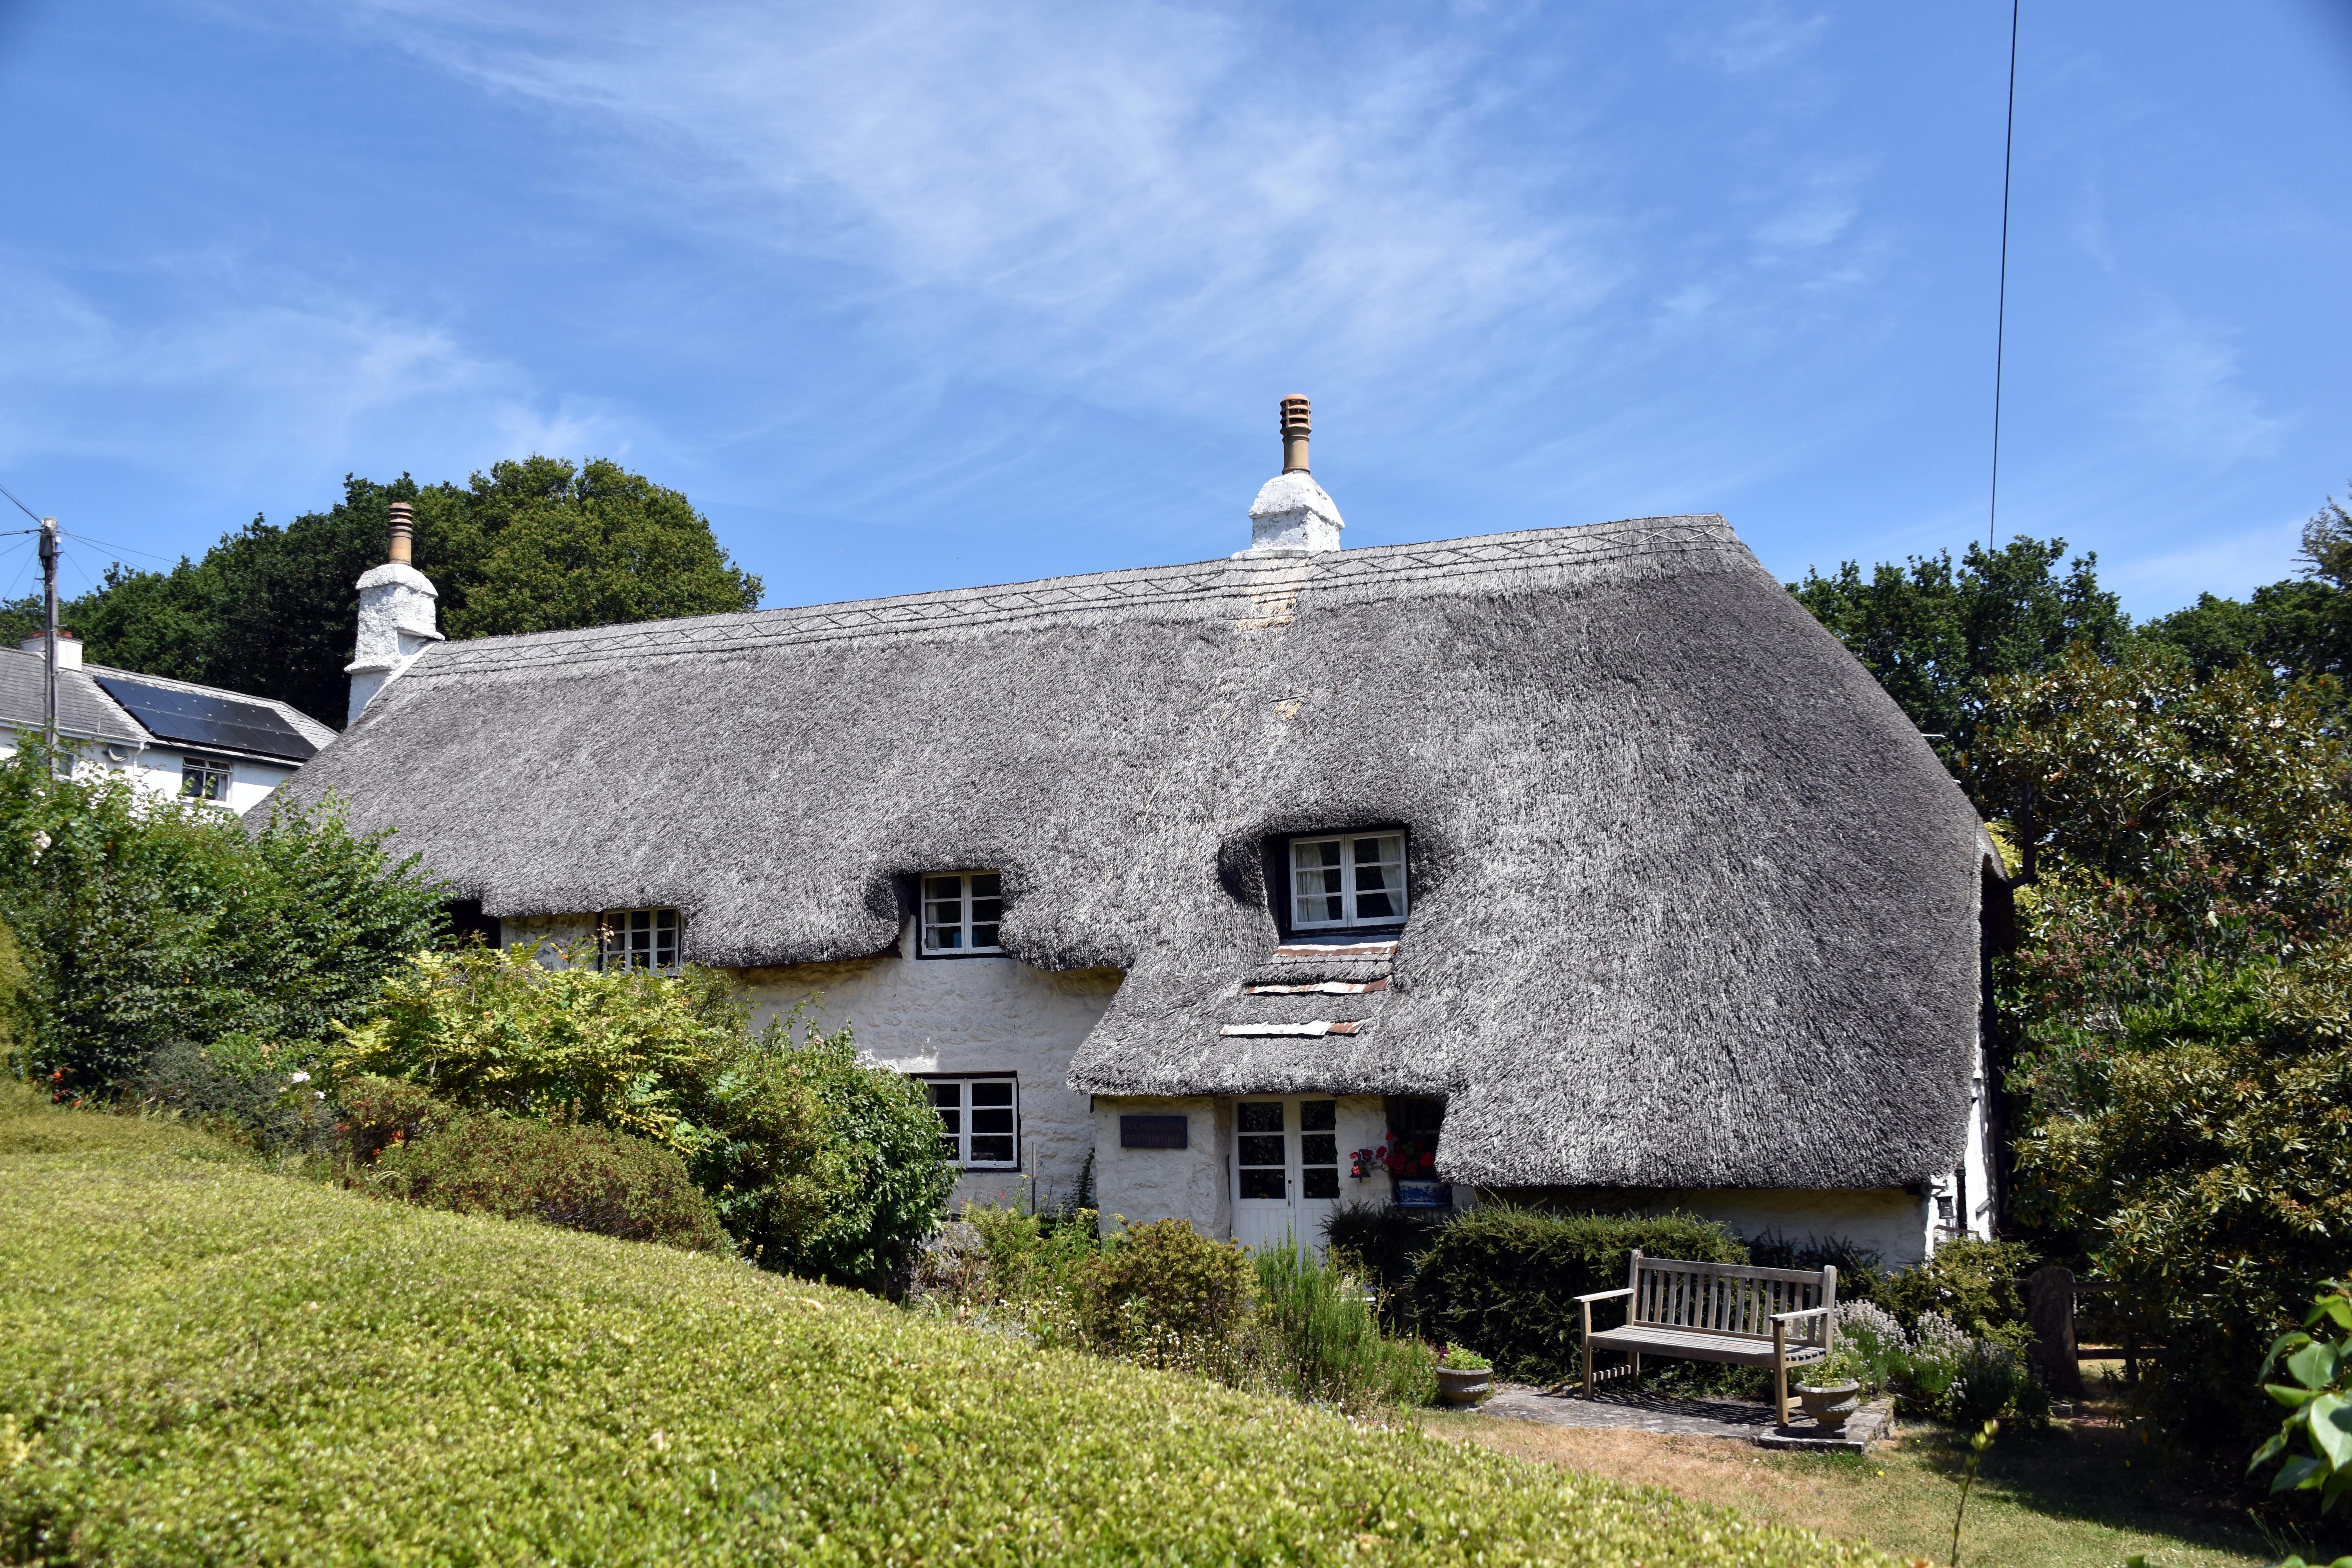
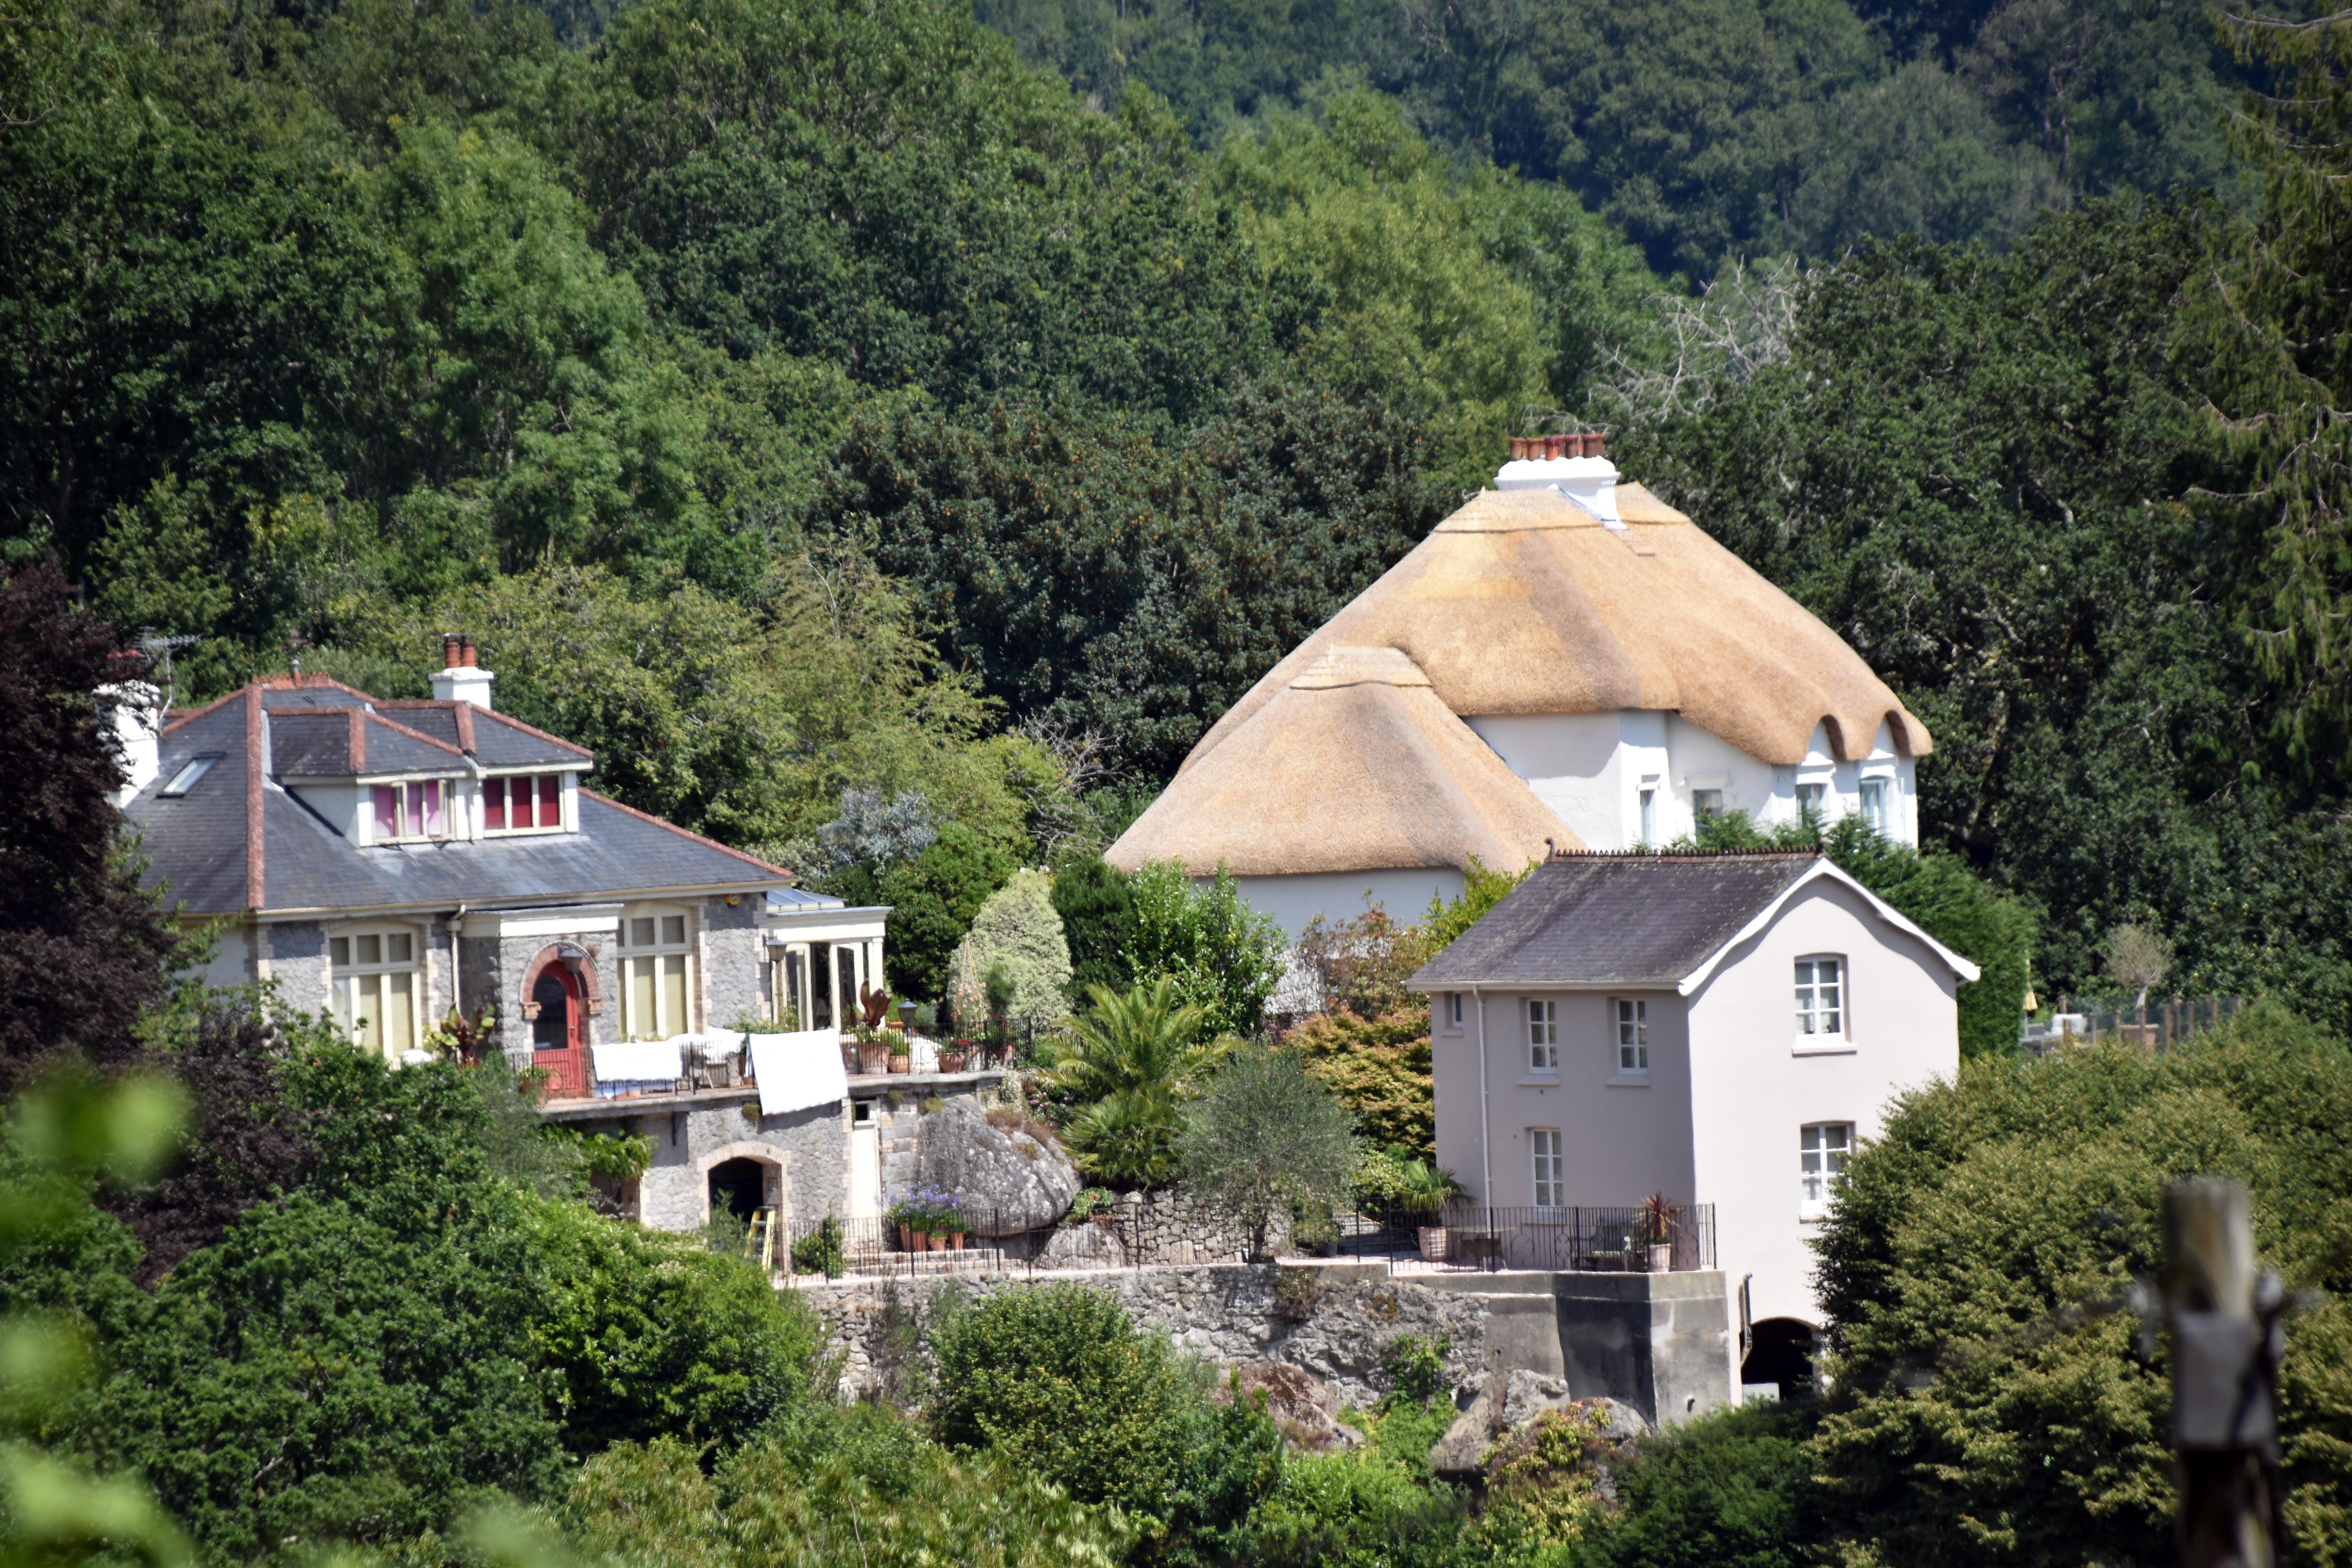
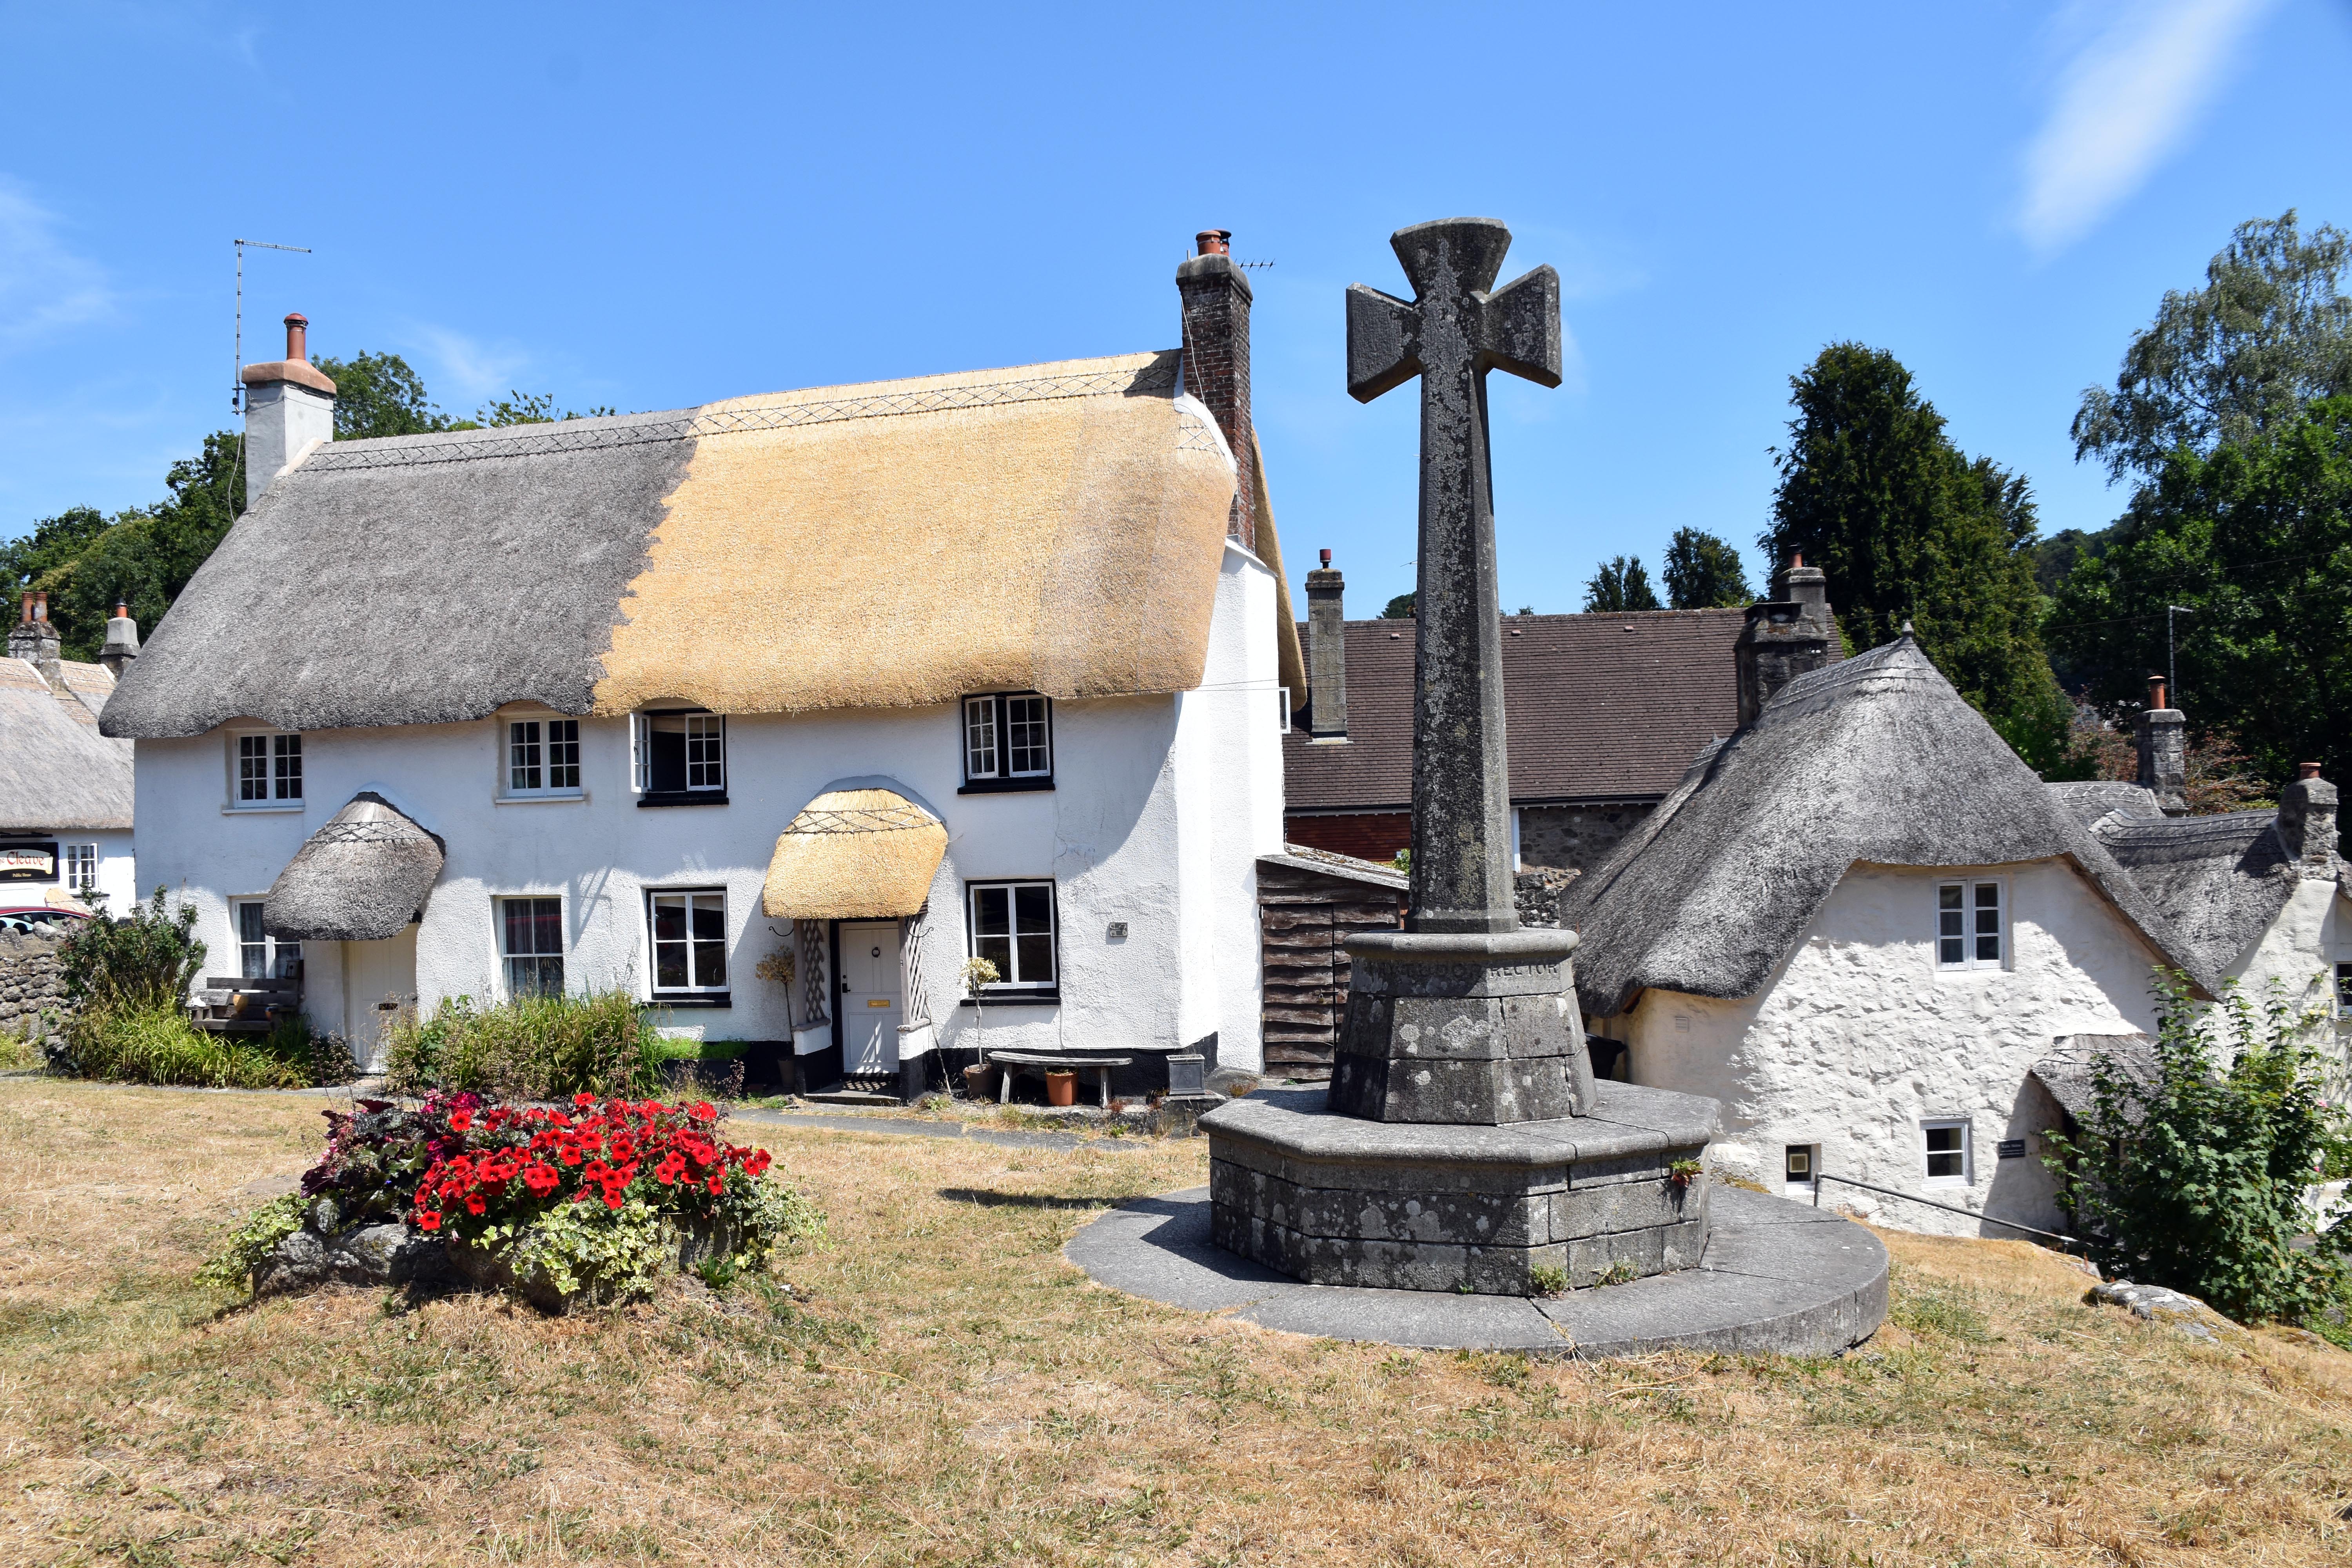
Pethybridge itself soon presented itself as full of stunning Devon cottages with impressive thatched roofs and bulbous walls that seem as if they have put on weight in older age! Either that or they are trying to make life even more difficult for passing cars and vans! Every direction you look appeared to be a genuine picture postcard of the type you remember from childhood holidays. And as if Pethybridge isn’t pretty enough, its height gives you stunning views down towards Lustleigh below and equally pretty thatched houses scattered along the valley. It felt like we had entered a film set. Perhaps this was the inspiration for ‘The Shire’ of Tolkien’s imagination; it certainly epitomises what many of us think of when we imagine Devonshire.
May Queen Throne

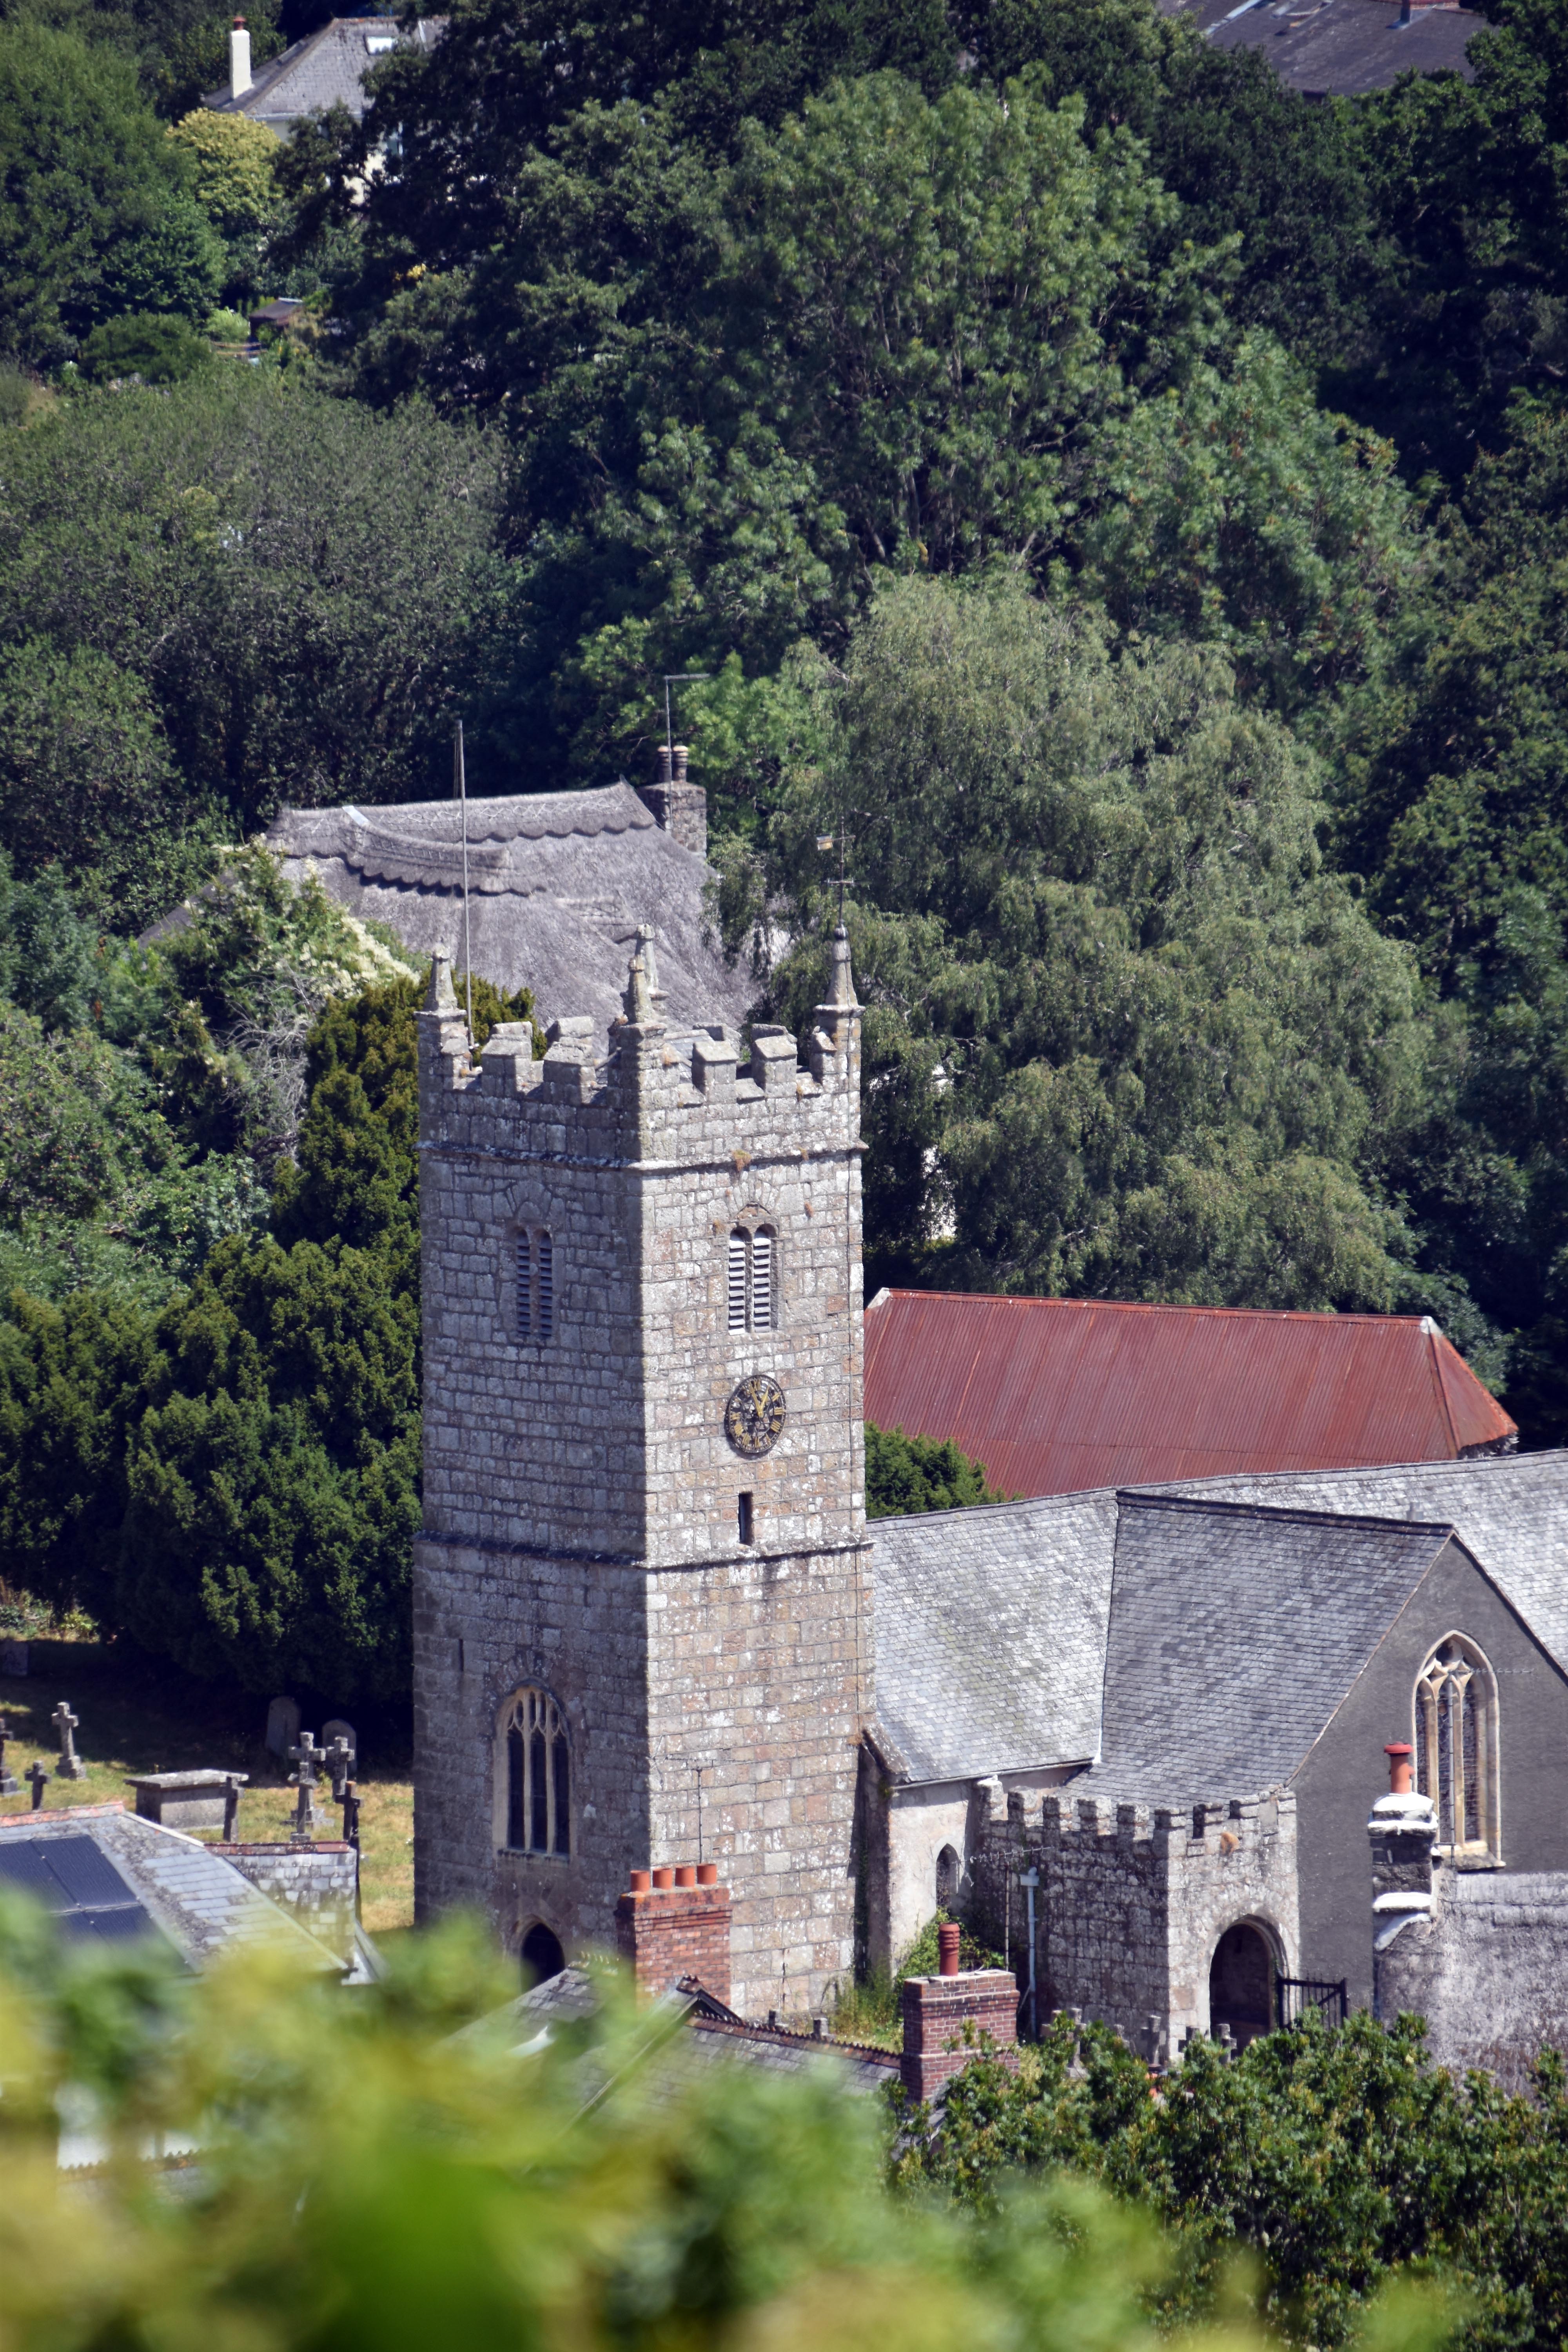
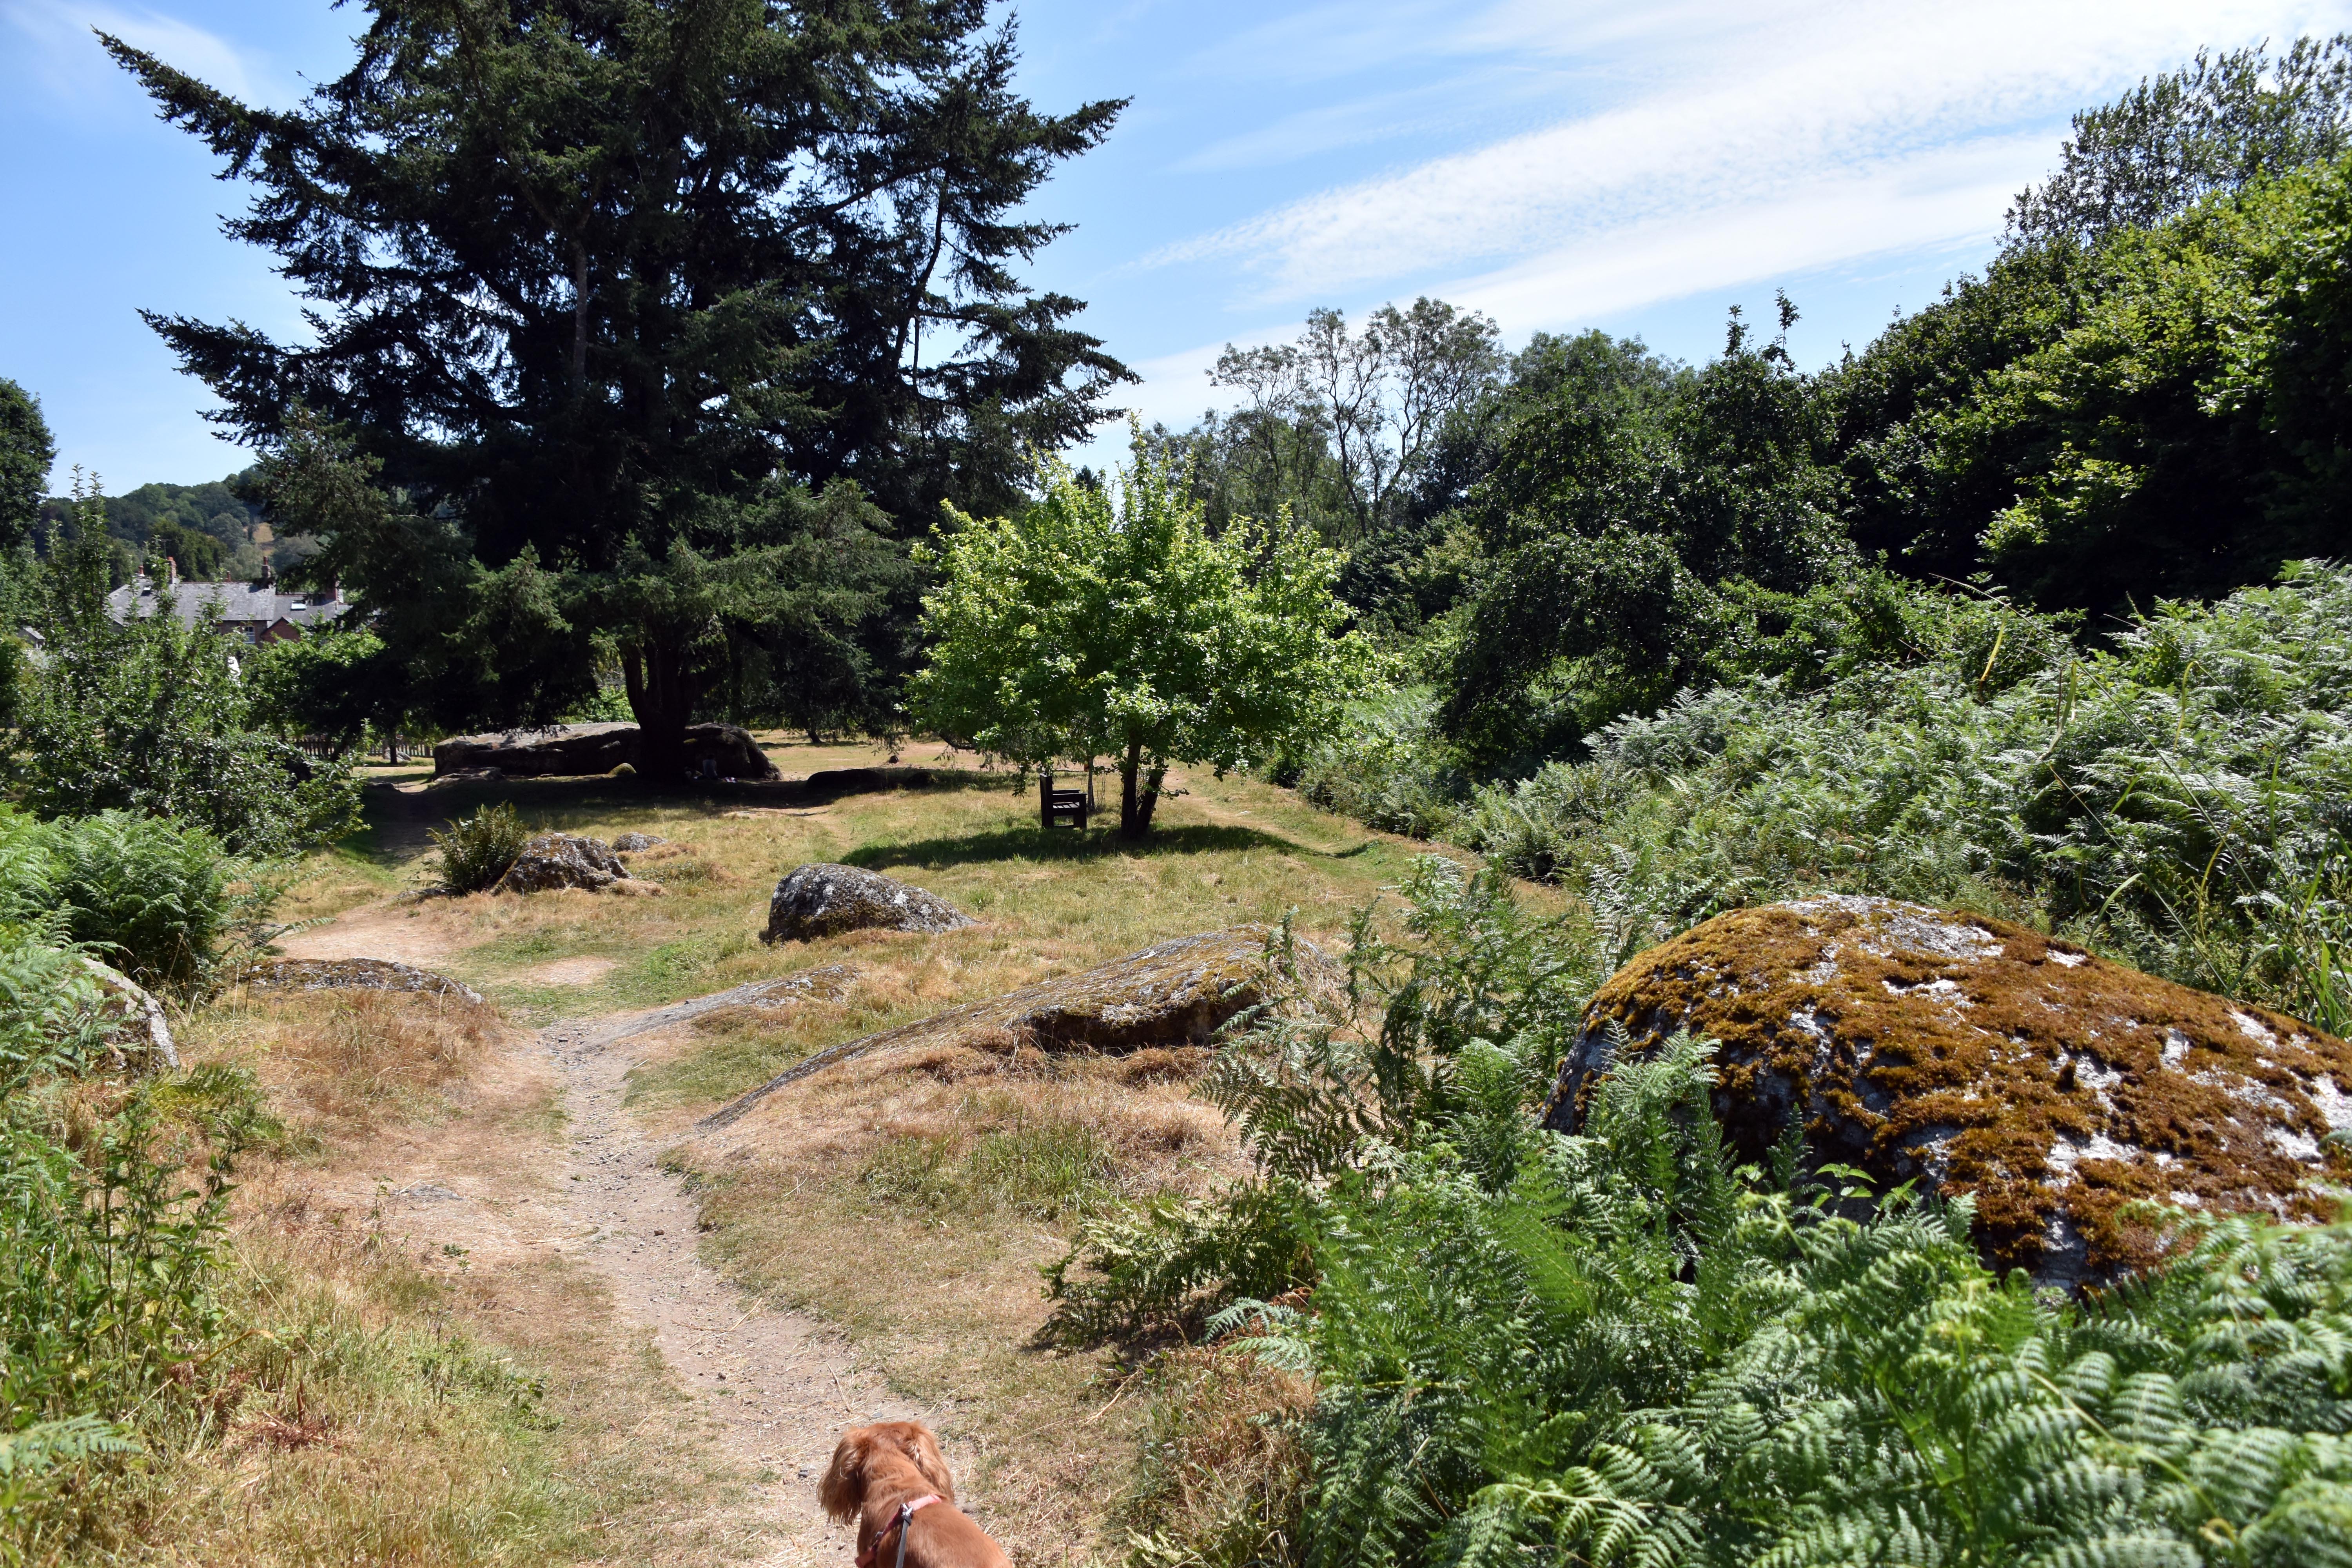
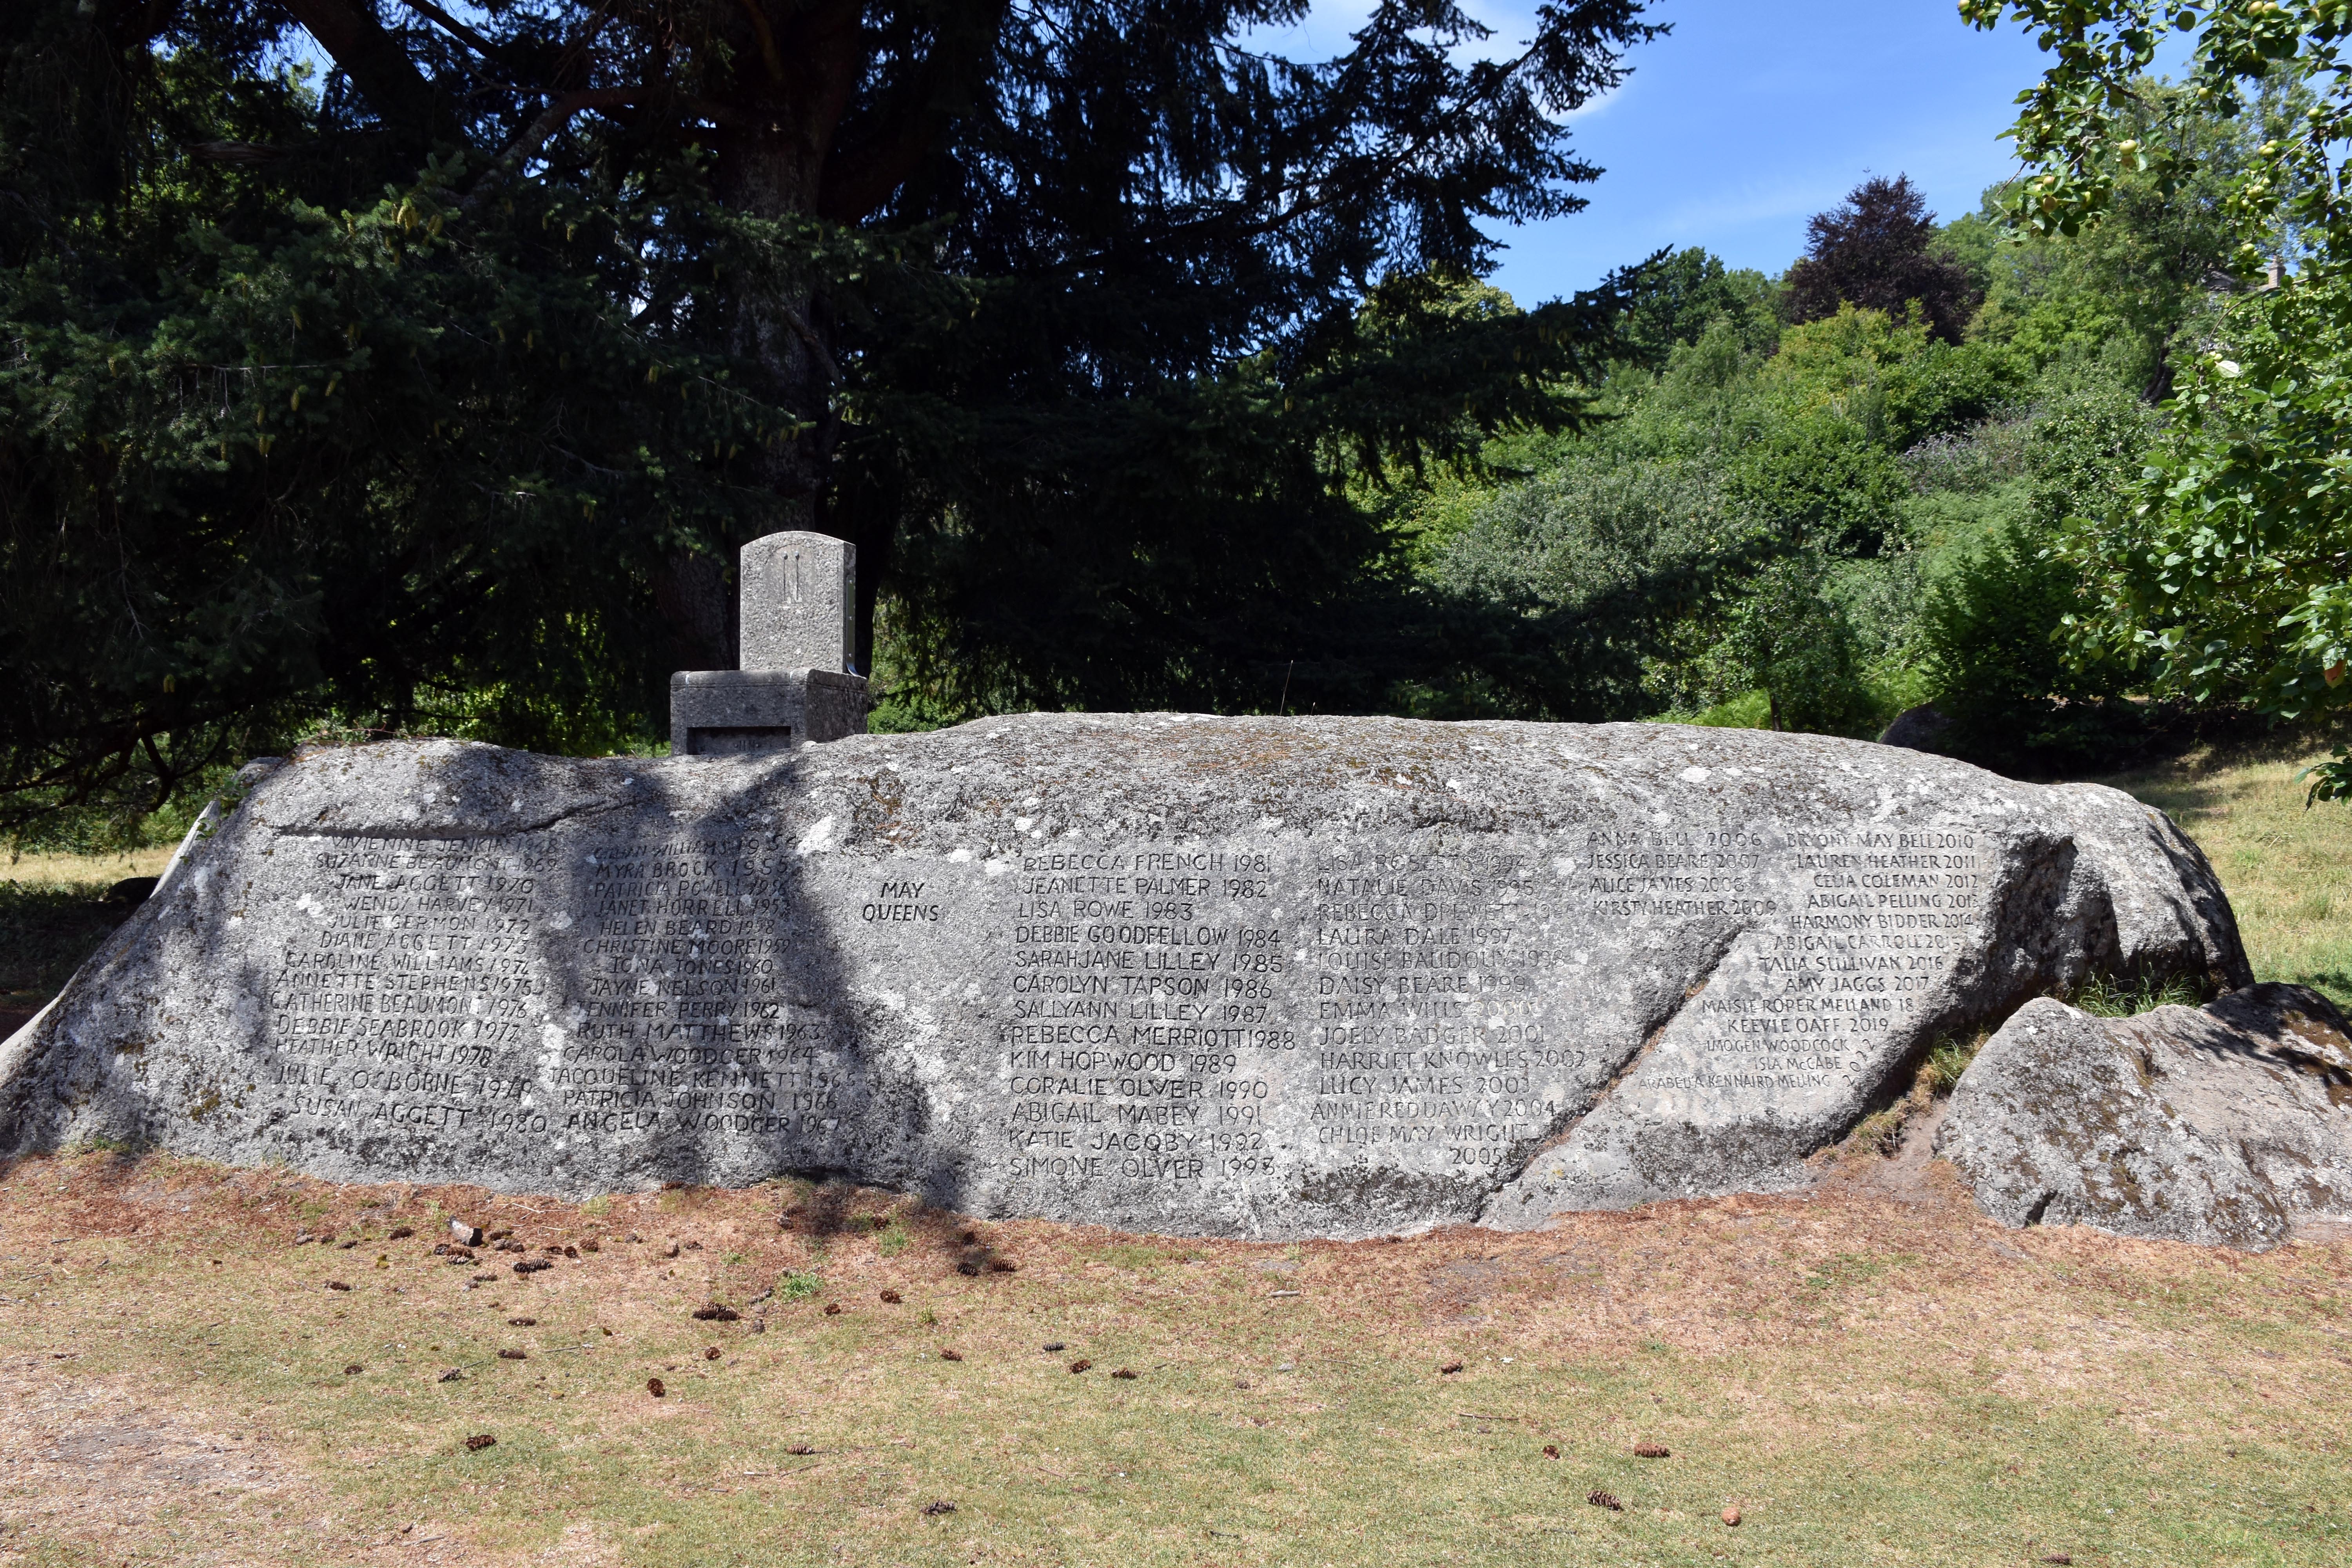
Lustleigh’s church may be deep in the valley, but it still found a way of announcing its presence to us, our eyes constantly drawn to it from a variety of angles as it emerged and disappeared again behind trees and foliage. We carried on our descent but took some footpaths to the west of the village and then followed one of the streams into the orchard at Lustleigh. This little park is definitely worth visiting as you are met by a very unusual stone chair atop a huge slab of granite. All around it are names of young ladies carved on it. What might this be? It is the chair where Lustleigh’s May Queen is crowned each year.

Rupert and I had our lunch under a tree next to this delightful throne under an apple tree (I did say it was the orchard) in a strong breeze. Indeed at times the wind was so heavy some of the young apples were falling around us. Fortunately none hit us, but they did startle you. But the view itself was worth the danger. We really were in a pastoral idyll.

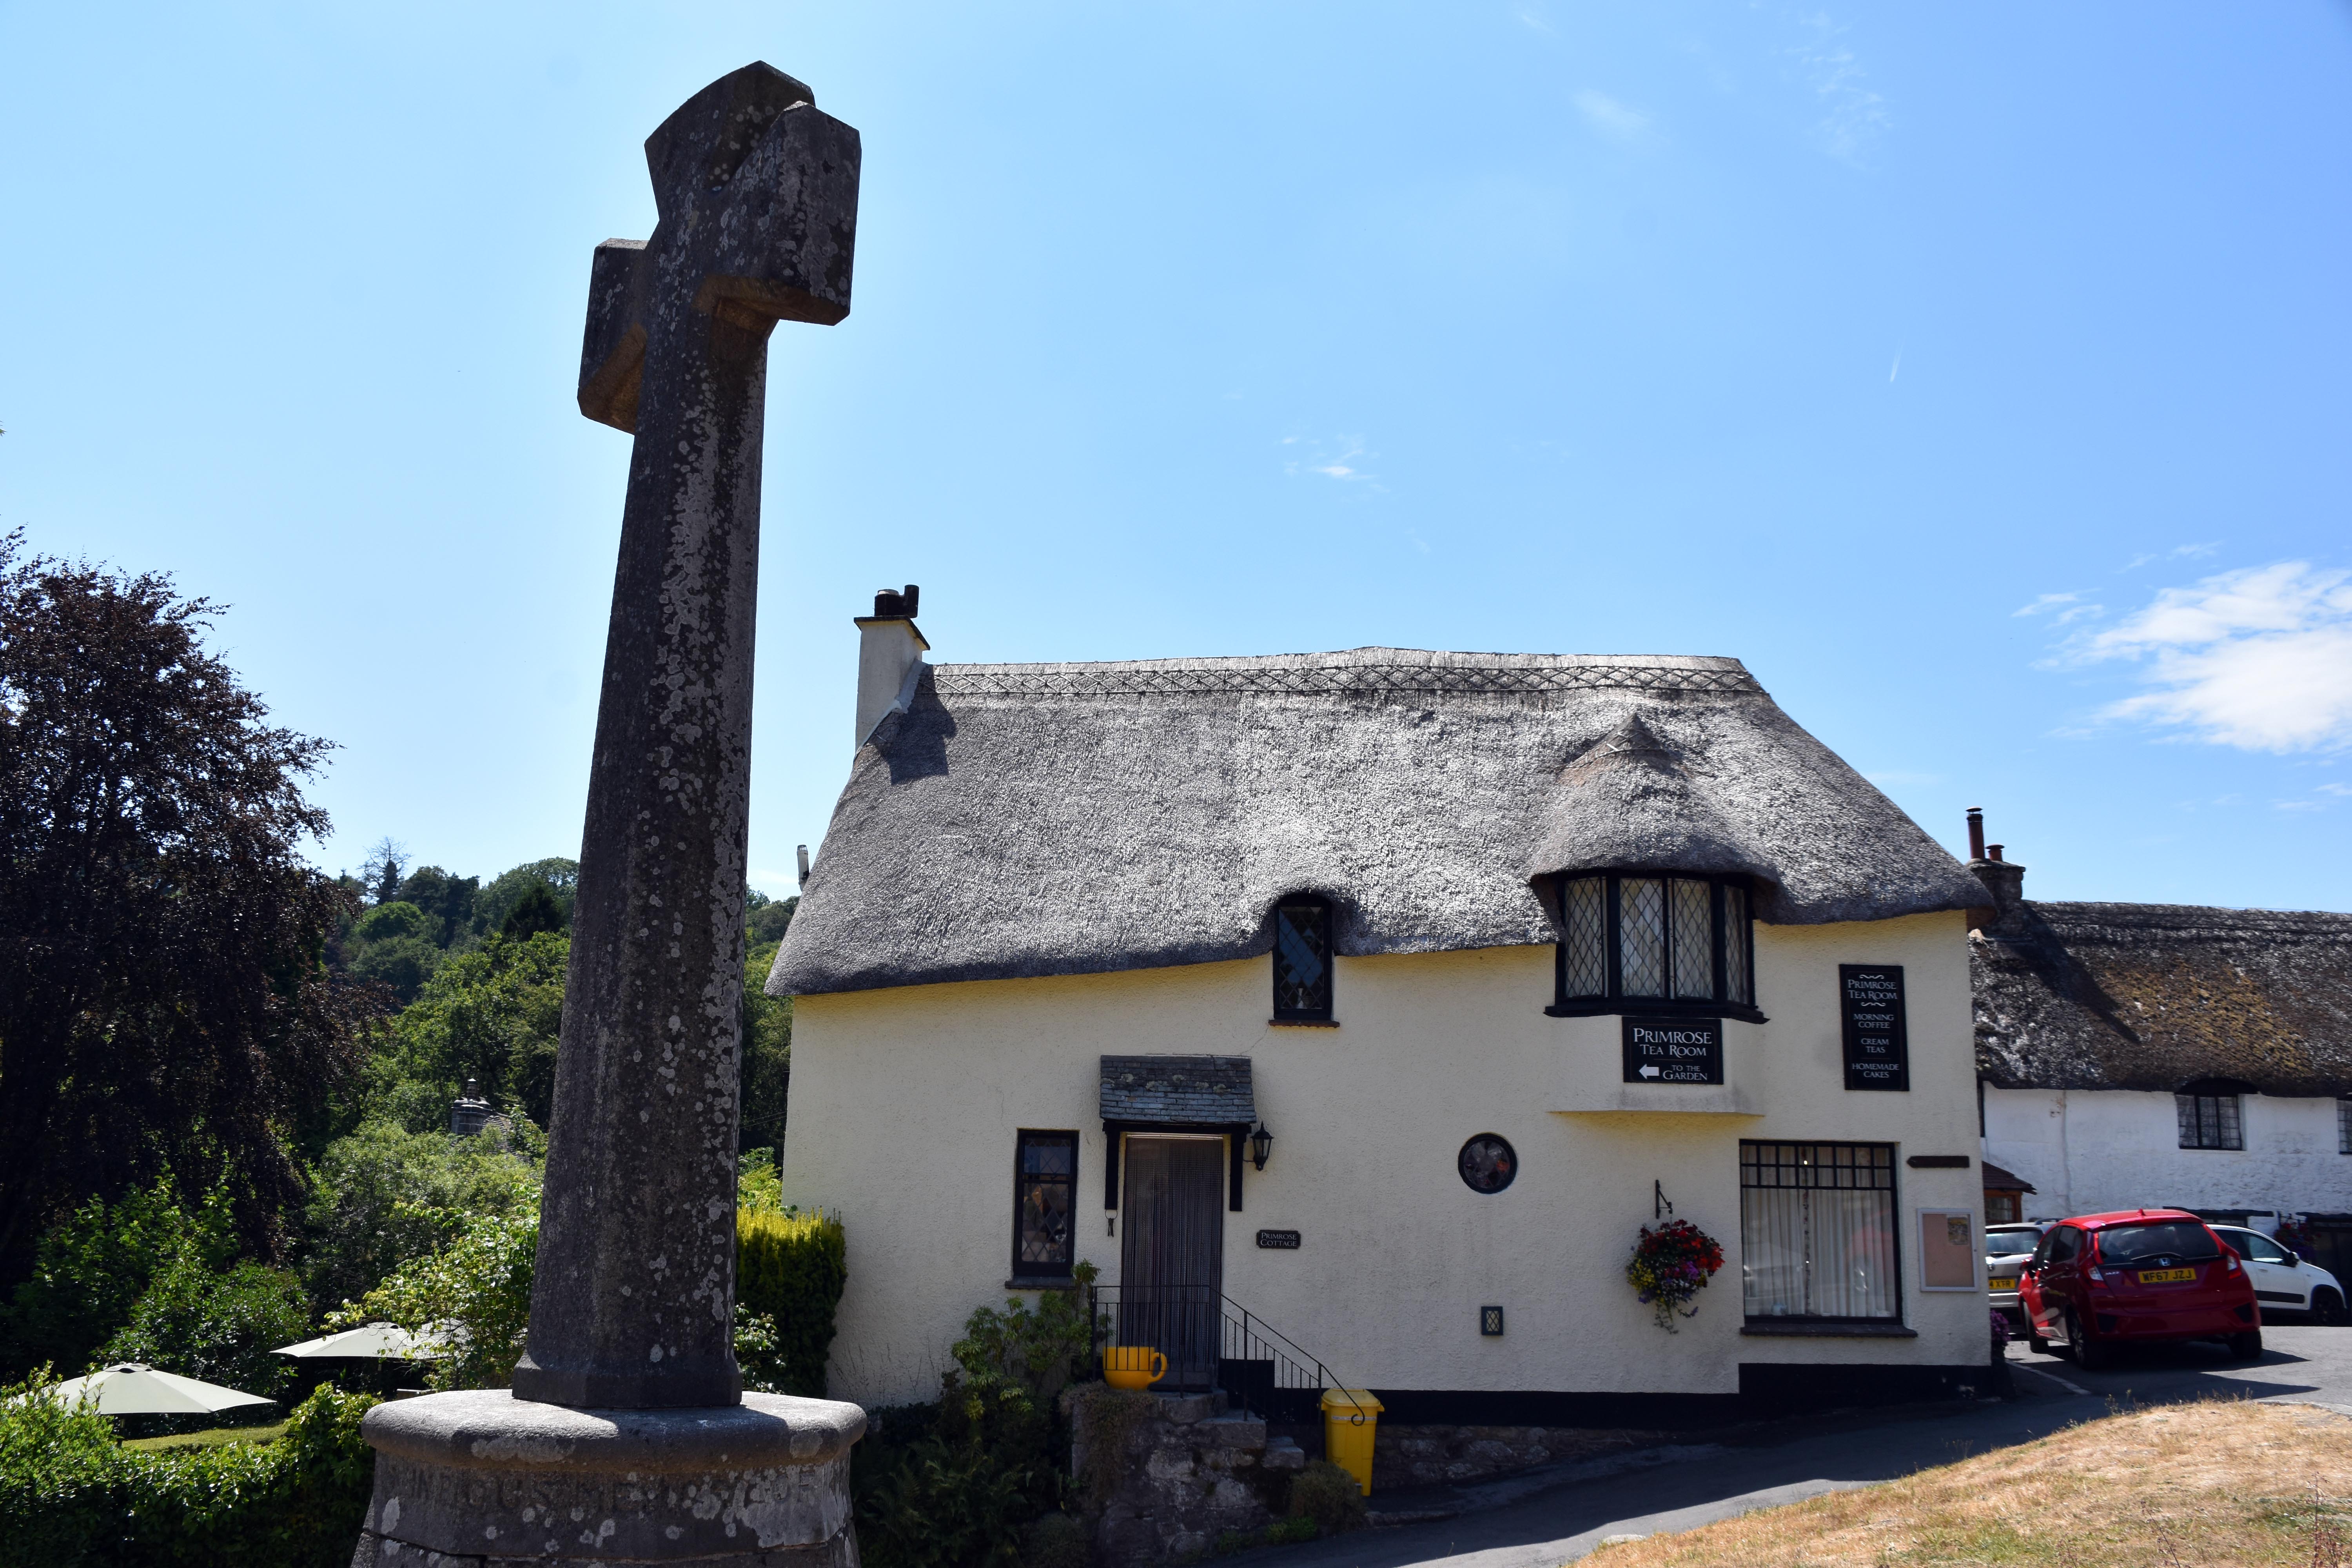
After lunch we walked the few yards into the village itself. The buildings continued to delight but I have to say that the cars definitely spoiled the picture‑postcard imagery. Narrow roads, steep hillsides and centuries‑old buildings have left little room to accommodate car parking. Indeed this was the reason we parked well out from the village. We saw cars really struggle to pass one another and find any of the all‑too‑precious car parking spots. But if you could look past the cars, the thatched houses once again enchanted. It was a Sunday so the shops were closed but there was a café serving cream teas (the Devon way of course) and a pub.
St John the Baptist

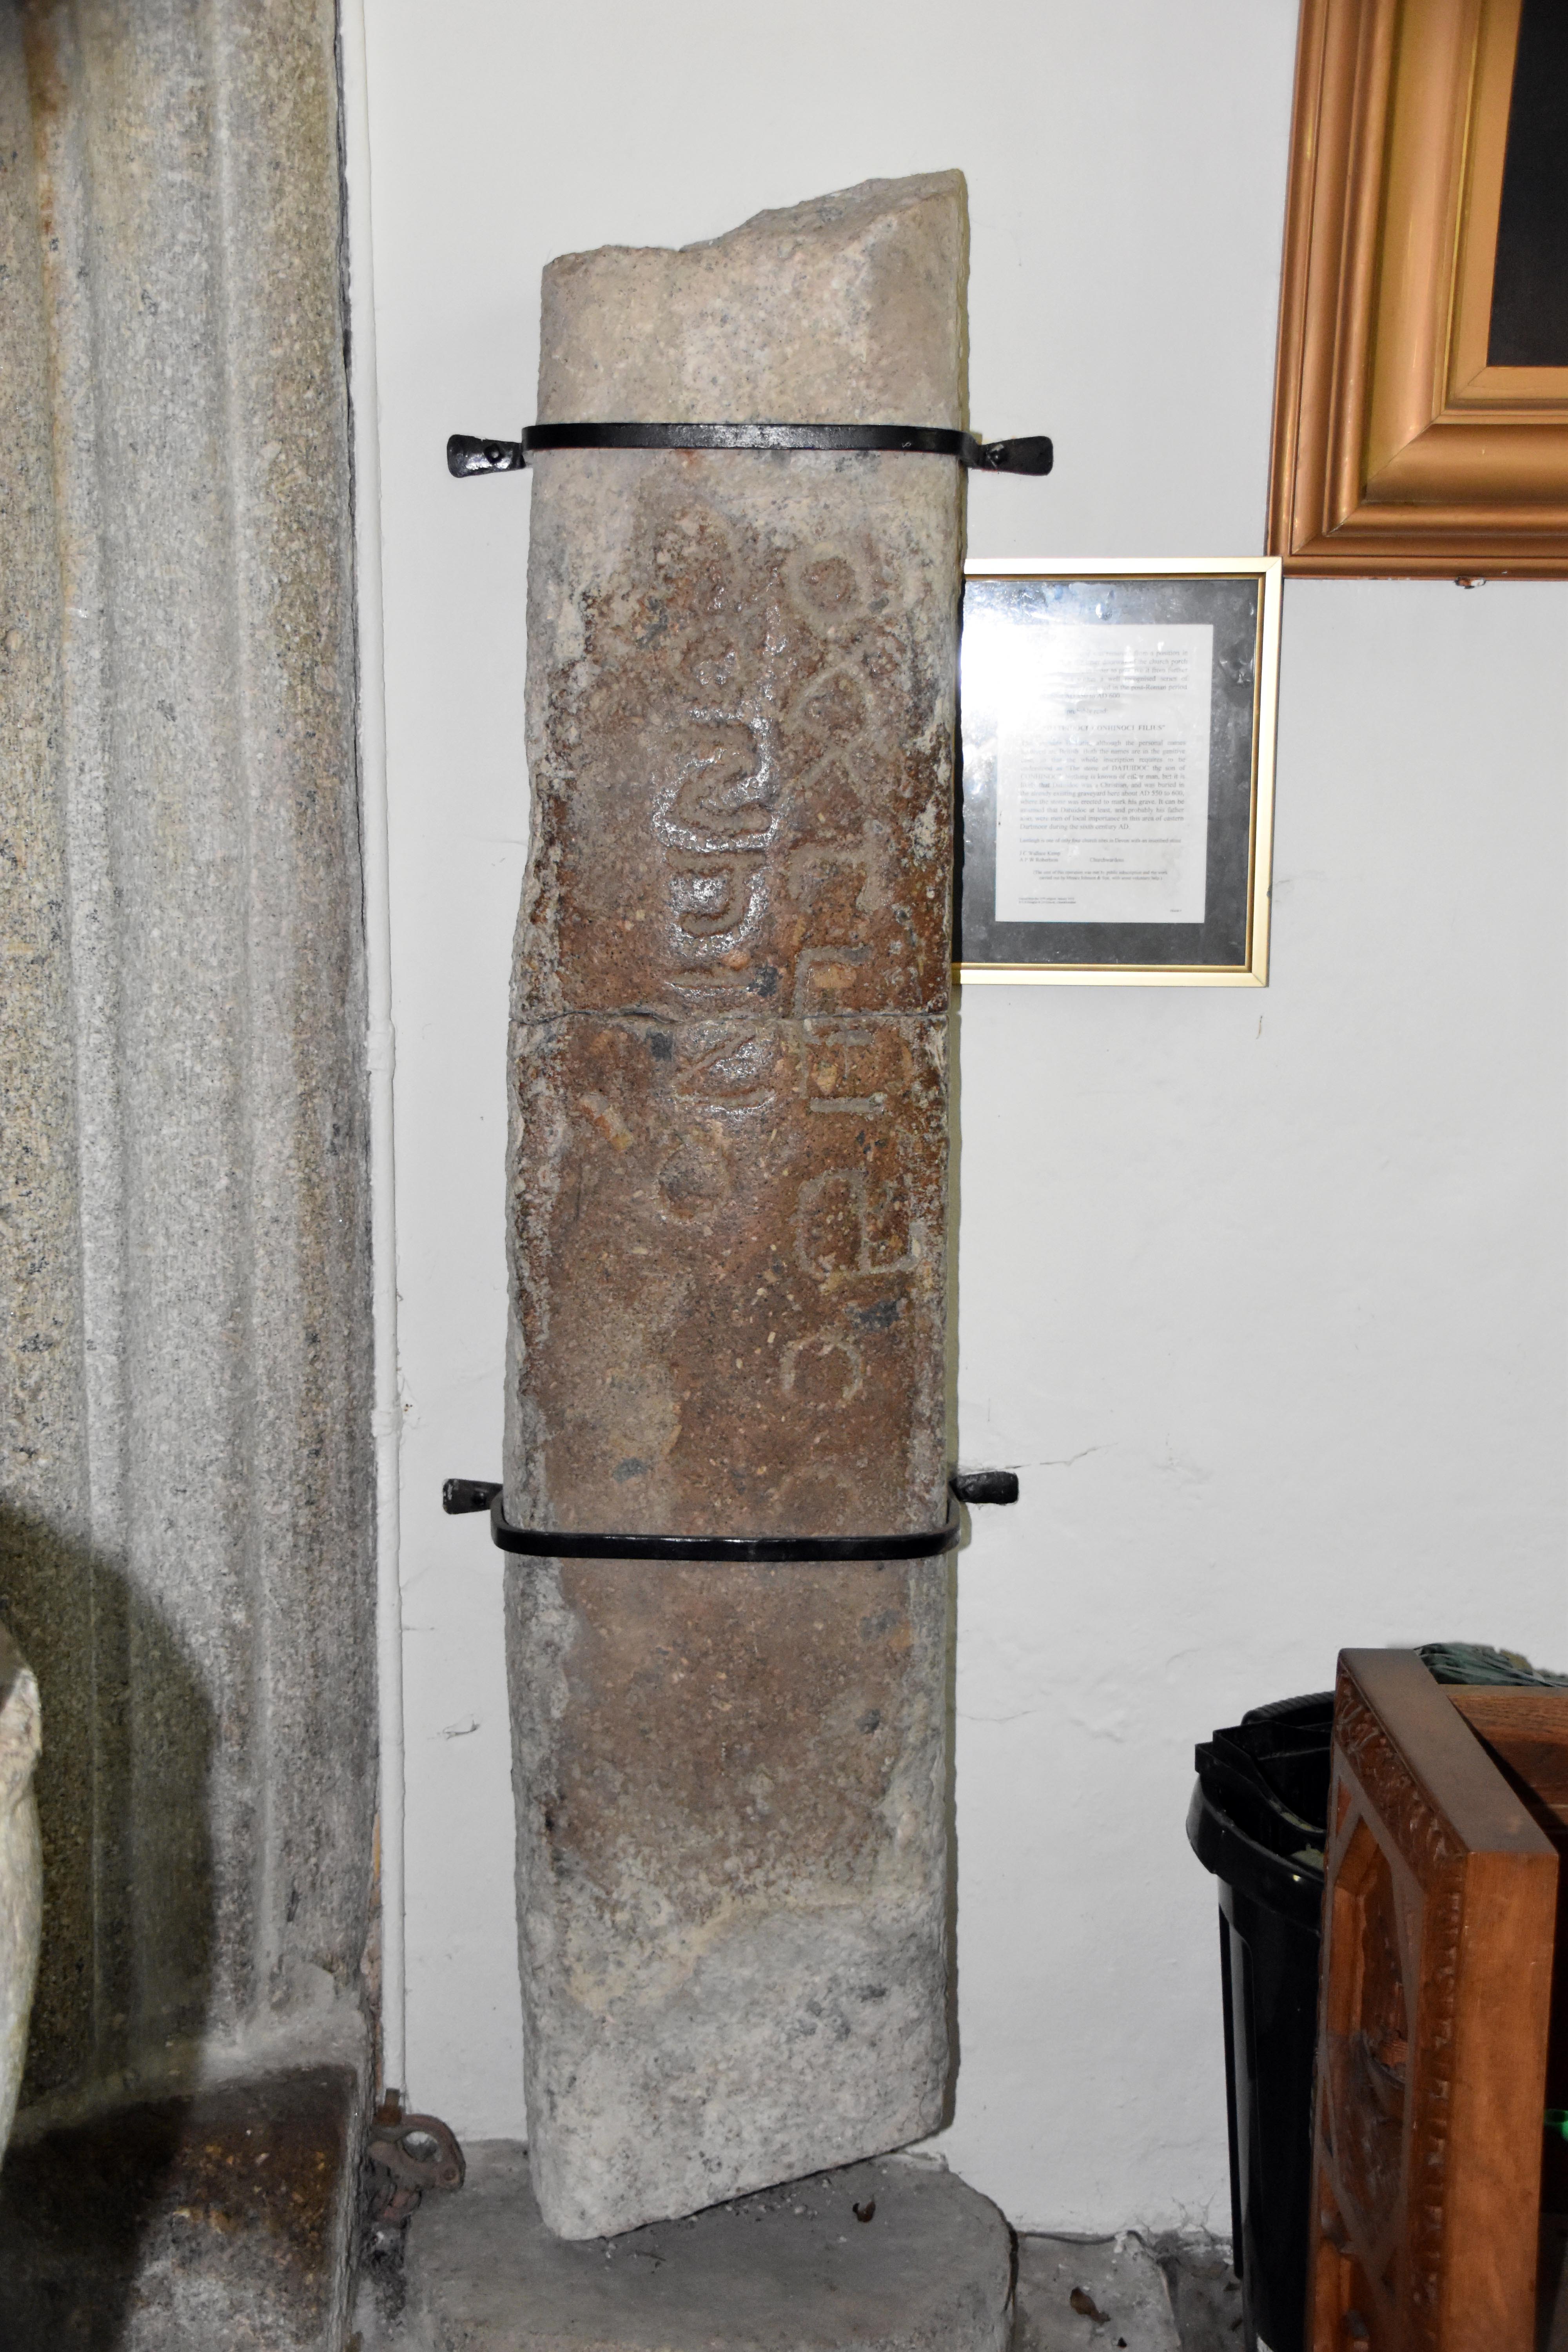
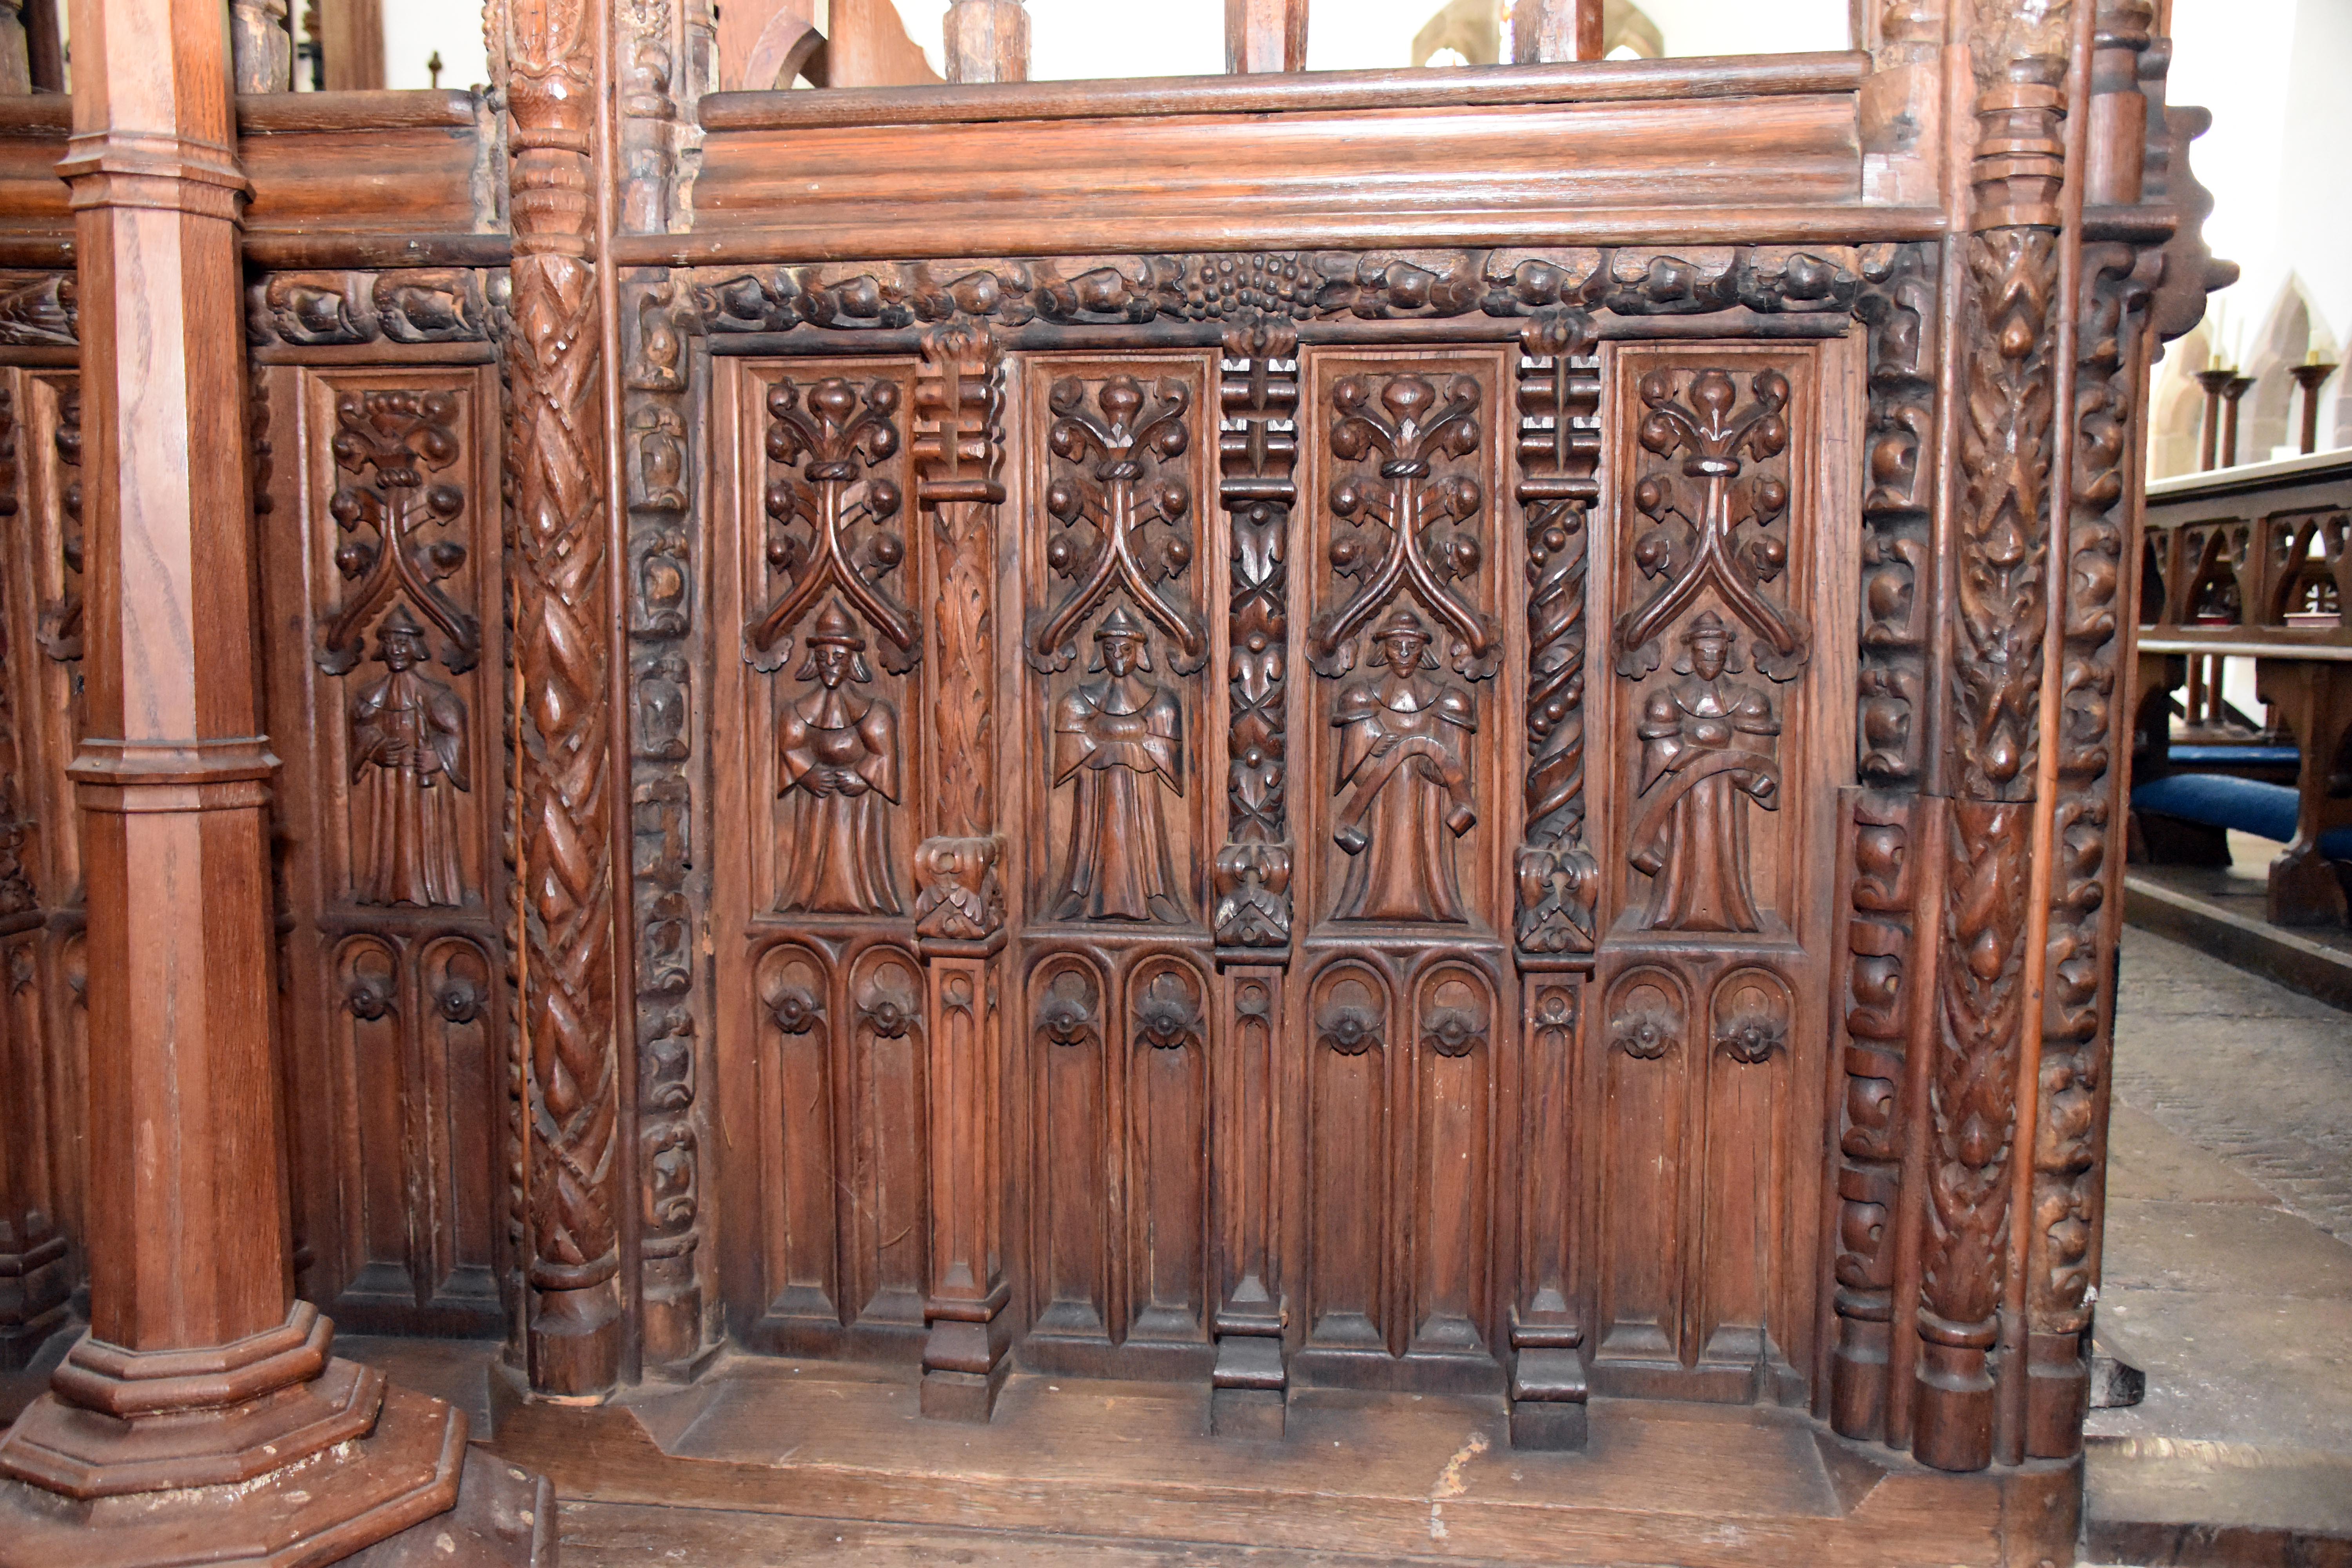
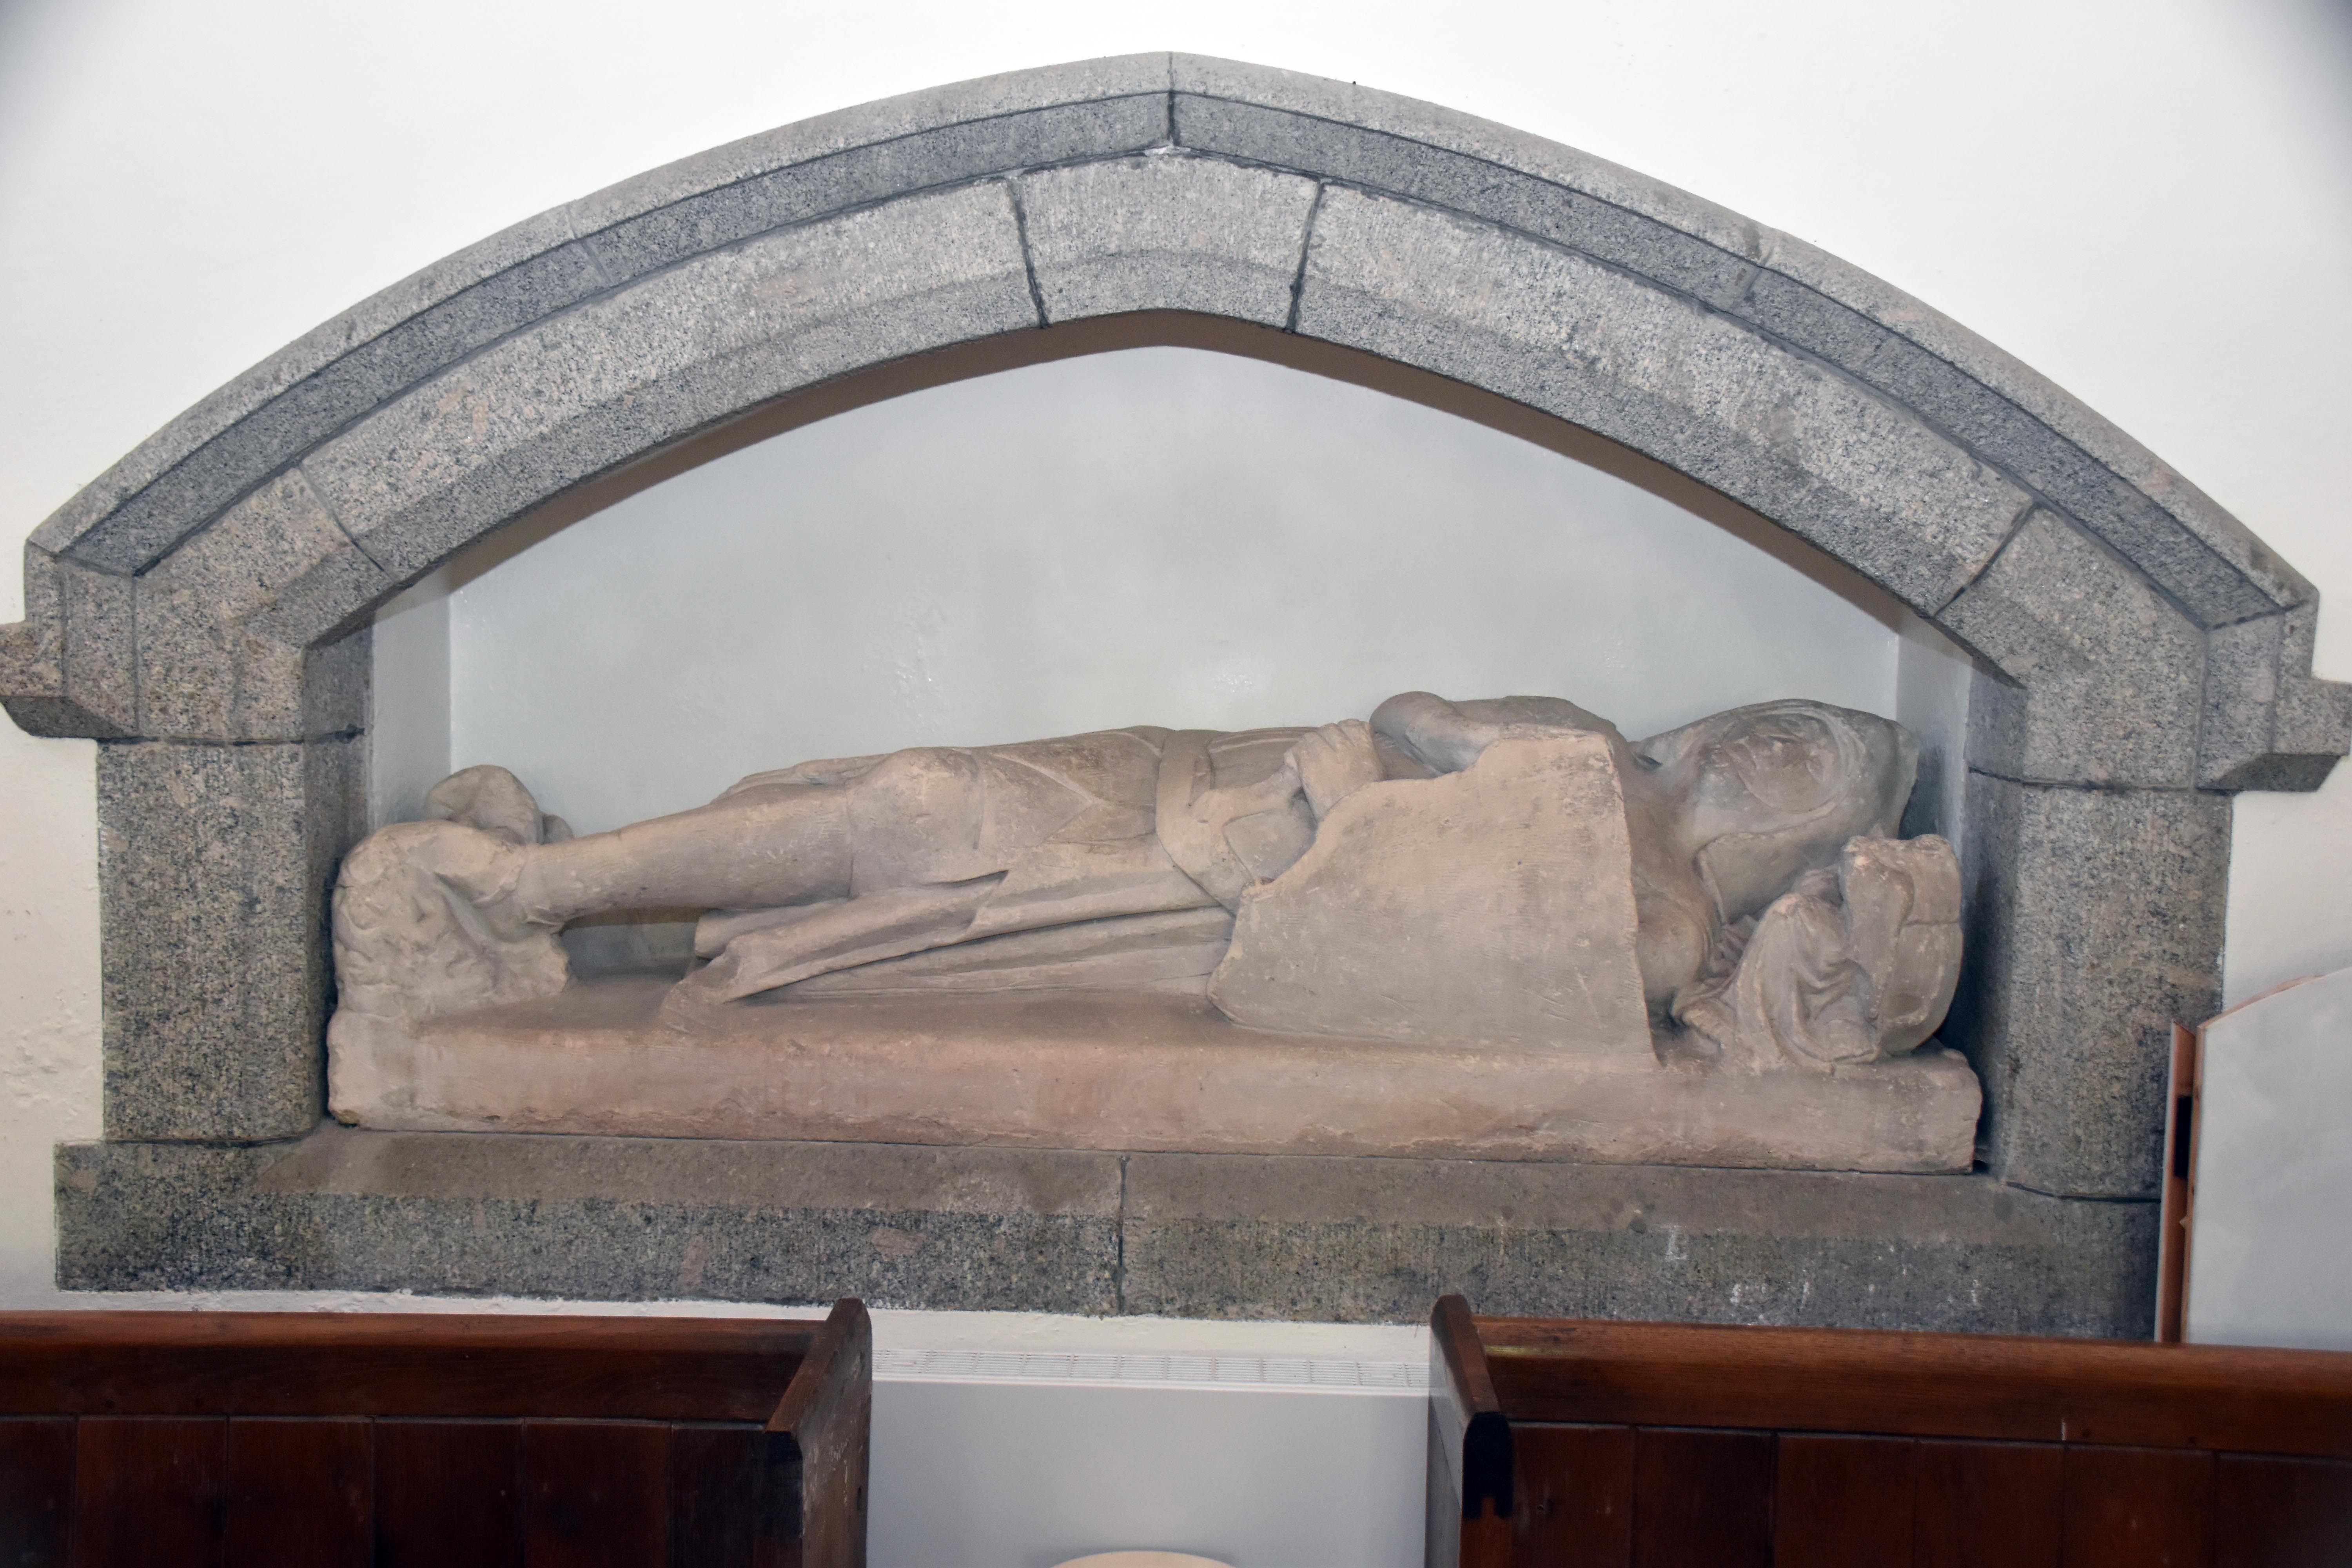
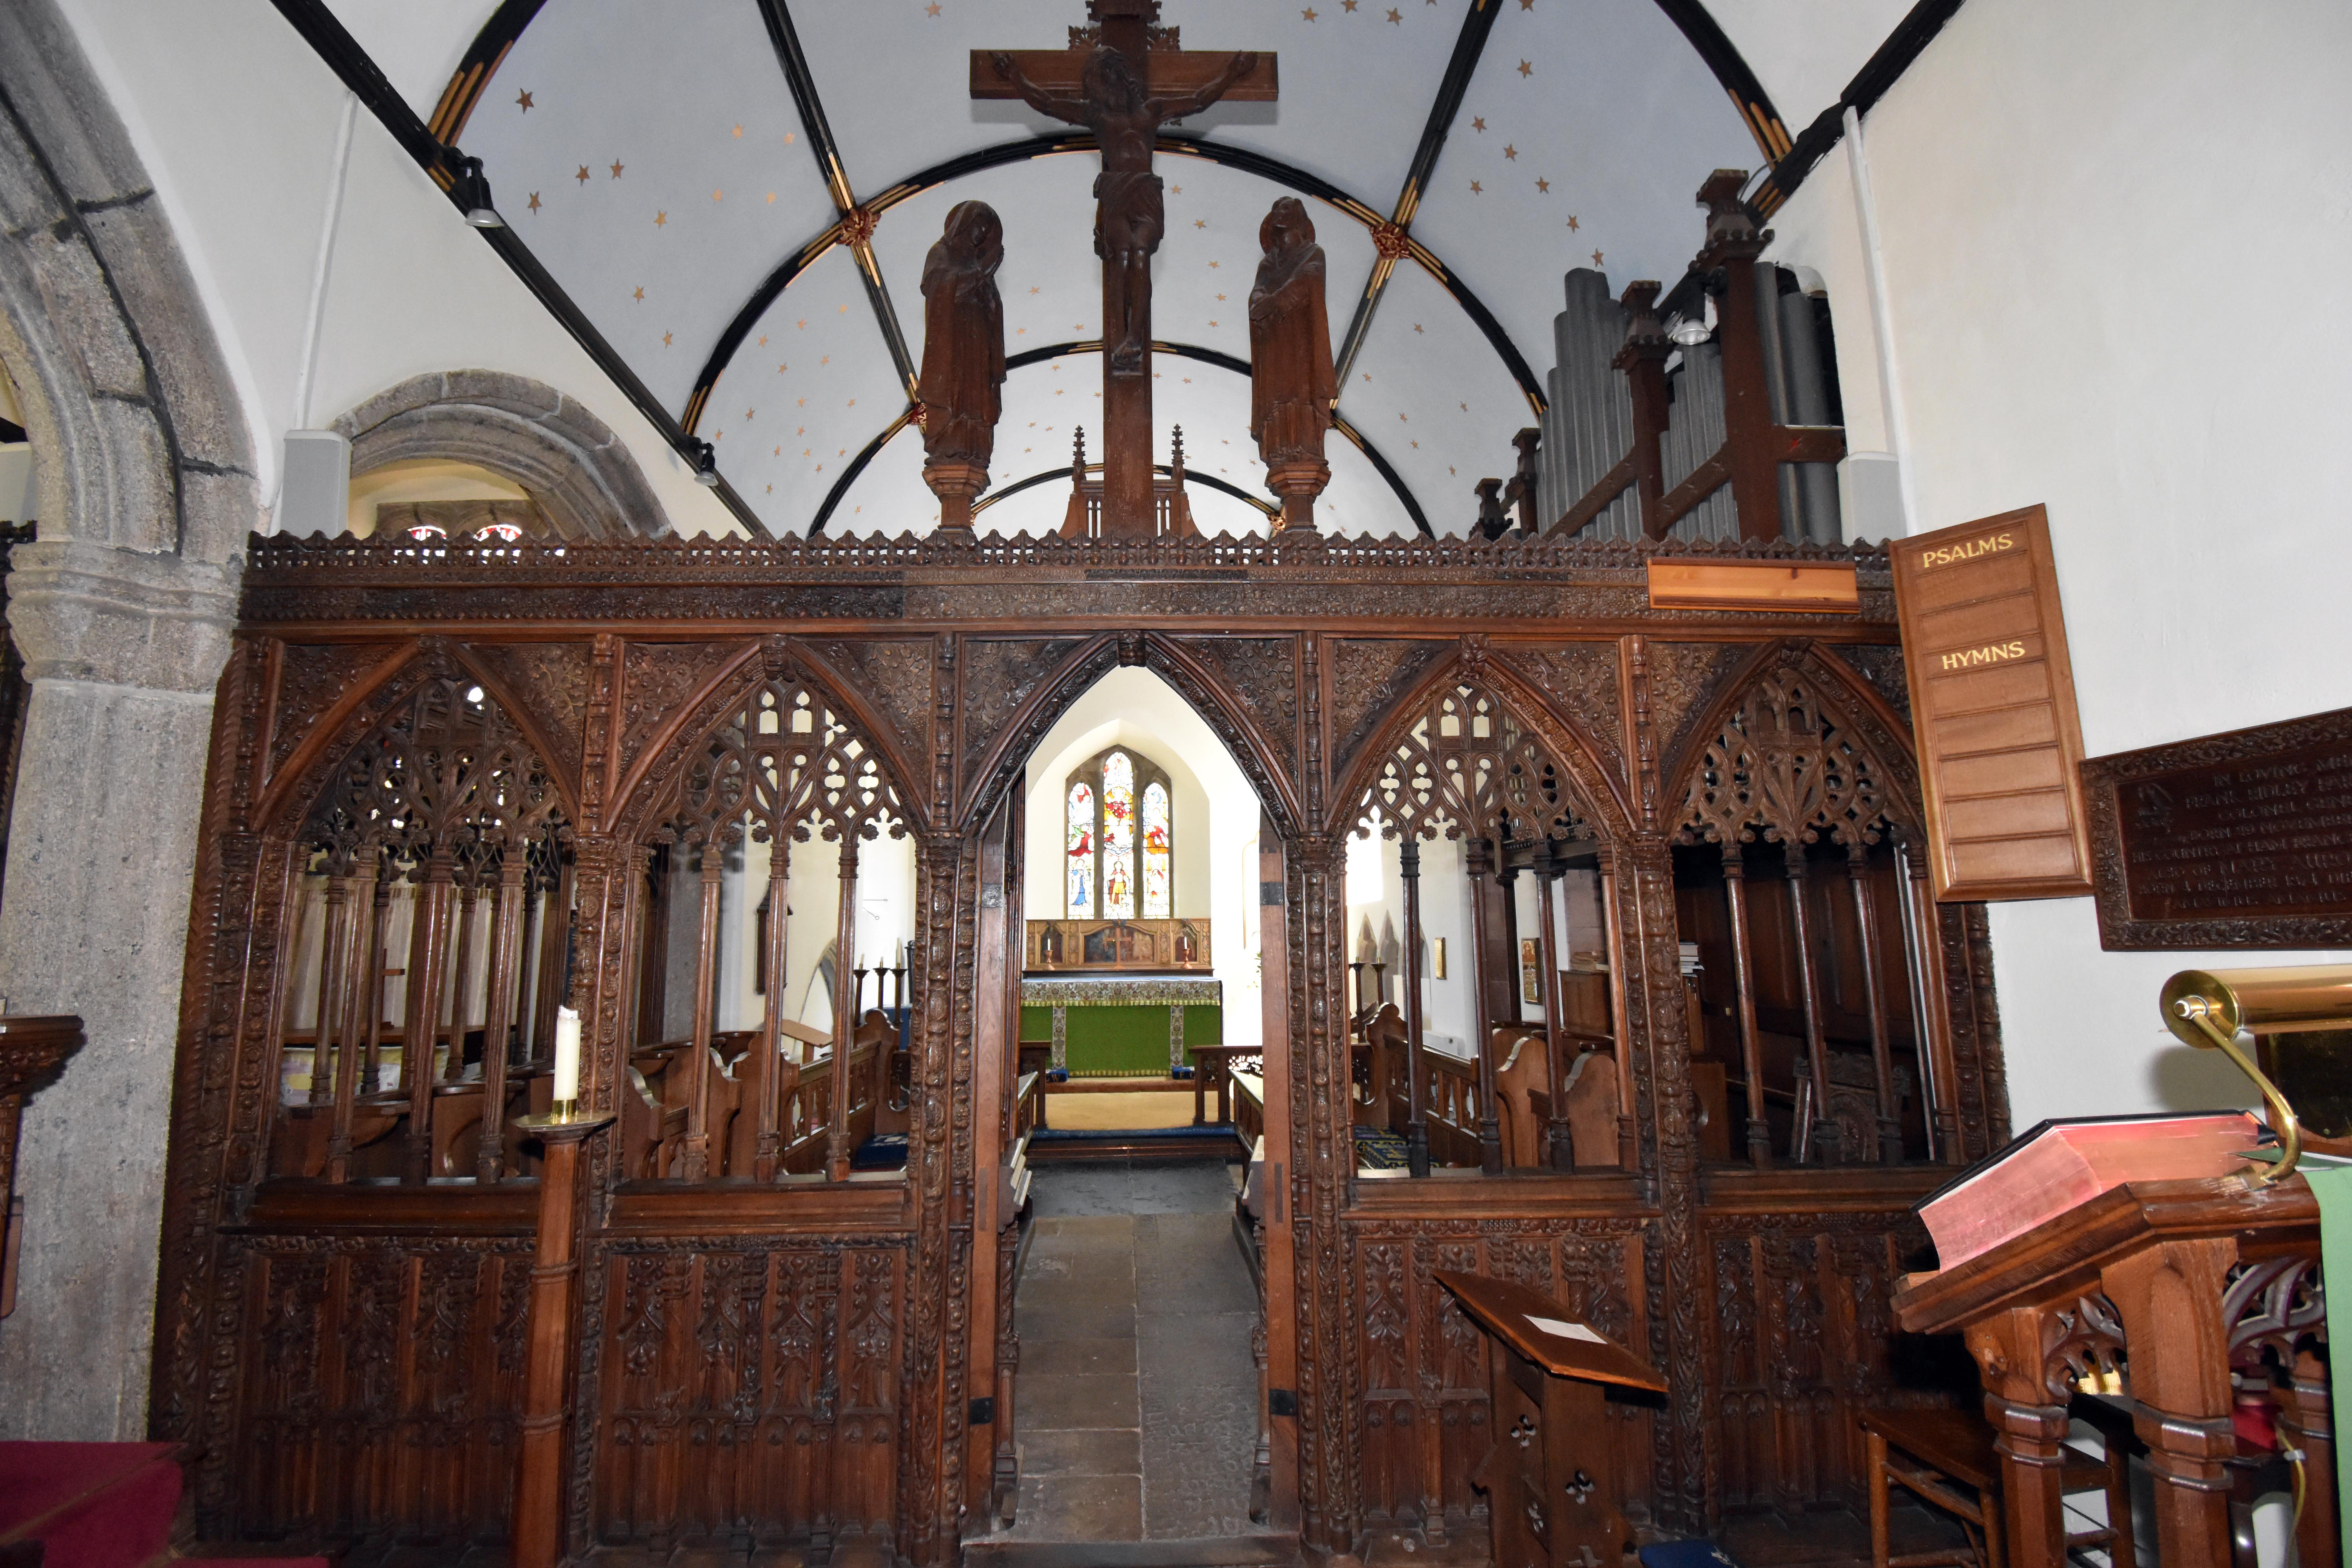
We though were drawn like a magnet to St John the Baptist’s Church. Now this church, even by the standards of Devon, has some serious ancestry to it. The chancel is in the Early English 12th‑century style. There are two 13th‑century effigies, possibly of the Dinham (Dynham) family who we came across recently with our visit to St Michael’s Church in Ilsington (which was next door to the Dinham Manor House). St John the Baptist’s also has a 14th‑century mortuary chapel to Sir William de Prowz complete with his effigy. And it has a delightfully carved rood screen from the reign of Queen Mary complete with Aragon pomegranates and wonderfully carved grotesque heads at the top of each archway. But what gives it real antiquity was the discovery of a tomb slab thought to date from the 6th century. It is inscribed DATUIDOCI CONHINOCI FILIUS; which just means, Datiudoc son of Conhinoc. But it means that we have possibly the descendants of Romano‑British very early Christians on this site. It is not unusual to find a Norman church built on the site of an earlier Saxon church (and indeed this one probably was too), but to find one built on the site of a pre‑Saxon religious site is even more impressive still. It may not have been a church, which were almost unheard of at that time. It is more likely to be the site of an early Christian graveyard which itself may have been of an older antiquity, perhaps into the Roman era? The thought of so many centuries of Christian worship on this one site really is humbling.
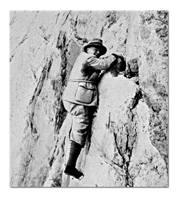
Leo Amery

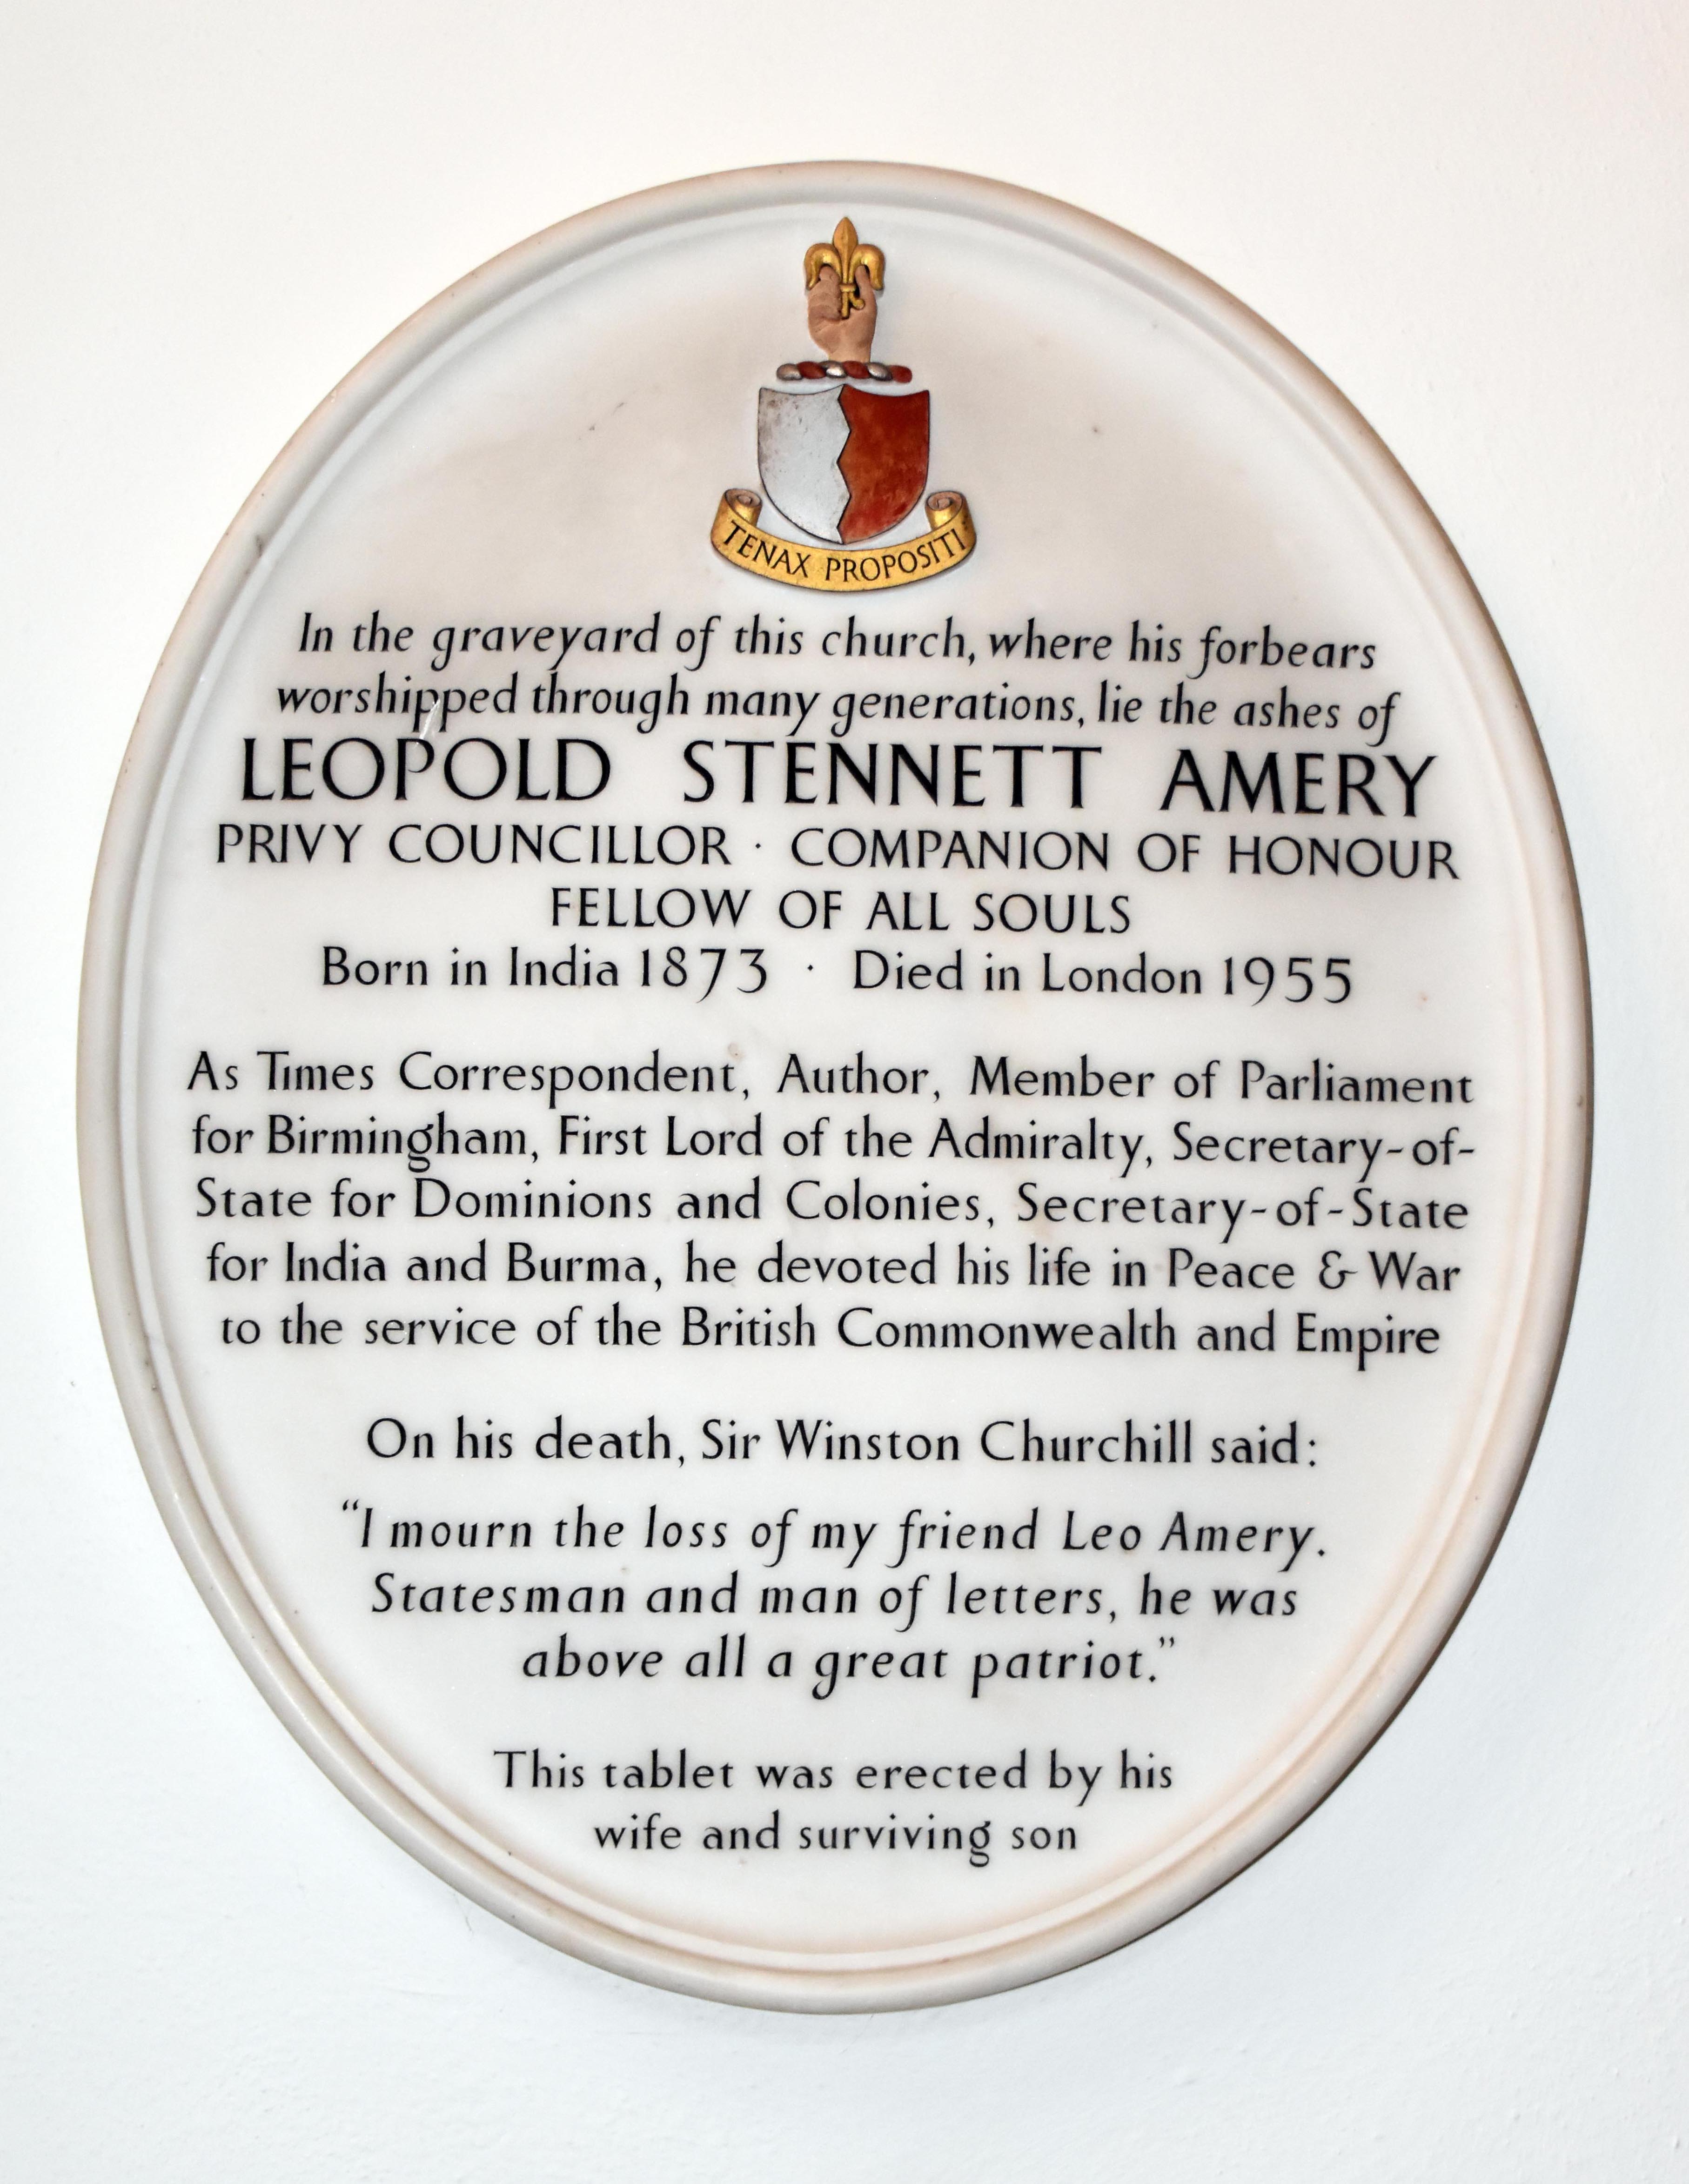
Given my interest in Imperial history there is one famous family commemorated here who I already knew were connected to this village. This is the Amery family who had not one but two very famous sons. Born in India, Leo Amery was one of the most important British politicians of the first half of the twentieth century. He was to become one of Winston Churchill’s most important allies. Indeed it was Leo Amery who delivered the famous “In the name of God, go!” reprise of Oliver Cromwell’s in a speech to Neville Chamberlain in the aftermath of the calamitous Norwegian campaign. This debate paved the way for Winston Churchill to become Prime Minister shortly after. He also played a very important role in the First World War. He was involved in the drafting of the famous ‘Balfour Declaration’ that first provided the idea of a homeland to Jews in the Middle East. But what is interesting is that he was the man responsible for inserting the clause after the idea of a national home for the Jewish people which read “it being clearly understood that nothing shall be done which may prejudice the civil and religious rights of existing non‑Jewish communities in Palestine, or the rights and political status enjoyed by Jews in any other country.” Why this is particularly interesting is that it was only decades after his death that it was discovered that Leo Amery was Jewish himself through his Hungarian mother. There is a certain irony, albeit a pleasingly humanitarian one, that the person with a Jewish connection in helping to write the Balfour Declaration should be the one insisting on honouring the rights of the Arabs and Christians in Palestine. History is never straightforward but it is clear that Leo Amery was trying his hardest to allow all the peoples of the region to call Palestine their home. Sadly, events were not to play out as he hoped.
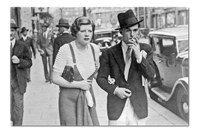
John Amery and Una Wing. Photo by anonymous (c. August 1932).

There was to be another disappointment in Leo Amery’s life with his eldest son, John Amery. John had always been a rebellious child but in the interwar years was attracted to Fascism. As it was failing to find traction in England, John moved to France and in 1936 volunteered to work for General Franco in the Spanish Civil War. When the Germans invaded France in 1940 he found himself in occupied Europe. In 1942 he was recruited by the Nazis to help make propaganda radio programmes. Hitler met and liked John Amery’s company. Eventually John asked to create a British wing of the Waffen SS and was allowed to travel to prisoner‑of‑war camps to try and recruit soldiers to what was called The British Free Corps. This was to be an unmitigated disaster with the vast majority of prisoners openly hostile to his pleas. The unit only ever mustered a couple of dozen men at the most and was used for propaganda purposes mostly interspersed with drinking and whoring. John later moved to Italy to help Mussolini after he had been rescued by the Germans. But in 1945 his luck ran out and he was captured in Italy by Partisans who handed him over to the British Army. John was flown back to England to be tried in the Tower of London as a traitor alongside the other notorious collaborator William Joyce, better known as Lord Haw Haw. John pleaded guilty and was hanged at Wandsworth Prison. There are so many ironies here you don’t really know where to begin. John Amery did not know that his own grandmother was Jewish. He would have been exterminated himself under Nazi rule had anyone found out. The other irony is that nobody did more than his father to establish a Jewish homeland which was to receive a turbo boost in political dynamism upon the discovery of the concentration camps and the extent of the Nazi Holocaust. And on top of this, nobody did more than Leo Amery to put Winston Churchill into Number 10 to defeat Hitler and destroy Fascism once and for all.
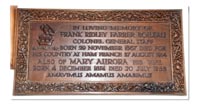
Colonel Frank Ridley Farrer Boileau

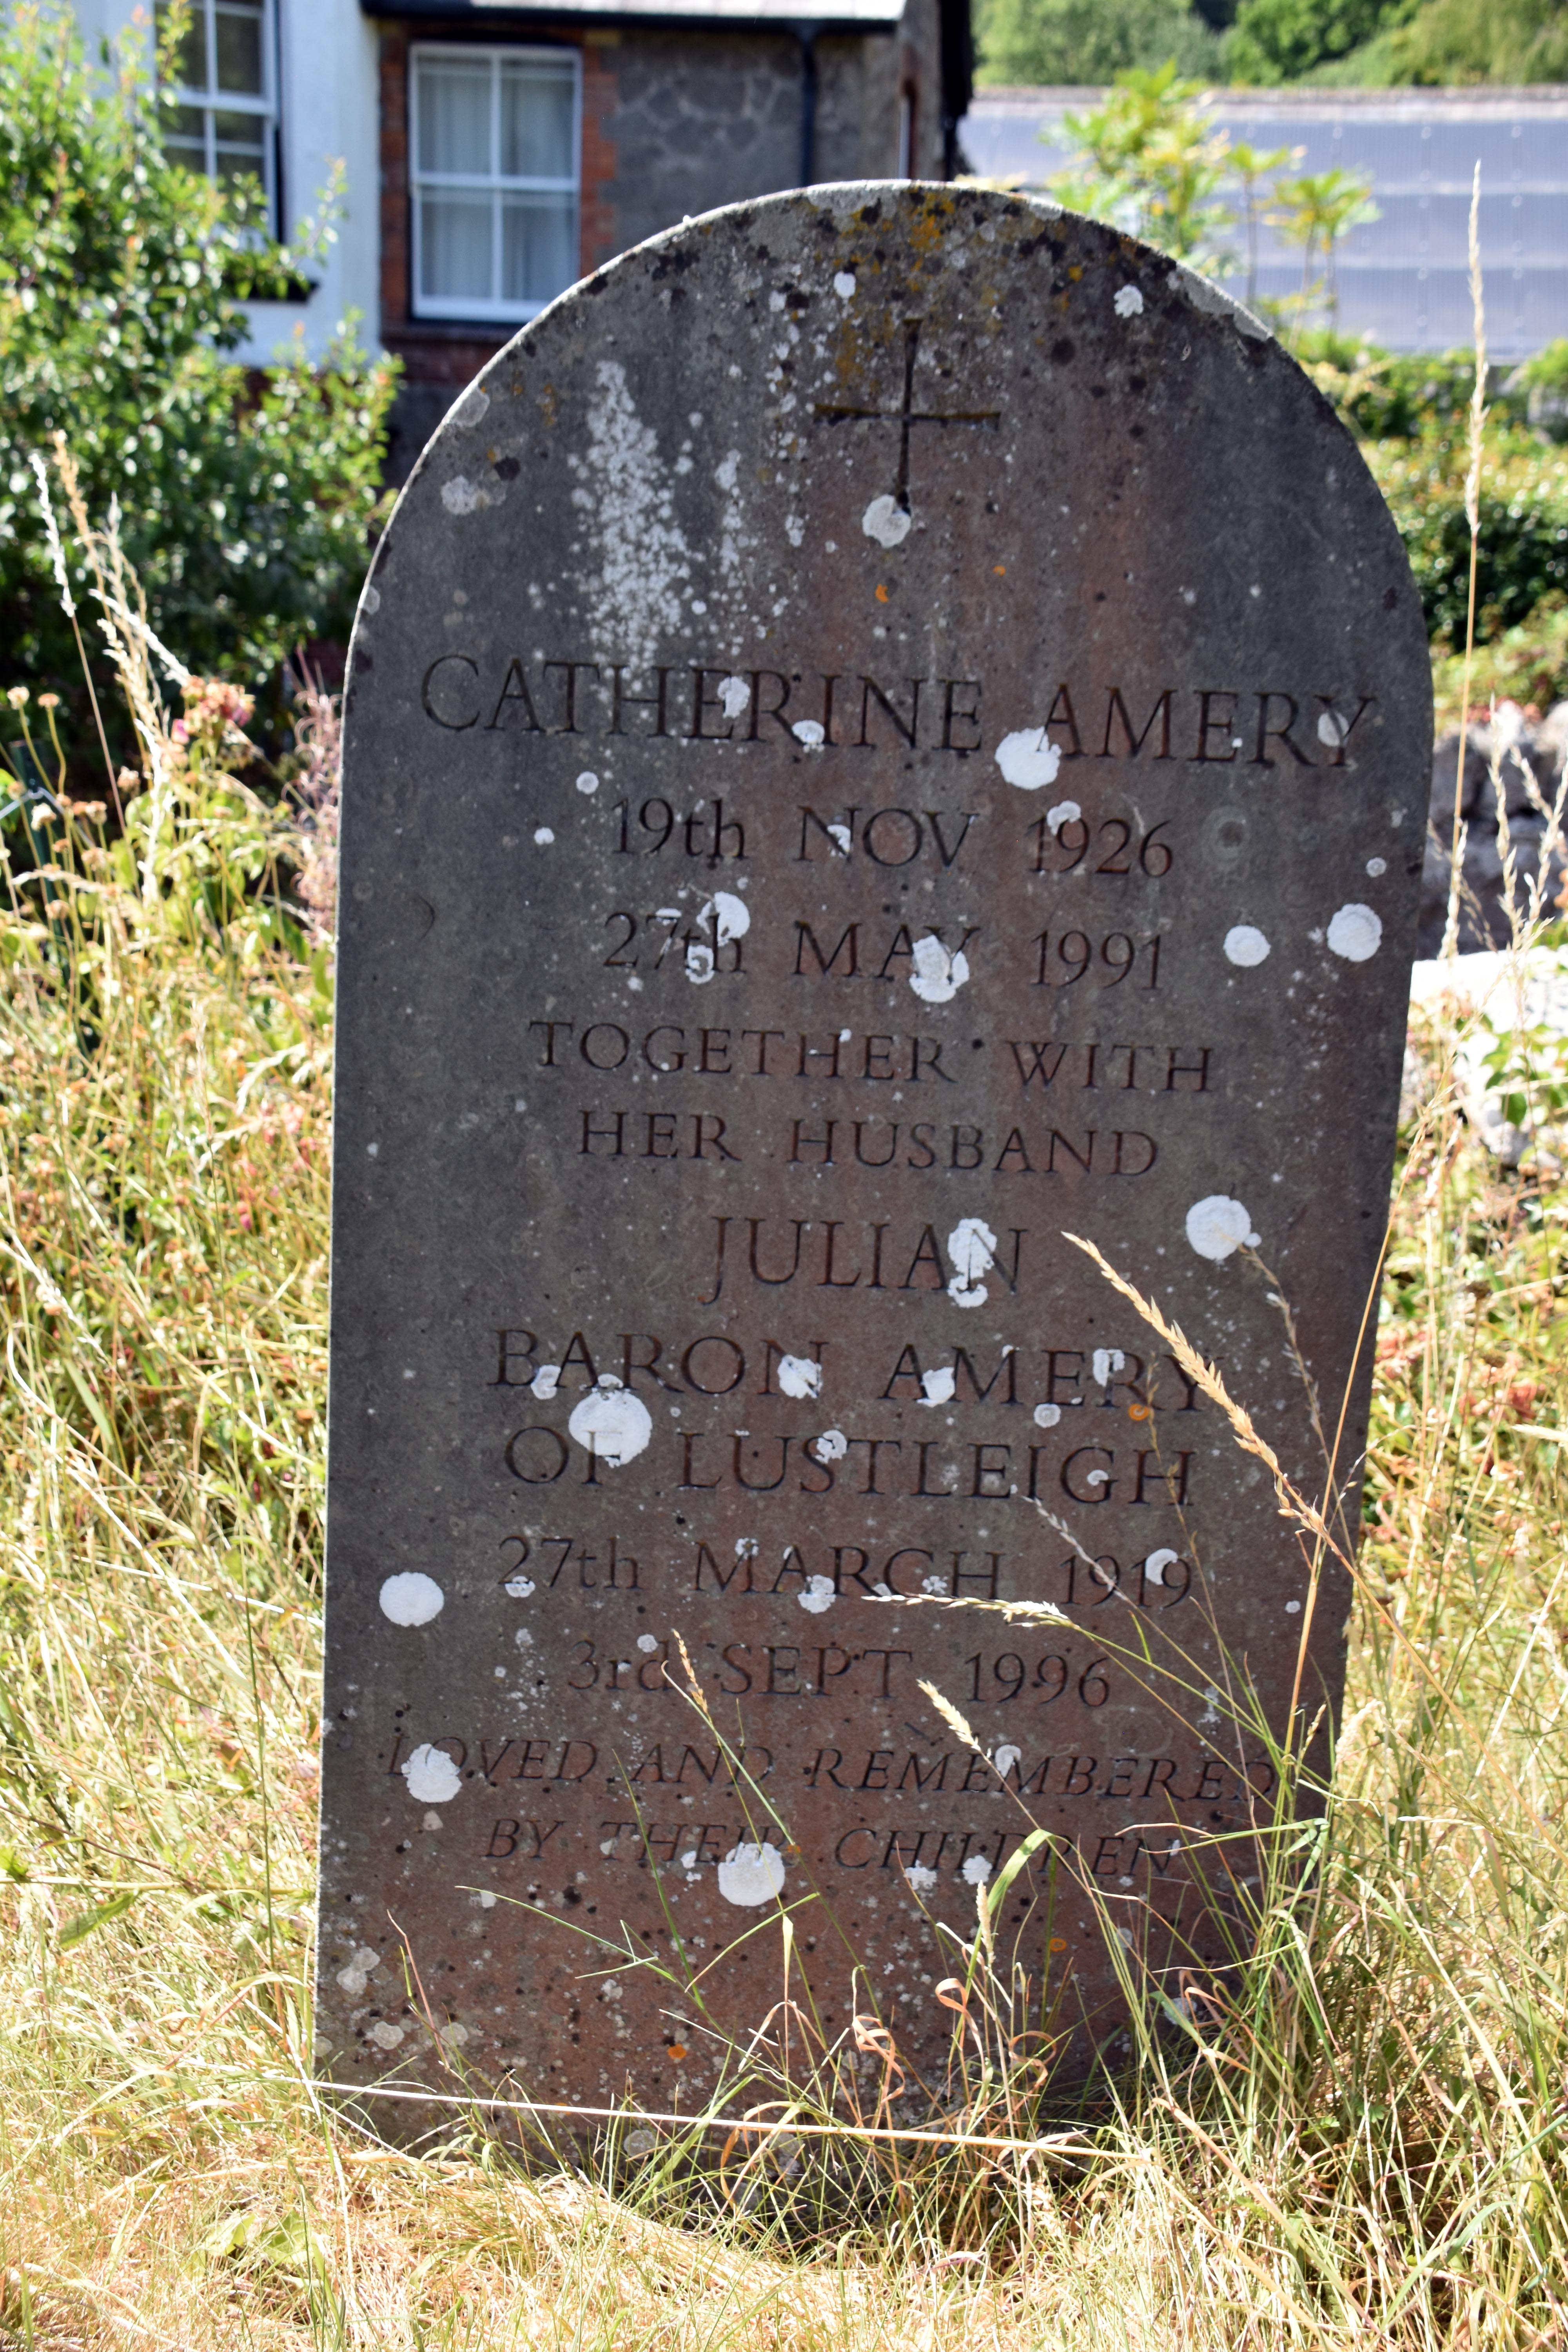
But there is another Amery from John’s generation who was to follow his father in more constructive ways. This was Julian Amery, the younger brother of John. Funnily enough Julian found himself in the Spanish Civil War on the Fascist side too, although in his case it was as a war correspondent. He then moved to Belgrade as a Foreign Office attaché. This Balkan experience would be put to good use during the Second World War when he was assigned to the Special Operations Executive (SOE) to work with the Albanian Resistance. Later he was assigned to work in supporting Chiang Kai‑shek in his fight against the Japanese. After a colourful military career he followed his father into politics. He would become the Minister of Aviation in the 1960s and was heavily involved in the development of Concorde. He remained an MP until 1992 when he retired but was created appropriately enough Baron Amery of Lustleigh. Both he and his father are buried in the churchyard. His brother John was not afforded any such privilege. Indeed for 50 years his ashes were the property of the British government as he had been a traitor. Julian eventually got permission to take control of his older brother’s ashes and took them to France where he had lived to have them scattered in the country that he called home. A nice gesture of reconciliation from a family with a history for reconciliation.

William Davy

Oh, we also found the grave of James Bond in the churchyard – but given that he died in the 19th century we are sceptical it is Ian Fleming’s hero! There is a lovely heritage centre there, sadly closed on Sundays, which once upon a time was a school paid for by subscription by the people of Lustleigh and organised by the Reverend William Davy in 1825. This was the era before government involvement in education and showed that the local community wanted to provide educational opportunities for the local children. It is interesting that it reads that it also had a meadow to help provide an income ‘for supporting a school forever!’ I guess when governments took over education there was no further use for this. It is pleasing that at least it has continued in an educational manner through the heritage centre which now occupies it and uses it.

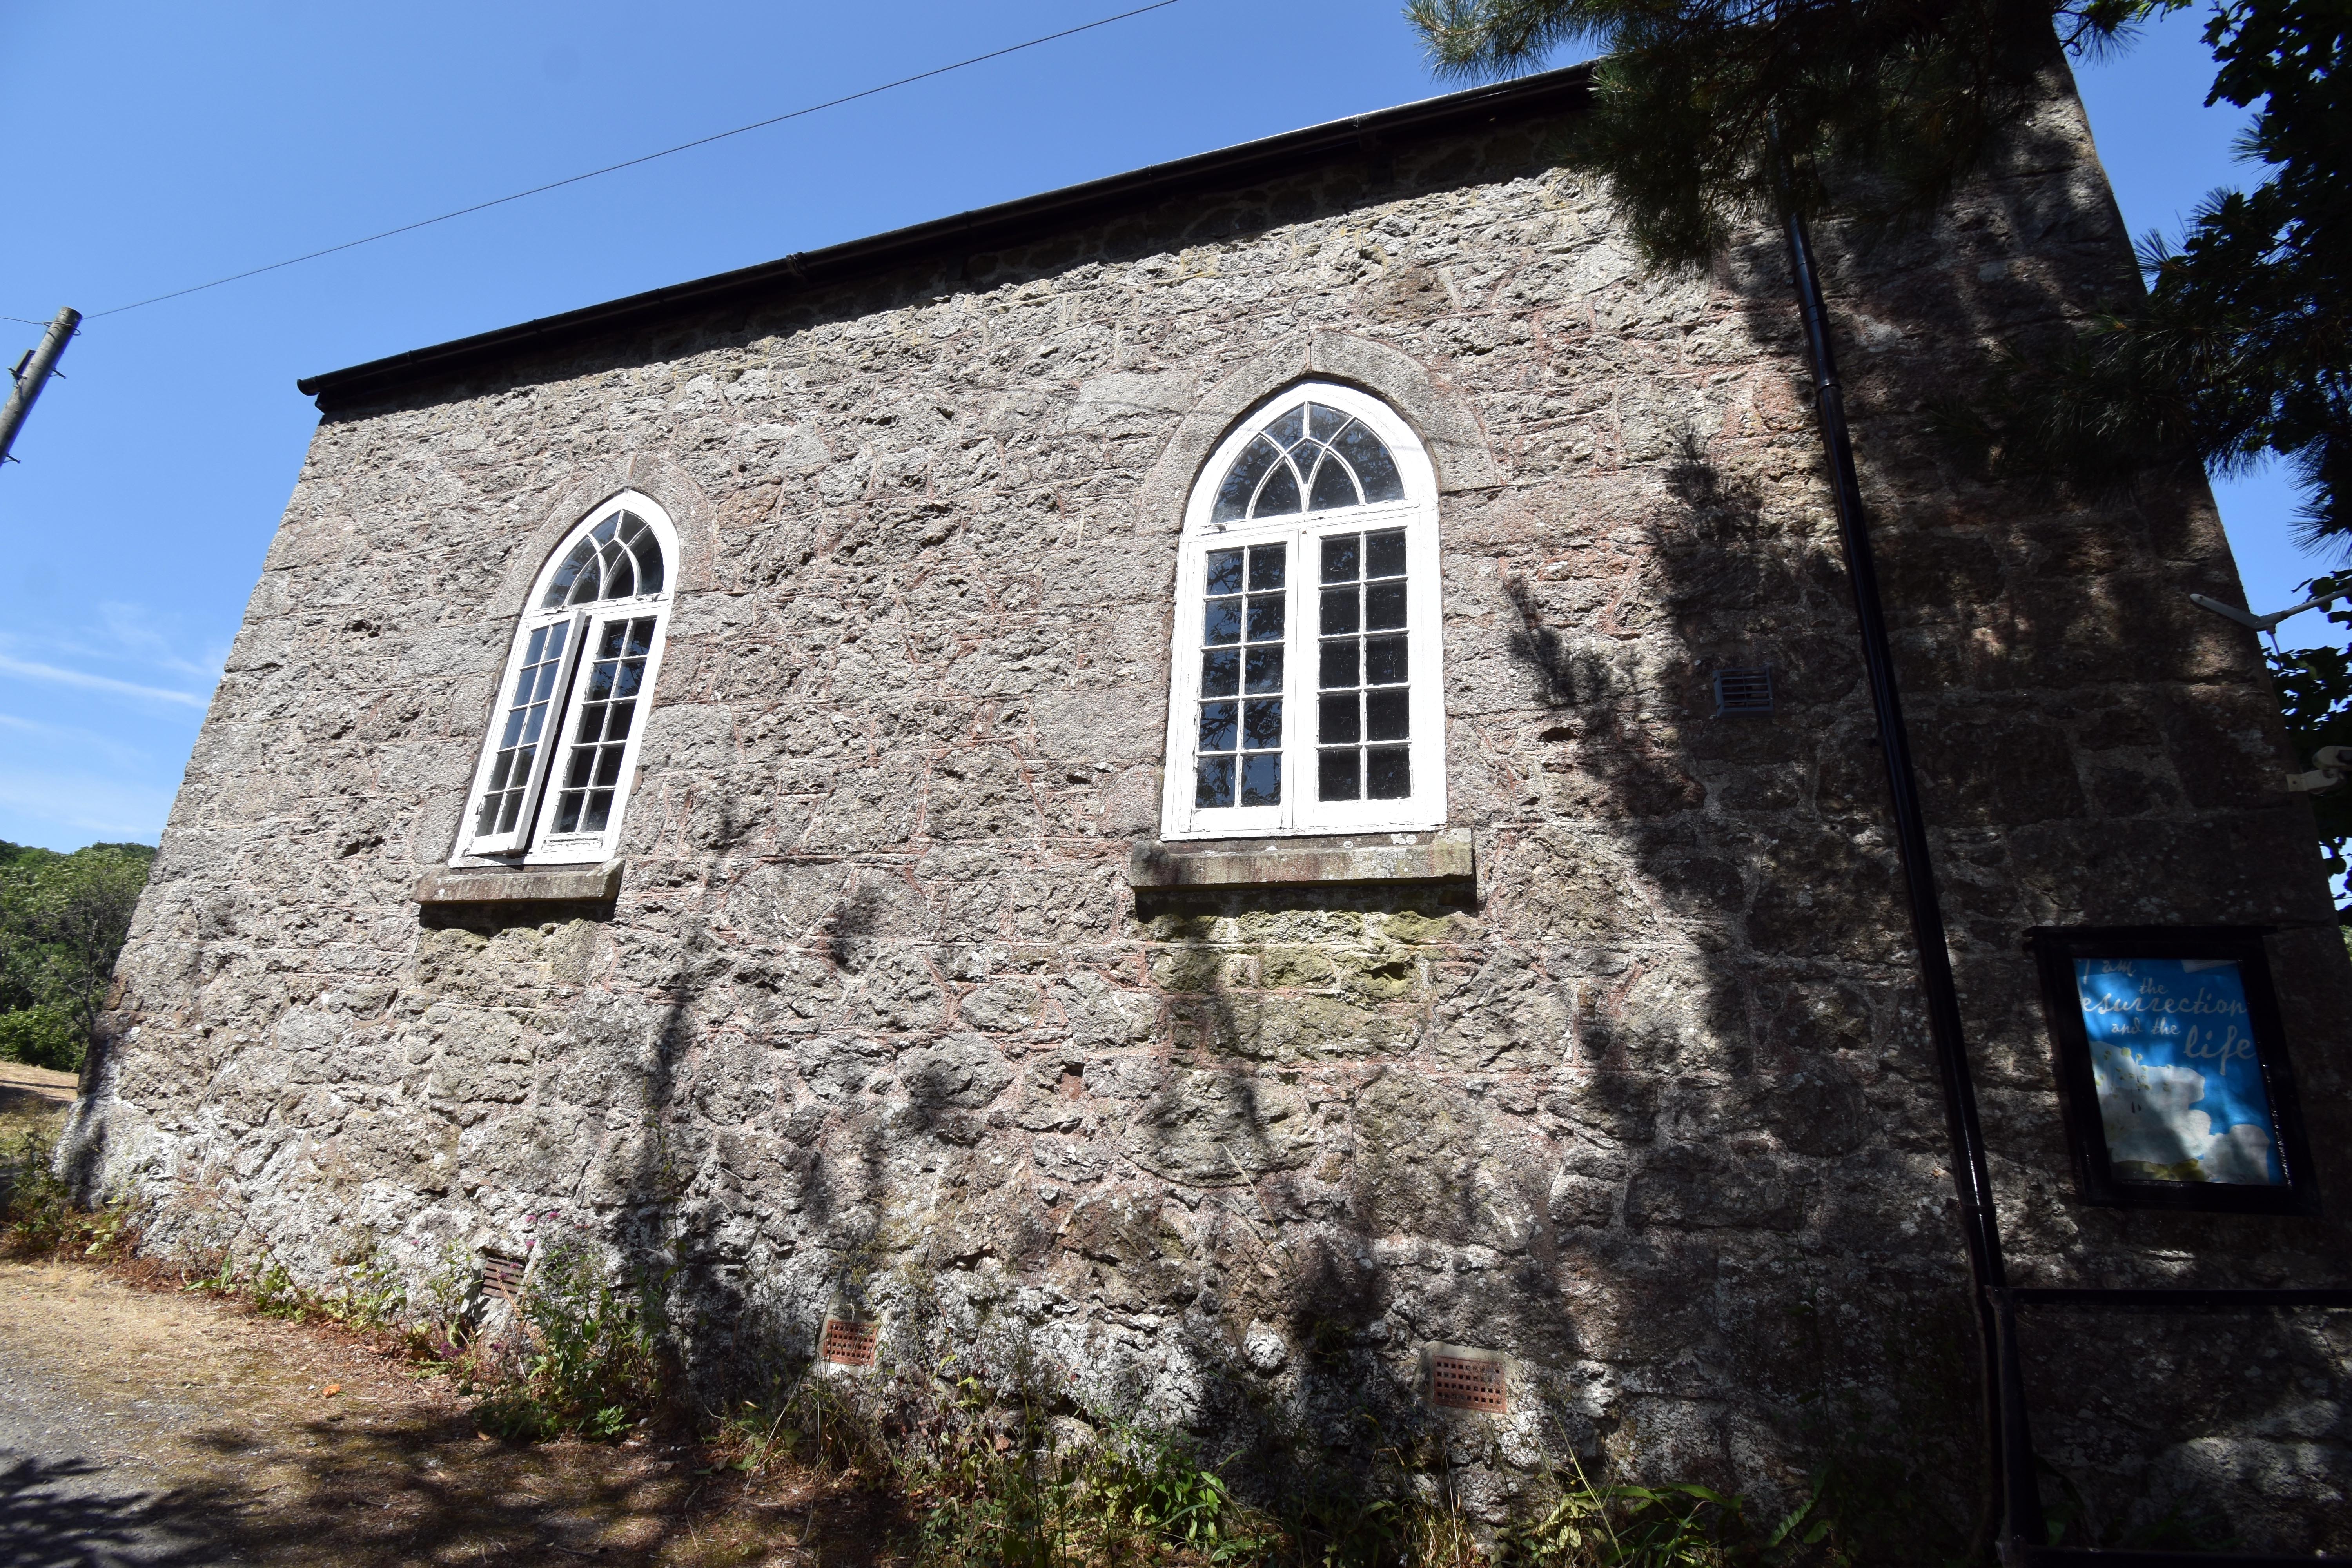
We walked down the hill to find the Baptist Church, walking along yet more pretty roads lined with charming thatched cottages. Sadly the Baptist Church no longer appears to be operational despite a sign optimistically saying that they meet every Sunday at 10:30. It looked well and truly boarded up. We had a quick rummage around the overgrown non‑conformist graveyard there and were fascinated to find an Amery grave. Clearly one of the family had left the Anglican tradition for the Baptists. When you combine the Judaism into the mix, this family had quite the religious journey.

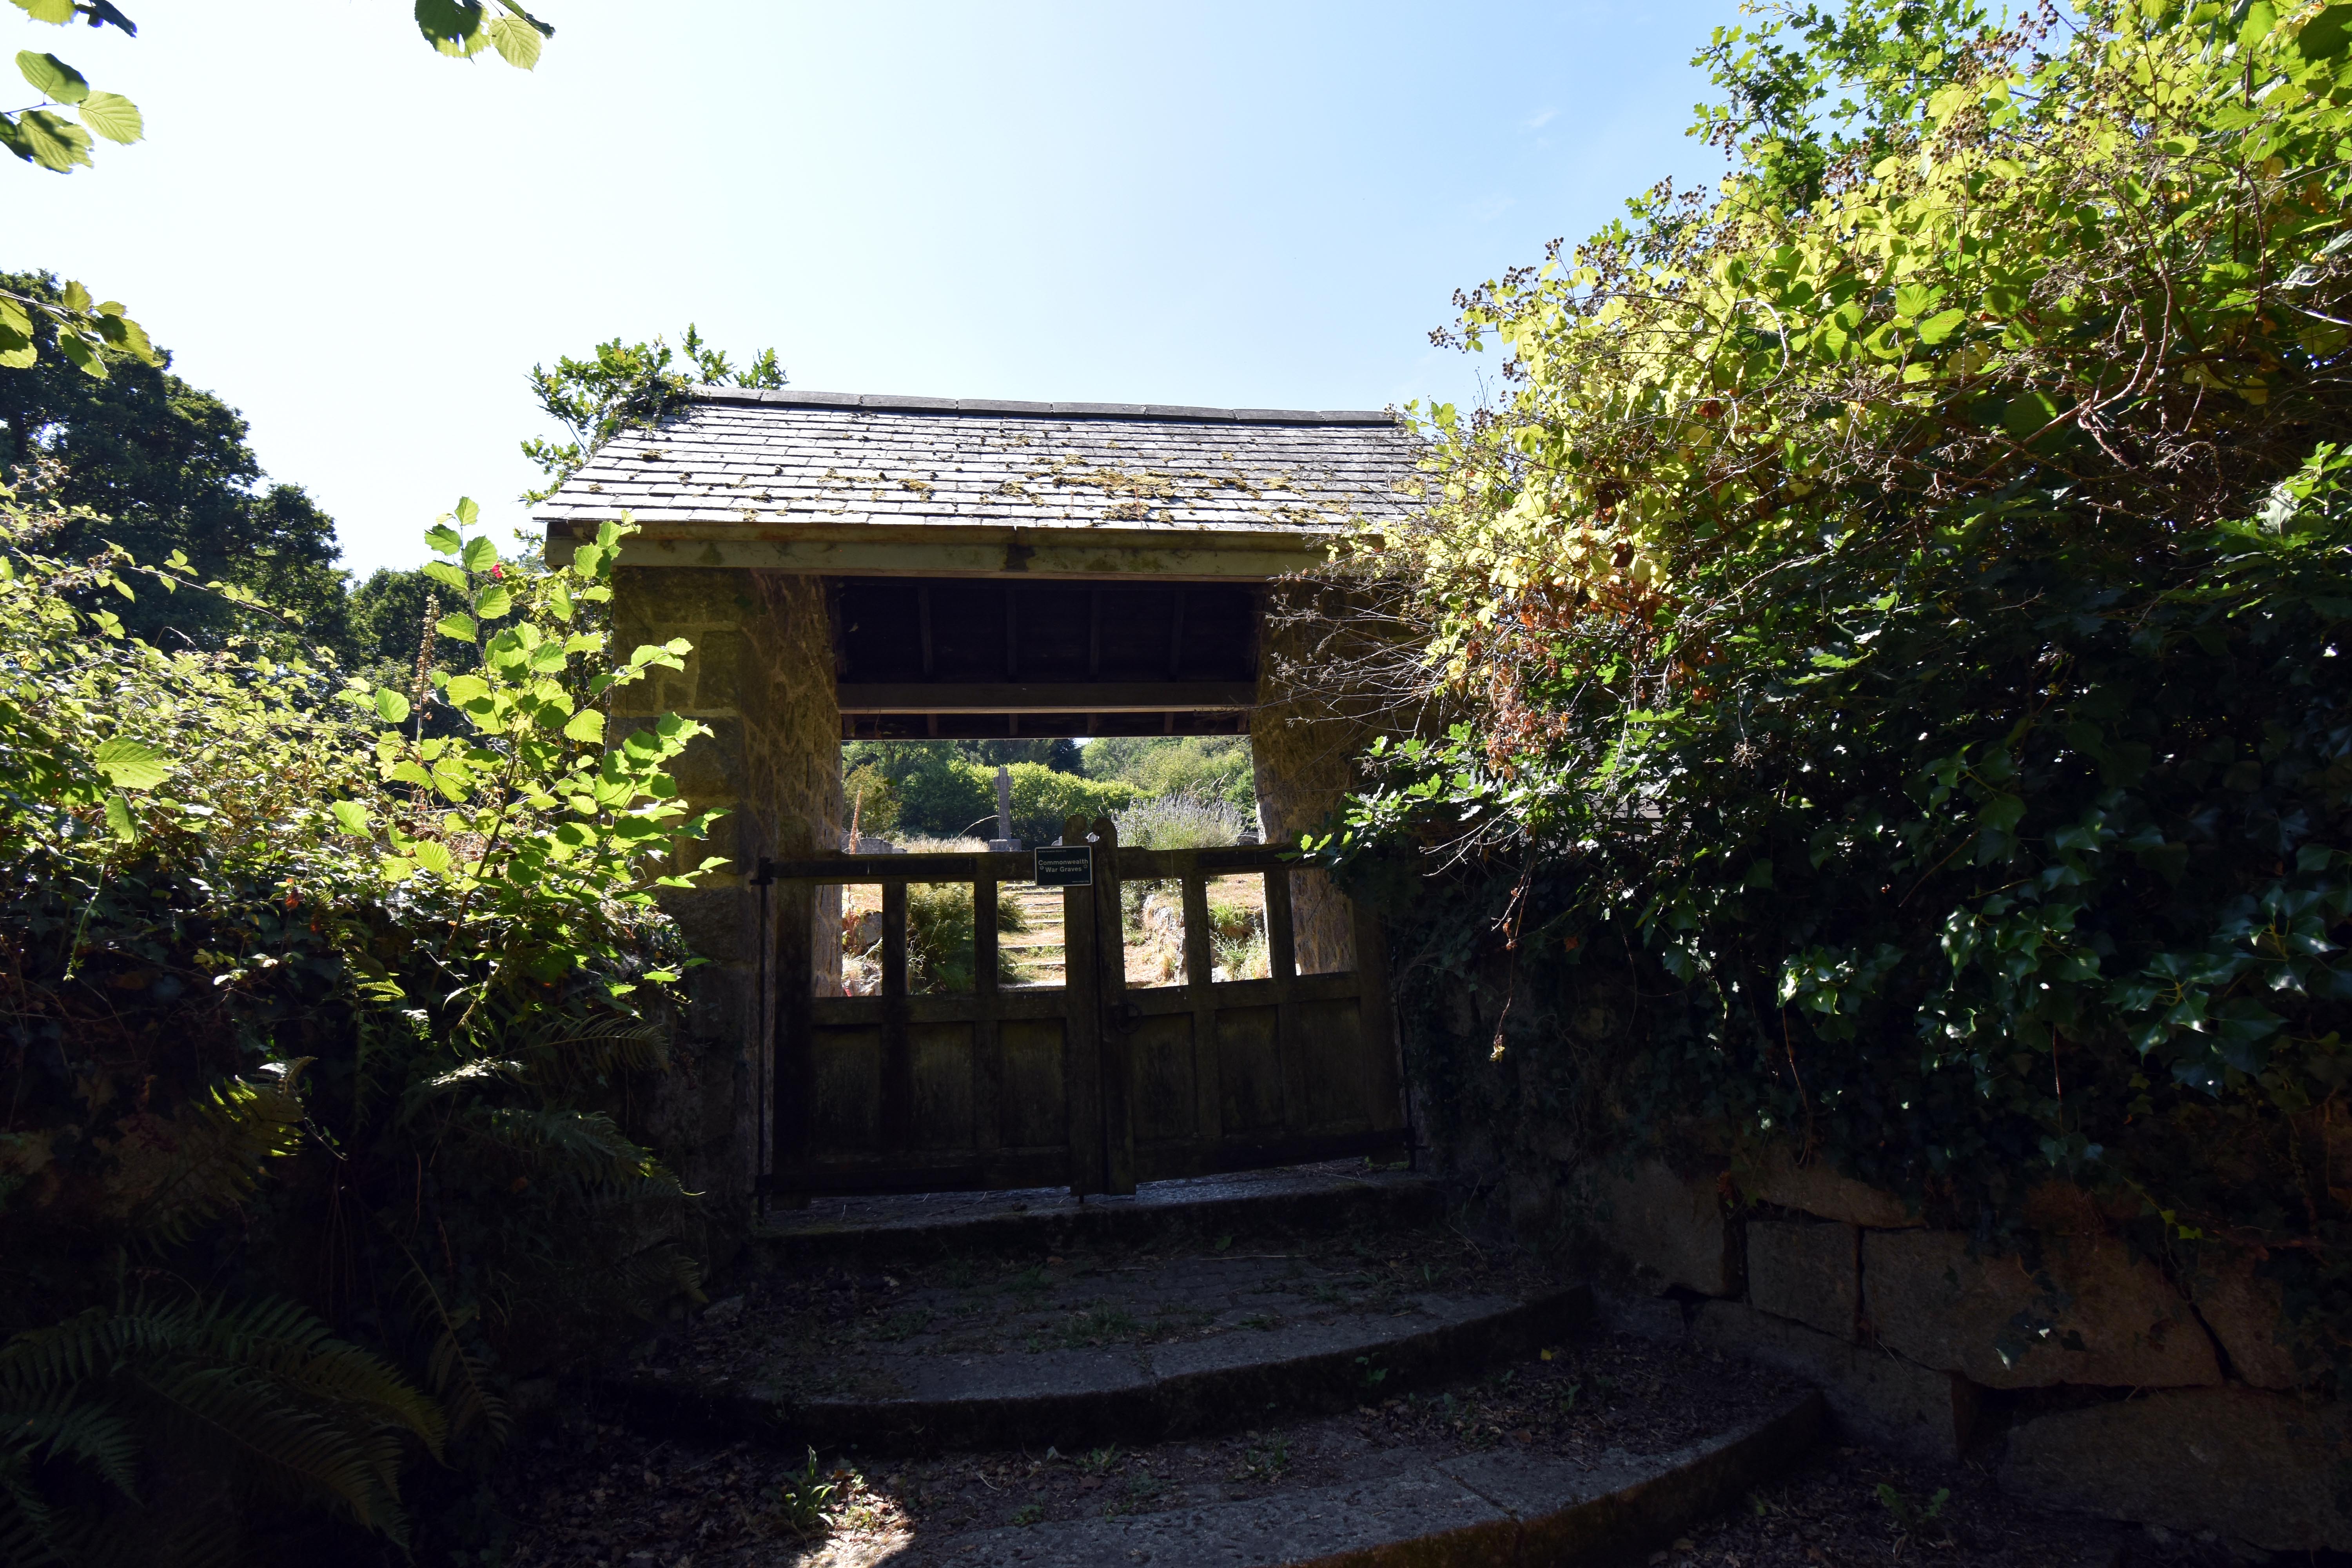
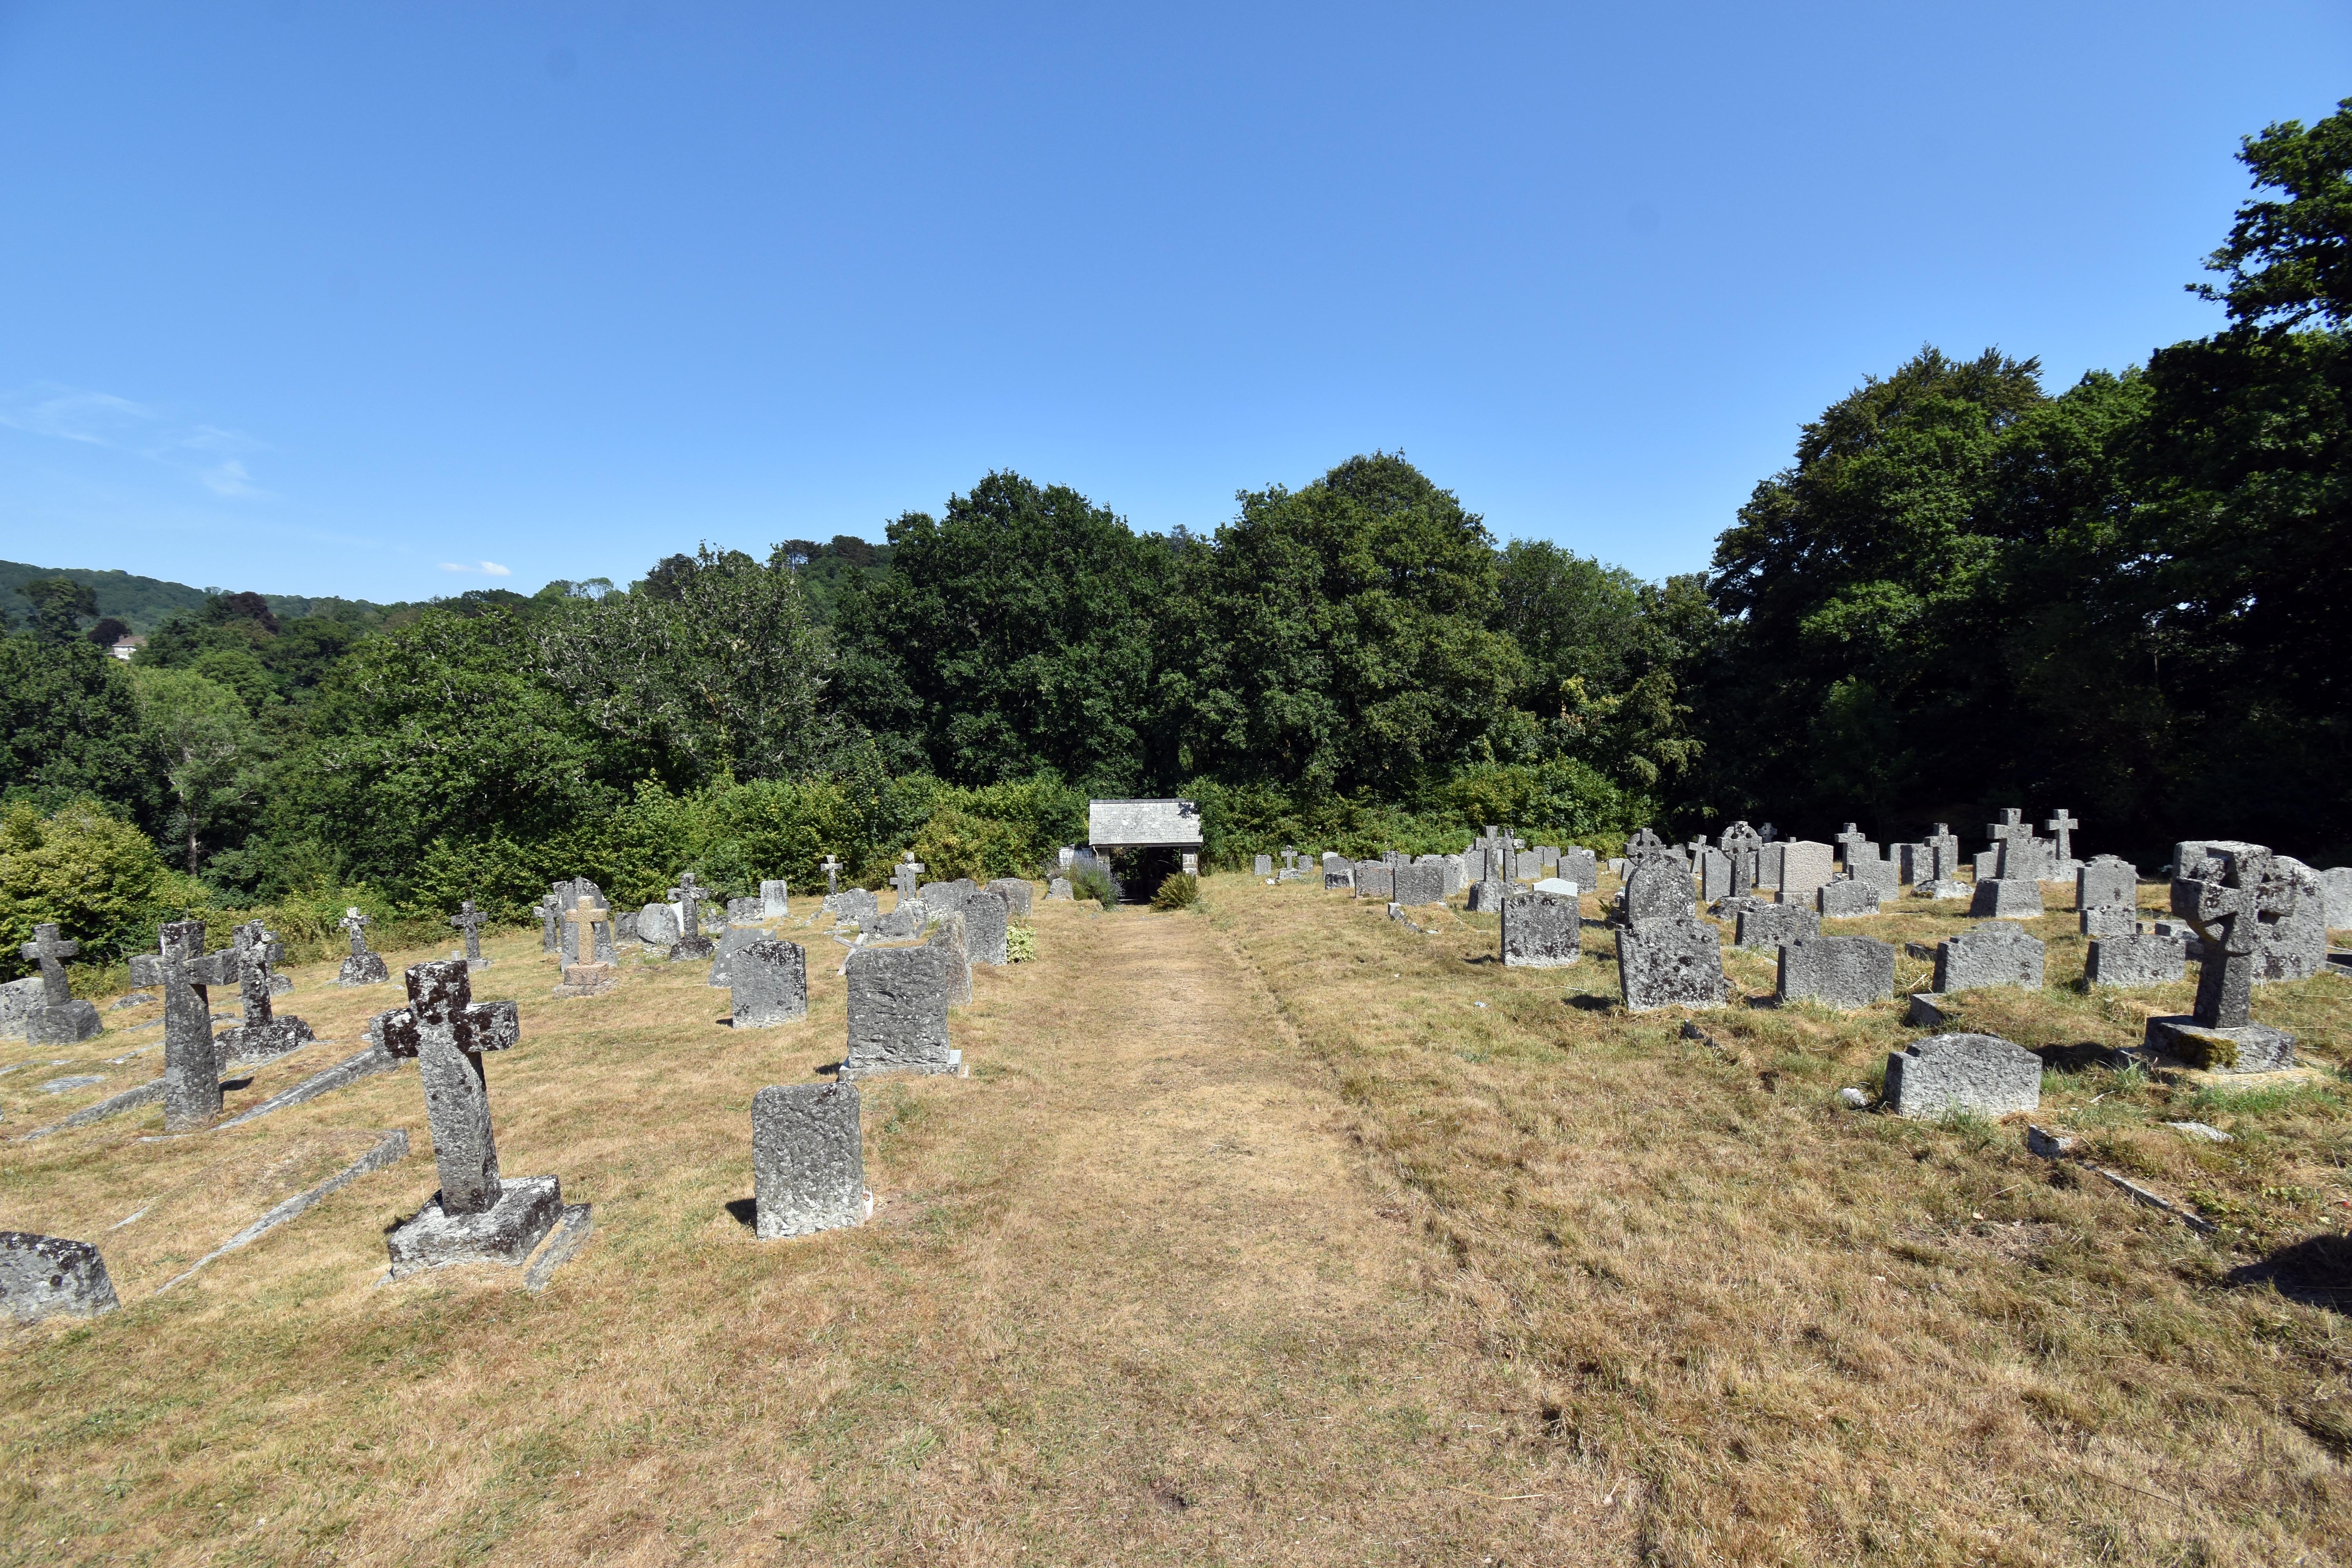
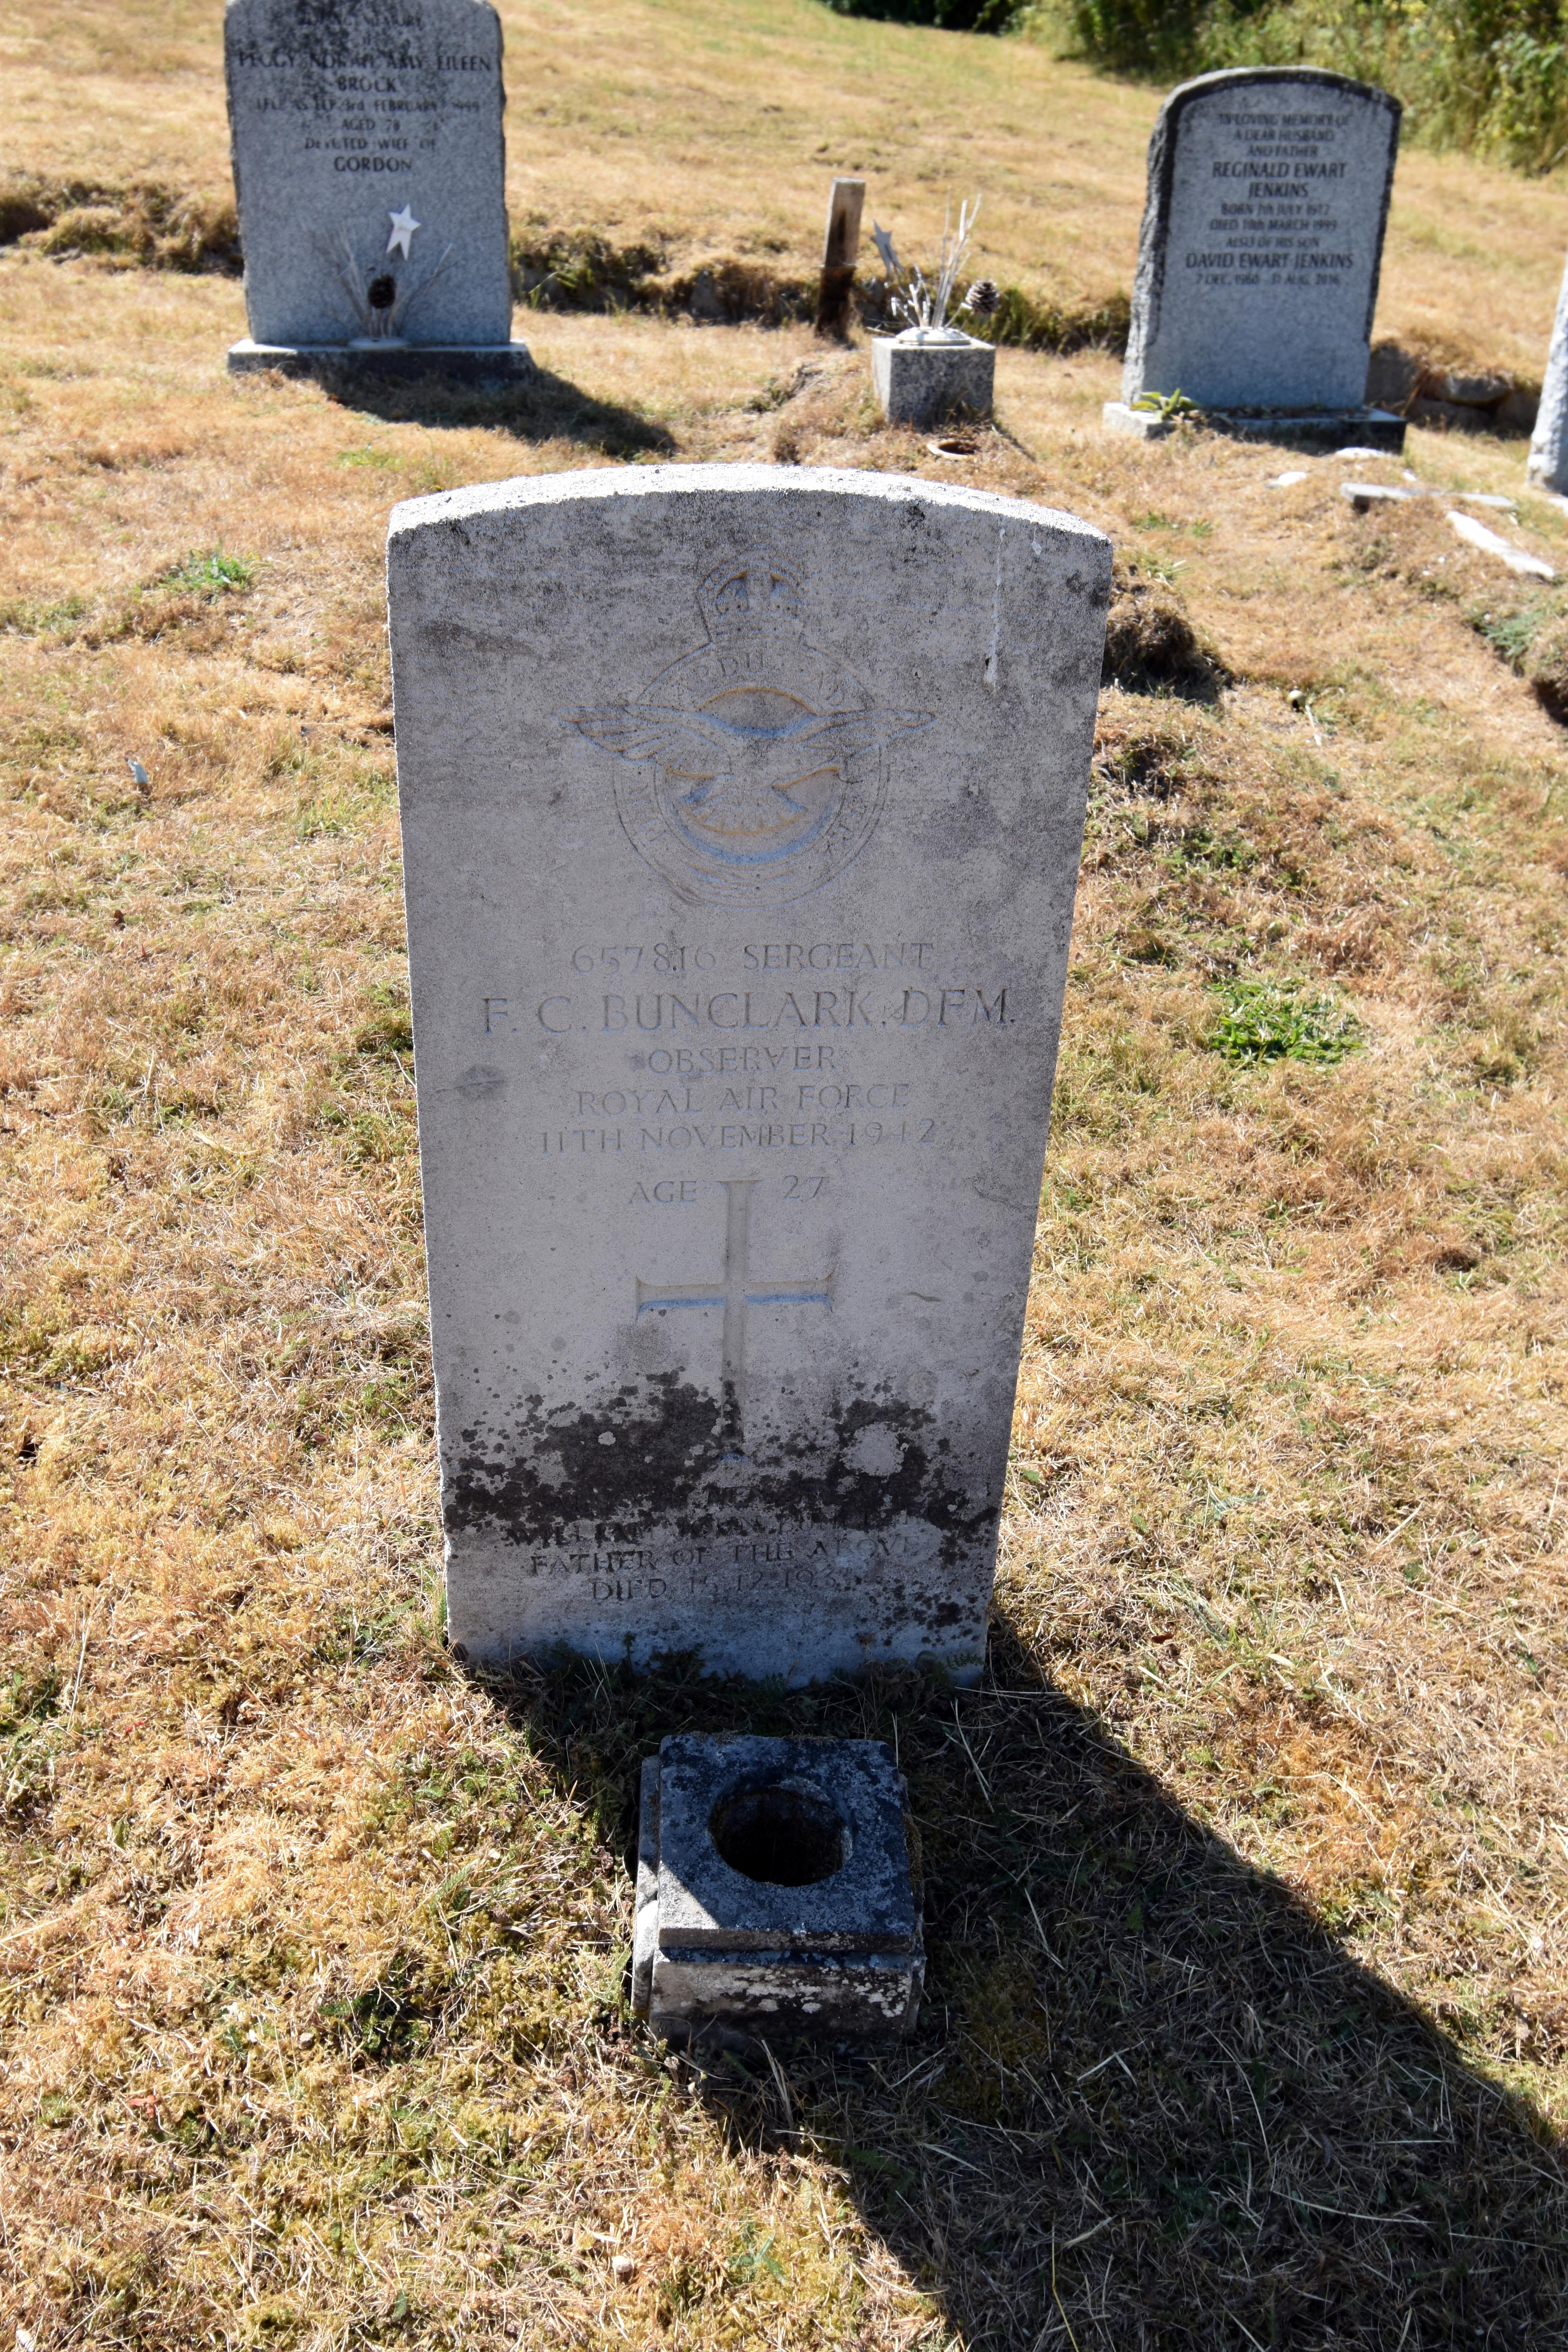
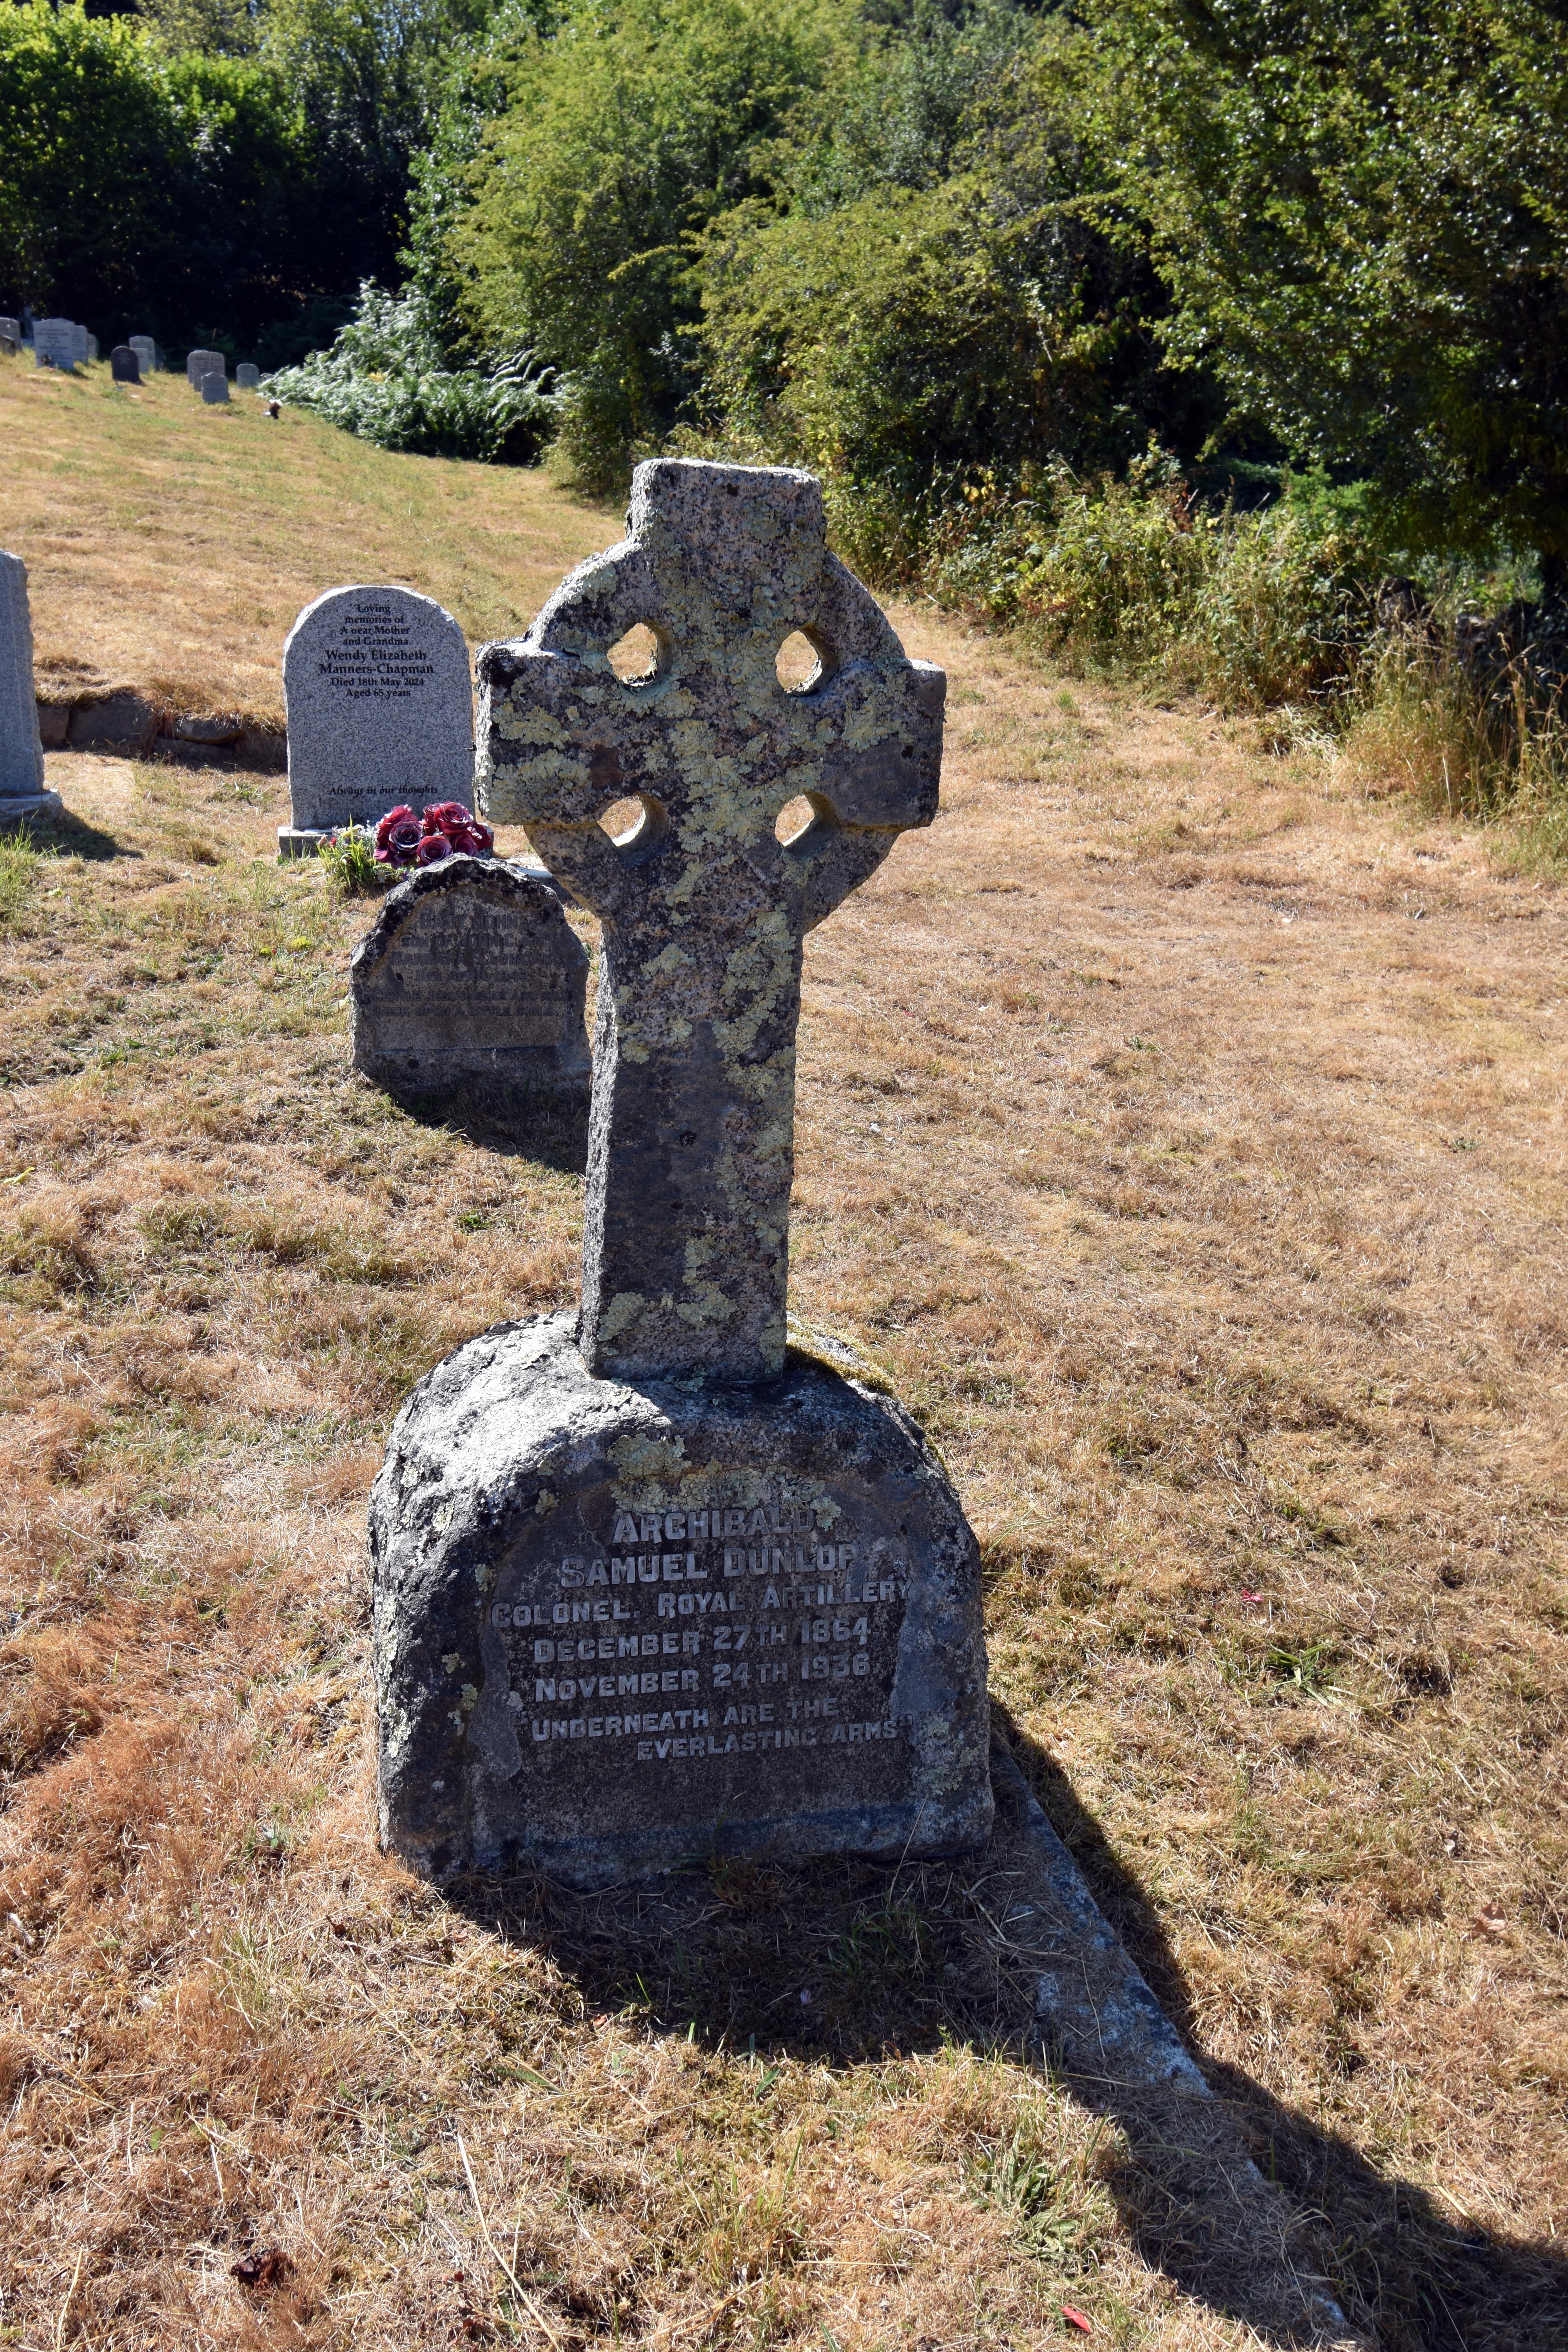
We then walked back towards the car past the old mill. We could see the old disused railway arches on the other side of the river. We stopped briefly at the out‑of‑town cemetery. Clearly the churchyard had been full to bursting and when illnesses like cholera came along, even the most remote communities were keen to move their dead far from their houses. One does have to wonder how people attend the burial services here as there is nowhere to park whatsoever and it is down the tiniest lane you can imagine. I cannot imagine a hearse negotiating this road with ease. There were a number of war graves here and quite a few ex‑soldiers who had died in their beds in peacetime with their ranks or decorations displayed. There was not much shelter here from the sun though, so after getting rehydrated we returned back to our car park for some much‑needed cold drinks I had stored in a cooler with plenty of ice. Nothing like a cold drink after a hot day’s walk. We had evaded the sun as much as we could, but there was no denying it was still a warm one.

There are so many beautiful places in Devon, but few walks can have such a quantity of pretty views and vistas as this one. It really did feel like we were walking through what you imagine Devon looks like. But this is not just a landscape of fudge boxes or postcards; this is a landscape steeped in history, from the earliest days of Christianity on these islands, to a rural economy, to its great and its good engaging and helping to shape the borders of the wider world, and even to treachery and heroism in the fight against tyranny. You don’t just find Devon in these valleys; you find the history of the world here.

Location of Walk

Click for OS Map of Area

Links

Lustleigh Stones
Background on the Lustleigh Stones and associated local traditions

May Queen Lustleigh
Article on Lustleigh’s annual May Queen ceremony and its history

Lustleigh Church of St John the Baptist Description
Detailed architectural and historical description of St John the Baptist’s Church

Church of St John the Baptist
Grade I listing entry for Lustleigh’s medieval parish church

The History of Lustleigh
Historical overview of Lustleigh from the Lustleigh Society

Lustleigh Community Archive
Archive resources and historical material from the Lustleigh Society

John Amery
Profile of John Amery and British wartime collaborators

John Amery – BBC Reel
BBC video feature on John Amery’s collaboration and trial

Leo Amery and the Balfour Declaration
BBC analysis of Leo Amery’s role in shaping the Balfour Declaration

Leo Amery and Churchill
Article on Leo Amery’s political relationship with Winston Churchill

The Printing Parson – Reverend William Davy
Biography of William Davy, the 18th‑century “Printing Parson” connected to Lustleigh

Suggested Reading

Crowdy, Joe – The Book of Lustleigh

Faber, David – Speaking for England: Leo, Julian, and John Amery

Levin, Rona – Comic, Curious & Quirky: News Stories From Centuries Past

Lewis, William Roger – In the Name of God, Go! Leo Amery and the British Empire in the Age of Churchill

Lustleigh Society – Chris Wilson Lustleigh: A Dartmoor Village in Focus

Lustleigh Society – Lustleigh Book of the First World War

Olson, Lynne – Troublesome Young Men

Amery, Leo – The Leo Amery Diaries

Weale, Adrian – Patriot Traitors

West, Rebecca – The Meaning of Treason

Wilson, Chris – A Devon Village’s Sacrifice: Lustleigh’s Fallen in the Great War

Wrey Valley Study – In the Footsteps of the Victorians

More Walks

Walks by the Westcountry Walker

Walks in Cornwall

Walks in Devon

Walks in Somerset

Walks in Hampshire

Walks in Wiltshire

Timber activity in Pullabrook Wood near Lustleigh, showing stacked logs beneath tall conifers used for managed forestry on the River Bovey valley floor. Shaded section of the Dartmoor Way near Pullabrook Wood, a gravel path lined with oak and fern undergrowth, sunlight filtering through the canopy. Hisley Packhorse Bridge viewed from the approach path, a narrow medieval stone crossing with uneven cobbles and moss-covered parapets beneath dense woodland. Hisley Packhorse Bridge spanning the River Bovey, its single stone arch reflected in the shallow stream surrounded by trees and dappled sunlight.
Pullabrook Wood – managed timber operations beside the River Bovey showing stacked logs and tall conifers under a clear summer sky. The Dartmoor Way – shaded woodland track through Pullabrook Wood with oak trees and ferns providing cool relief from the summer heat. Hisley Packhorse Bridge – medieval stone bridge on the Lustleigh–Manaton route, its cobbled surface worn smooth by centuries of packhorse traffic. Hisley Packhorse Bridge – view from the riverbank showing the single arch over the Bovey and the surrounding woodland canopy.
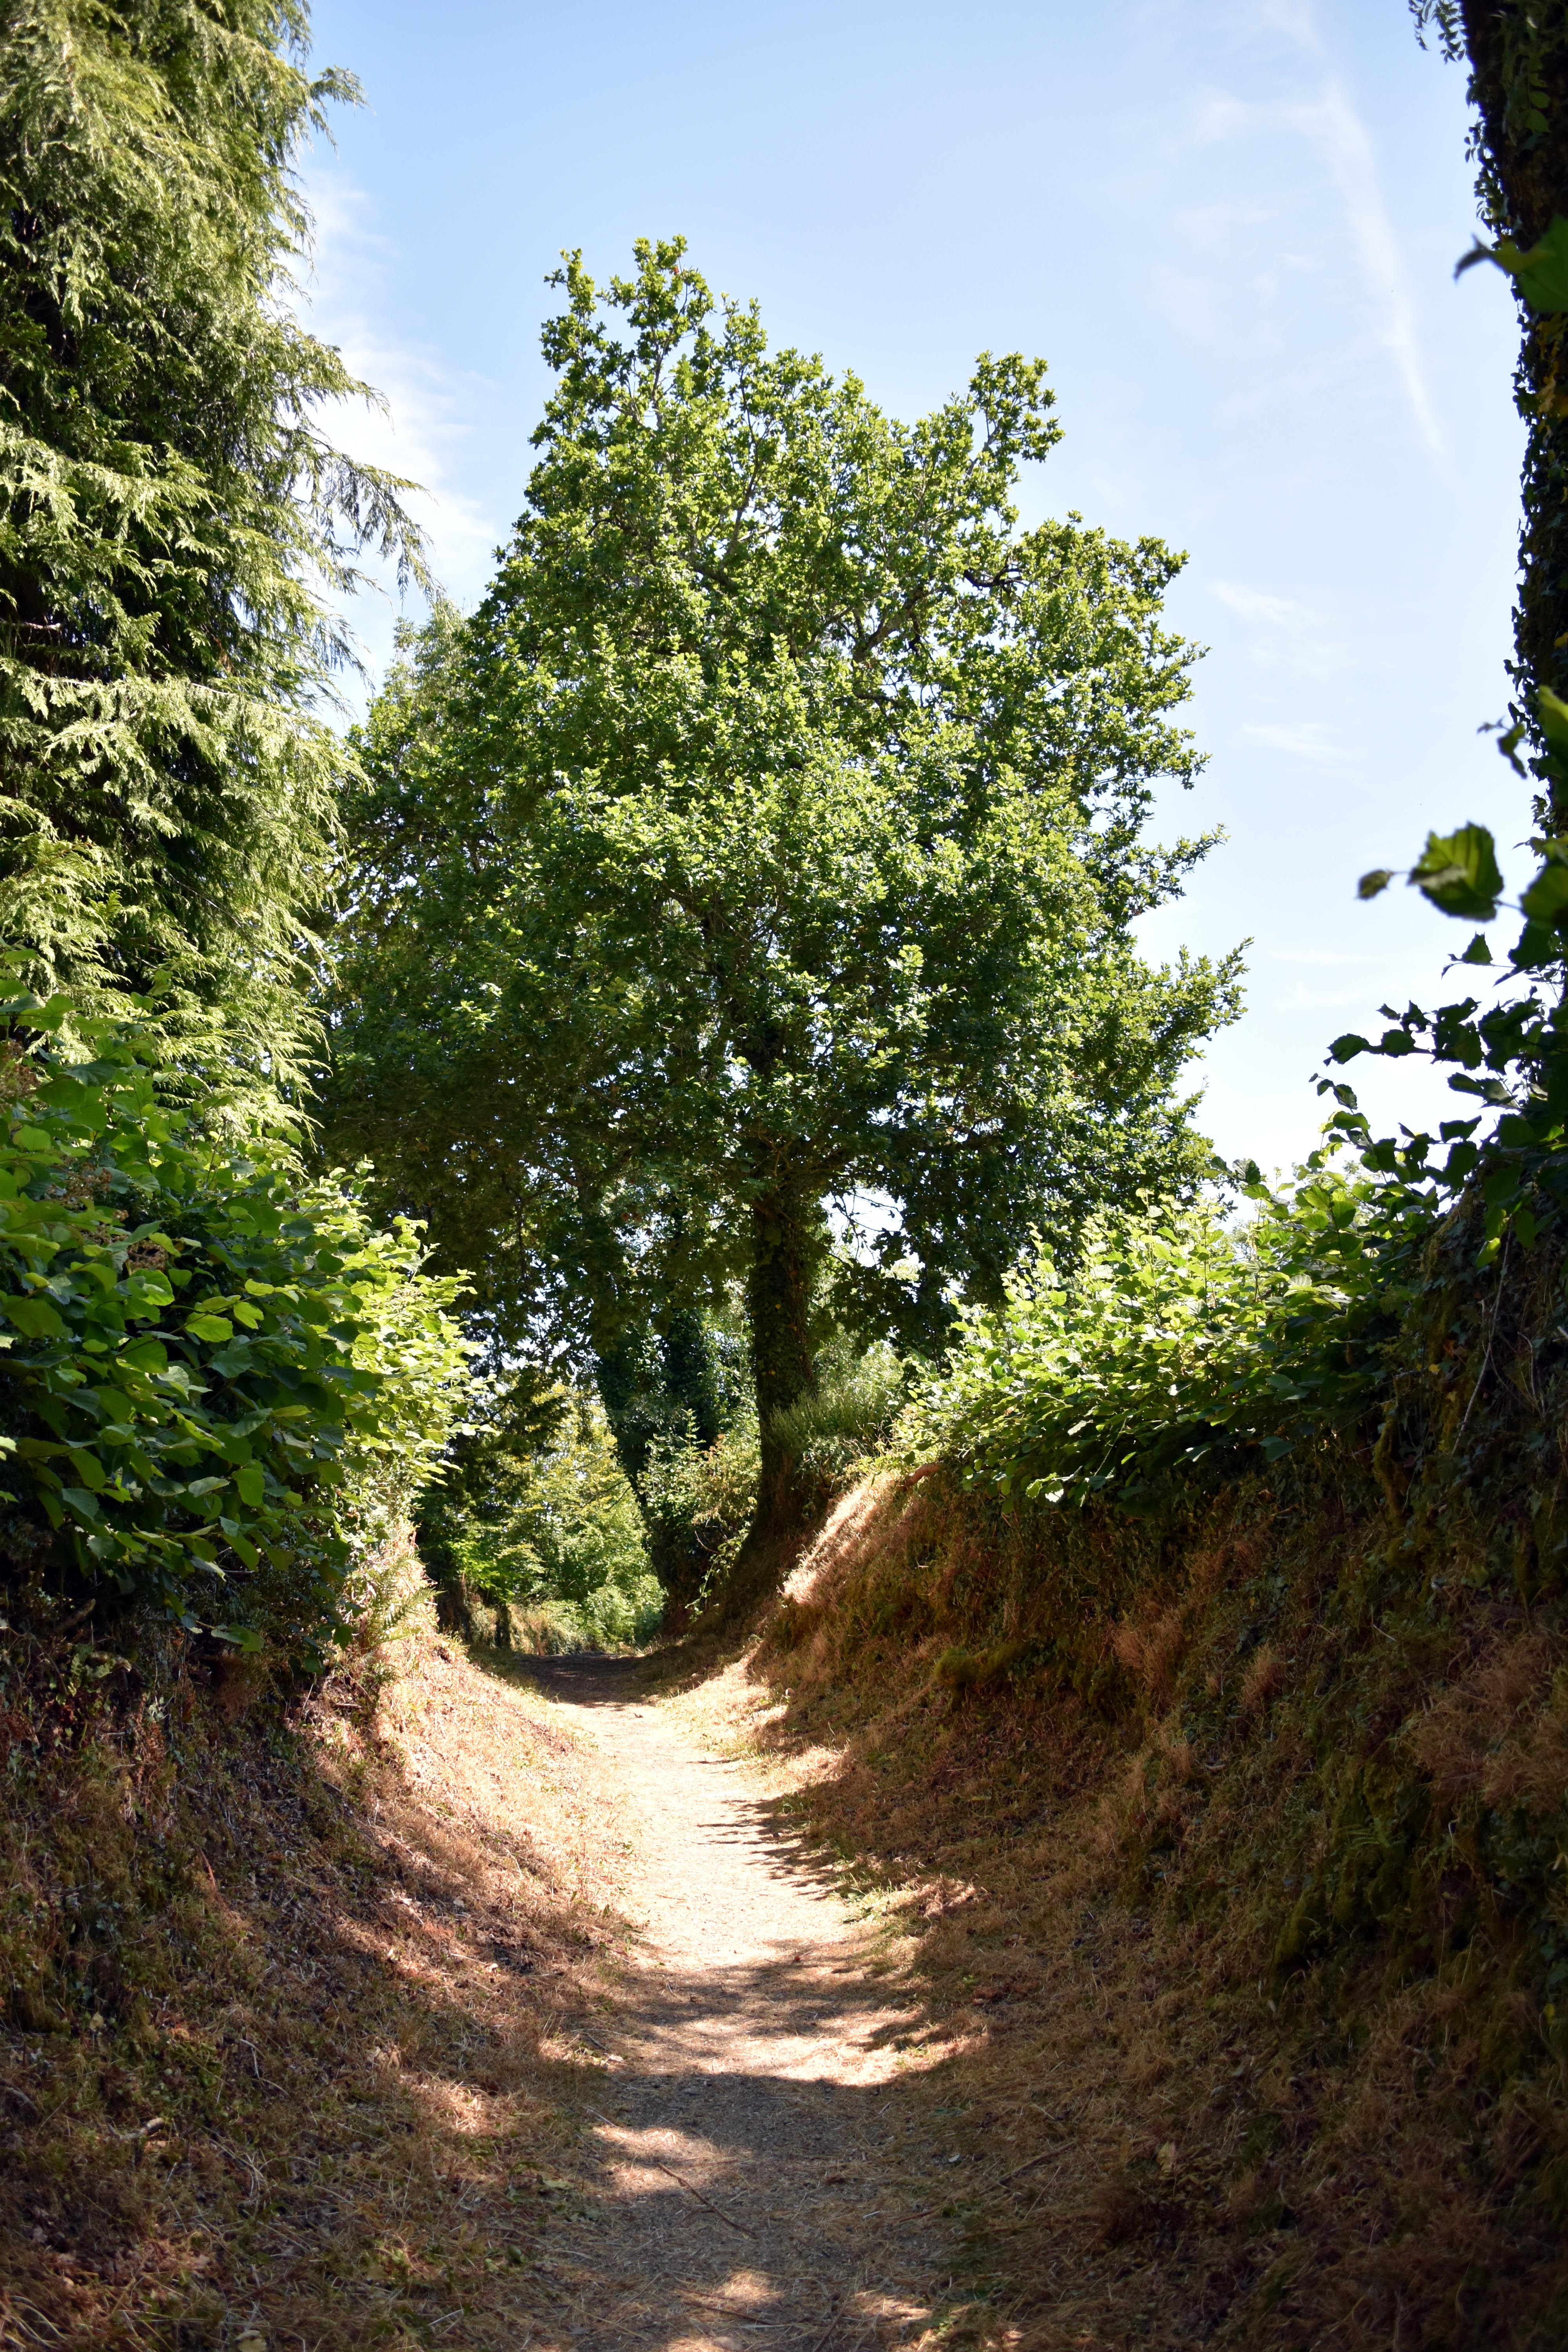
View across the valley towards Black Hill from the ridge above Hisley Wood, showing open moorland and wooded slopes under a bright summer sky. Hisley Wood – dense oak woodland with moss-covered granite boulders and ferns beneath a canopy filtering the midday light. Sunken lane climbing towards the ridgeline en route to Pethybridge, flanked by high banks and overhanging trees forming a shaded tunnel. Thatched cottage in Pethybridge with whitewashed walls, deep eaves and garden shrubs under a clear blue sky.
View across the valley to Black Hill – open Dartmoor landscape of moorland and woodland seen from the ridge above Hisley Wood. Hisley Wood – oak and birch woodland with mossy granite boulders and ferns, part of the shaded ascent from Hisley Bridge. Path to the ridgeline – narrow sunken lane bordered by high banks and overhanging trees leading towards Pethybridge. Thatched cottage in Pethybridge – typical Devon longhouse style with whitewashed walls and deep thatch, surrounded by summer gardens.
Narrow lane through Pethybridge with a sign warning drivers 'Too narrow for vehicles – Ignore Sat Nav – Use other route', flanked by granite cottages and stone walls. Thatched cottage in Pethybridge with whitewashed stone walls, deep eaves and garden shrubs under a clear summer sky. Another narrow lane in Pethybridge with a sign reading 'Unsuitable for motor vehicles – Pethybridge Stop', bordered by high stone walls and thatched cottages. Lustleigh’s Church of St John the Baptist seen from above, showing its granite tower with battlements and clock face surrounded by trees and village rooftops.
Pethybridge lane – granite cottages and a warning sign advising drivers to ignore Sat Nav and use another route due to narrow roads. Thatched cottage in Pethybridge – whitewashed stone walls and deep thatch typical of Devon longhouses, surrounded by summer gardens. Pethybridge lane – another sign warning motorists of narrow access, with high stone walls and traditional thatched cottages lining the route. Lustleigh’s Church of St John the Baptist – granite tower and slate roof viewed from above, surrounded by trees and village houses.
Thatched cottages above Lustleigh surrounded by trees, showing a mix of traditional and modern houses built into the hillside. Lustleigh Orchard, now a public park, with grassy paths, granite boulders and trees providing shade on a summer day. Lustleigh May Queen throne carved into a granite boulder, inscribed with the names of past May Queens beneath surrounding trees. Maltese cross in Lustleigh village, set on a double octagonal pedestal topped with rounded slabs and inscribed 'In Pious Memory of Henry Tudor Rector of this Parish'.
Thatched cottages above Lustleigh – a cluster of hillside homes combining traditional thatch and modern architecture amid dense woodland. Lustleigh Orchard – now a public park with granite boulders, trees and grassy paths leading towards the village centre. Lustleigh May Queen throne – granite boulder carved with the names of successive May Queens, a long-standing village tradition. Maltese cross – fine stone cross on a double octagonal pedestal with rounded slabs, inscribed 'In Pious Memory of Henry Tudor Rector of this Parish'.
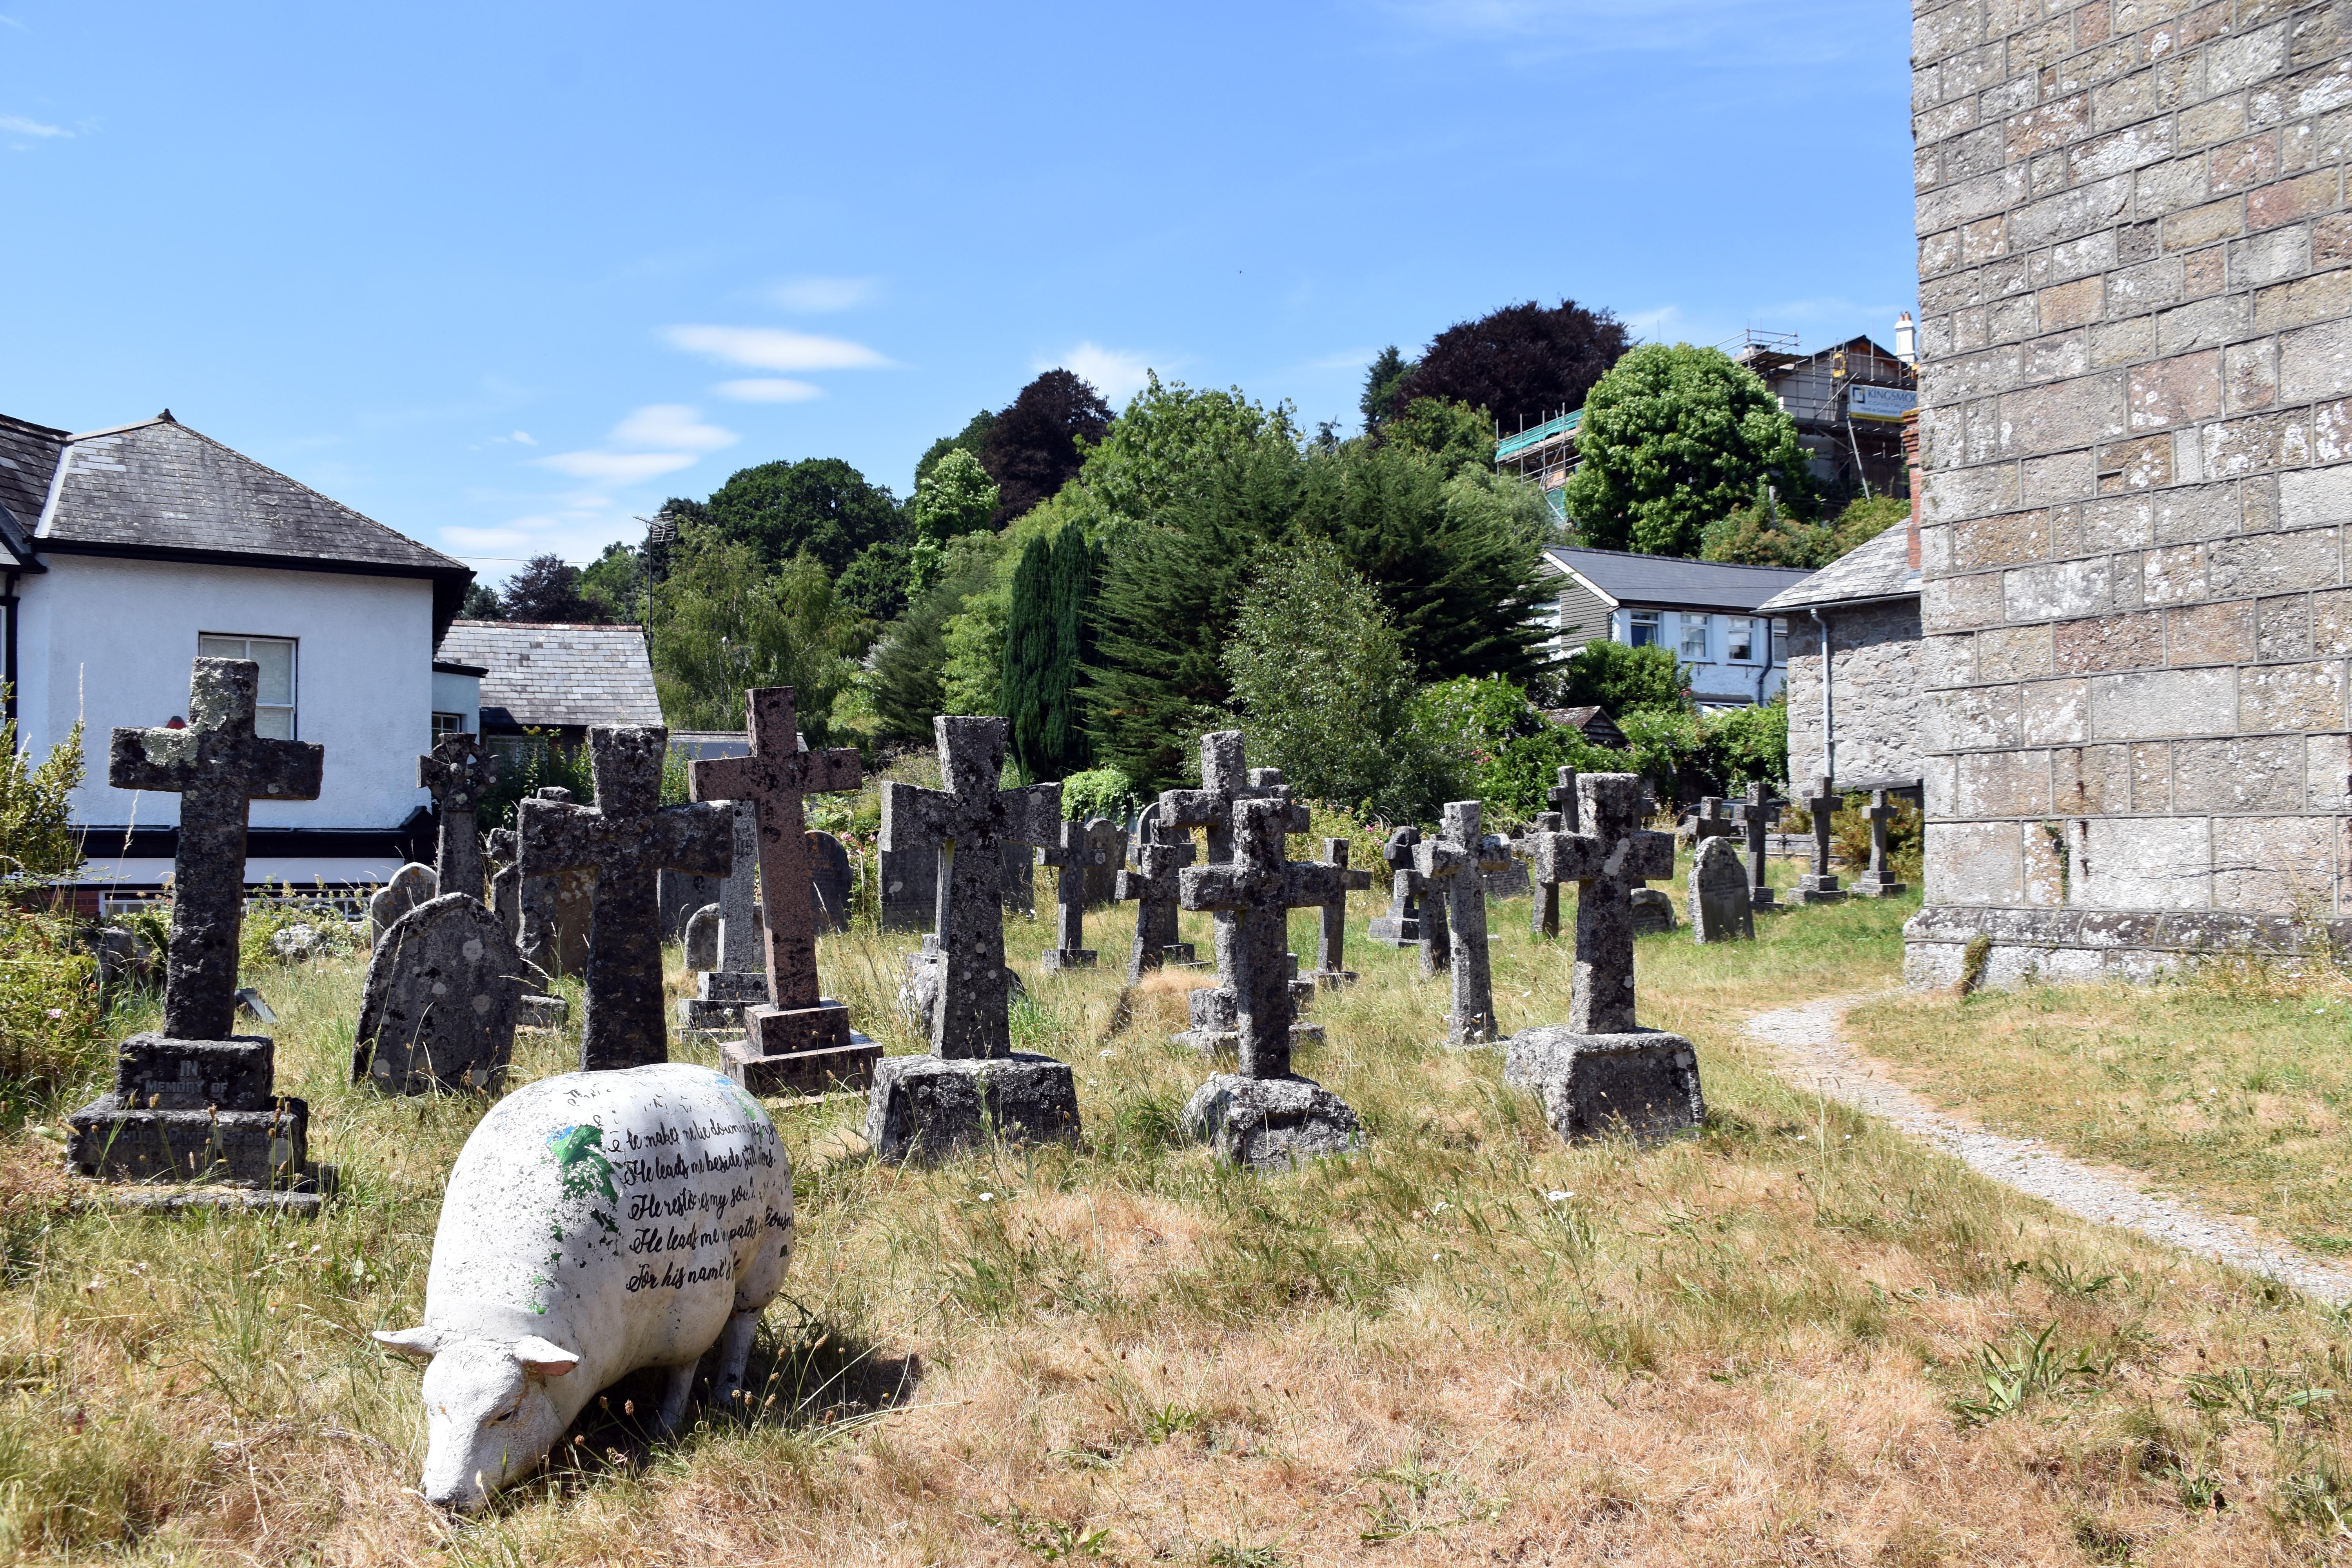
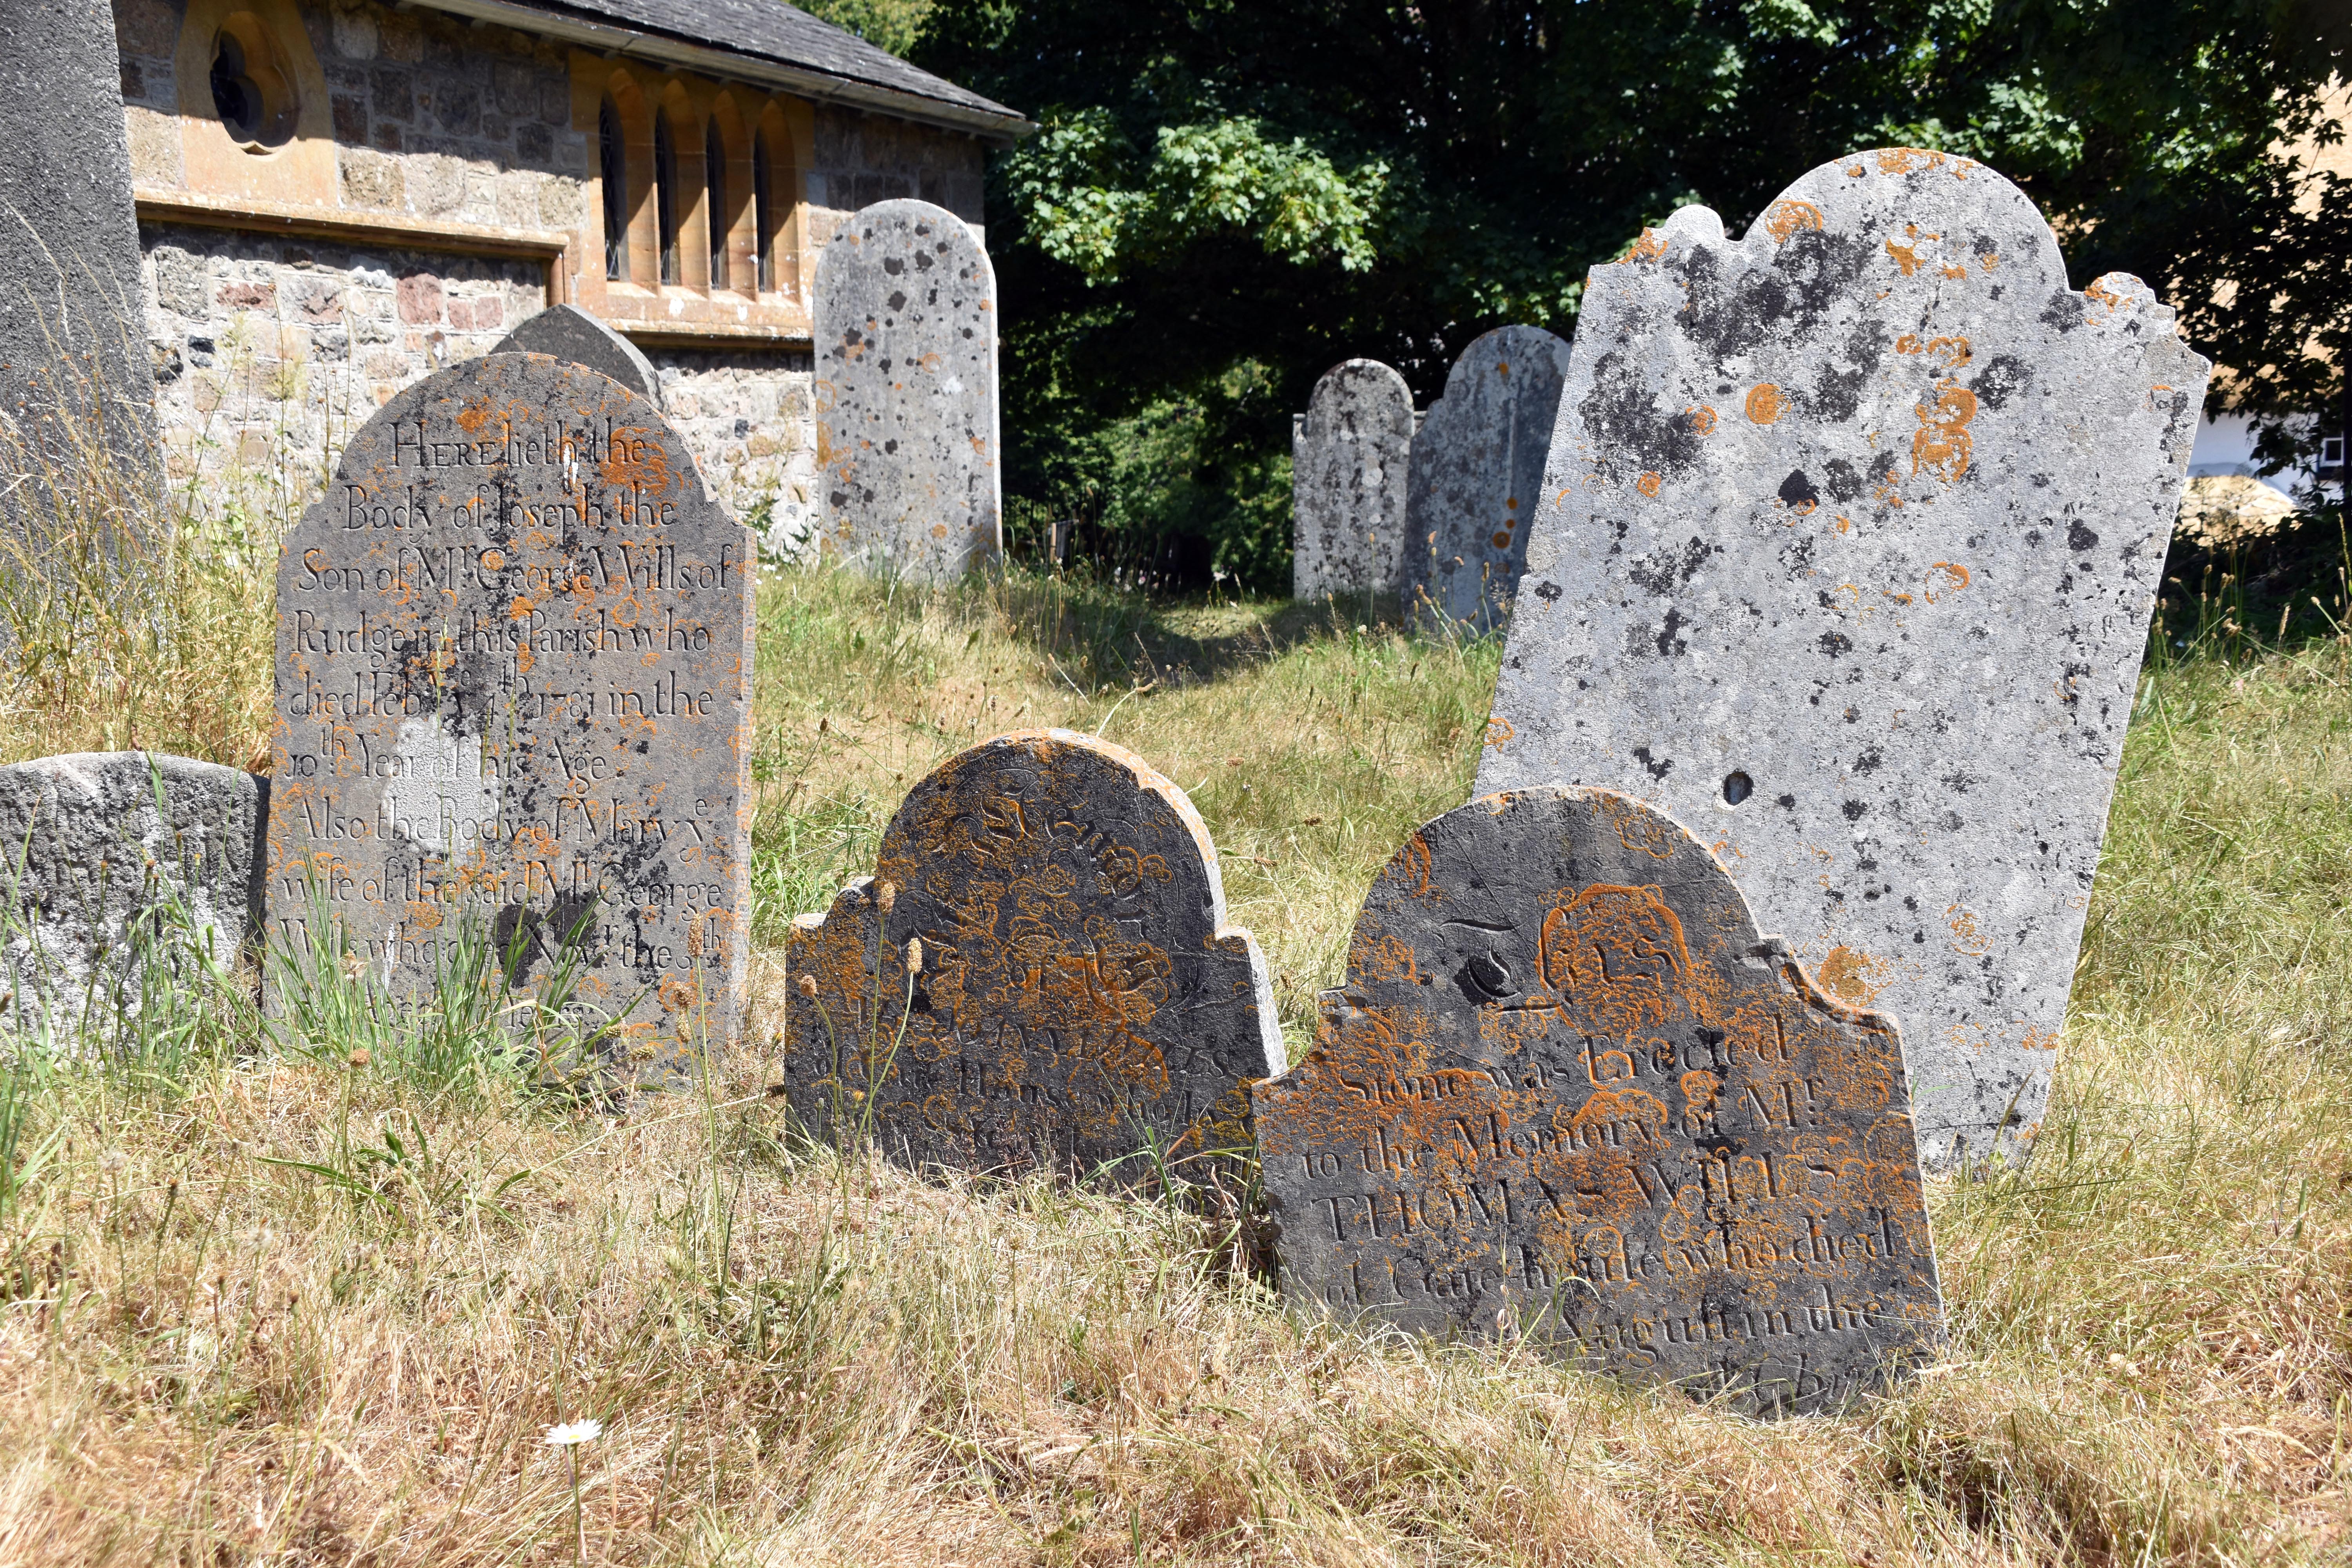
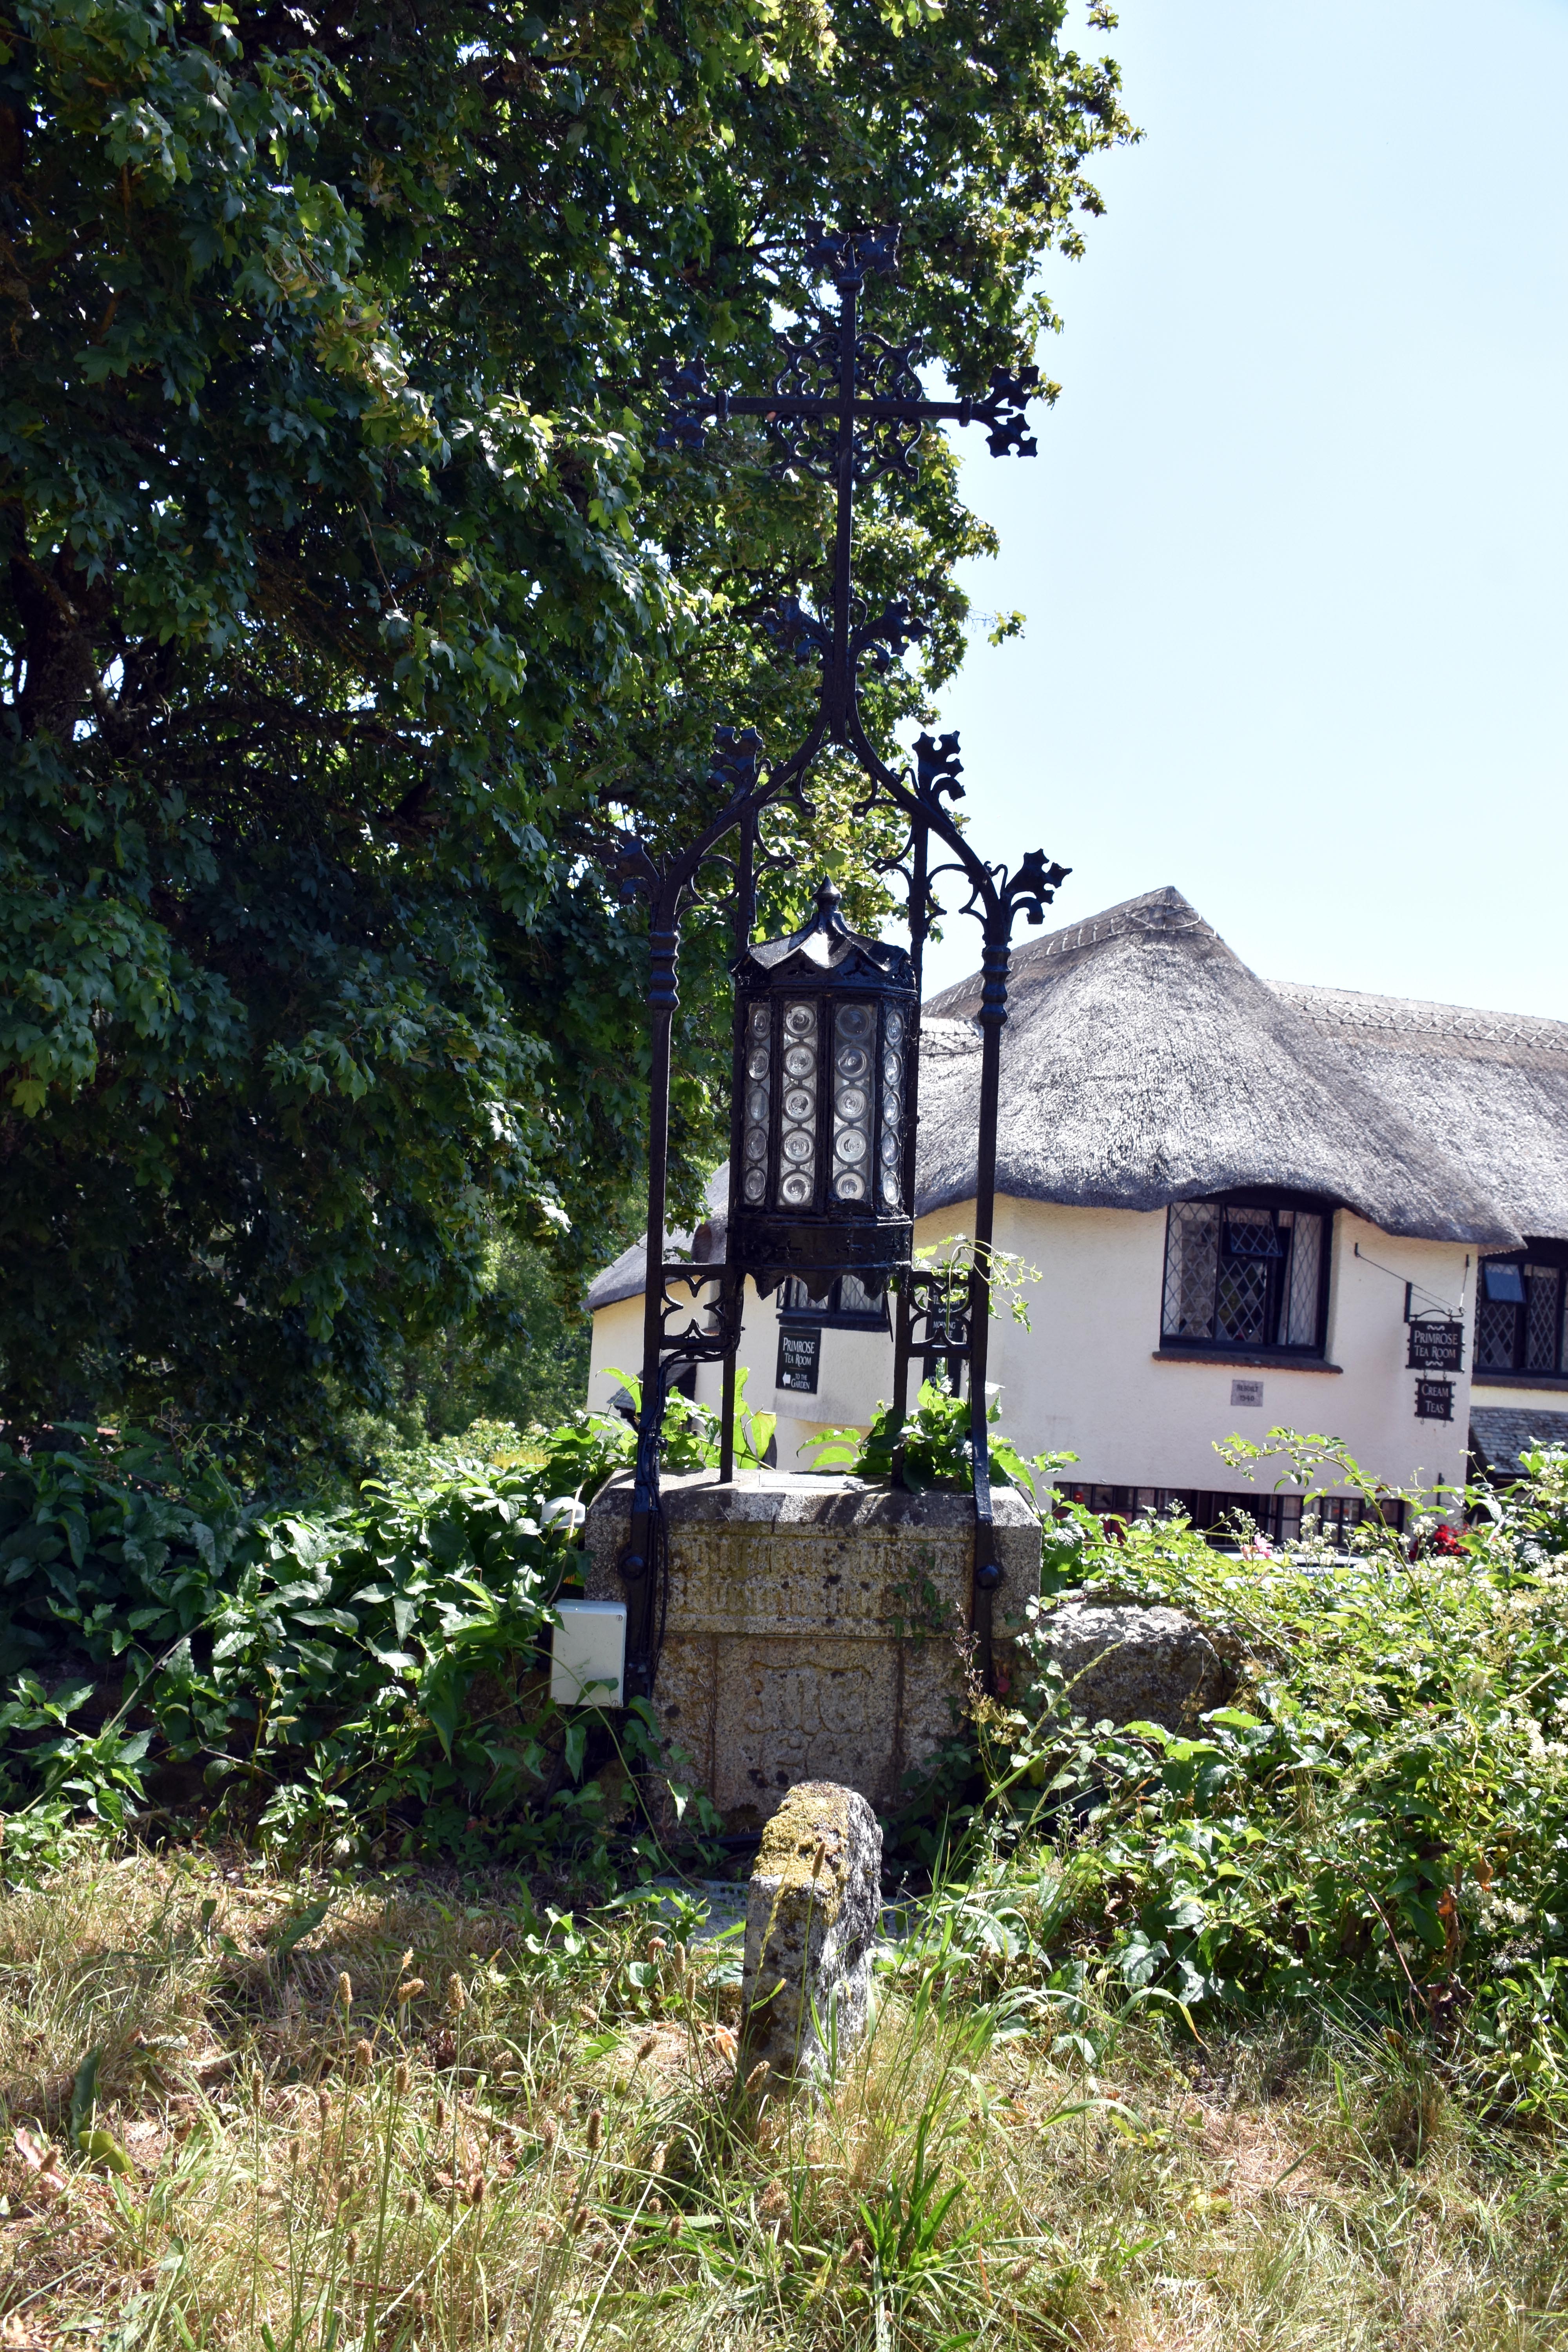
Primrose Tea Room in Lustleigh, a cream-painted thatched cottage beside the village cross, offering morning coffee, light lunches and afternoon teas. Churchyard at Lustleigh with rows of granite crosses and a sculpted sheep bearing verses from Psalm 23, surrounded by summer grass and village houses. Old gravestones in Lustleigh churchyard commemorating members of the Wills family, their inscriptions weathered and covered with lichen. Decorative lantern erected in the late 19th century in memory of James Nutcombe Gould and his wife Edith Gould, standing near the churchyard wall.
Primrose Tea Room – thatched cottage beside the village cross serving morning coffee, light lunches and afternoon teas. Lustleigh churchyard – granite crosses and a sculpted sheep inscribed with Psalm  23 verses, set among summer grass and village houses. Lustleigh churchyard – old gravestones of the Wills family, their lettering softened by age and lichen growth. Memorial lantern – ornate wrought‑iron lantern commemorating James  Nutcombe  Gould  (1849–1899) and Edith  Gould (1859–1900), near the churchyard wall.
1825 schoolroom at Lustleigh established by Reverend William Davy, built of granite with slate roof and small porch, now part of the heritage centre beside the churchyard. Gravestone of James Bond and his wife Susan Bond in Lustleigh churchyard, inscribed with gold lettering and decorative flourishes dating from the late 19th century. Grave of Julian Baron Amery of Lustleigh and his wife Catherine, simple granite headstone inscribed with their names and dates of birth and death. Weathered gravestone believed to mark the resting place of Leopold Stennett Amery, inscribed 'Here lie the ashes of Leopold Stennett Amery Statesman and mountaineer 1873–1955'.
1825 schoolroom – granite building founded by Reverend William Davy to provide education for Lustleigh’s children, now the village heritage centre. James Bond’s gravestone – memorial to James Bond (1825–1896) and his wife Susan Bond (1818–1900), decorated with gold script and floral motifs. Julian Baron  Amery  of  Lustleigh – headstone commemorating Julian  Amery (1919–1996) and his wife  Catherine  Amery (1926–1991), buried together in the churchyard. Leo  Amery’s grave – weathered stone believed to read ‘Here lie the ashes of Leopold  Stennett  Amery  Statesman  and  mountaineer 1873–1955’.
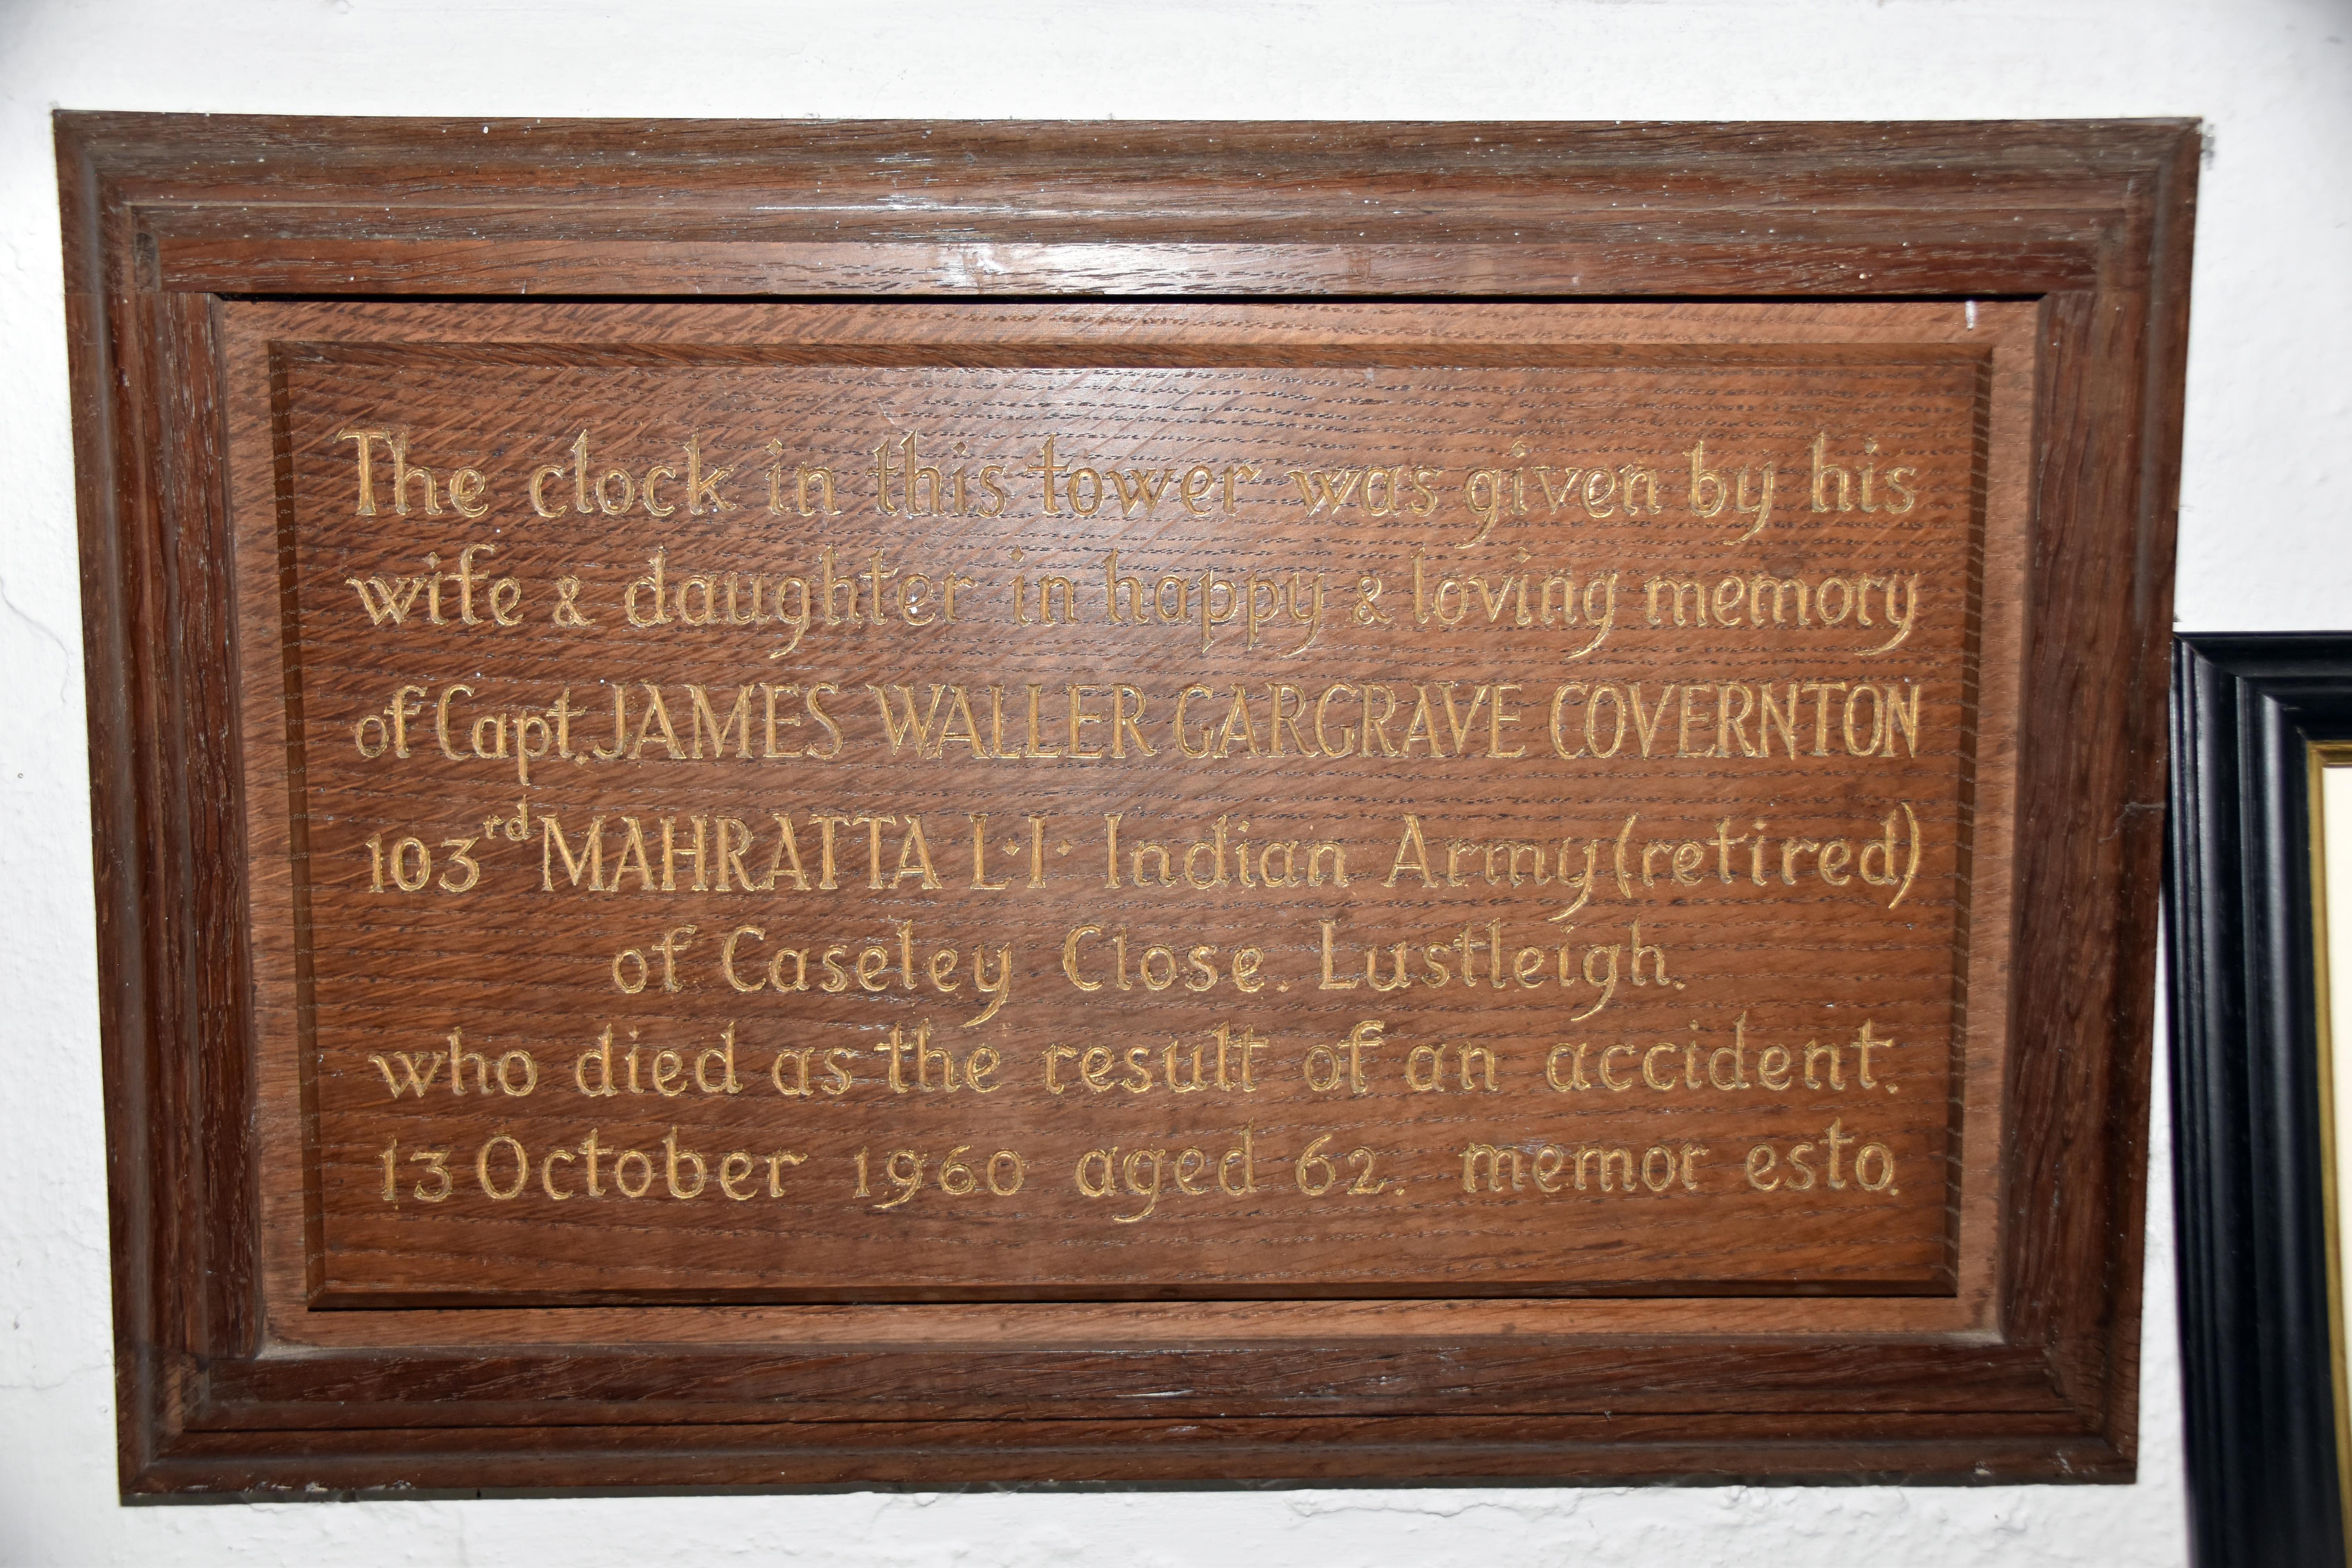
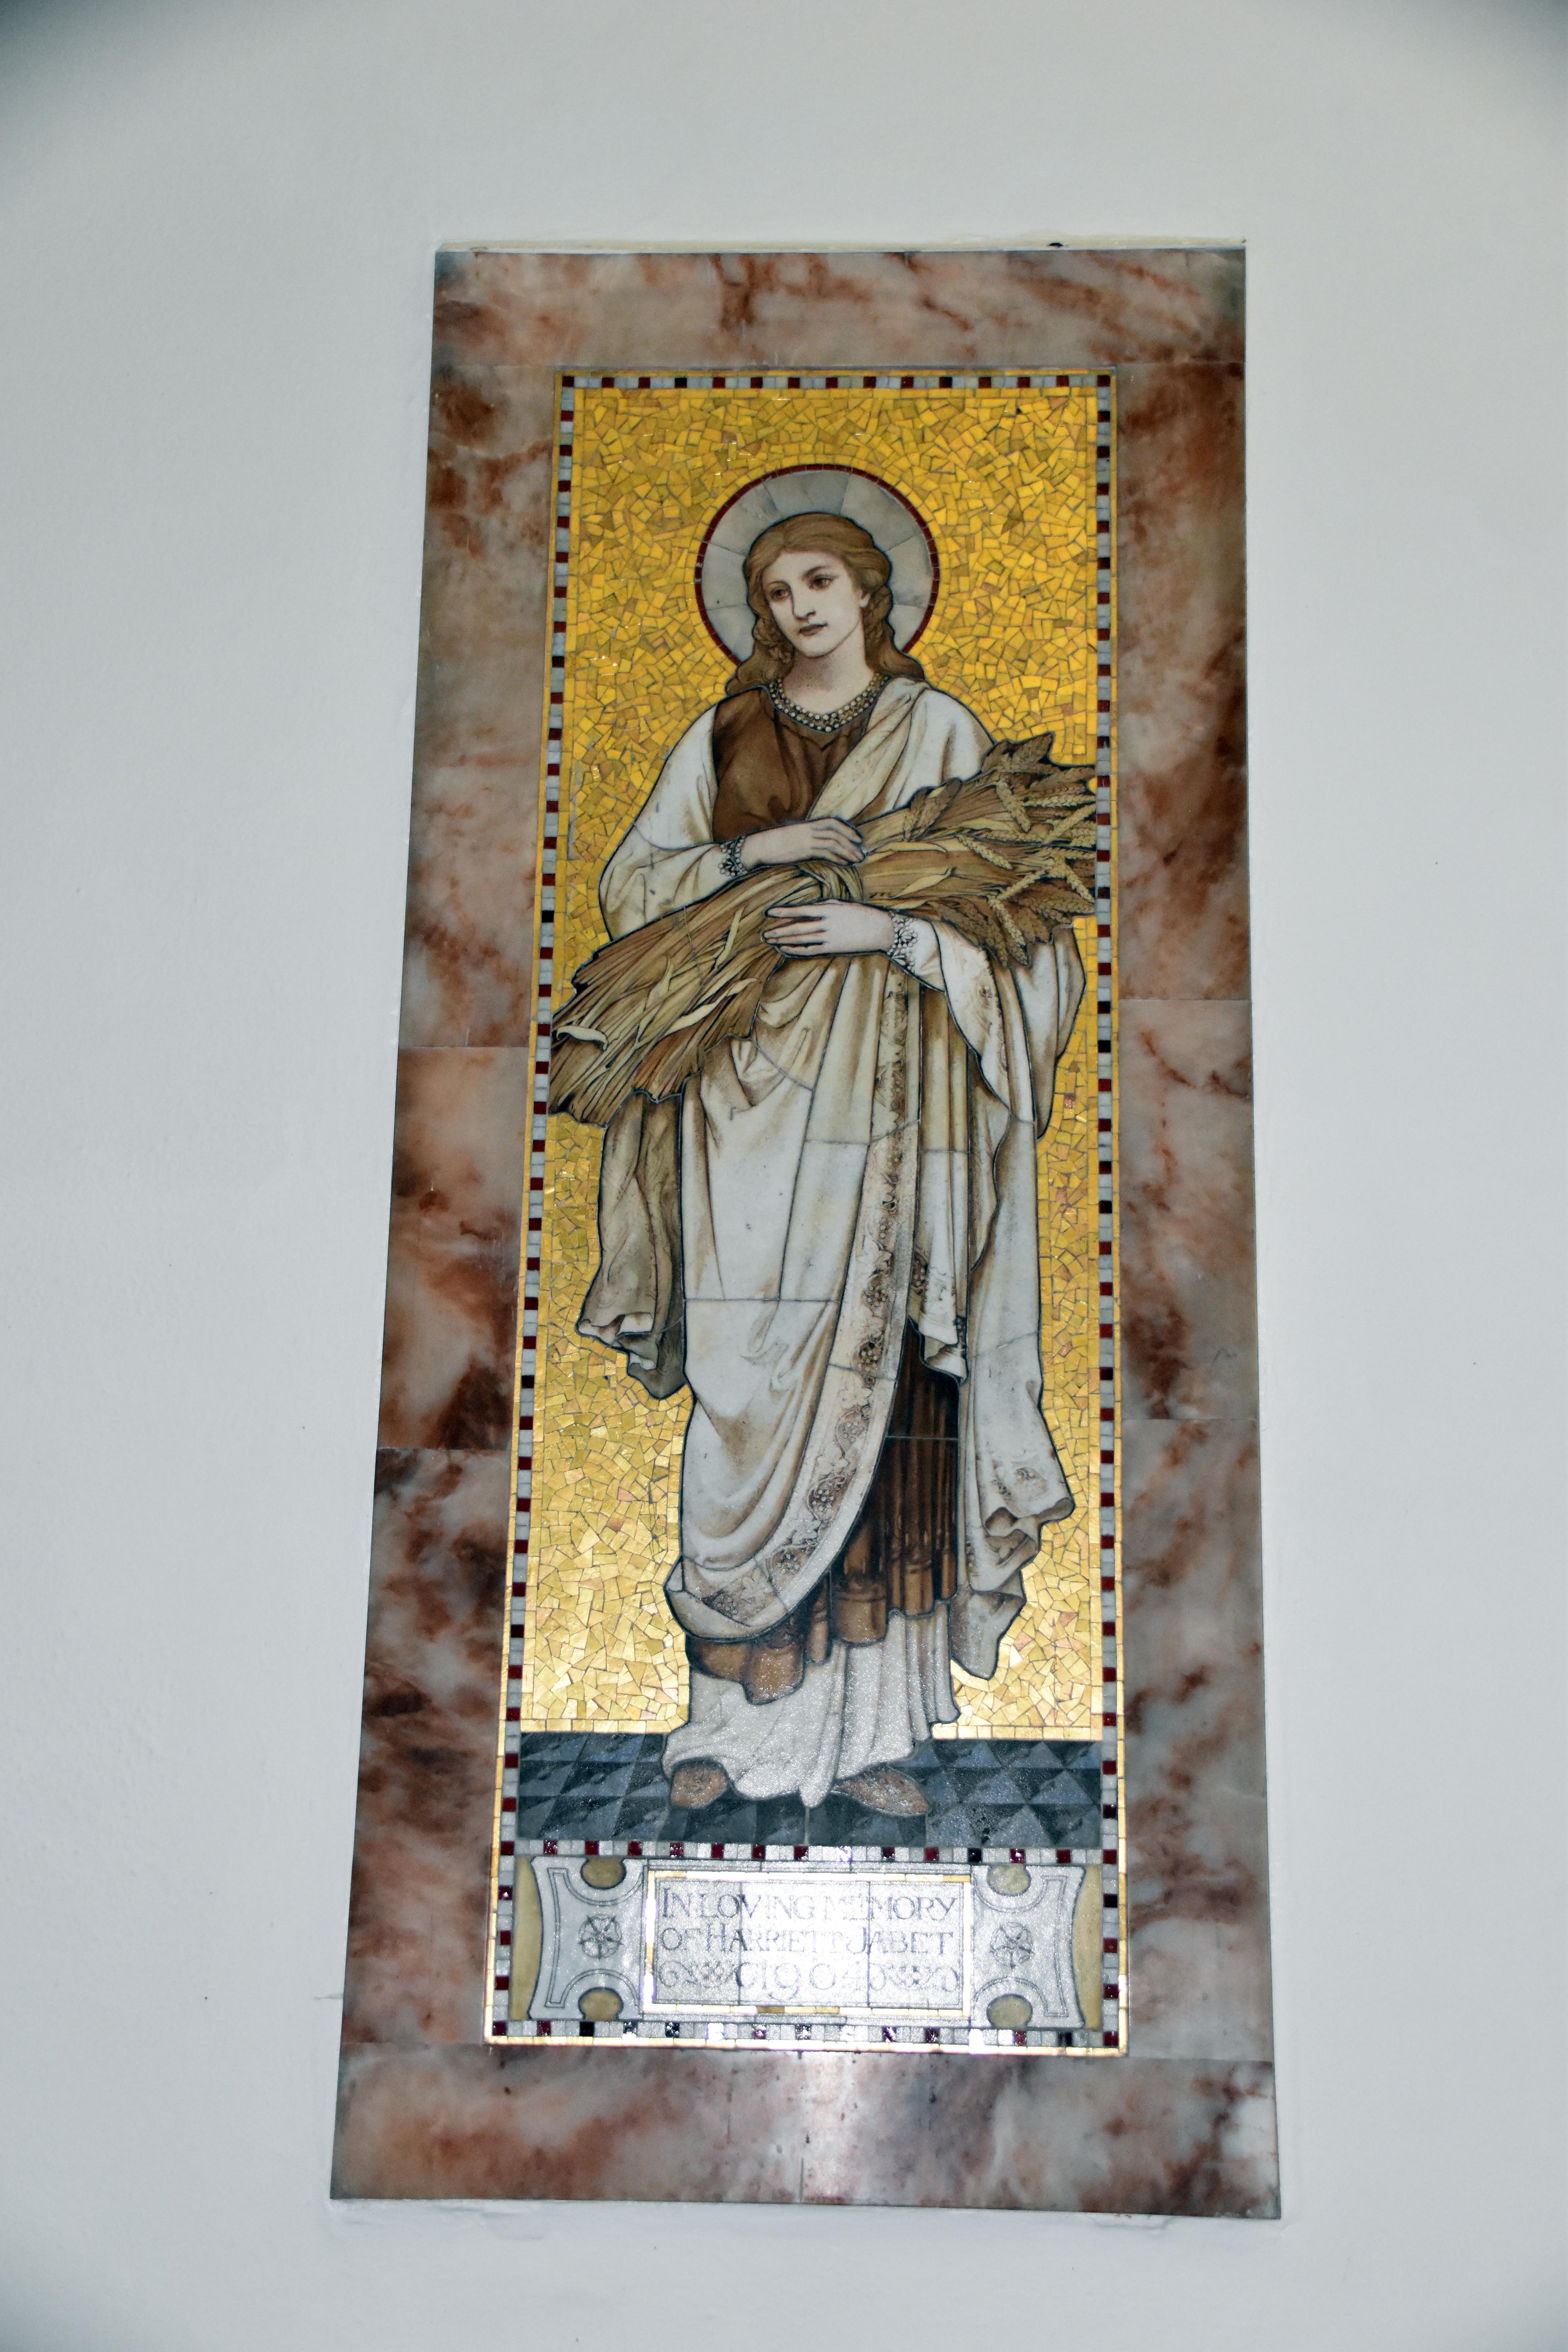
6th‑century Romano‑British grave marker inside Lustleigh Church, inscribed with the Latin text 'DATUIDOCI CONHINOCI FILIUS', mounted vertically and secured by iron bands. Wooden memorial plaque commemorating Captain James Waller Gargrave Covernton of the 103rd Mahratta Light Infantry, Indian Army, who died in 1960; the clock in the tower was given in his memory. Pre‑Raphaelite‑style mosaic memorial depicting a haloed female figure holding a sheaf of wheat, dedicated 'In Loving Memory of Harriet Jabet'. Two memorial plaques in Lustleigh Church: one brass plaque to Selina Emily Wingfield (d. 1923) and one granite plaque to Lady Evelyn Beatrice Couchman (1882–1977), granddaughter of Captain Webb Daniell RN.
Romano‑British grave marker – 6th‑century inscribed stone reading 'DATUIDOCI  CONHINOCI  FILIUS', evidence of early Christian burial on the site. Memorial plaque – commemorates Captain  James  Waller  Gargrave  Covernton (1898–1960), Indian  Army  retired, whose family donated the church clock in his memory. Pre‑Raphaelite memorial – mosaic panel of a saintly figure with wheat, dedicated to Harriet  Jabet, combining religious symbolism and fine craftsmanship. Church memorials – brass plaque to Selina Emily Wingfield (1923) and granite plaque to Lady  Evelyn  Beatrice  Couchman (1882–1977), grand daughter of Captain  Webb  Daniell  Indian Navy.
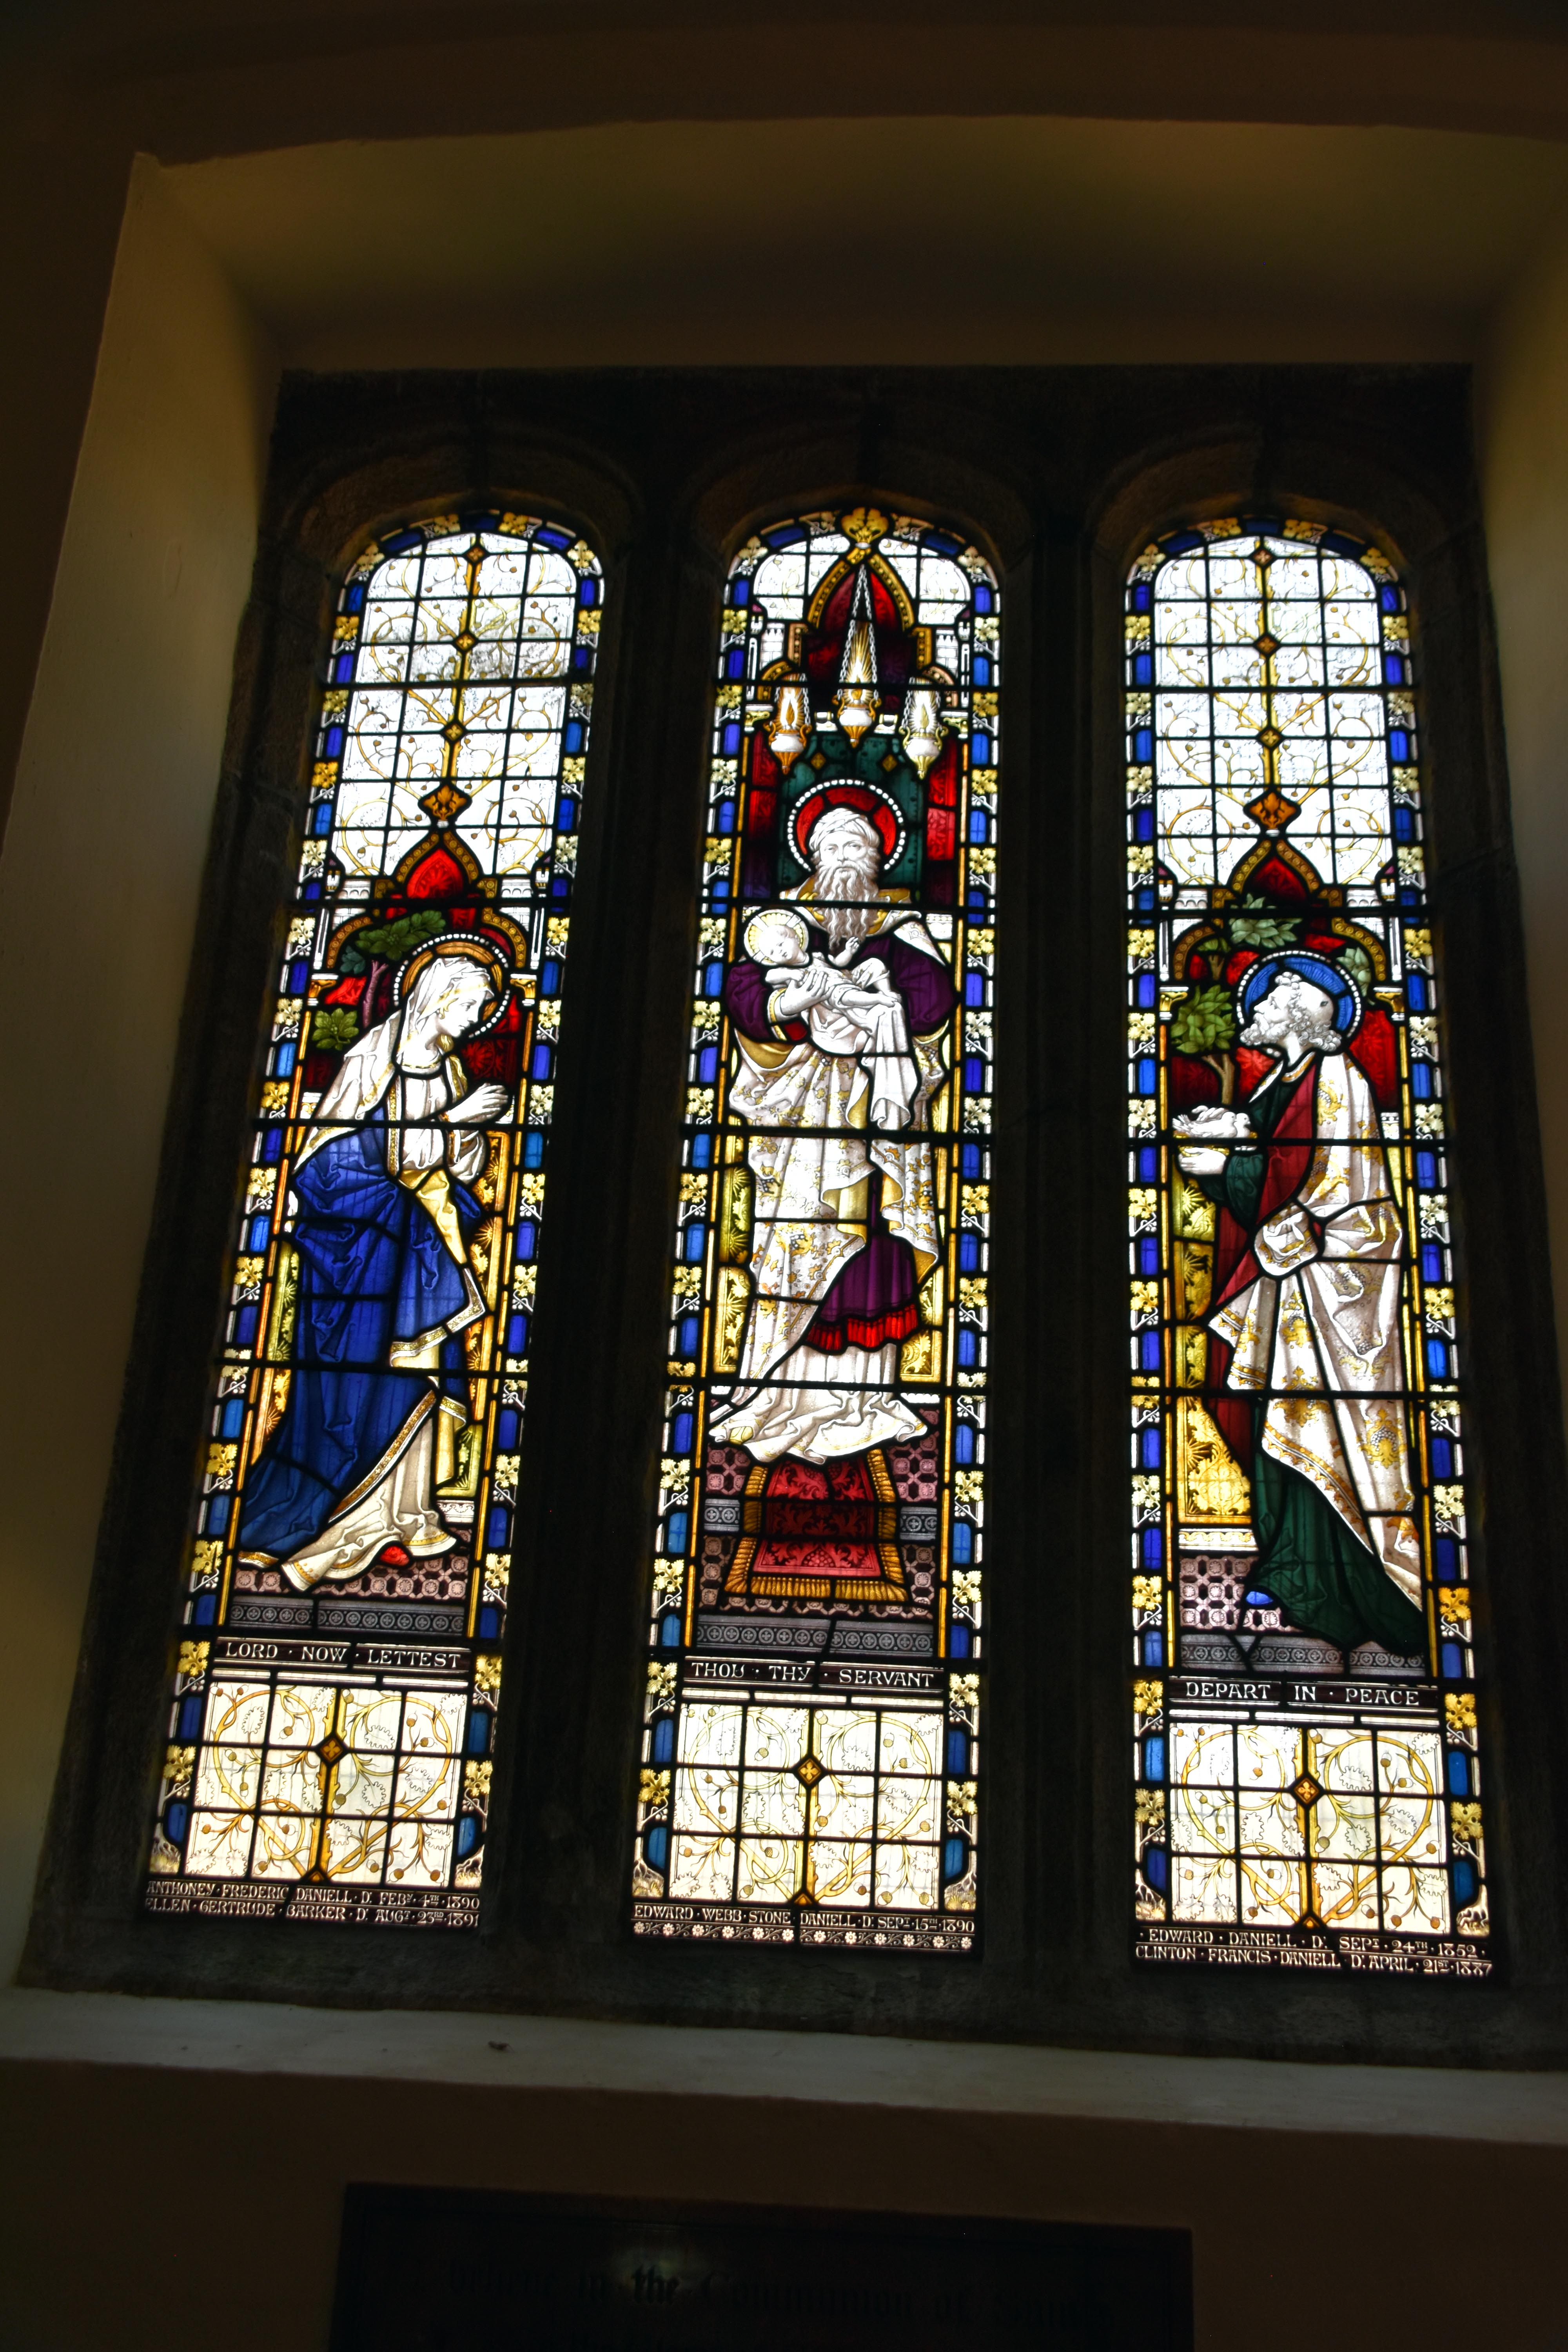
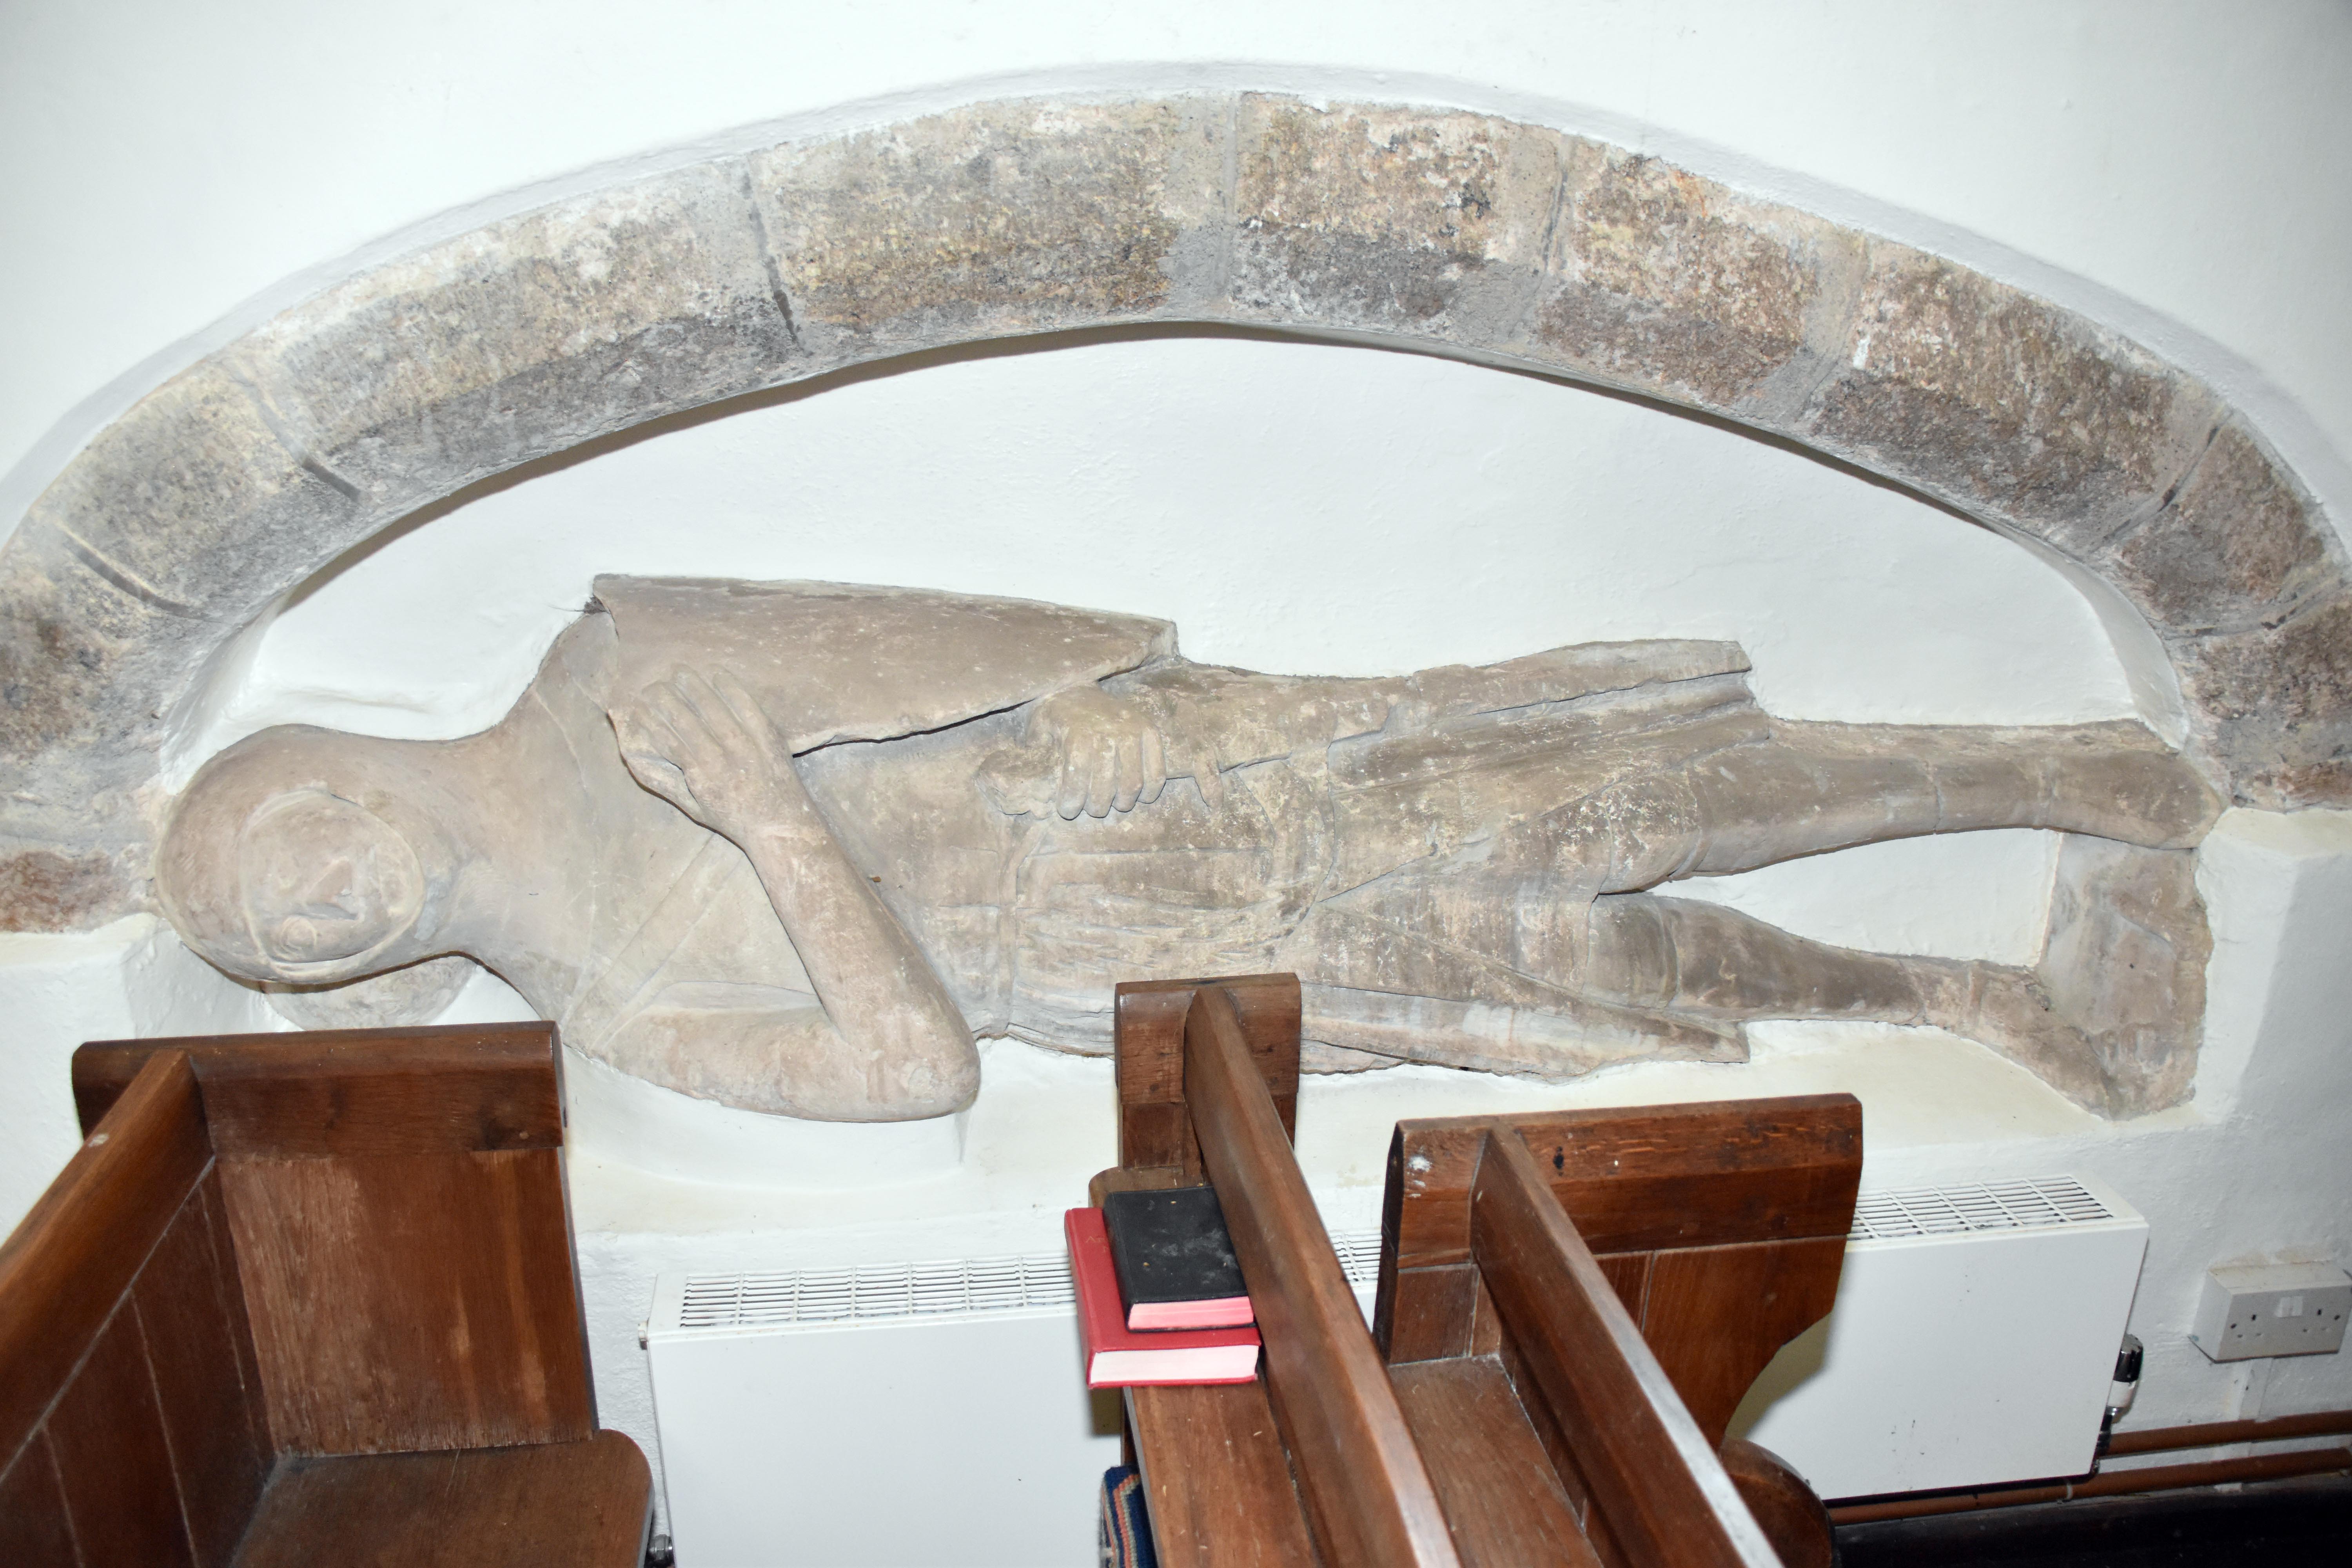
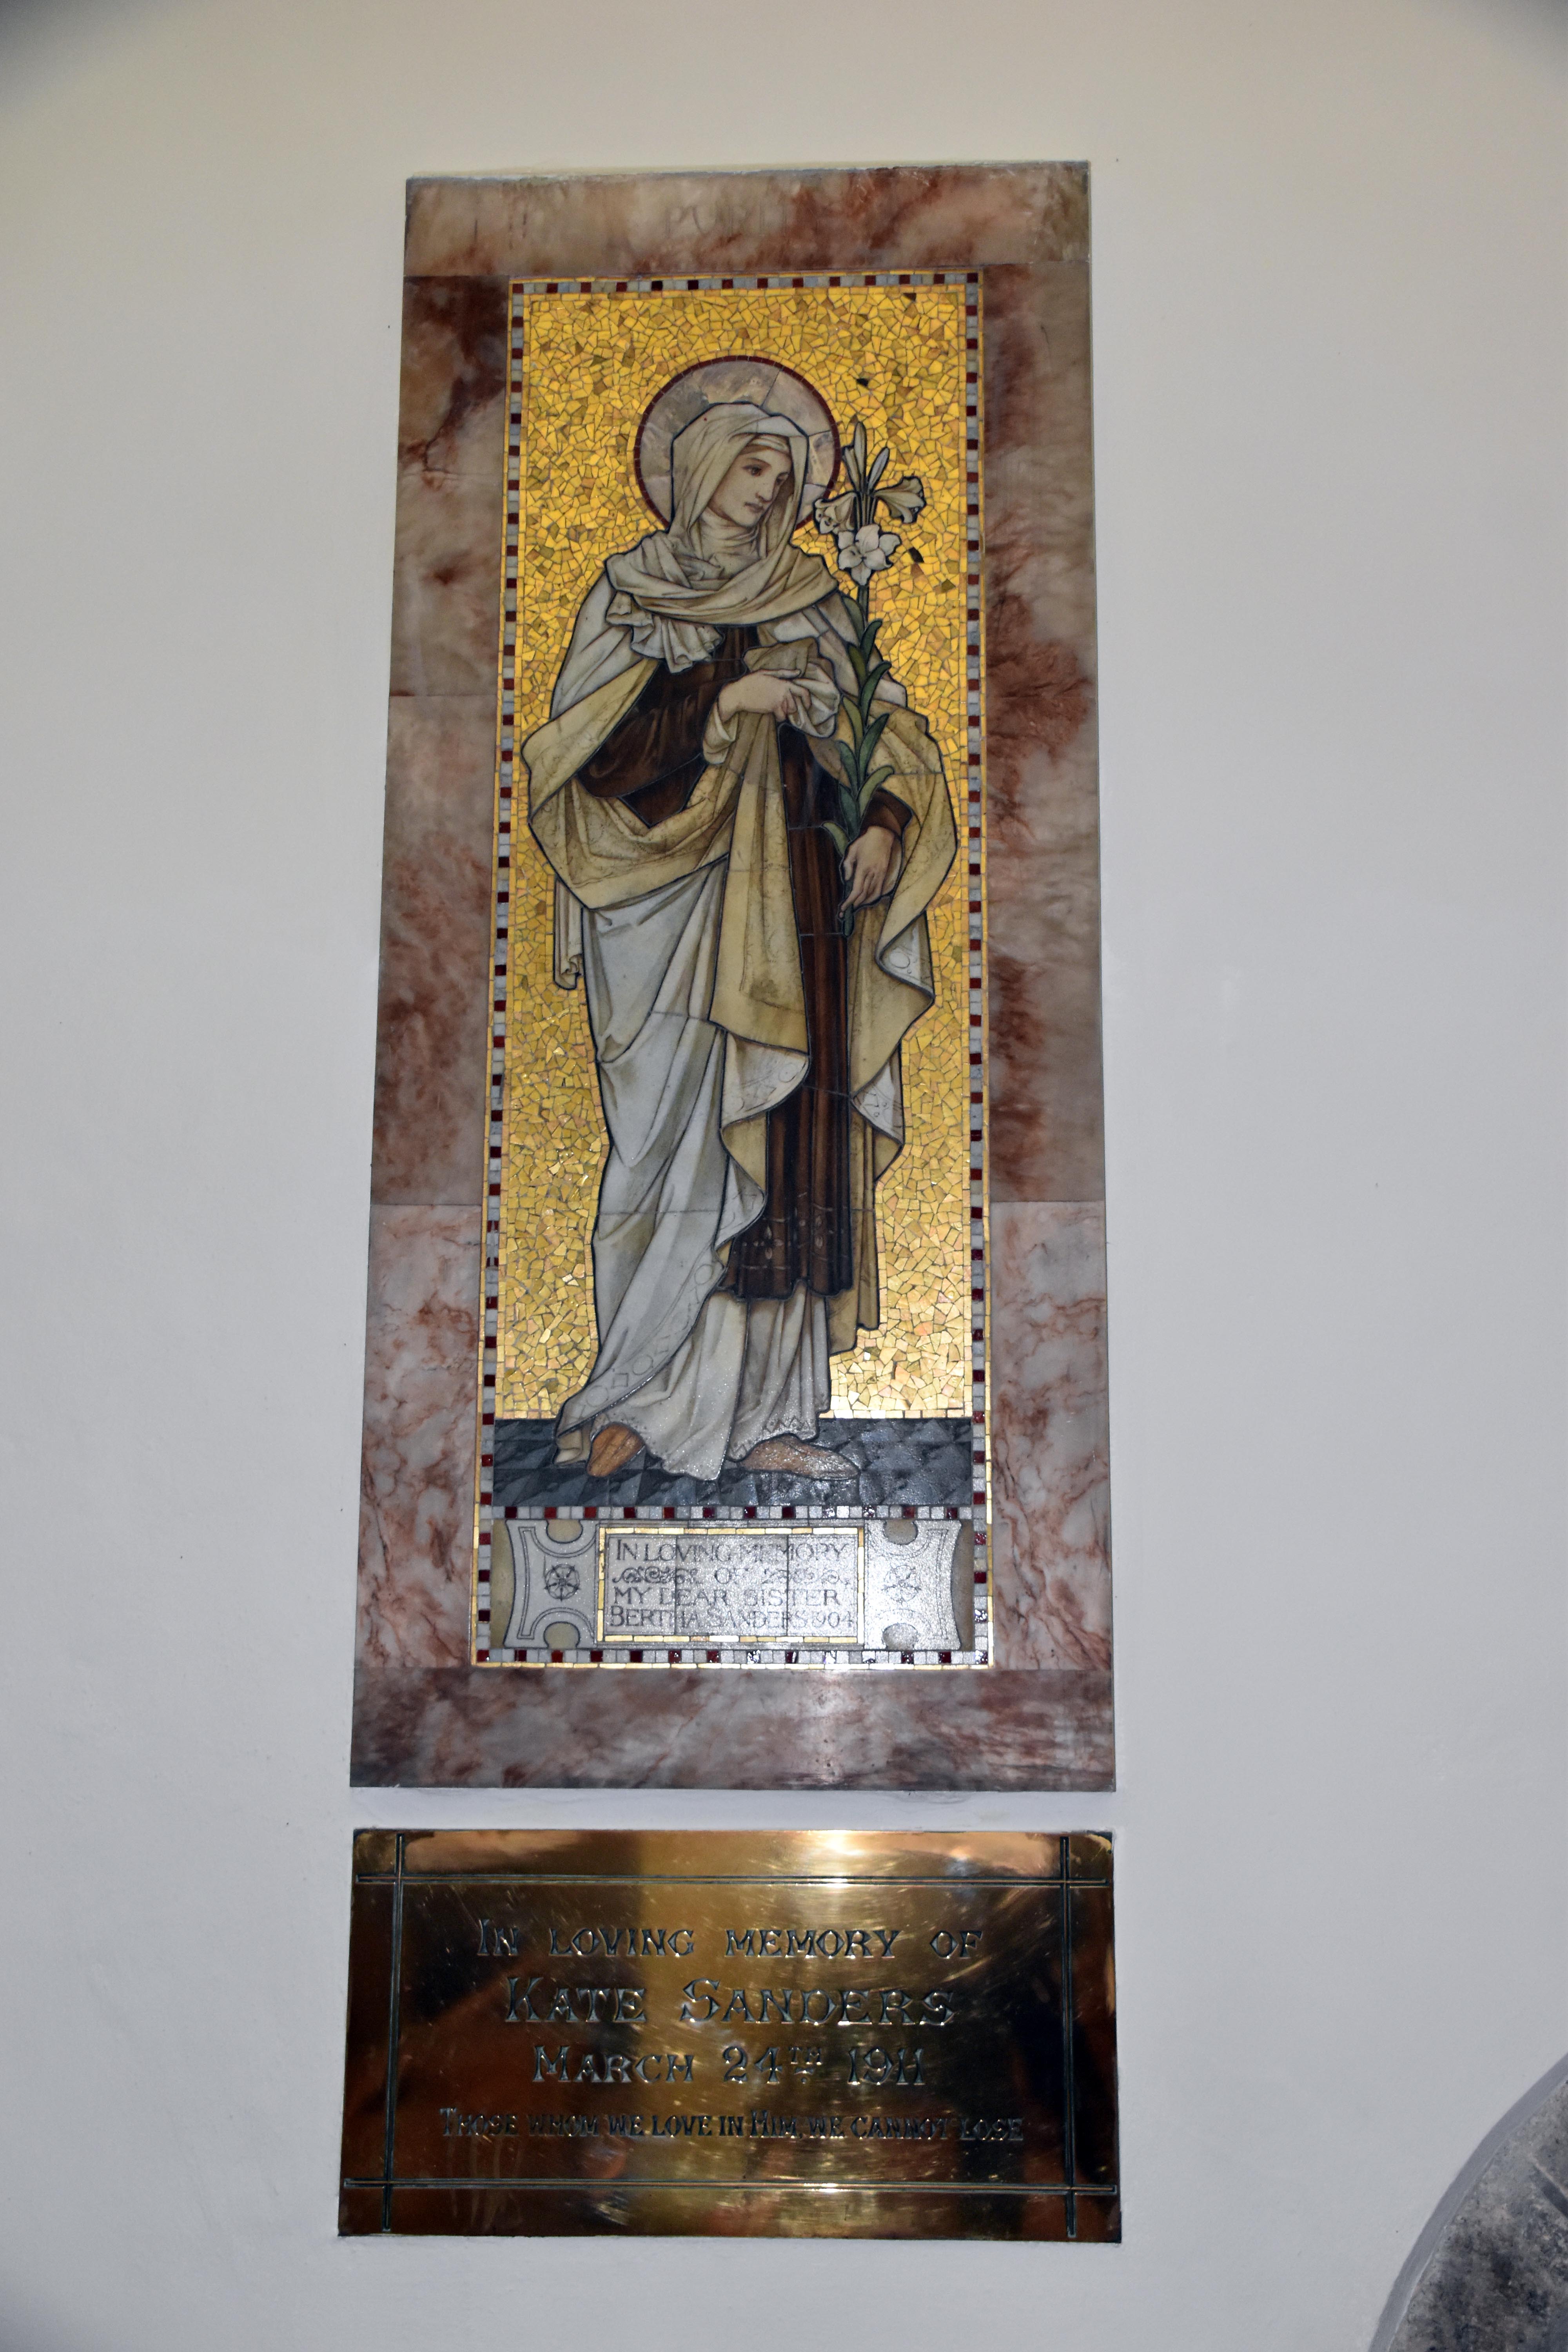
Stained glass window in Lustleigh Church dedicated to the Daniell family, depicting the Presentation in the Temple with Simeon holding the infant Christ between Mary and Joseph, inscribed with memorials to members of the Dunnell family. Medieval effigy of a recumbent female figure in Lustleigh Church, set within a granite arched recess in the north aisle wall, likely one of the Dynham family effigies described by Pevsner. Medieval effigy of a recumbent knight in Lustleigh Church, carved in limestone and set within a granite arched niche, probably representing a member of the Dynham family from the 13th century. Pre‑Raphaelite mosaic memorial in Lustleigh Church dedicated to Bertha Sanderson, depicting a haloed female saint holding lilies against a gold background, with inscription below in memory of Kate Sanders, 1914.
Stained glass window – Presentation in the Temple scene dedicated to the Daniell family, with memorial inscriptions to the Dunnells, typical of late‑Victorian ecclesiastical glasswork. Dynham effigy – recumbent female figure in the north aisle recess, carved in limestone and dating from the 13th century, one of two medieval effigies noted by Pevsner. Dynham effigy – recumbent knight in armour within a granite arched niche, representing the medieval Dynham family associated with Lustleigh and nearby Islington. Pre‑Raphaelite memorial – mosaic of a saint holding lilies dedicated to Bertha Sanderson, with brass plaque below commemorating Kate Sanders (1914).
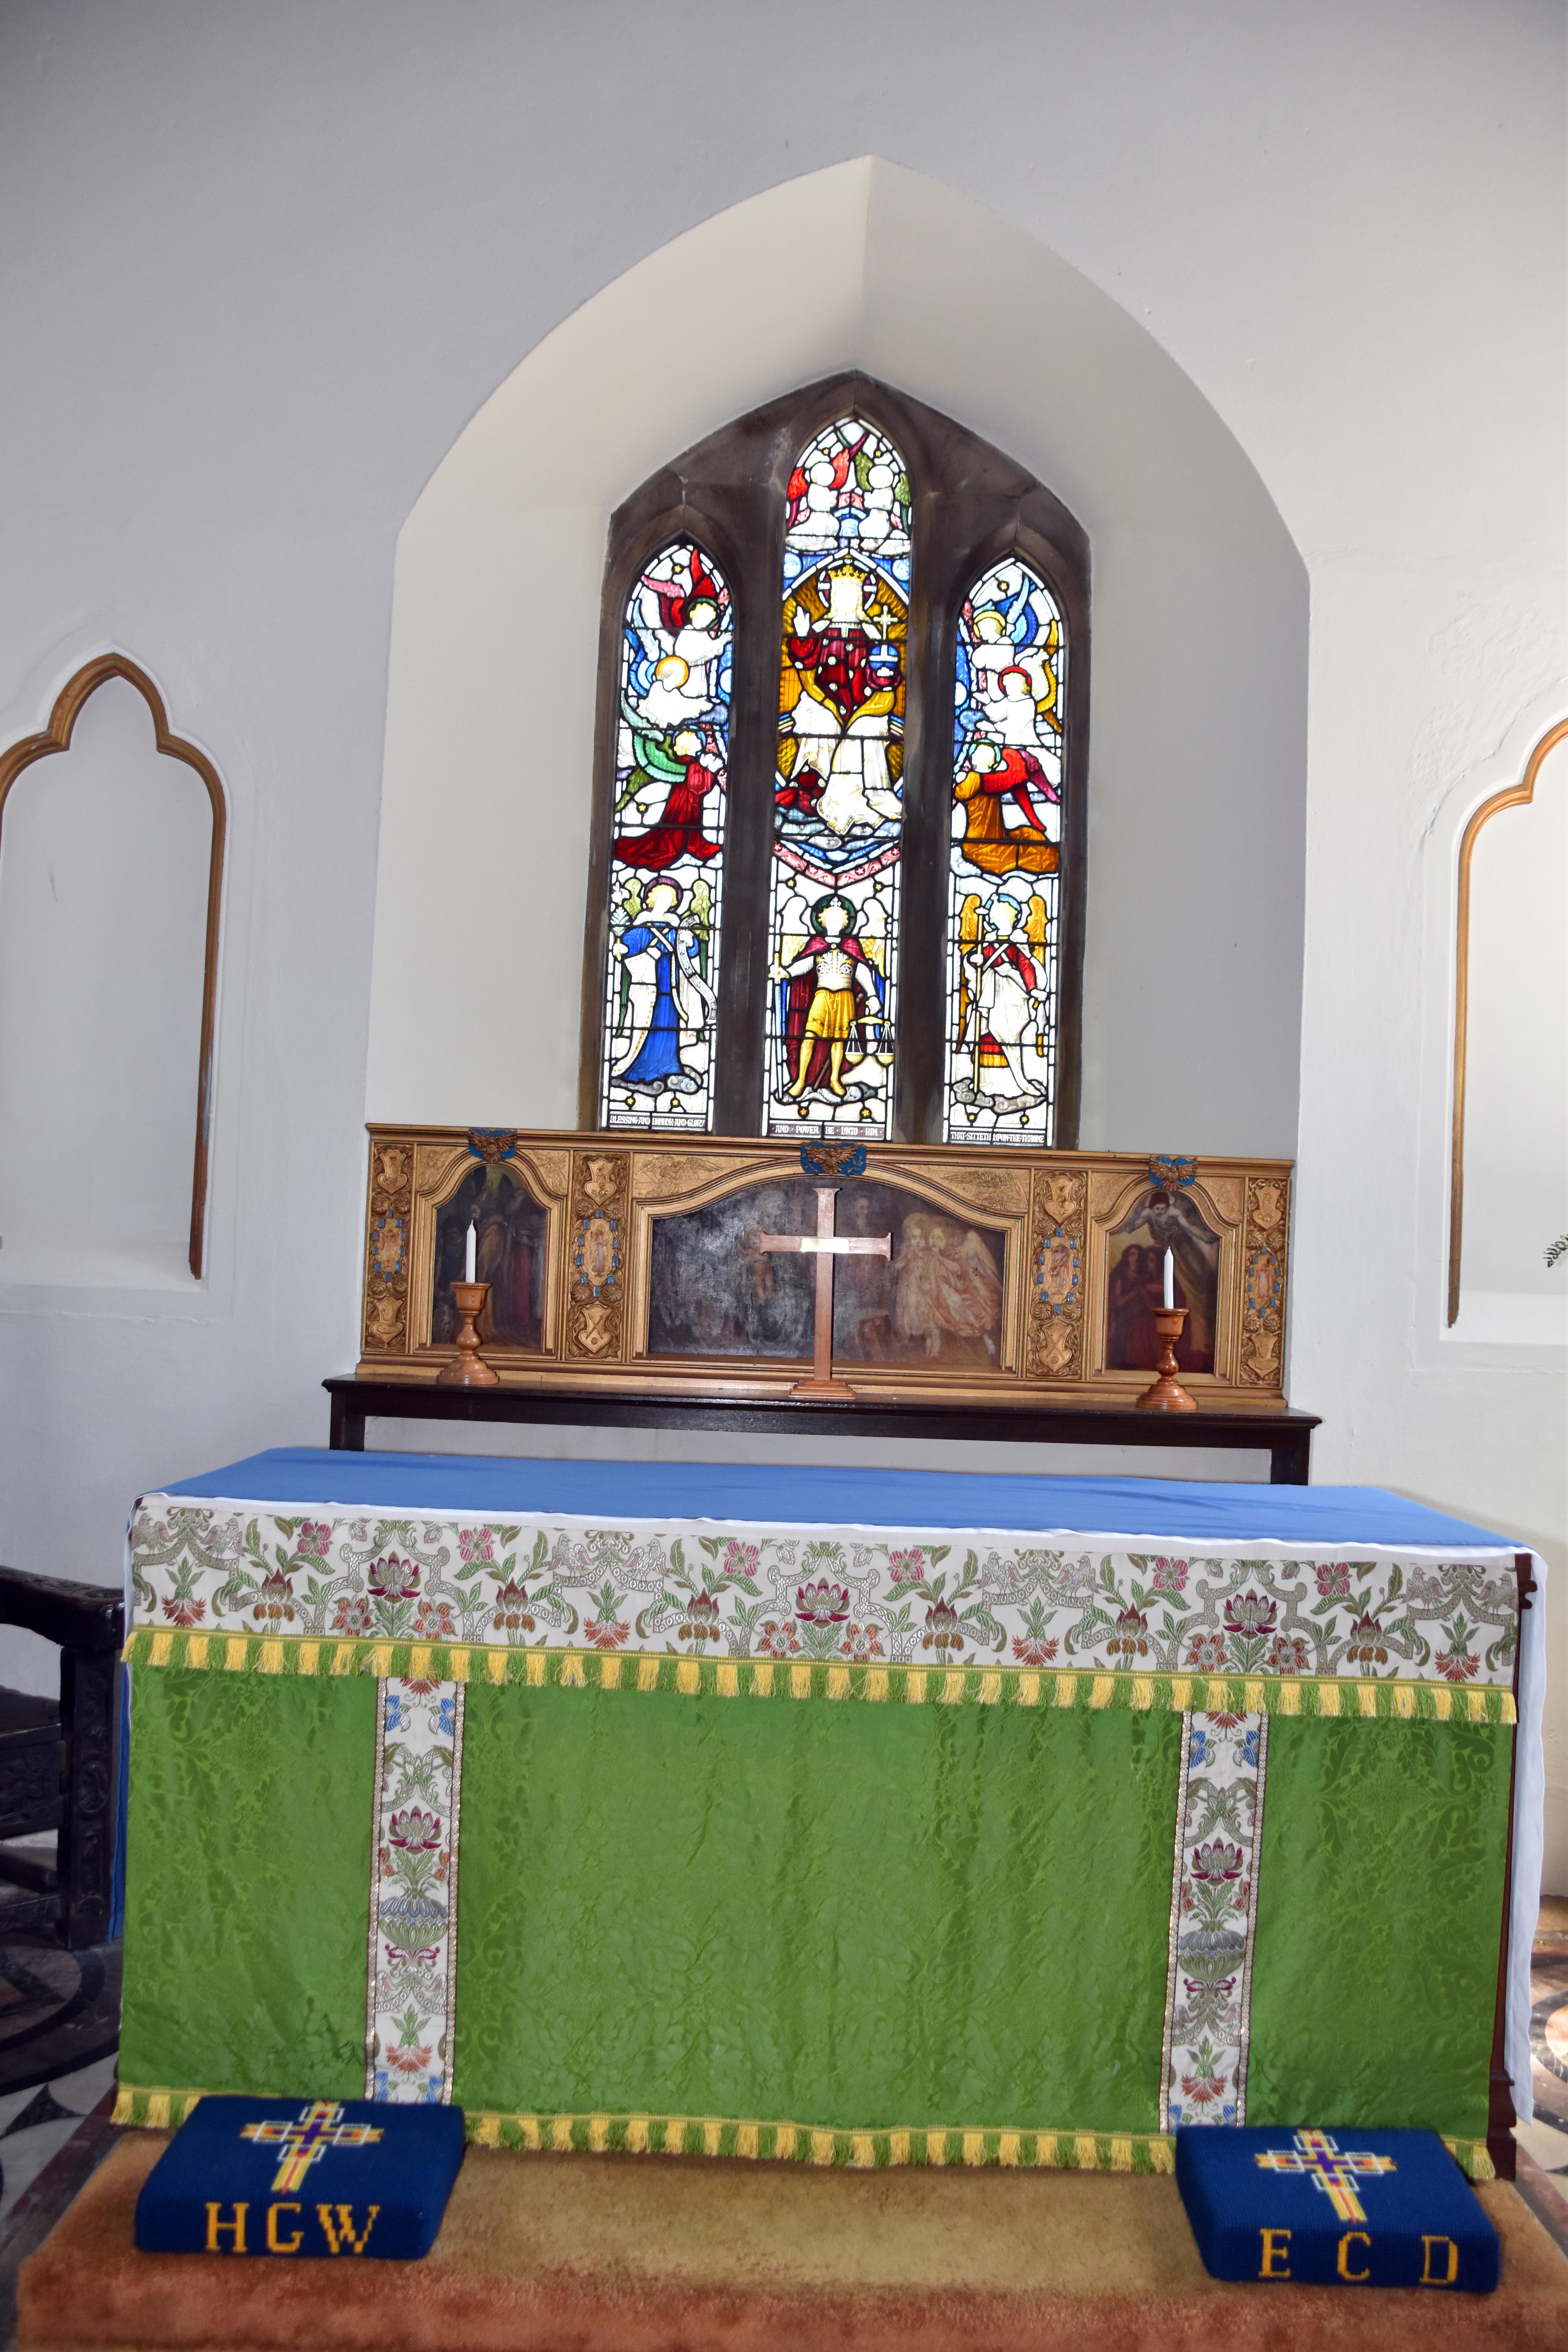
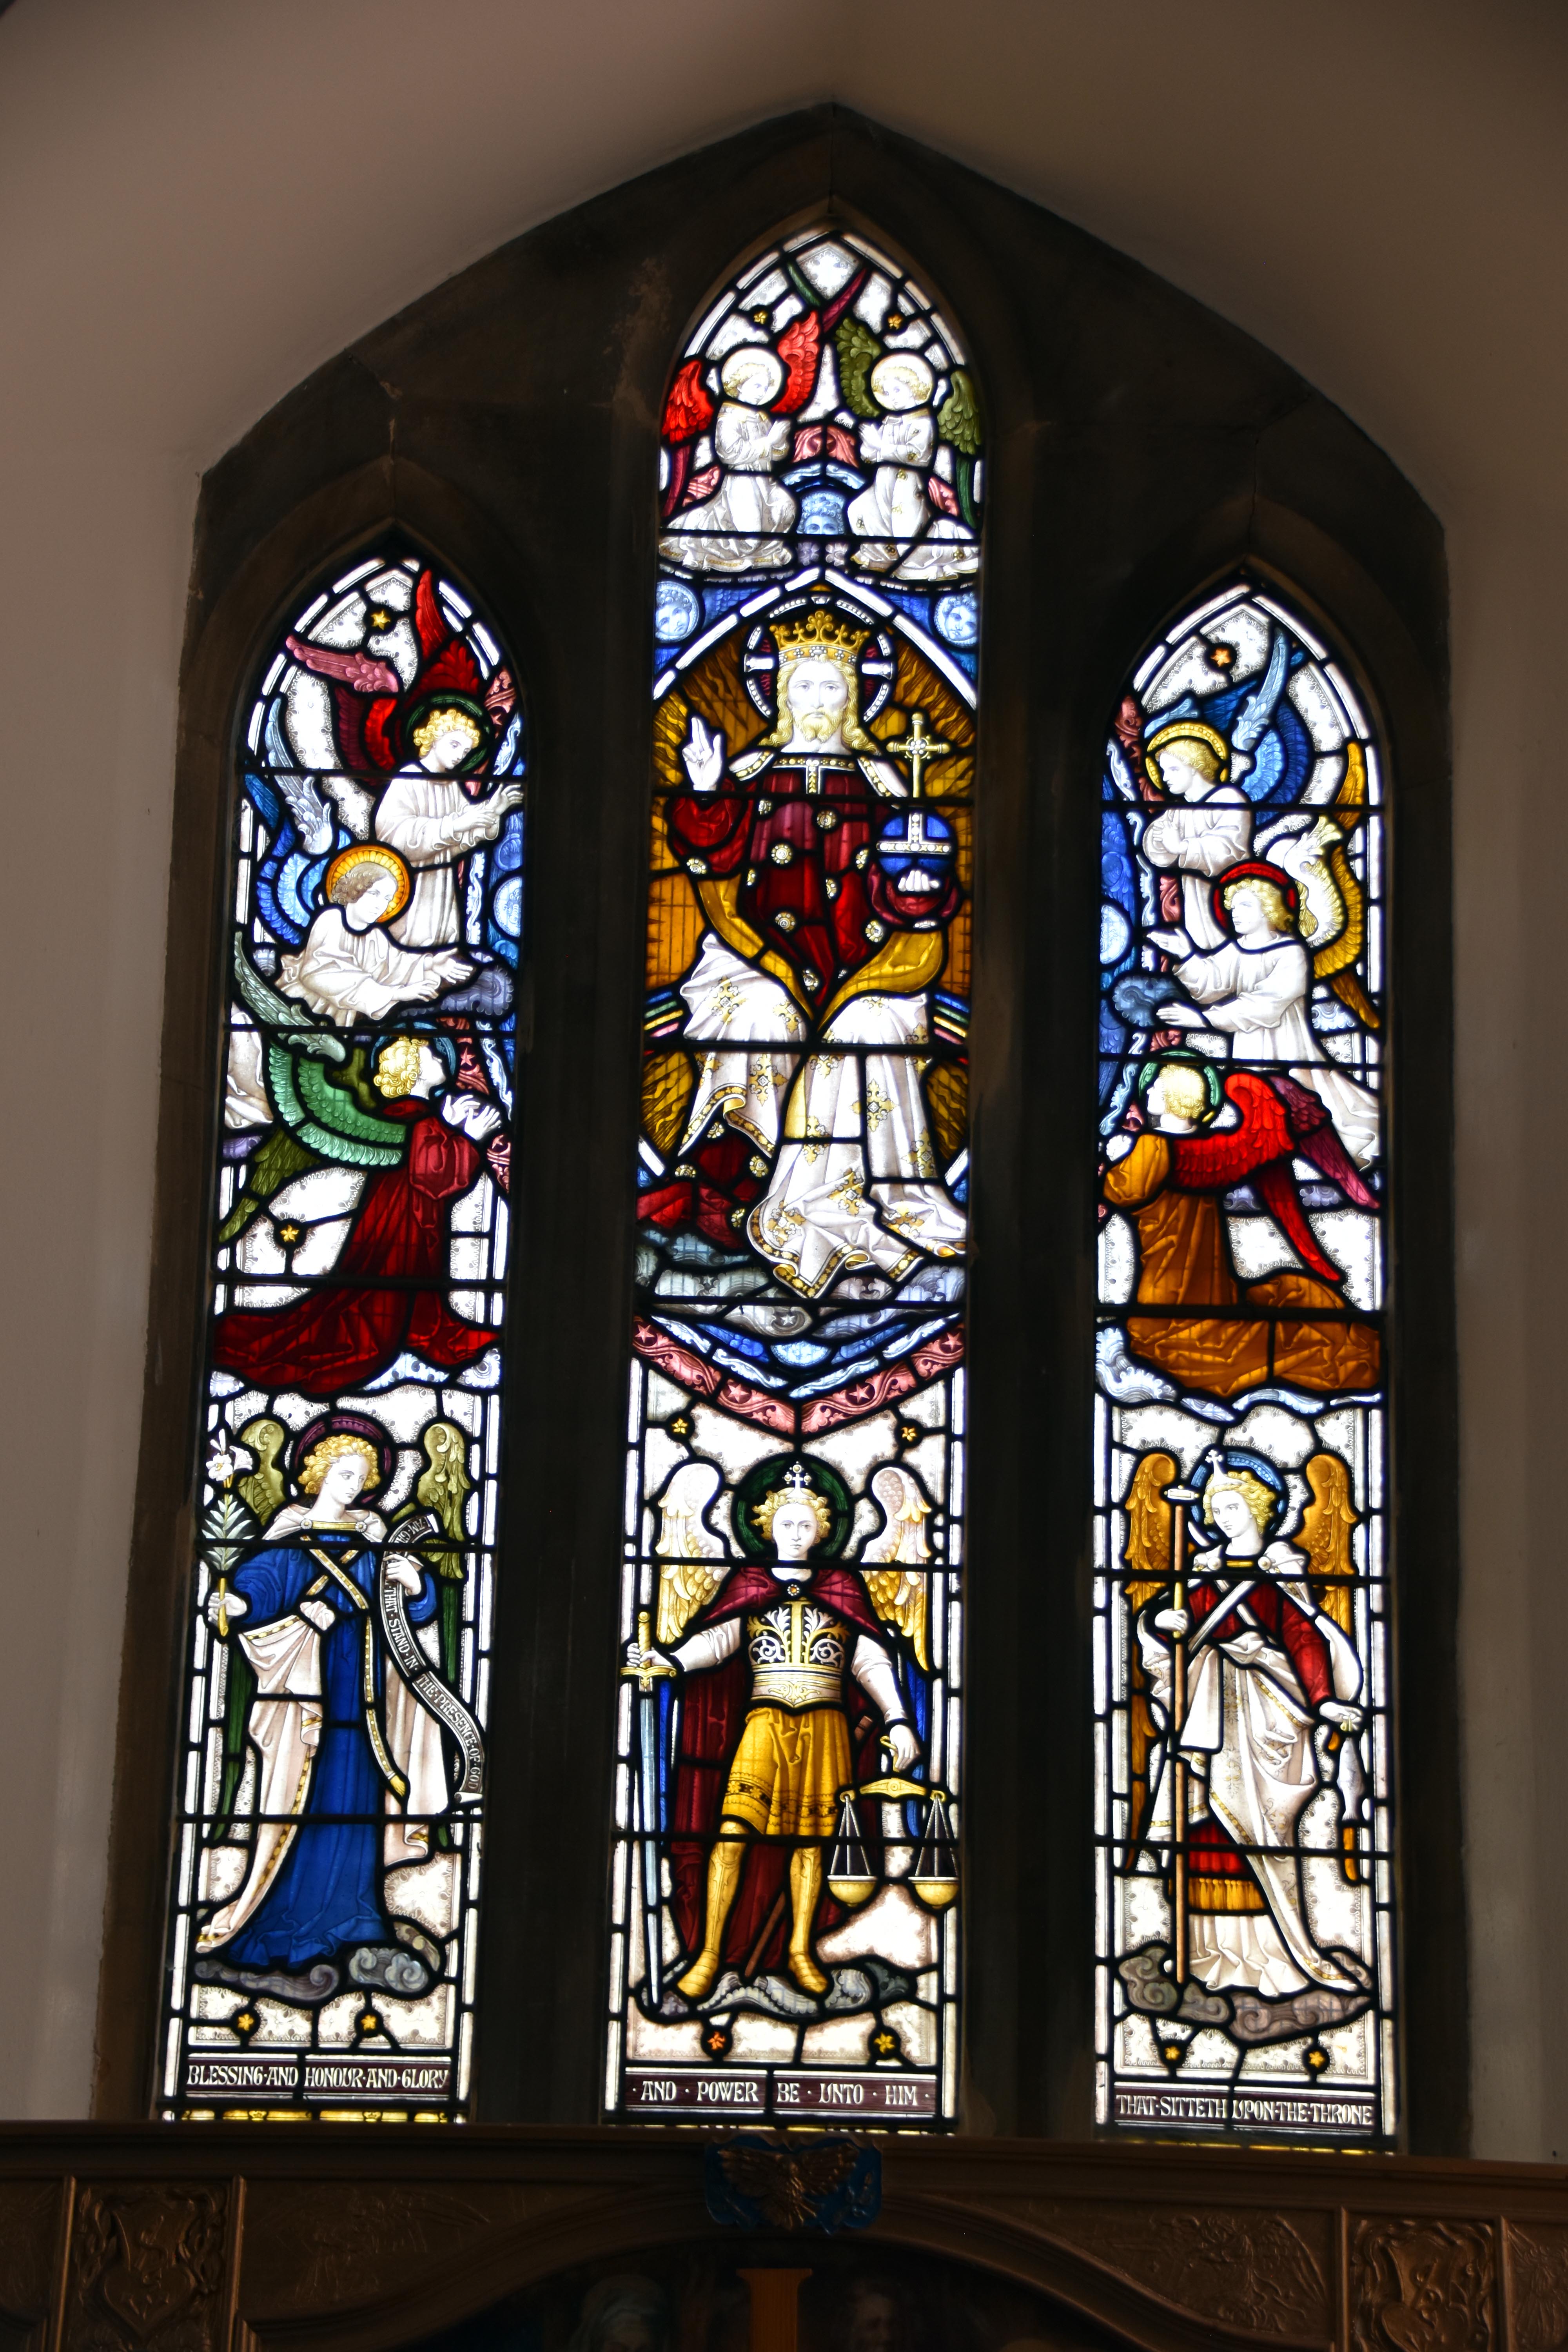
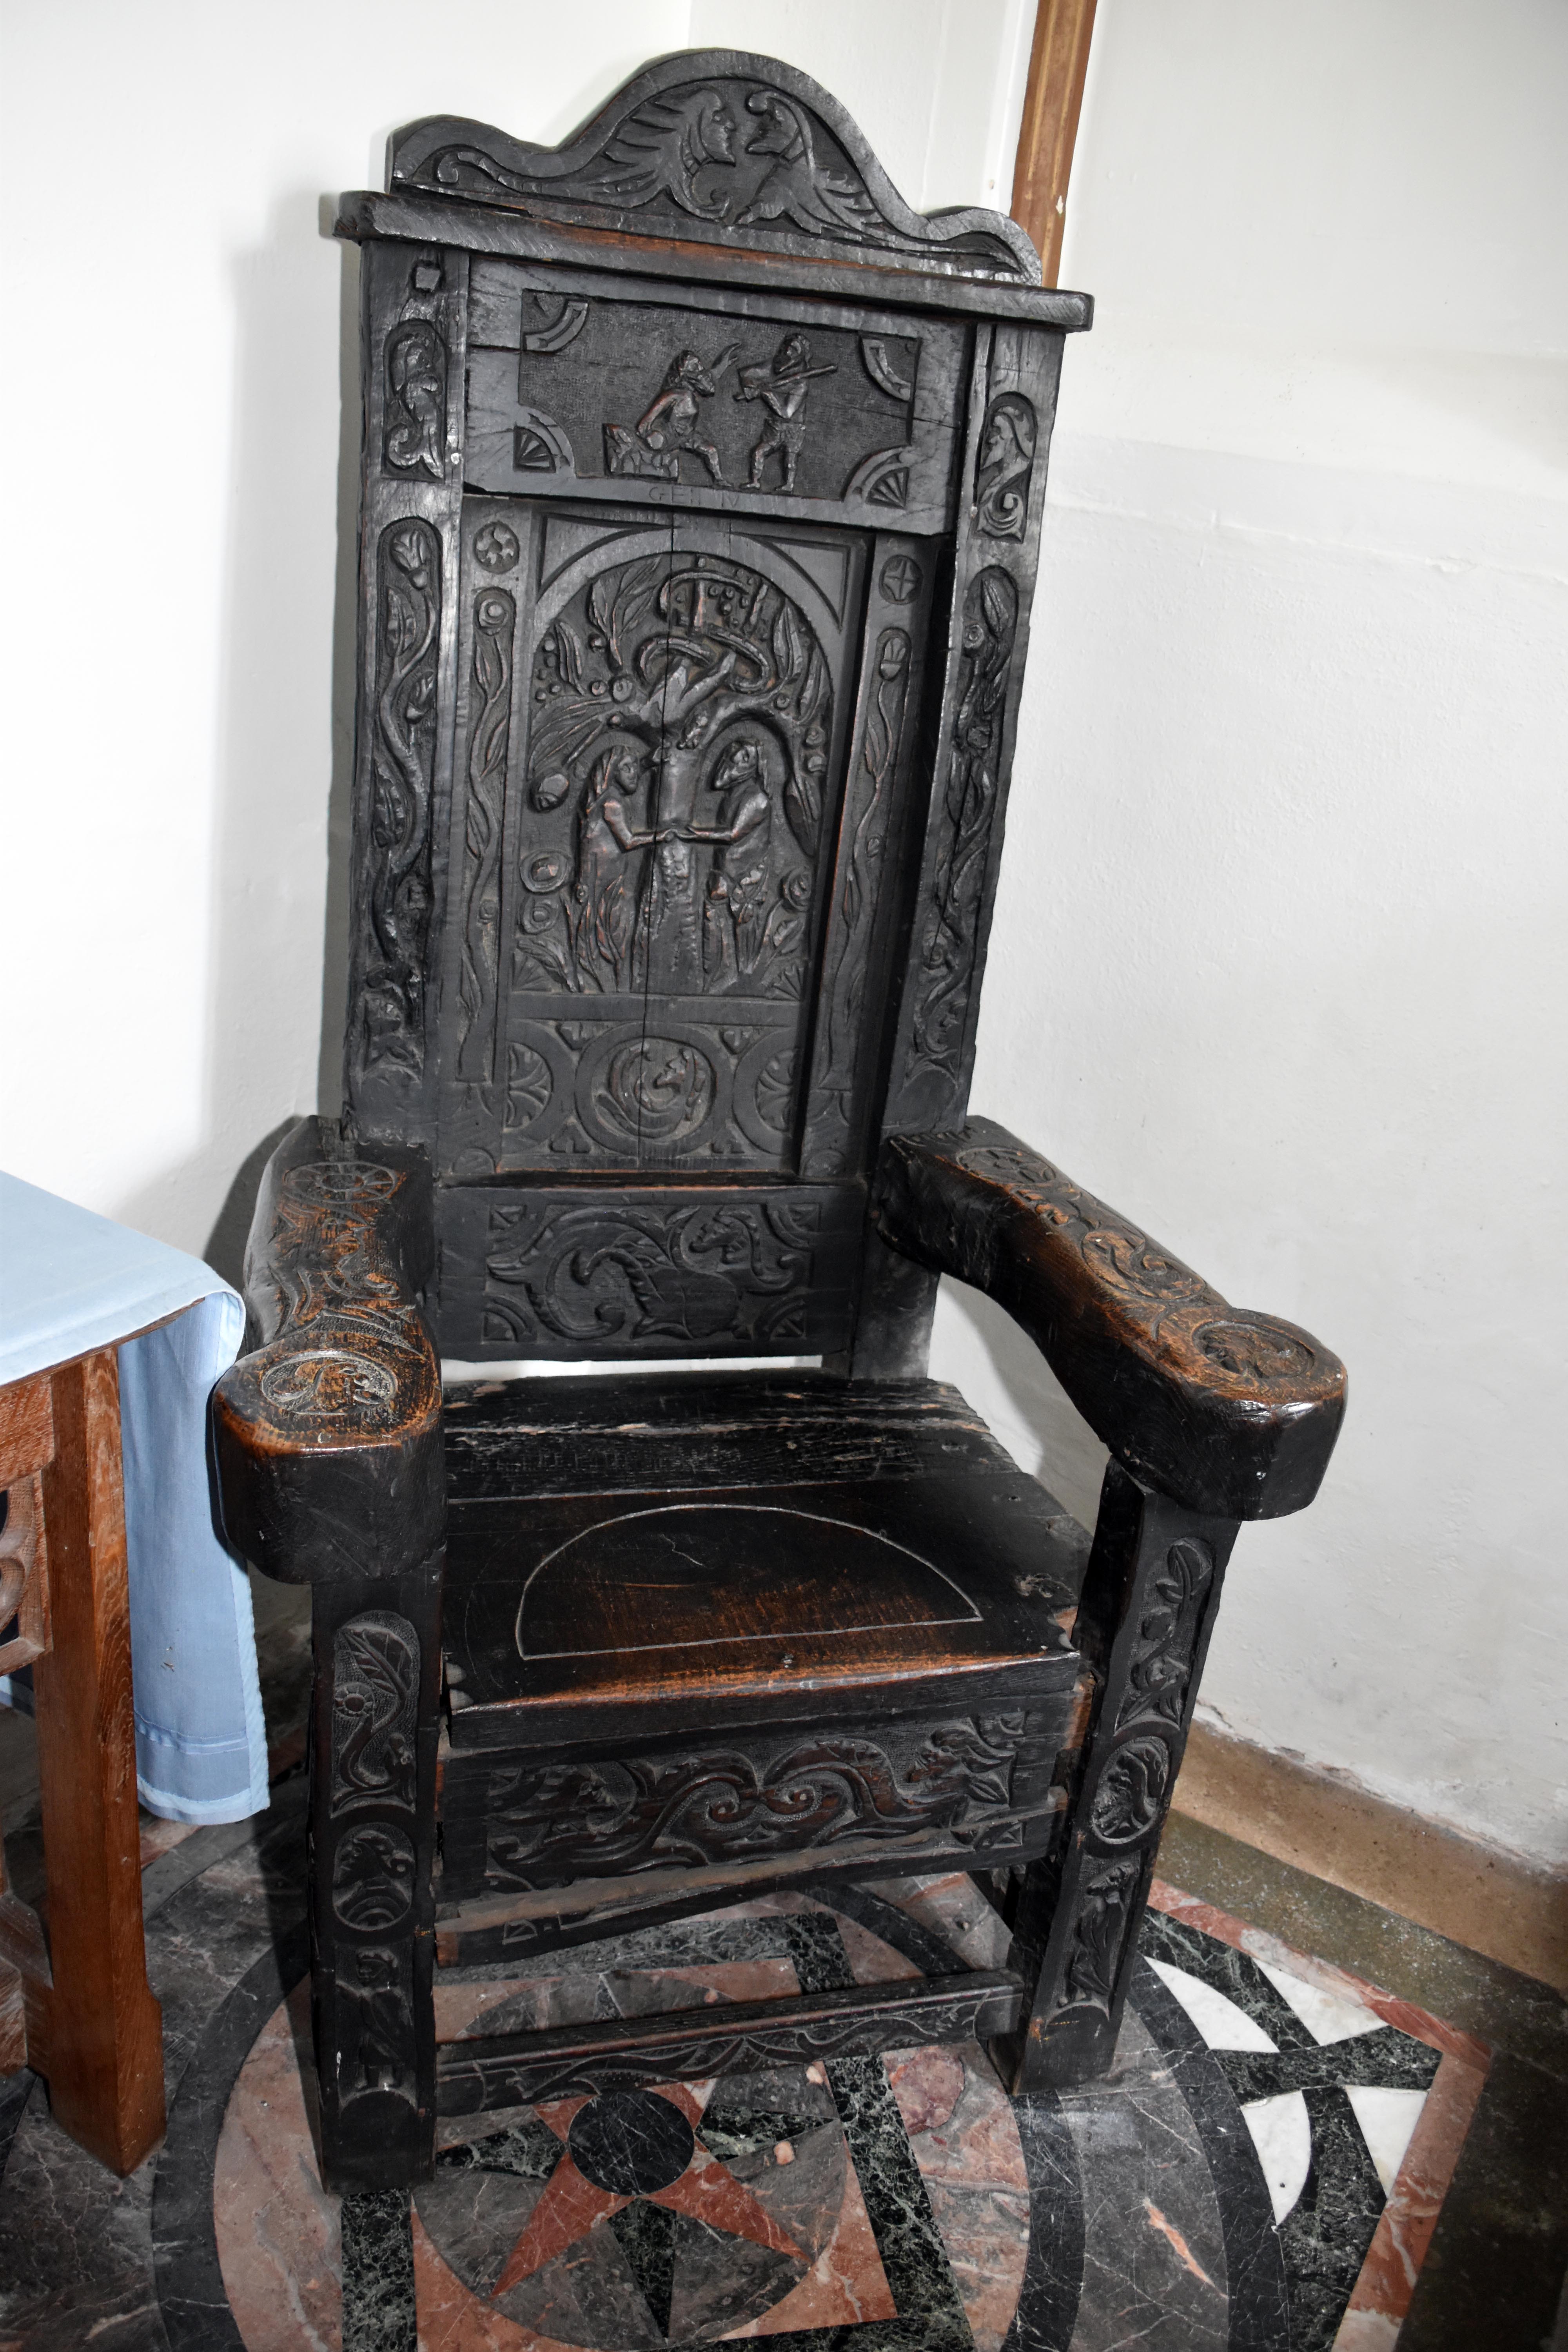
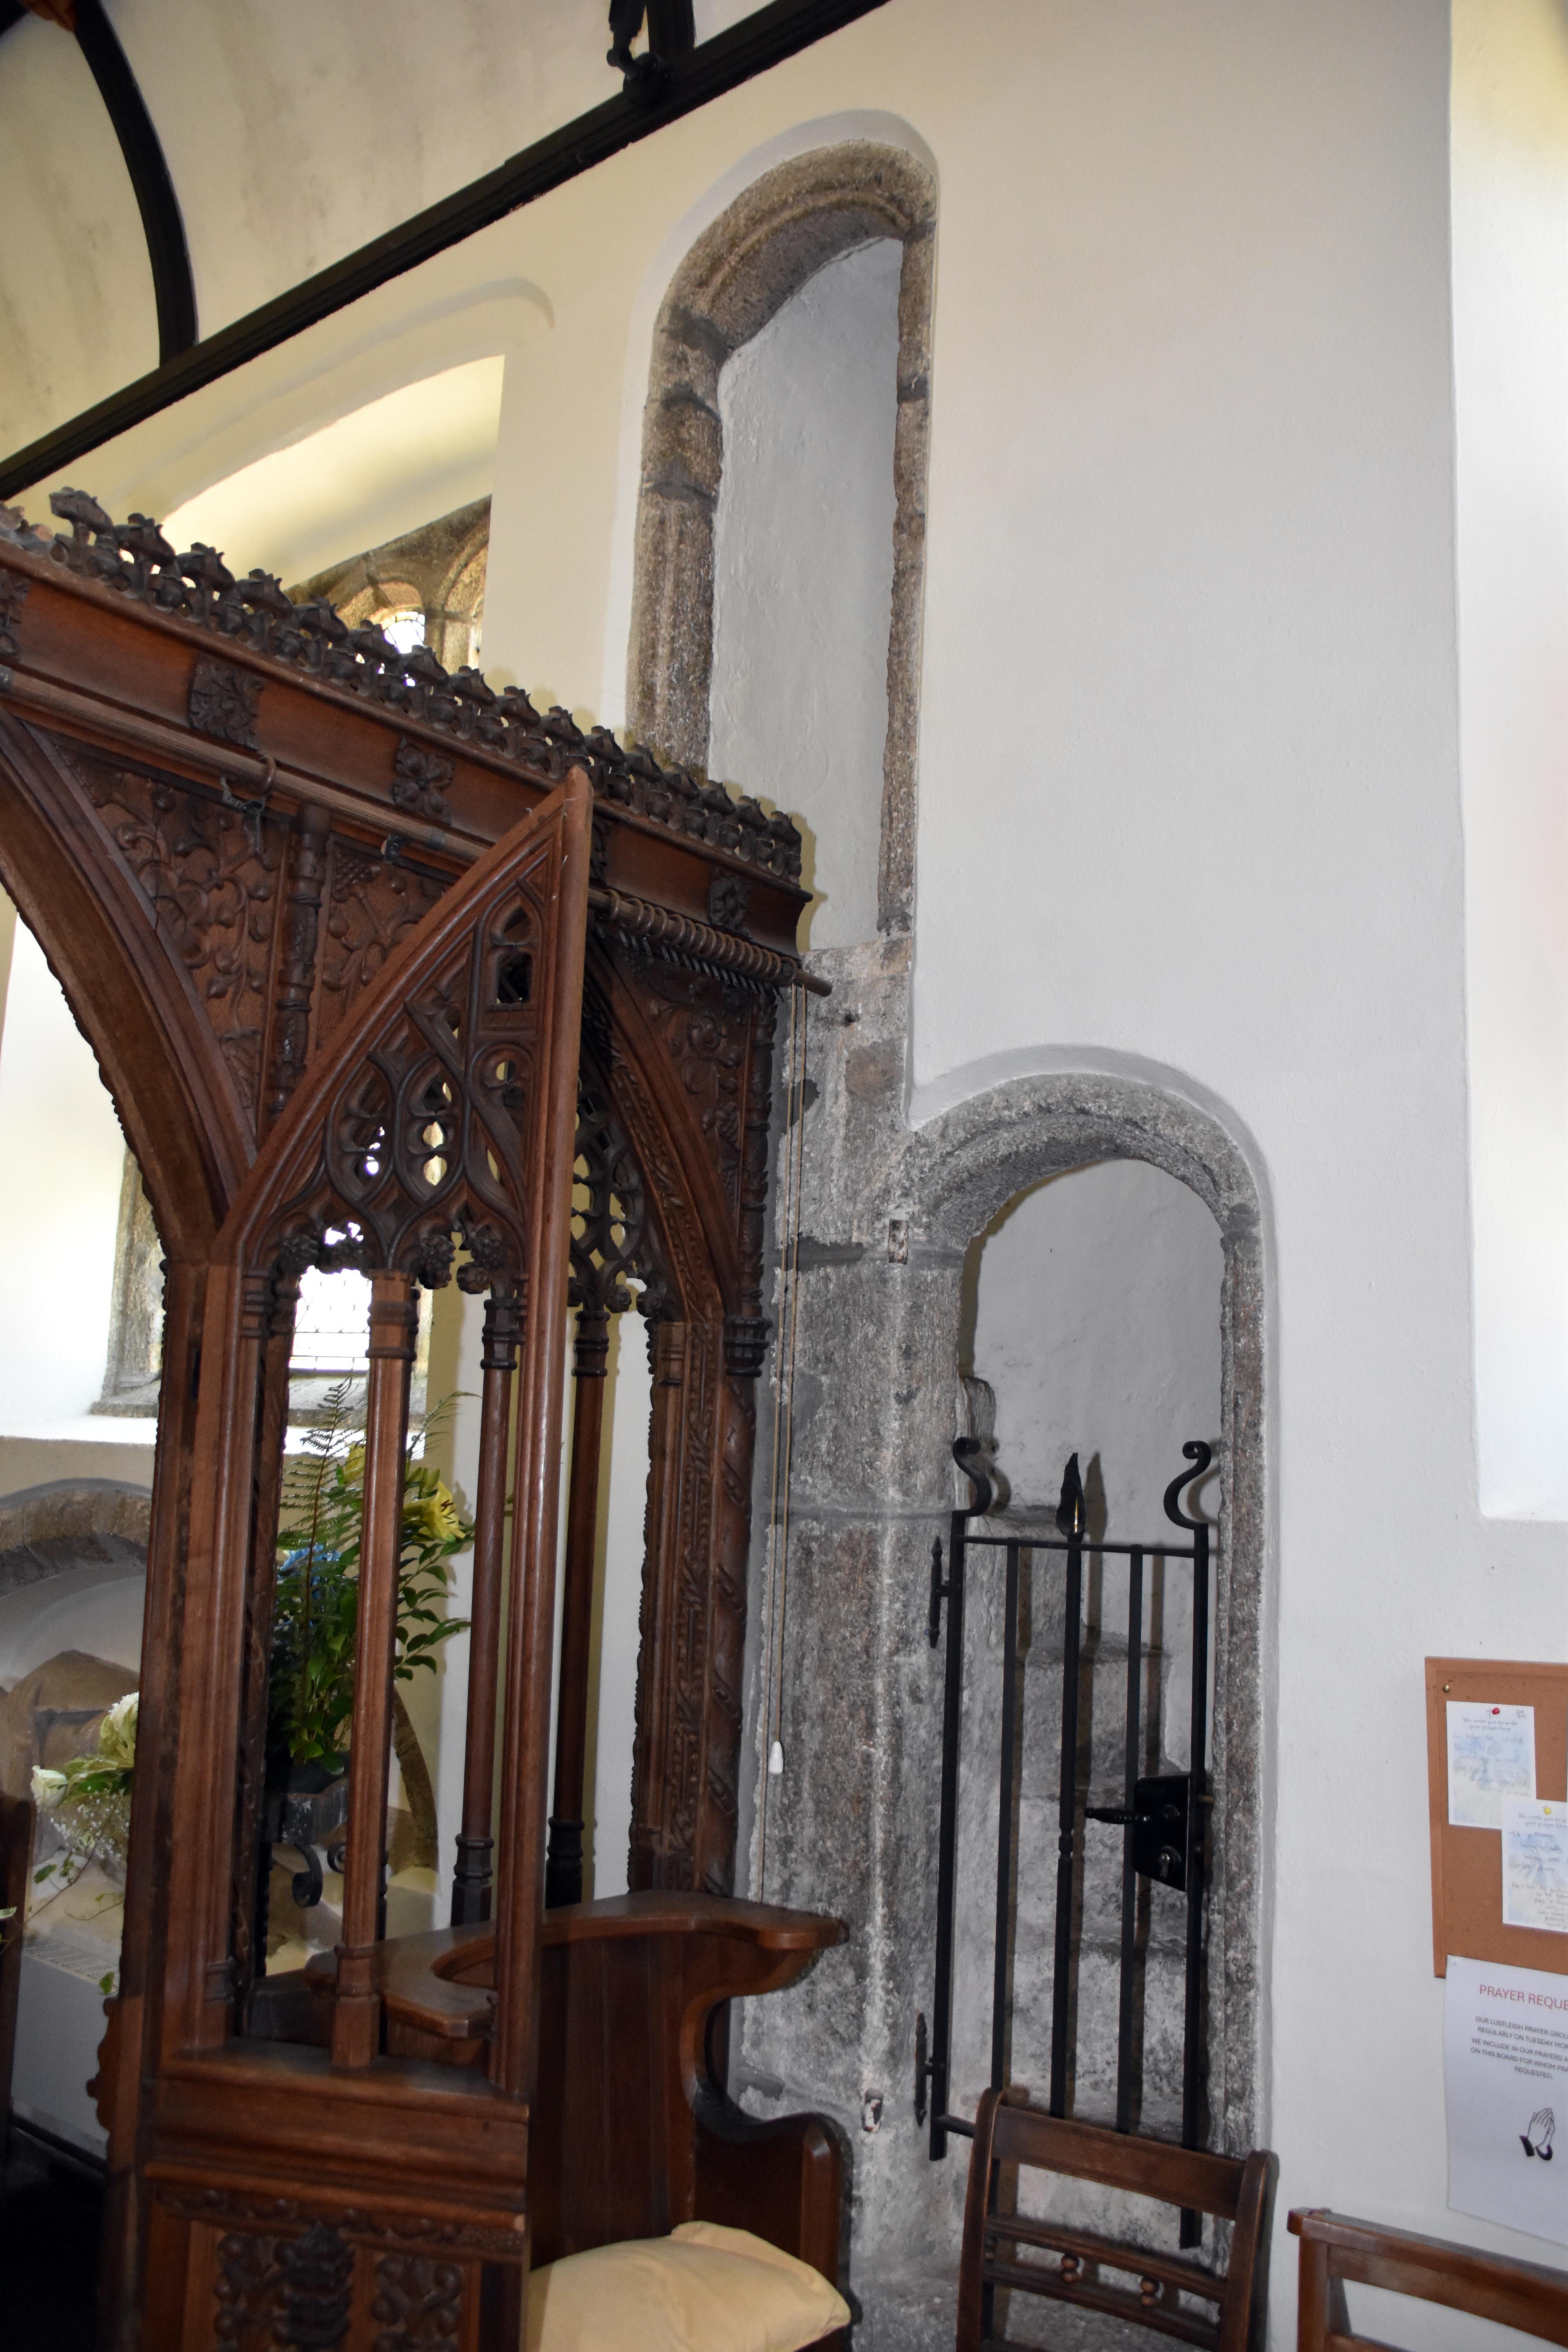
Granite stairway to the old rood loft in Lustleigh Church, showing the lower doorway with rounded arch and iron gate, and the upper blocked doorway above the carved rood screen. Main altar in the chancel of Lustleigh Church, covered with a green frontal embroidered with floral motifs and yellow fringe, flanked by two kneelers and backed by a carved wooden reredos and stained glass window. Triple lancet East Window of Lustleigh Church, classic thirteenth‑century design depicting Christ in Majesty surrounded by angels and saints, with inscriptions of blessing and glory. Carved oak chair in Lustleigh Church showing Adam and Eve holding hands as Eve reaches for the apple offered by the serpent, symbolising shared human responsibility in the Fall.
Stairway to the old rood loft – granite steps with lower and upper doorways, the lower fitted with an iron gate beside the carved rood screen. Main altar in the chancel – green embroidered frontal with floral motifs and yellow fringe, flanked by kneelers and backed by carved reredos and stained glass. East Window – triple lancet stained glass of thirteenth‑century form showing Christ in Majesty with angels and saints, inscribed with words of blessing and glory. Carved chair – oak chair depicting Adam and Eve holding hands as Eve reaches for the serpent’s apple, illustrating shared human responsibility in the Fall.
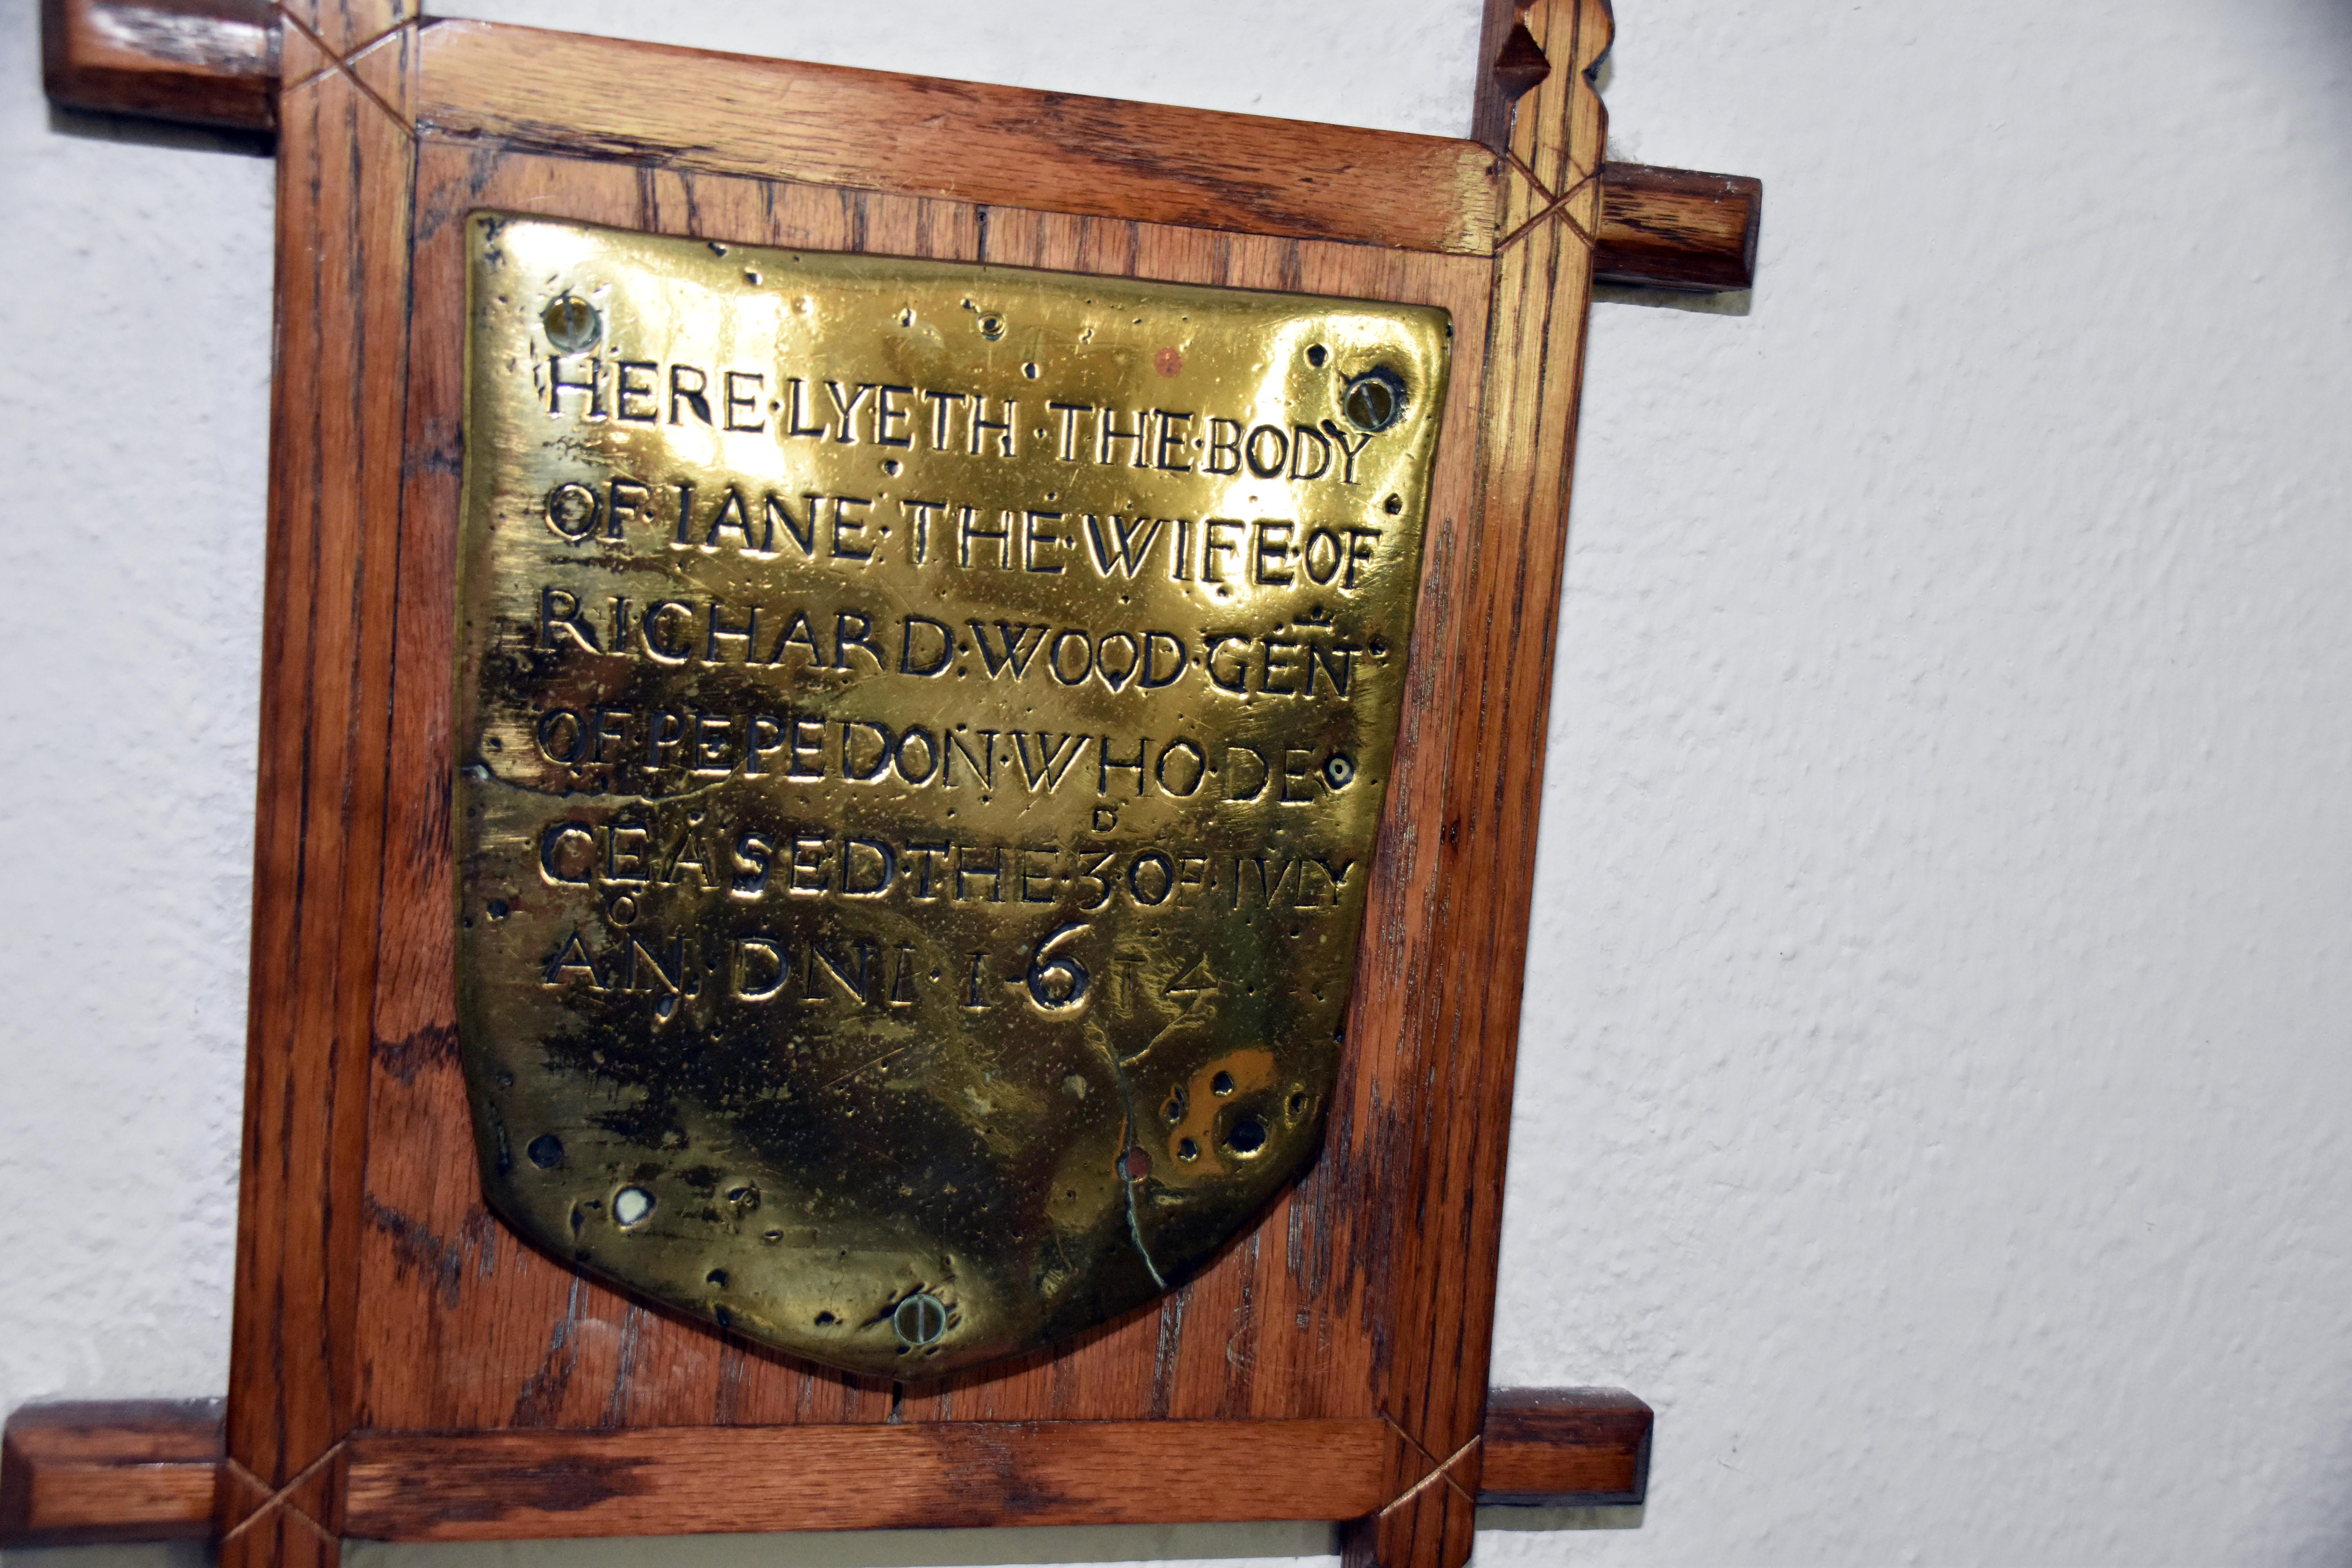
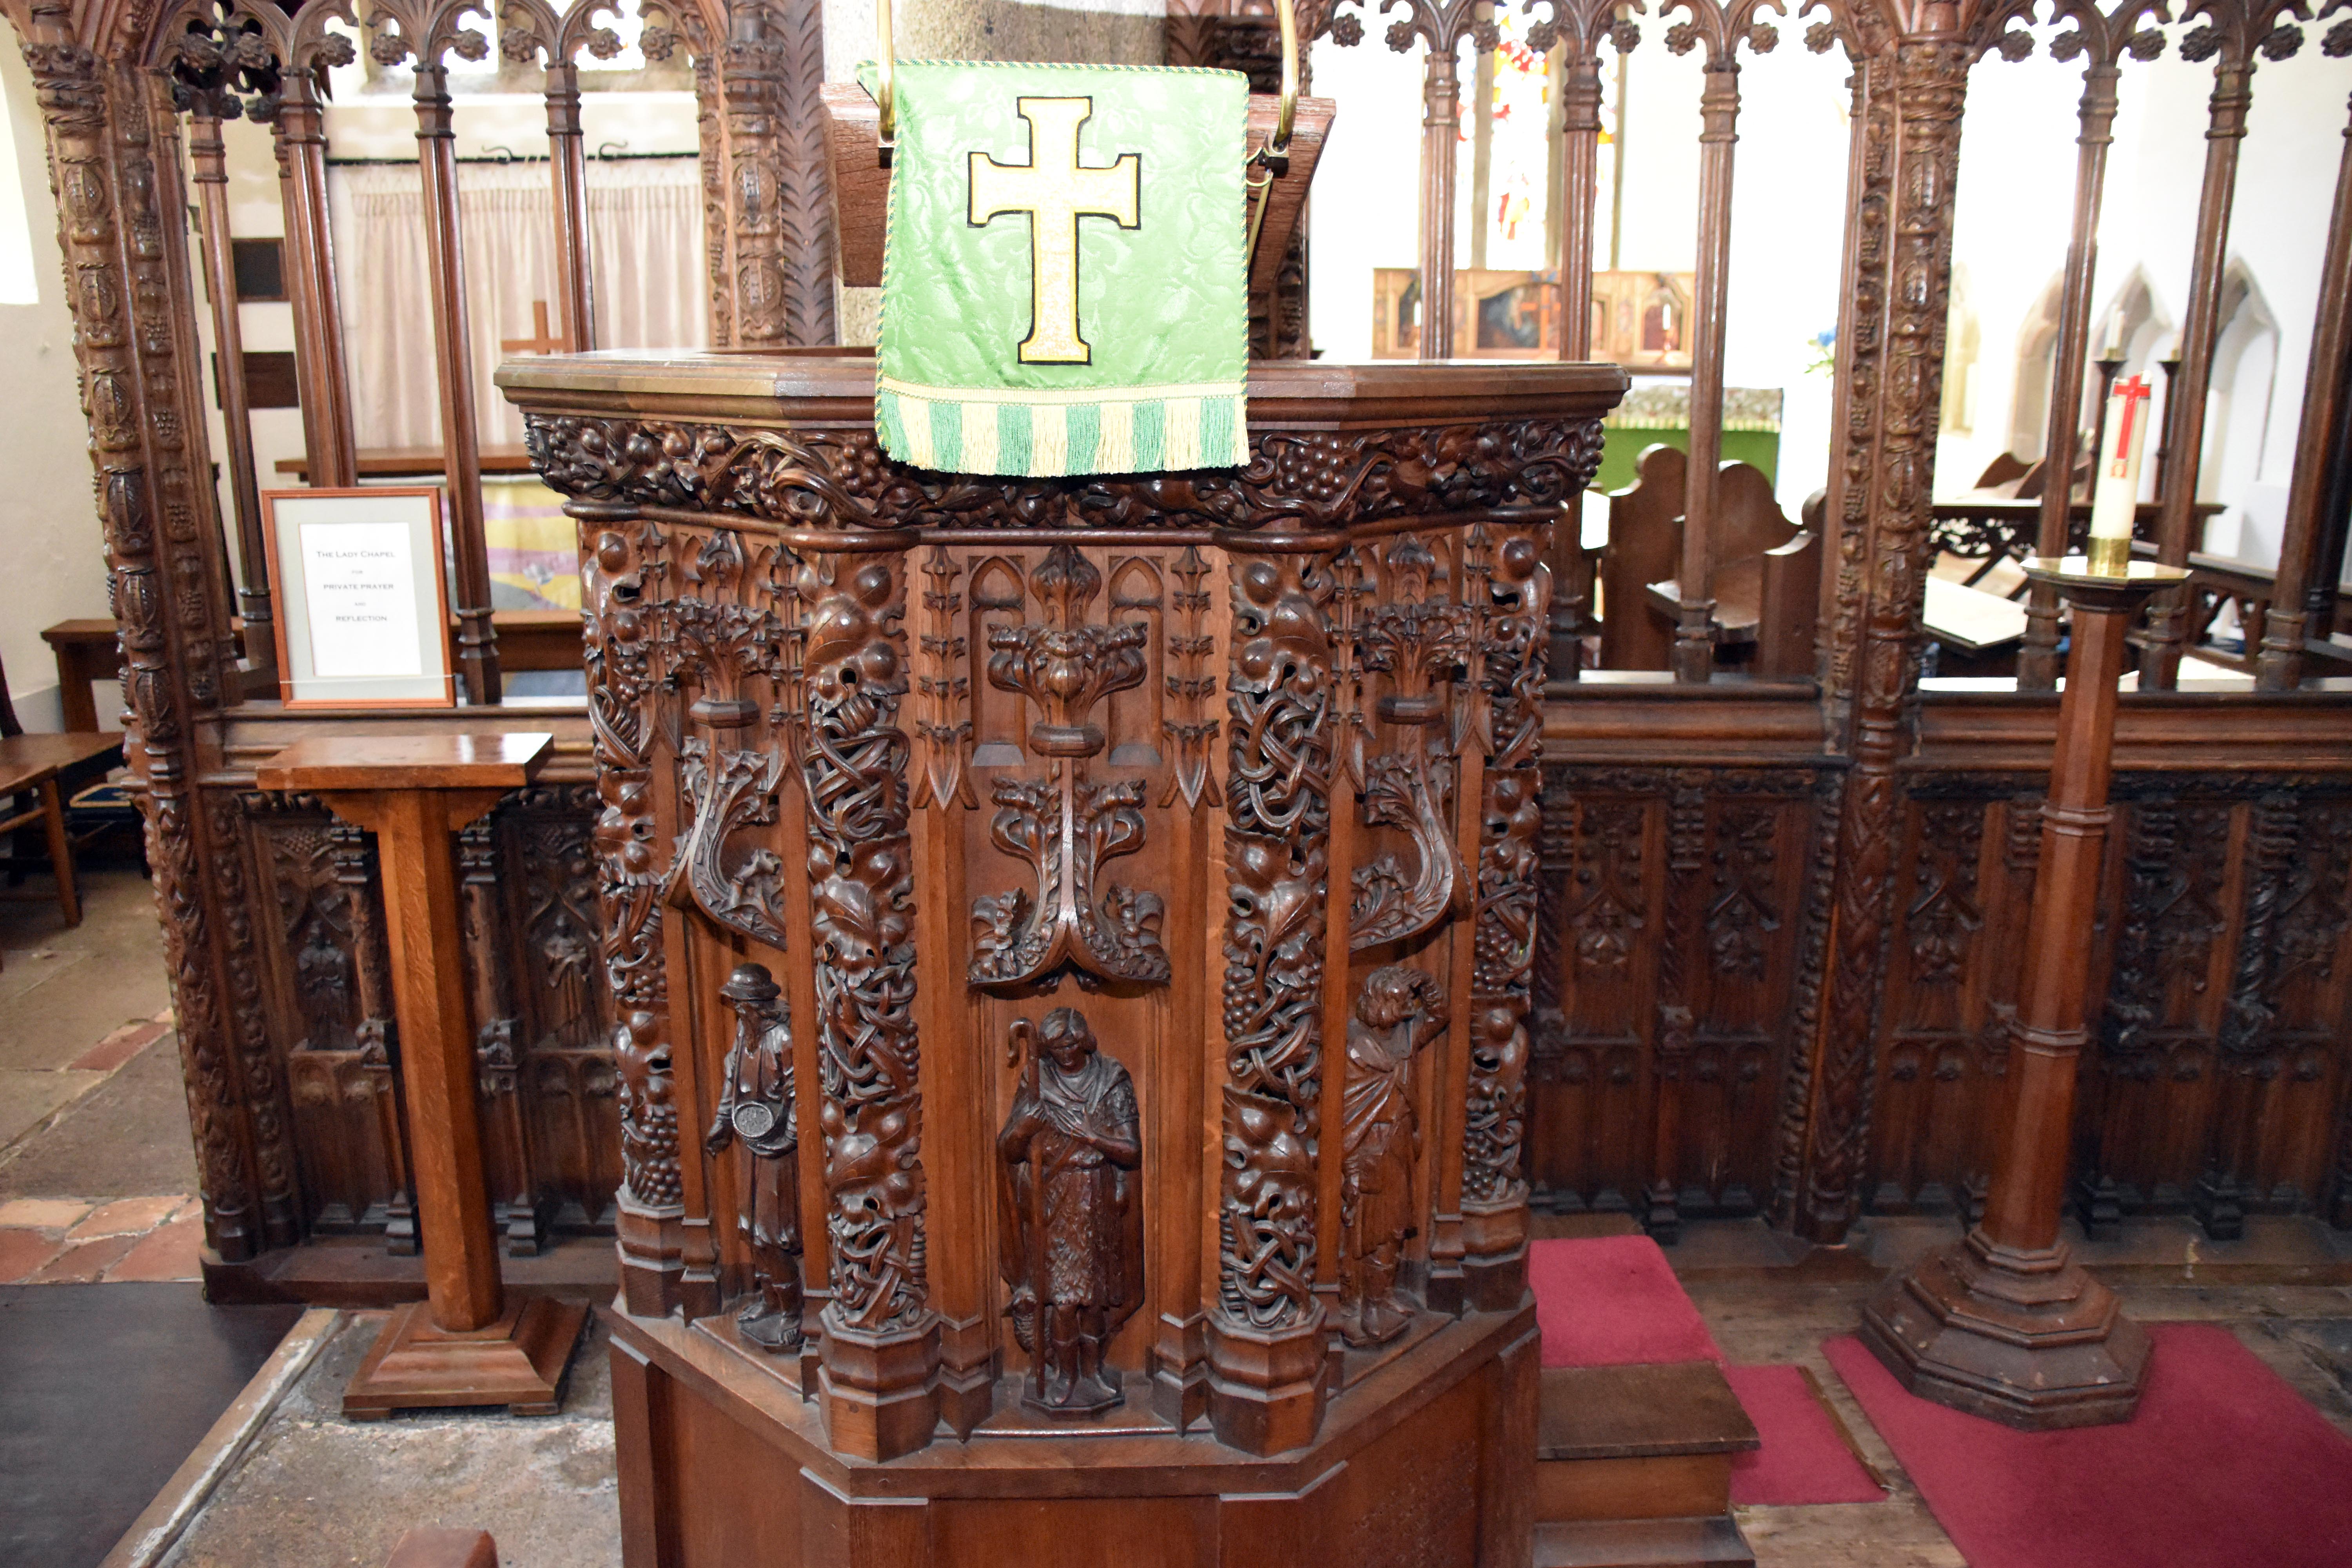
Carved wooden memorial plaque to Colonel Frank Ridley Farrer Boileau and his wife Mary Aurora, framed with vine and berry motifs and bearing the Latin inscription 'Amavimus Amamus Amabimus'. Brass memorial plate dated 1614 commemorating Jane, wife of Richard Wood of Pepedon, mounted on a wooden cross frame and inscribed in early seventeenth‑century lettering. Carved oak pulpit in Lustleigh Church, made by Herbert Read in 1904, richly decorated with foliage, figures and Gothic tracery, draped with a green cloth bearing a gold cross. Carved rood screen in Lustleigh Church showing the wainscoting panels with figures of bishops and saints beneath canopies, Marian in date and finely detailed with foliage and twisted columns.
Memorial plaque – carved oak panel commemorating Colonel  Frank  Ridley  Farrer  Boileau (1867–1914) and his wife Mary Aurora (1874–1958), inscribed with the Latin phrase “Amavimus  Amamus  Amabimus”. Brass memorial – seventeenth‑century plate to Jane Wood, wife of Richard  Wood  of  Pepedon, dated 1614, mounted on a wooden cross frame. Pulpit – oak pulpit carved by Herbert Read in 1904, decorated with foliage and figures, draped with a green cloth bearing a gold cross. Rood screen – Marian‑period carved wainscoting with figures of bishops and saints beneath canopies, detailed with foliage and twisted columns.
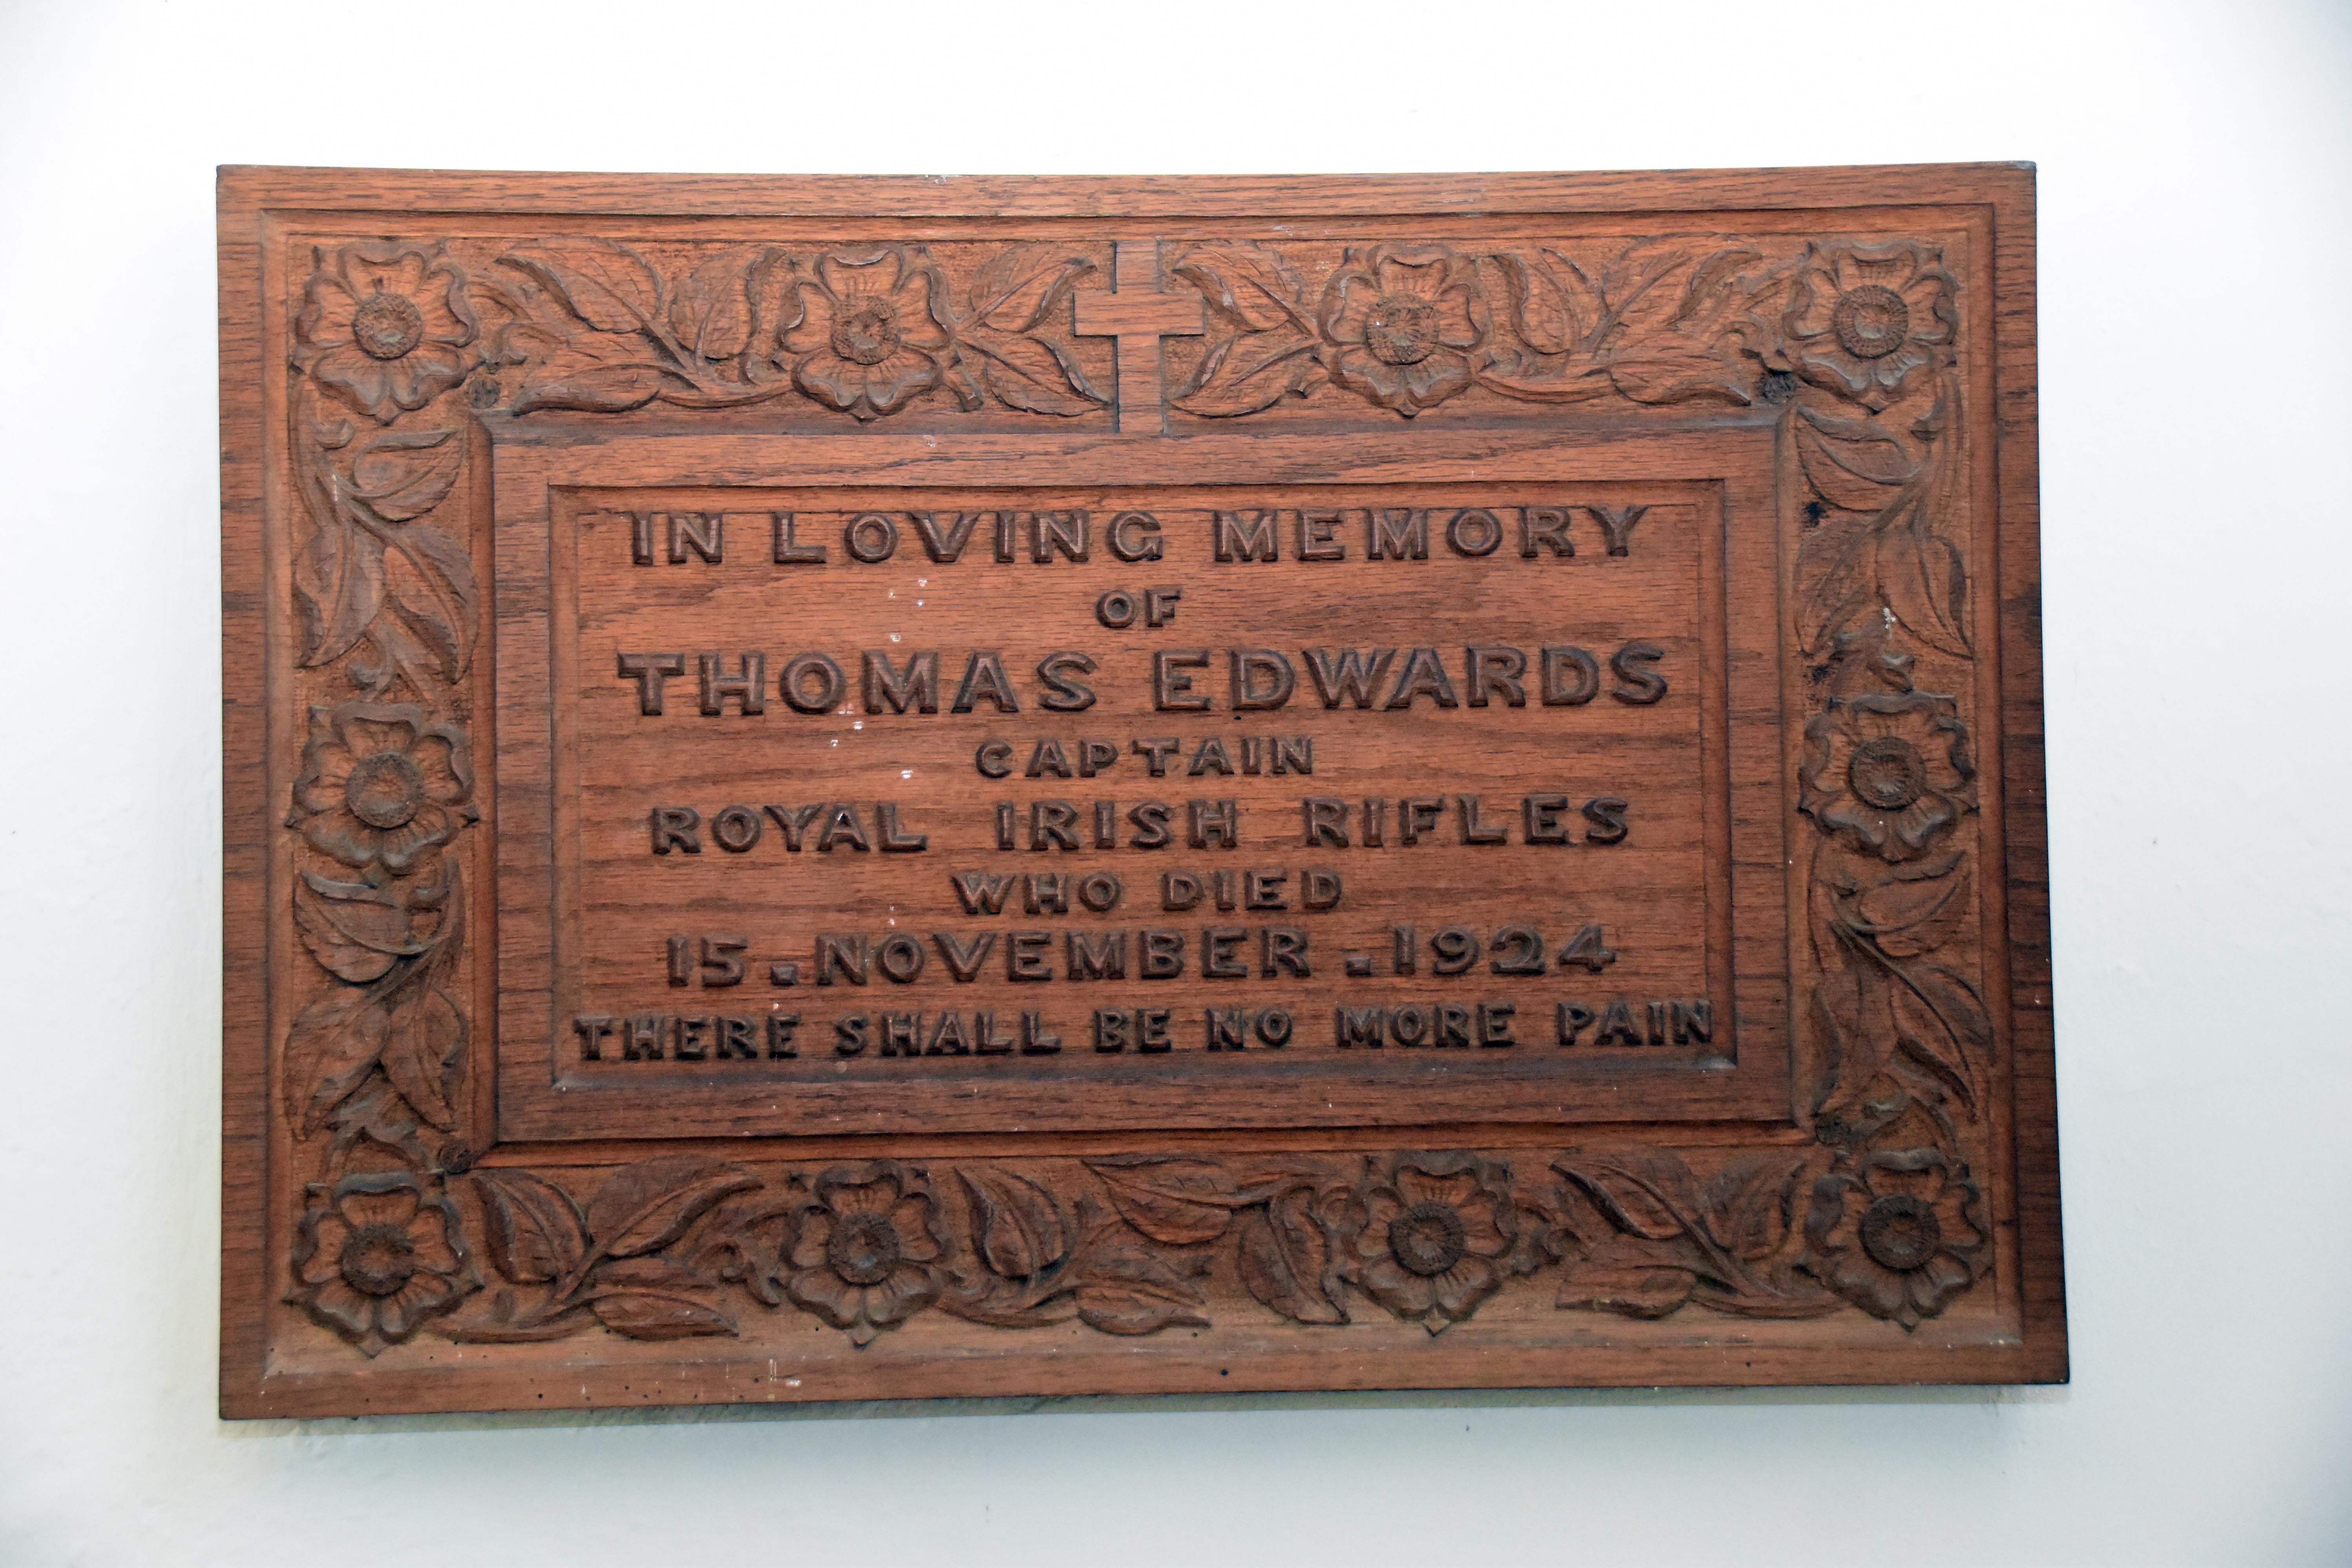
Mortuary chapel to Sir William de Prowz in Lustleigh Church, containing his recumbent effigy in armour beneath a granite arched recess, dating from the early fourteenth century. Memorial tablet to Leopold Stennett Amery, Privy Councillor and Companion of Honour, with inscription noting his service to the British Commonwealth and a tribute from Sir Winston Churchill. Carved wooden plaque commemorating Captain Thomas Edwards of the Royal Irish Rifles, who died in 1924, framed with floral motifs and inscribed 'There shall be no more pain'. Norman font in Lustleigh Church, circular stone bowl supported by a central cable‑moulded shaft and six black marble columns, with decorative metal cover and candle stand beside.
Mortuary chapel – effigy of Sir William de Prowz in armour beneath a granite arch, early fourteenth‑century monument within Lustleigh Church. Leopold  Stennett  Amery memorial – marble tablet recording his distinguished public service and Churchill’s tribute describing him as a great patriot. Thomas  Edwards memorial – carved oak plaque to Captain  Thoma s Edwards (1924), Royal  Irish  Rifles, inscribed 'There  shall  be  no  more  pain'. Norman font – circular stone bowl supported by central cable‑moulded shaft and six black marble columns, with decorative metal cover and candle stand.
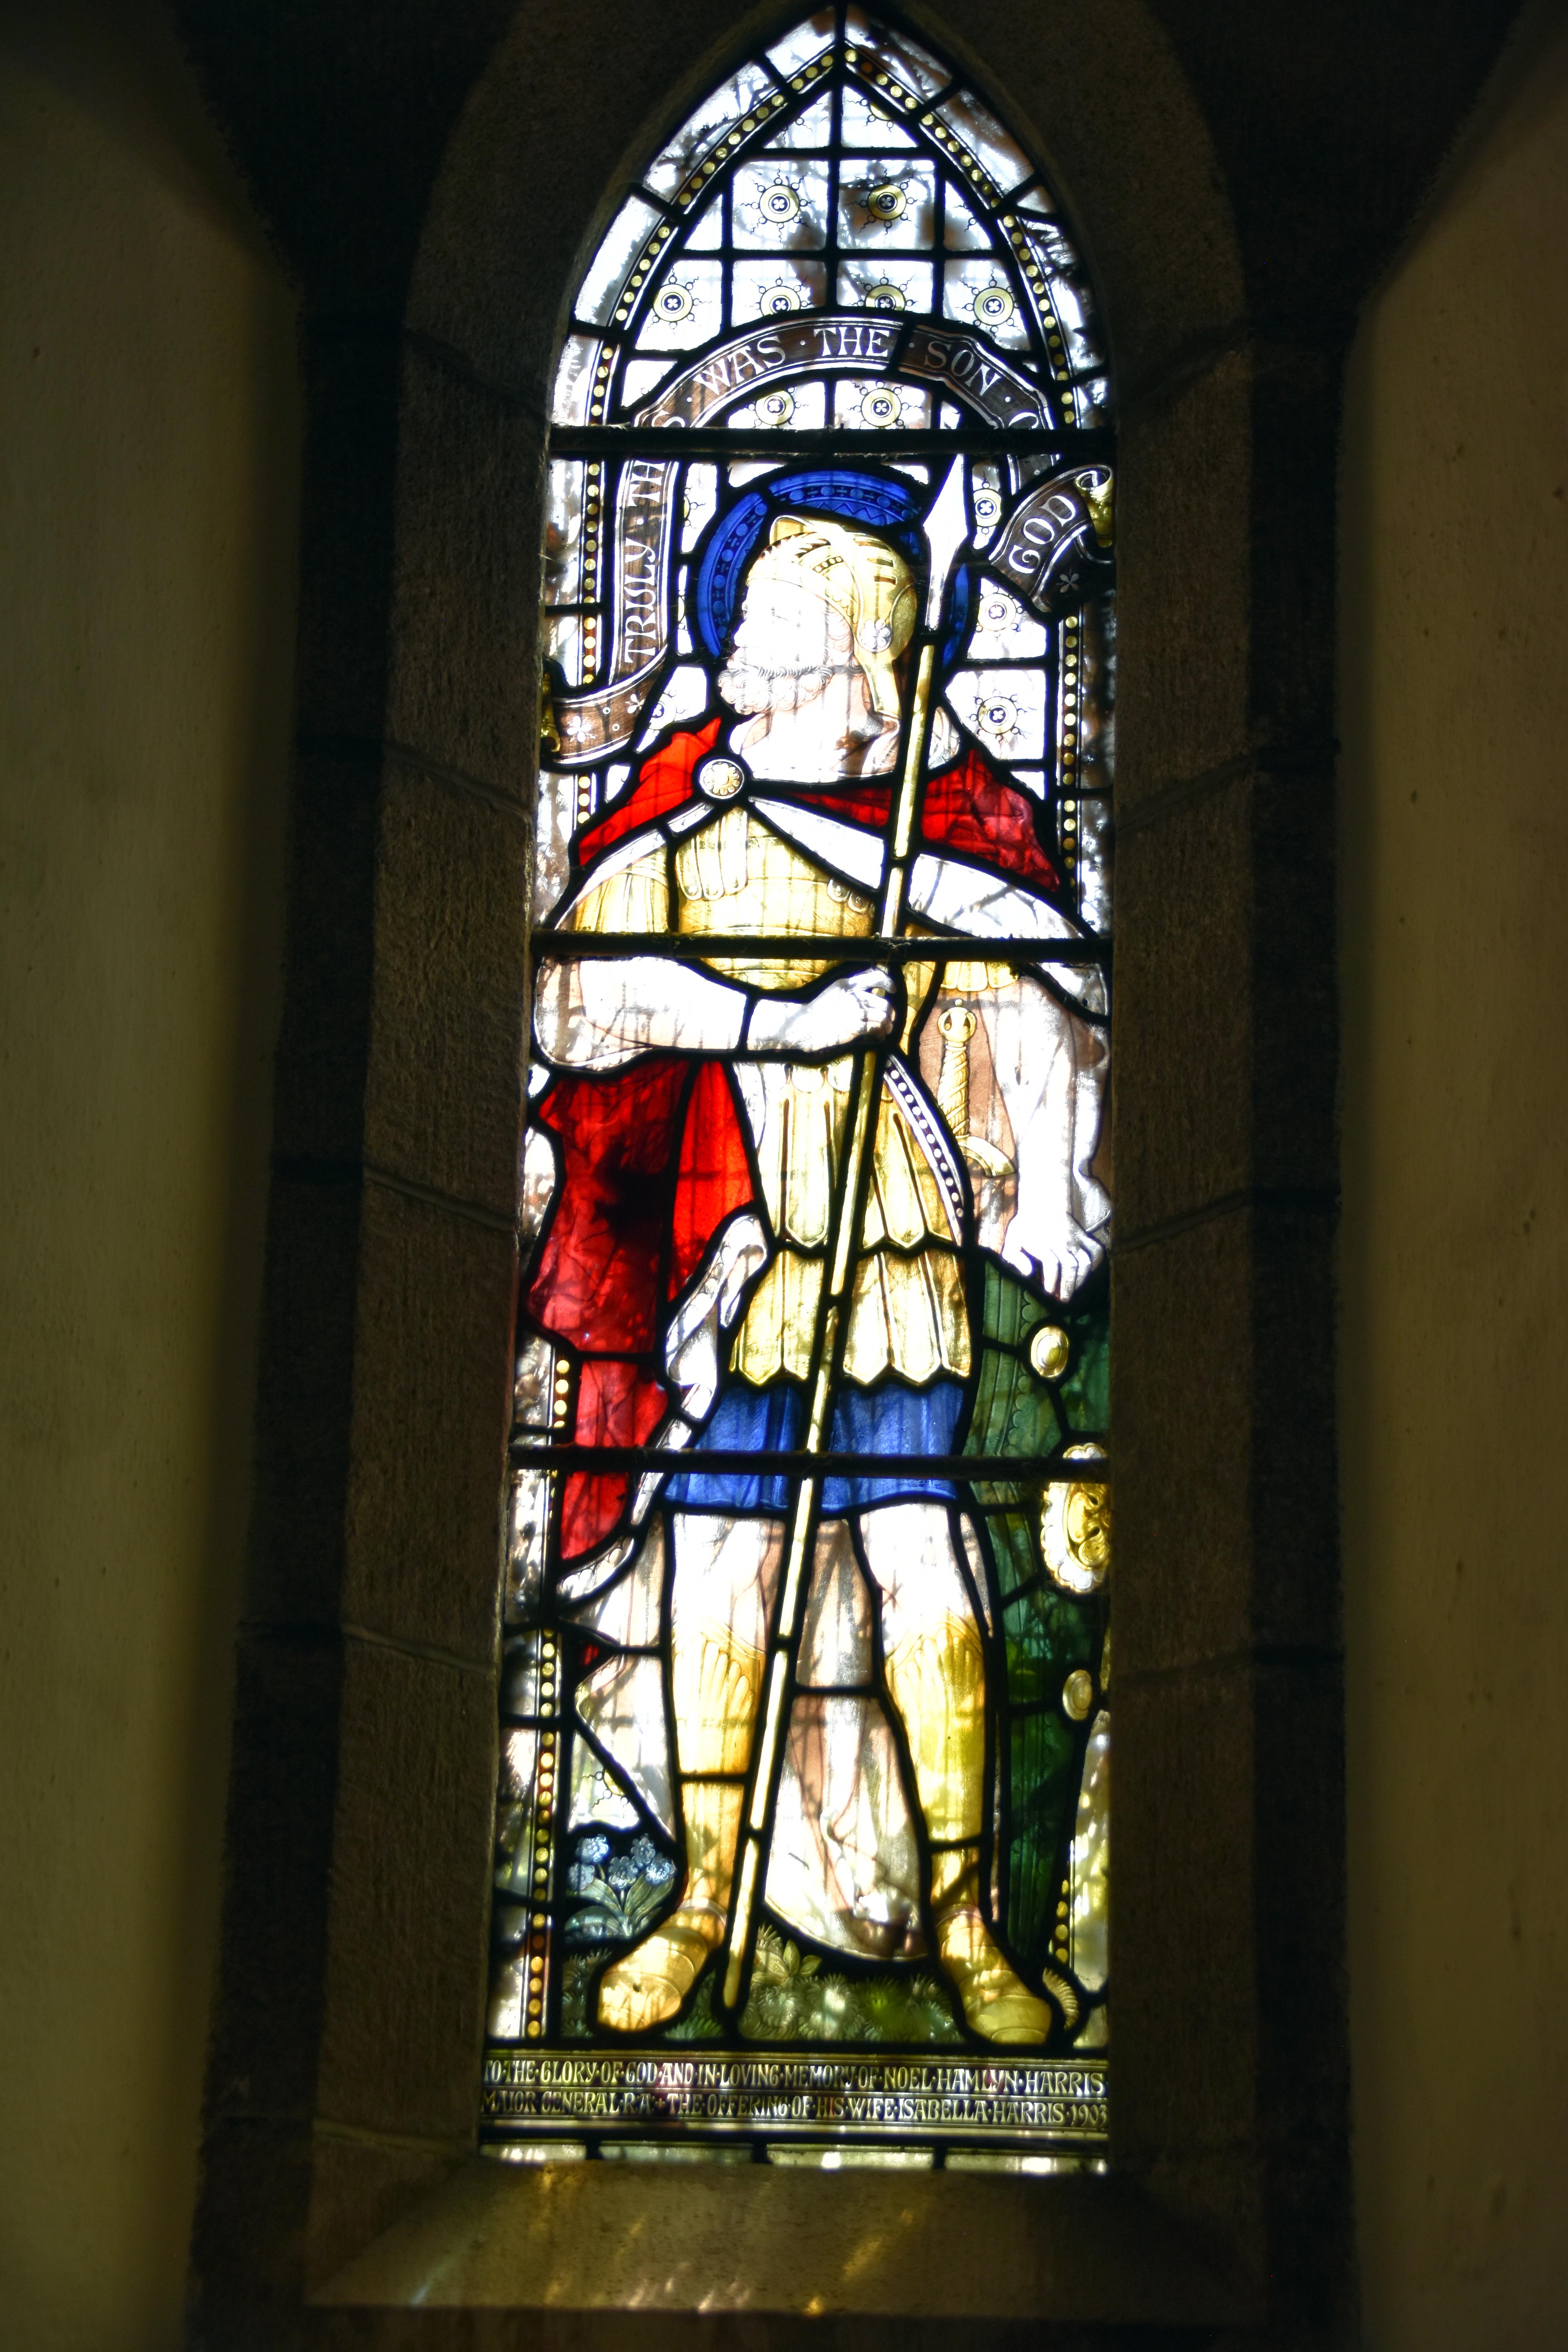
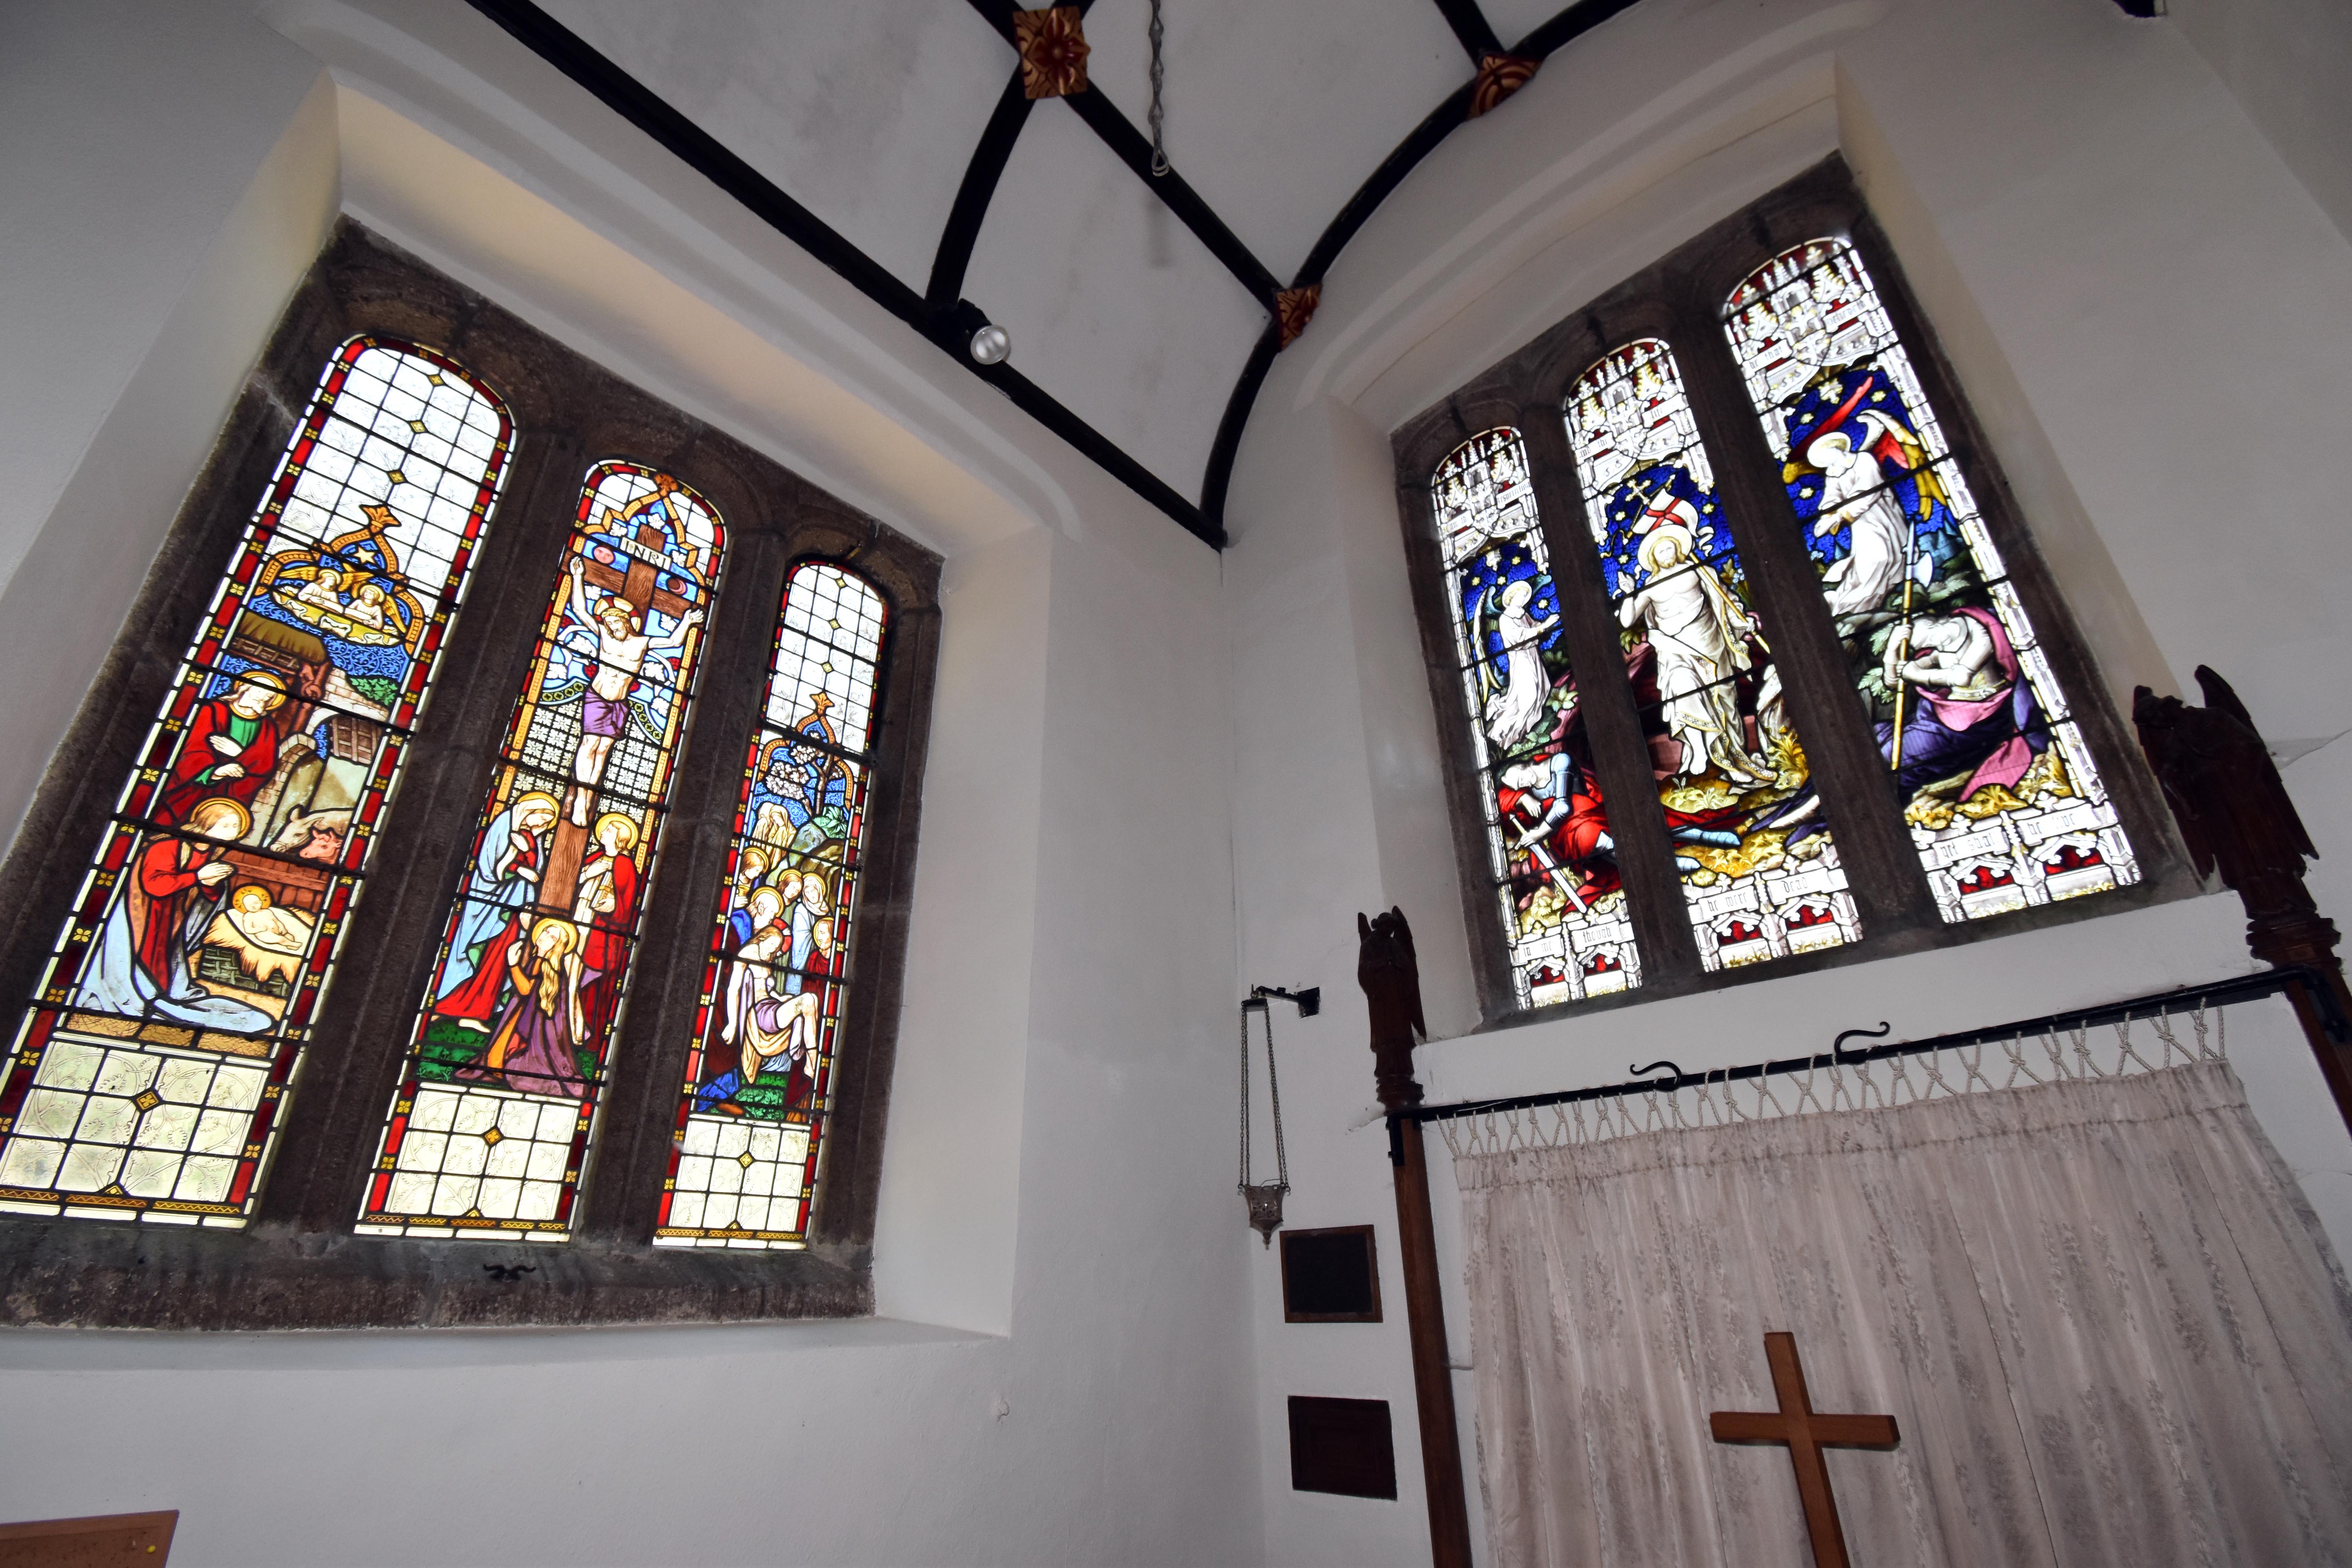
Stained glass window in Lustleigh Church dedicated to Major General Noel Hamlyn Harris, Royal Artillery, depicting a Roman centurion with the inscription 'Truly this was the Son of God'. View down the nave of Lustleigh Church towards the chancel, showing the carved rood screen, vaulted ceiling with painted bosses, and rows of wooden pews with hymn books neatly arranged. Marian rood screen in Lustleigh Church, elaborately carved with Gothic tracery and pointed arches, surmounted by a large crucifix flanked by two figures beneath a star‑decorated ceiling. Stained glass windows in the Lady Chapel of Lustleigh Church, depicting saints and angels in vivid colours, framed by granite mullions and illuminated by natural light.
Stained glass window – memorial to Major  General  Noel  Hamlyn  Harris, Royal Artillery, showing a Roman centurion with the words ‘Truly  this  was  the  Son  of  God’. Nave view – looking towards the chancel and Marian rood screen, with vaulted ceiling, carved bosses, and orderly rows of wooden pews. Marian rood screen – richly carved Gothic tracery and pointed arches, surmounted by crucifix and attendant figures beneath a star‑patterned ceiling. Lady Chapel windows – stained glass depicting saints and angels in vivid colour, framed by granite mullions and illuminated by natural light.
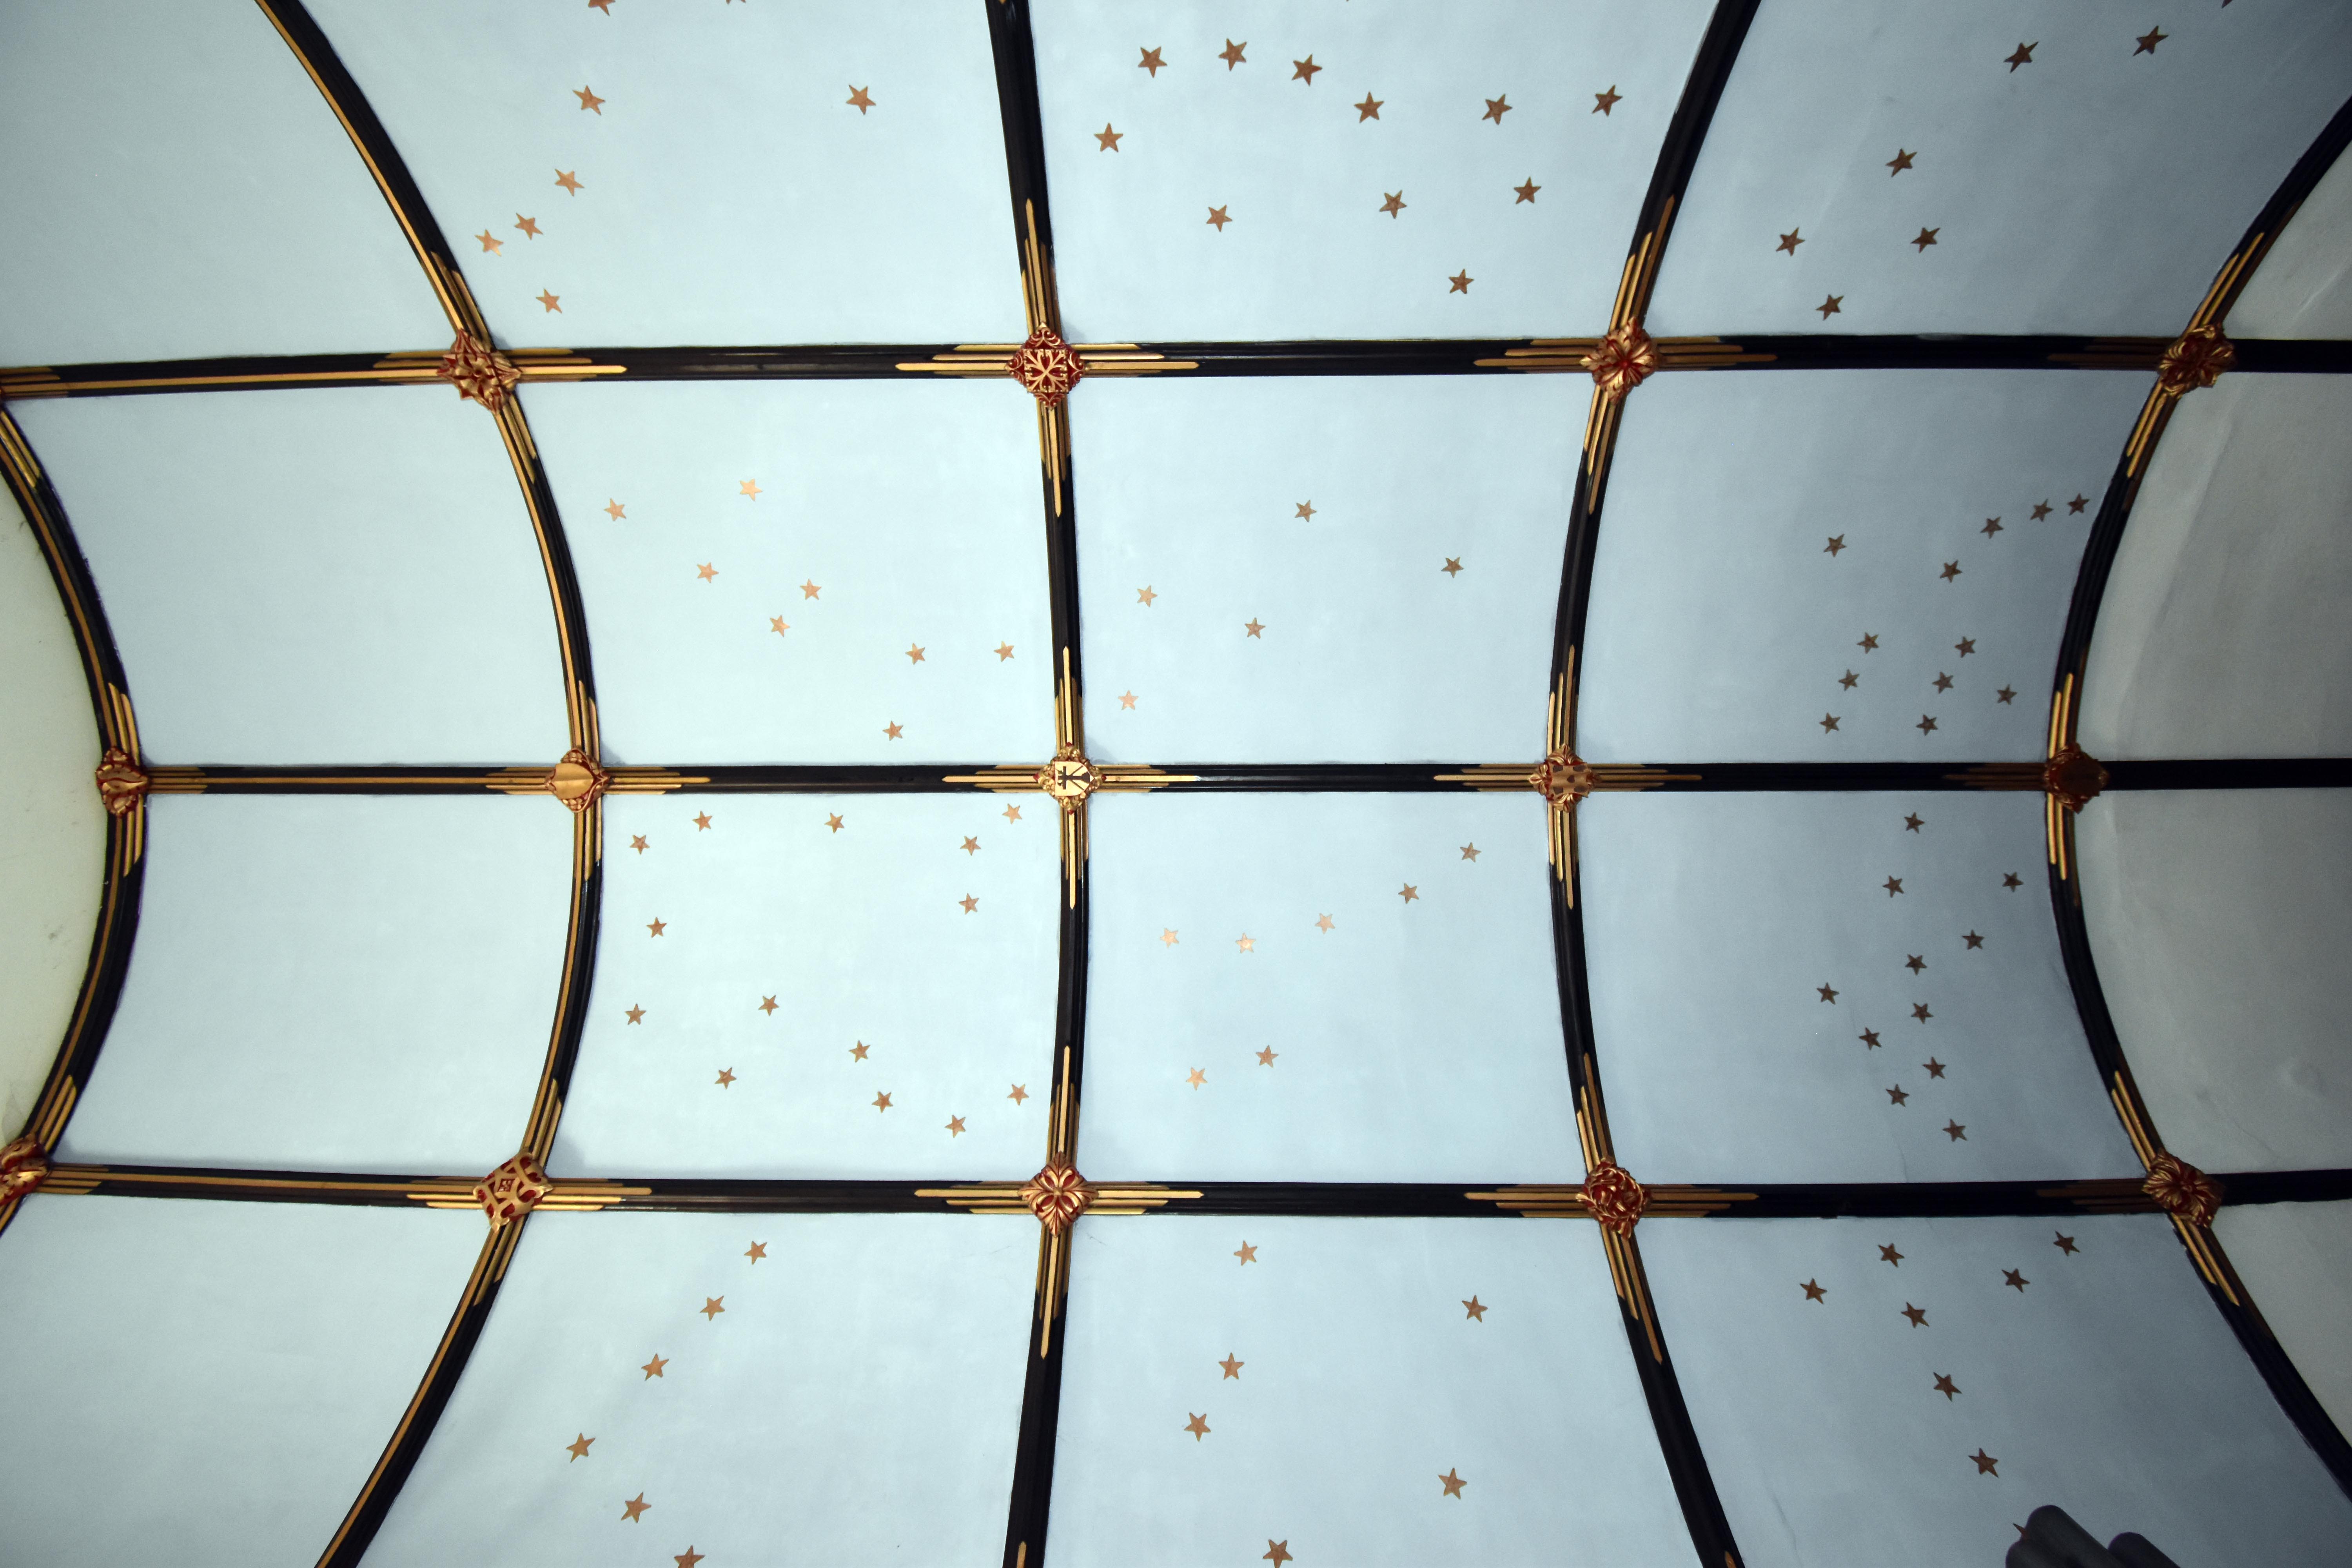
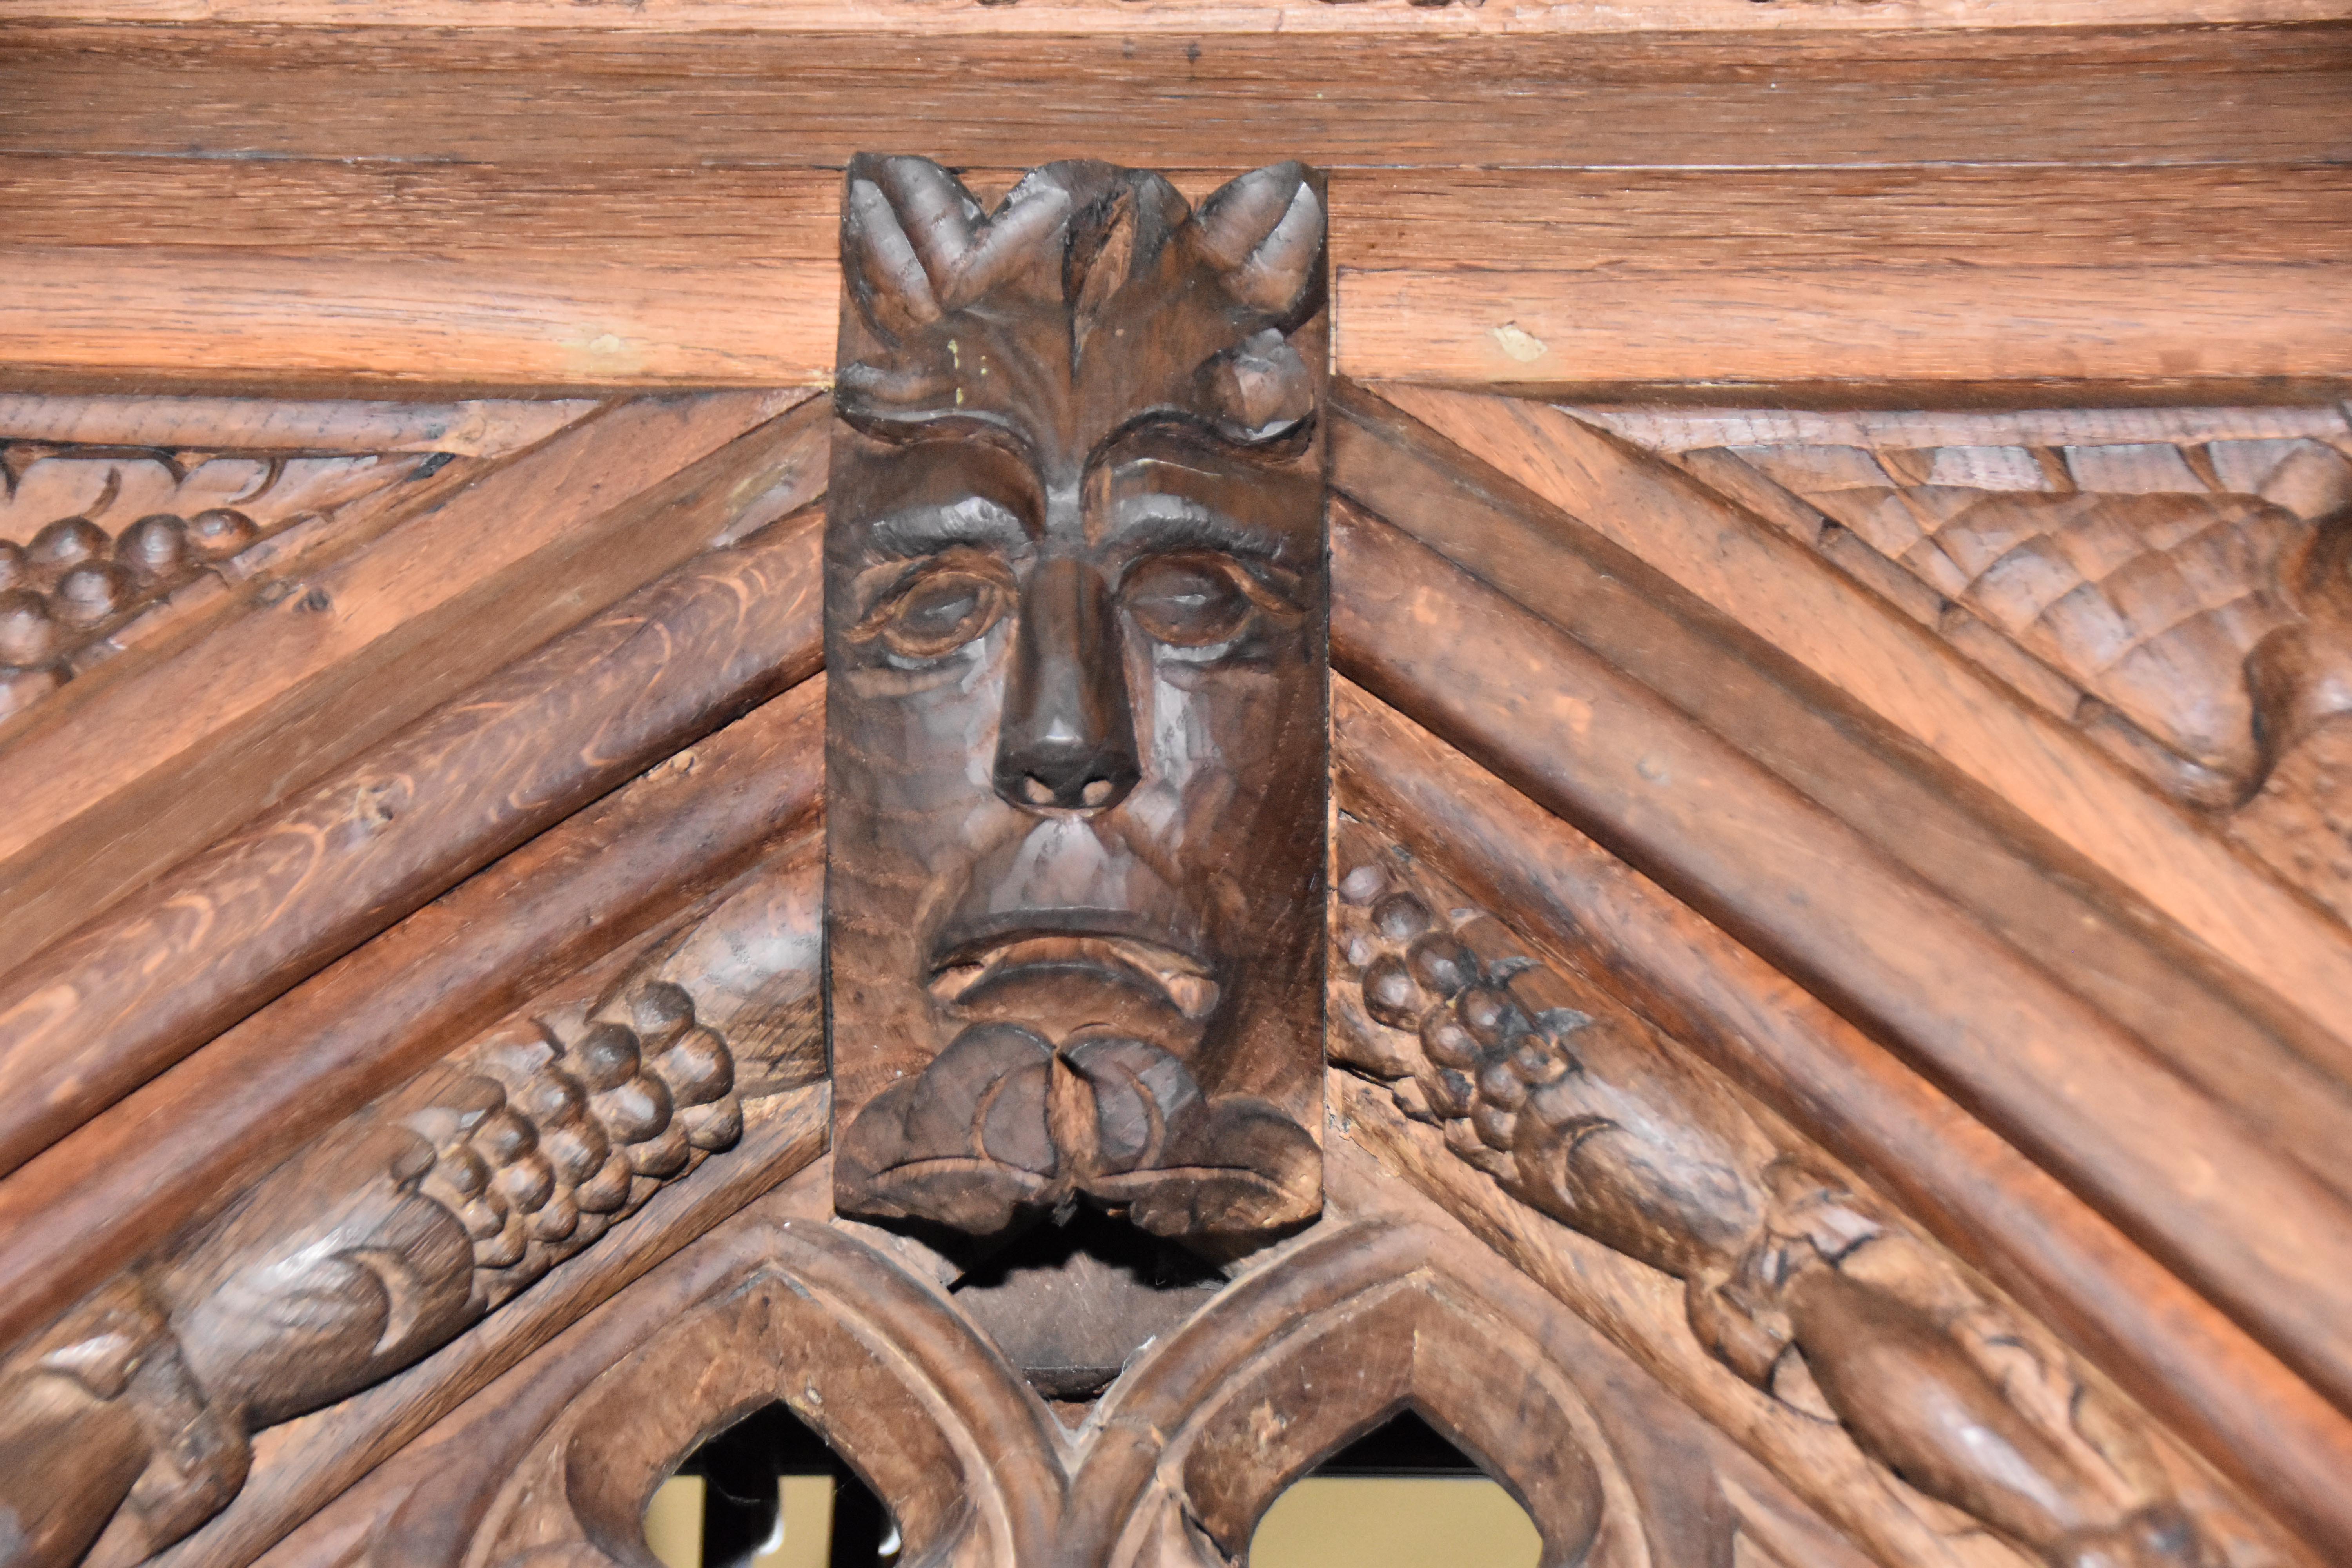
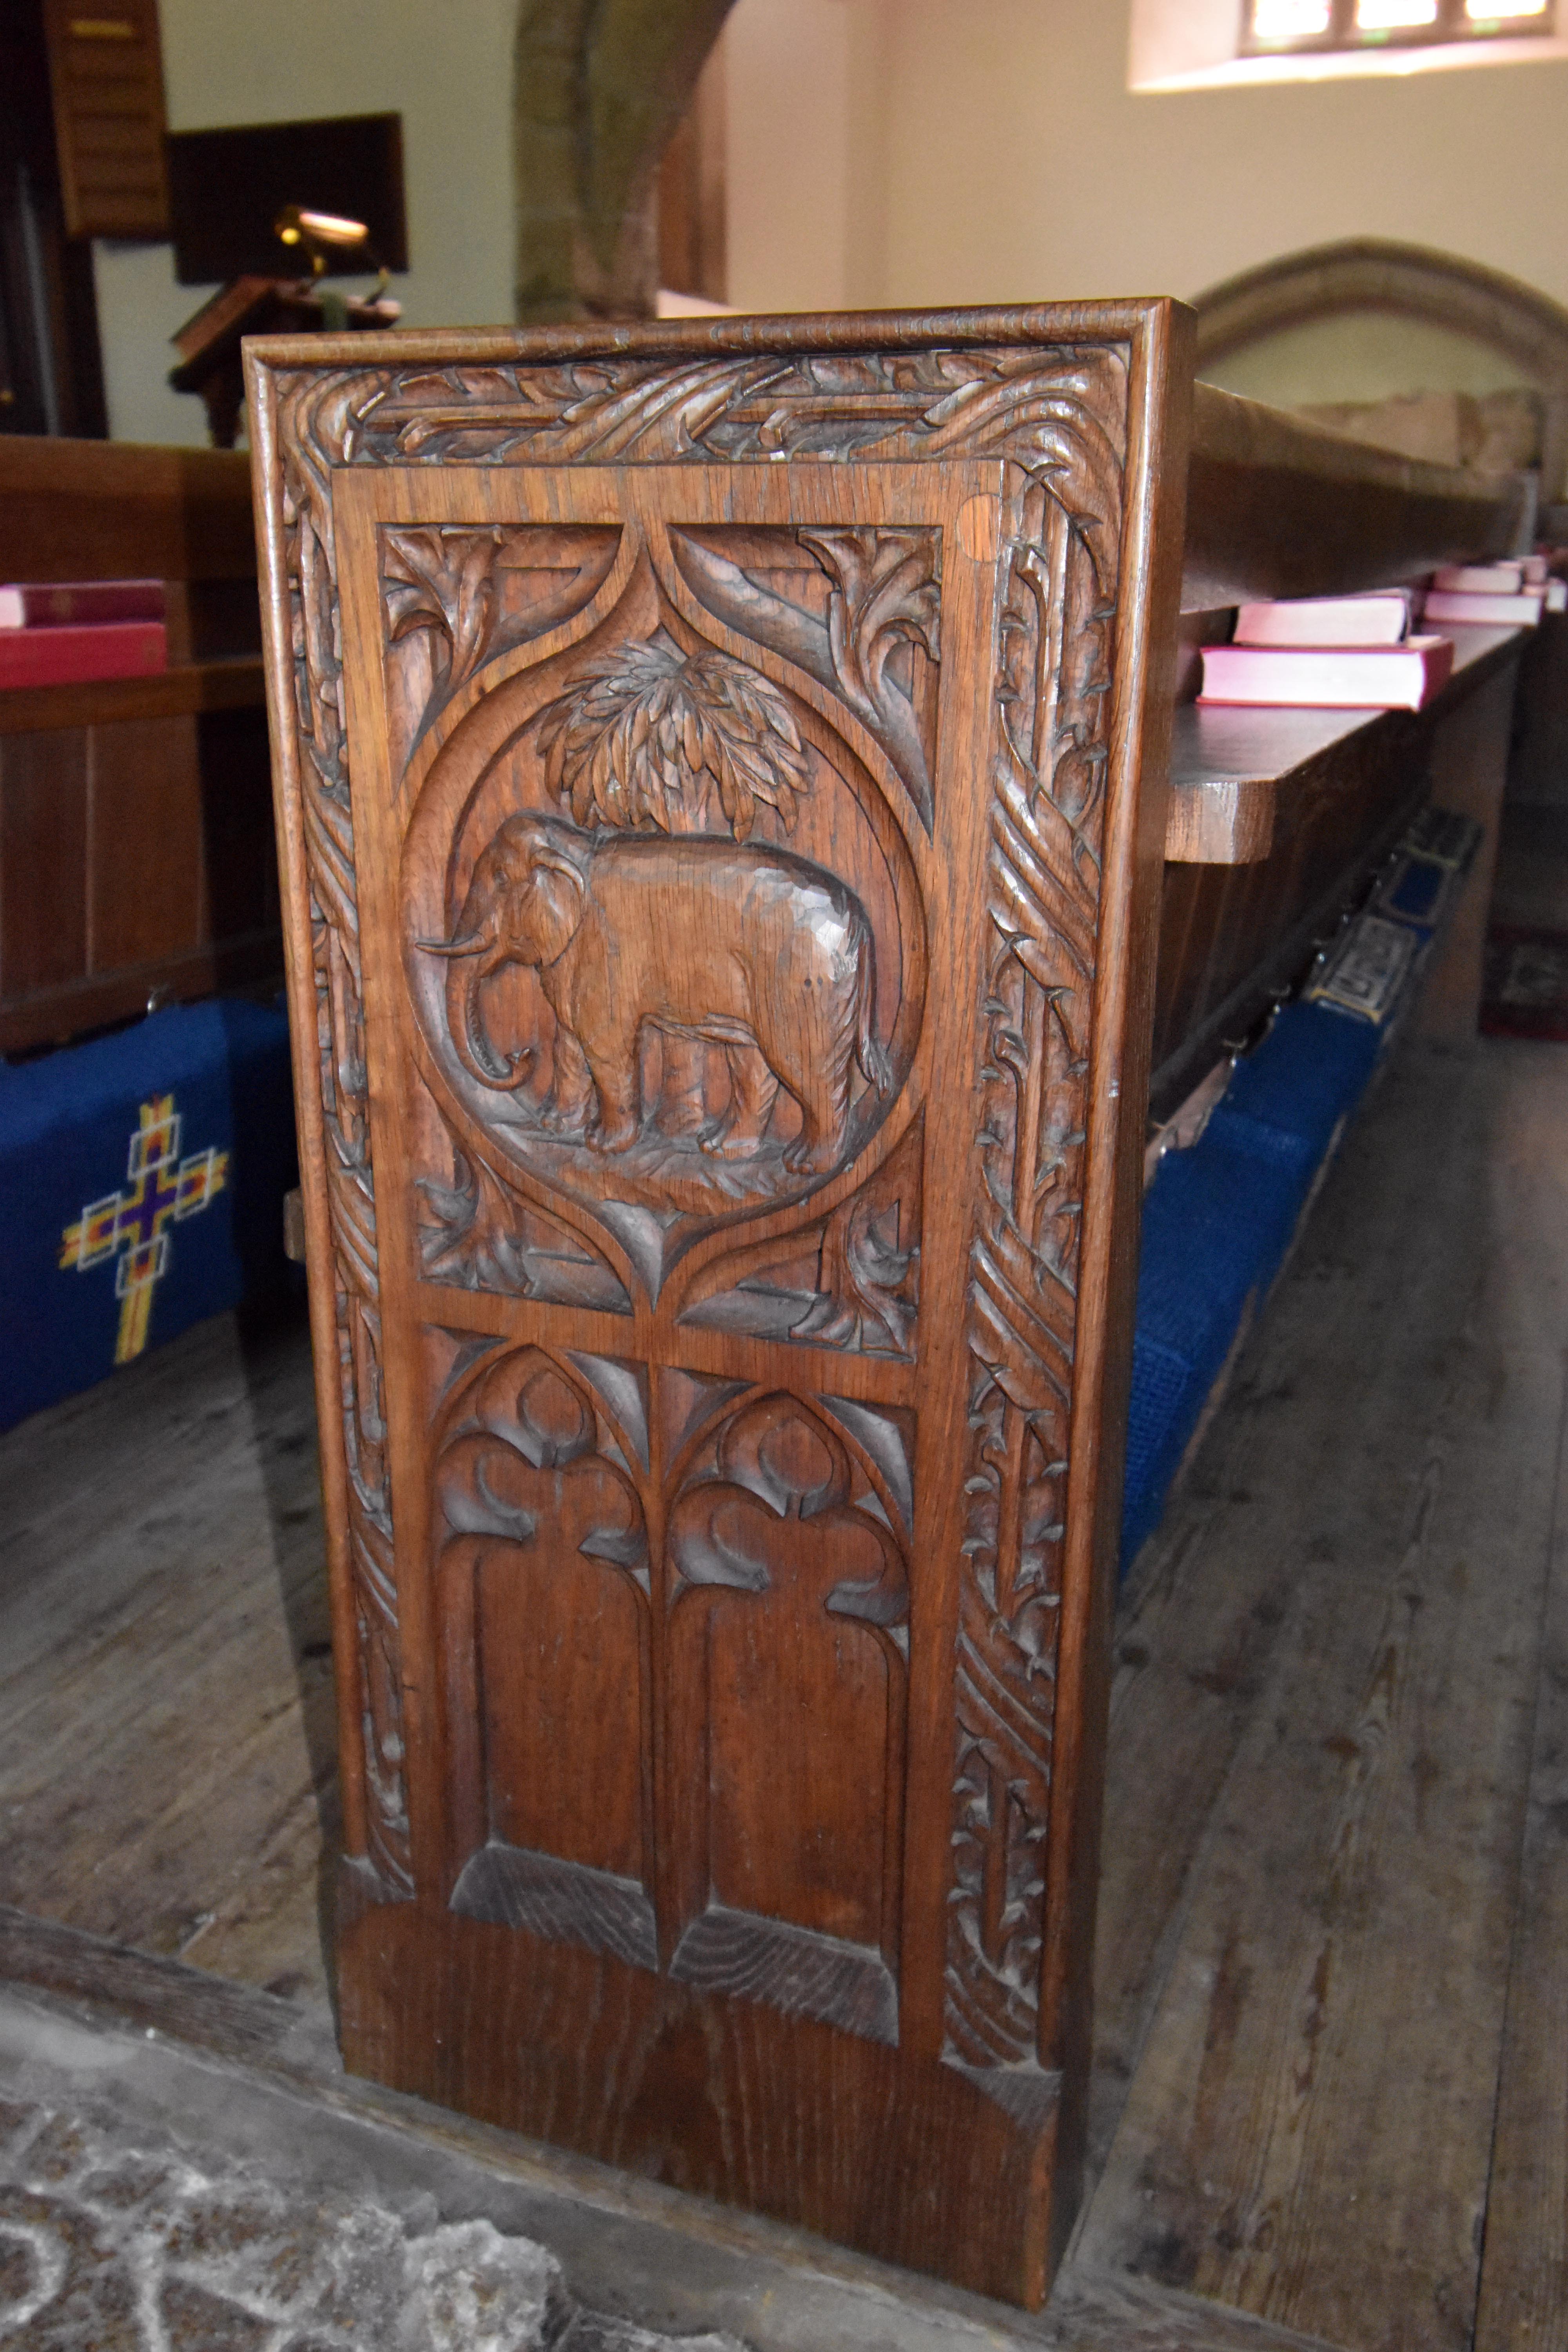
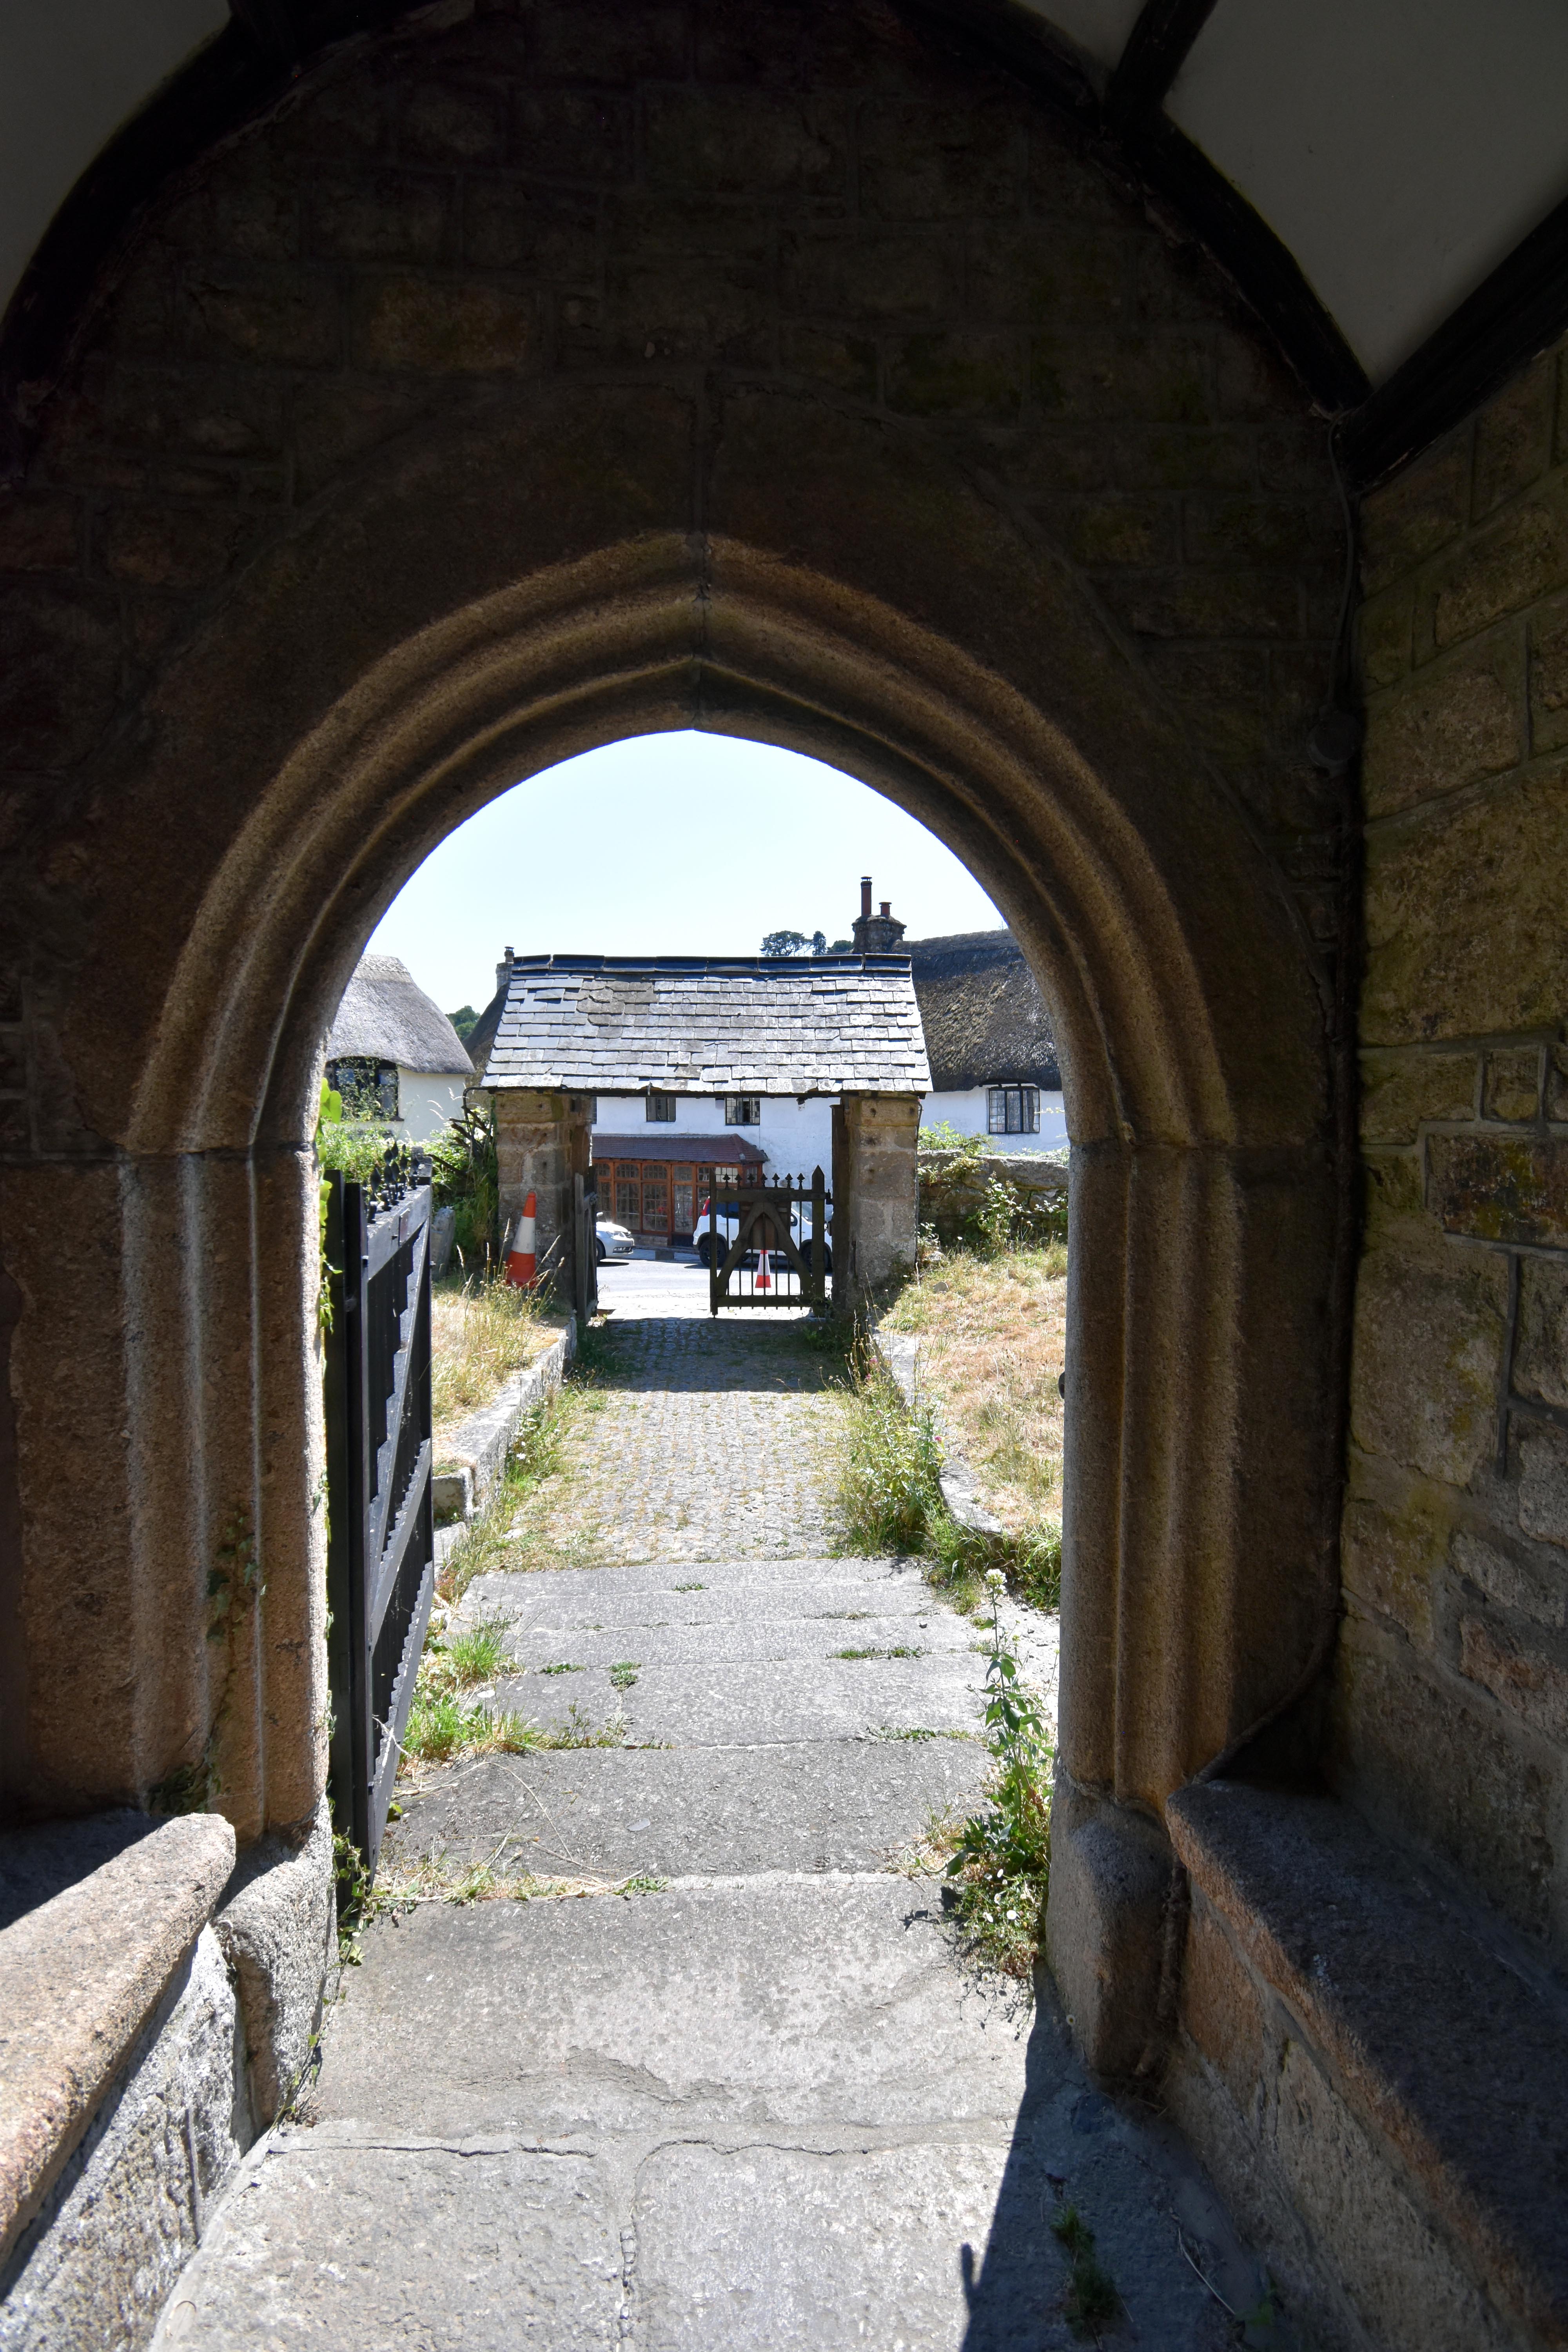
Wagon roof of Lustleigh Church painted pale blue with gold stars, intersecting black ribs and gilded bosses forming a grid pattern across the vaulted ceiling. Carved green man boss on the Marian rood screen of Lustleigh Church, showing a foliate face surrounded by oak leaves symbolising rebirth and renewal. Carved elephant on bench end in Lustleigh Church, framed by Gothic tracery and foliage motifs, representing strength and memory within ecclesiastical symbolism. View out of Lustleigh Church porch through the granite archway towards the lych gate and thatched cottages beyond, showing cobbled path and summer sunlight.
Wagon roof – pale blue ceiling with gold stars and gilded bosses at the intersections of black ribs, forming a decorative grid pattern. Green man boss – carved foliate face on the Marian rood screen, surrounded by oak leaves symbolising renewal and the cycle of nature. Bench end carving – elephant beneath a stylised tree framed by Gothic tracery, representing strength and memory in church symbolism. Porch view – looking out through the granite archway towards the lych gate and thatched cottages, with cobbled path and bright summer light.
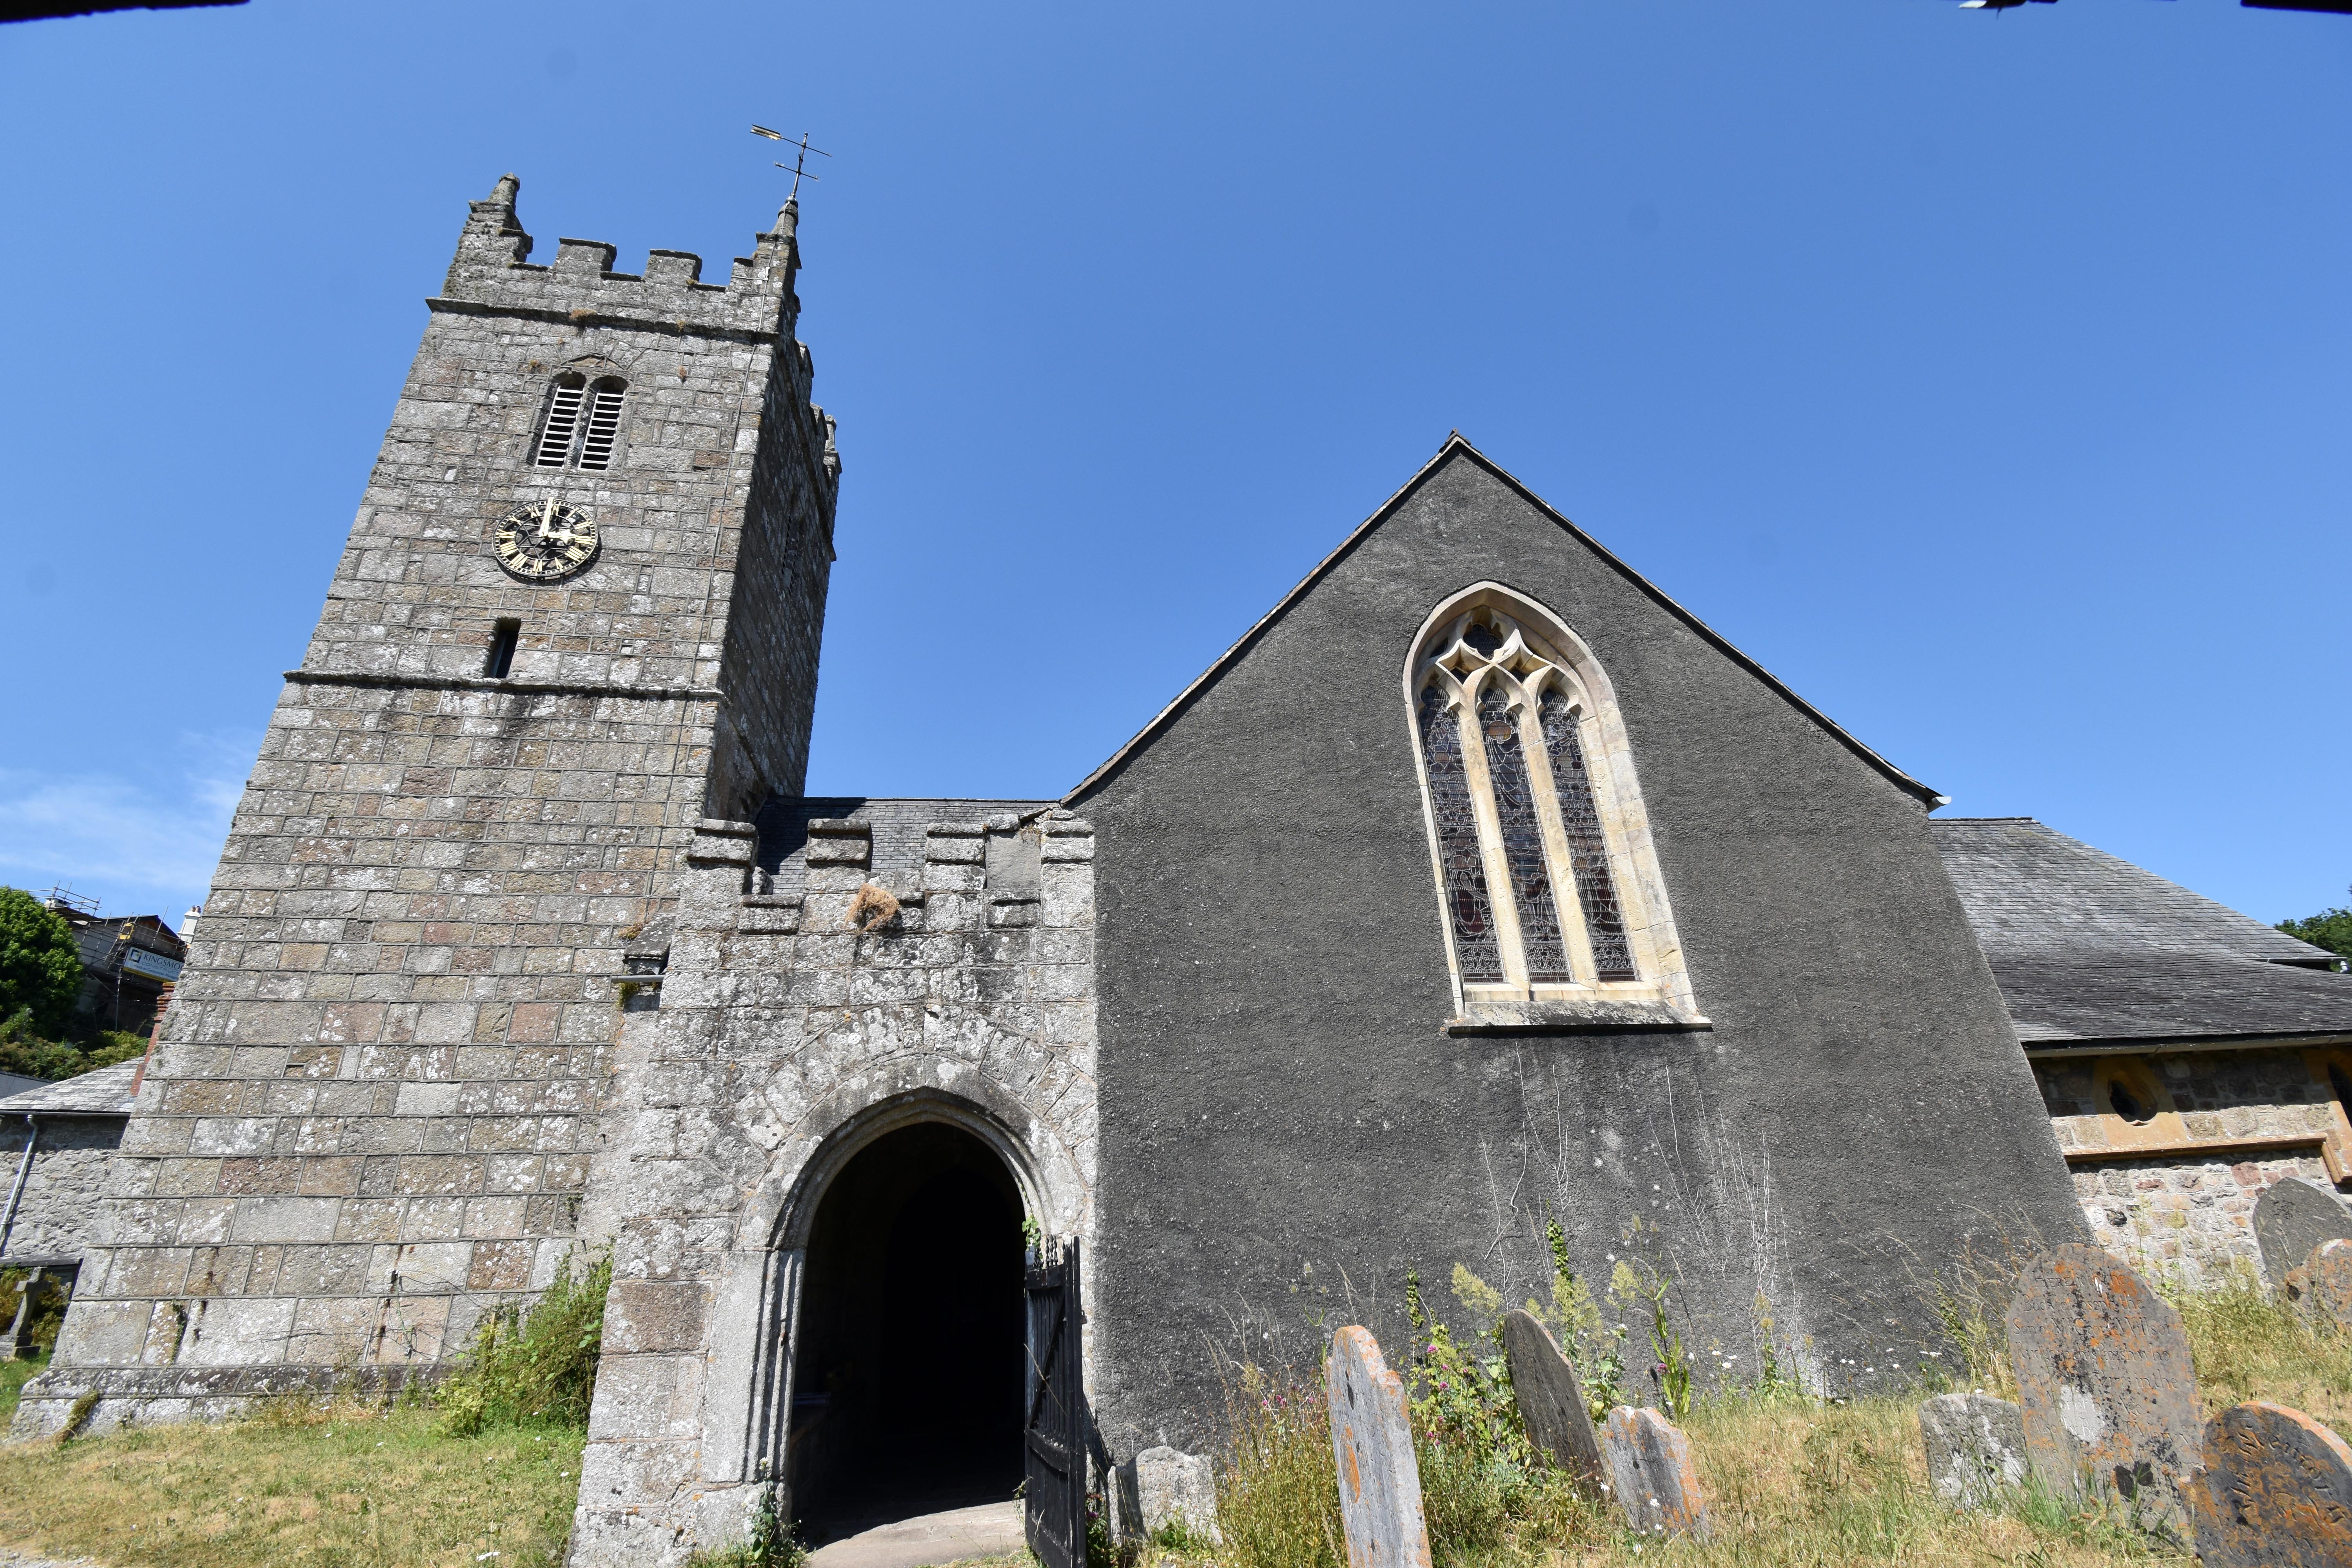
Church of St John the Baptist, Lustleigh – granite tower with battlements and clock face above the arched porch, adjoining nave with tall Gothic window and surrounding gravestones. Church of St John the Baptist, Lustleigh – view from the road showing the tower and the lychgate built for Queen Victoria’s Golden Jubilee, with slate roof and iron gates. Thatched cottages in Lustleigh village near the church, whitewashed walls and slate roofs surrounded by summer greenery under a clear blue sky. Lustleigh Baptist Church – simple granite building with two arched windows and white frames, sunlight casting shadows of nearby trees across the stone façade.
Lustleigh Church – granite tower with battlements and clock above the porch, adjoining nave with Gothic window and gravestones in the churchyard. Lustleigh Church and lychgate – view from the road showing the tower and Jubilee lychgate built for Queen Victoria’s Golden Jubilee, with slate roof and iron gates. Lustleigh cottages – traditional thatched houses with whitewashed walls and slate roofs, surrounded by summer greenery under a clear blue sky. Baptist Church – granite building with two arched windows and white frames, sunlight casting tree shadows across the stone façade.
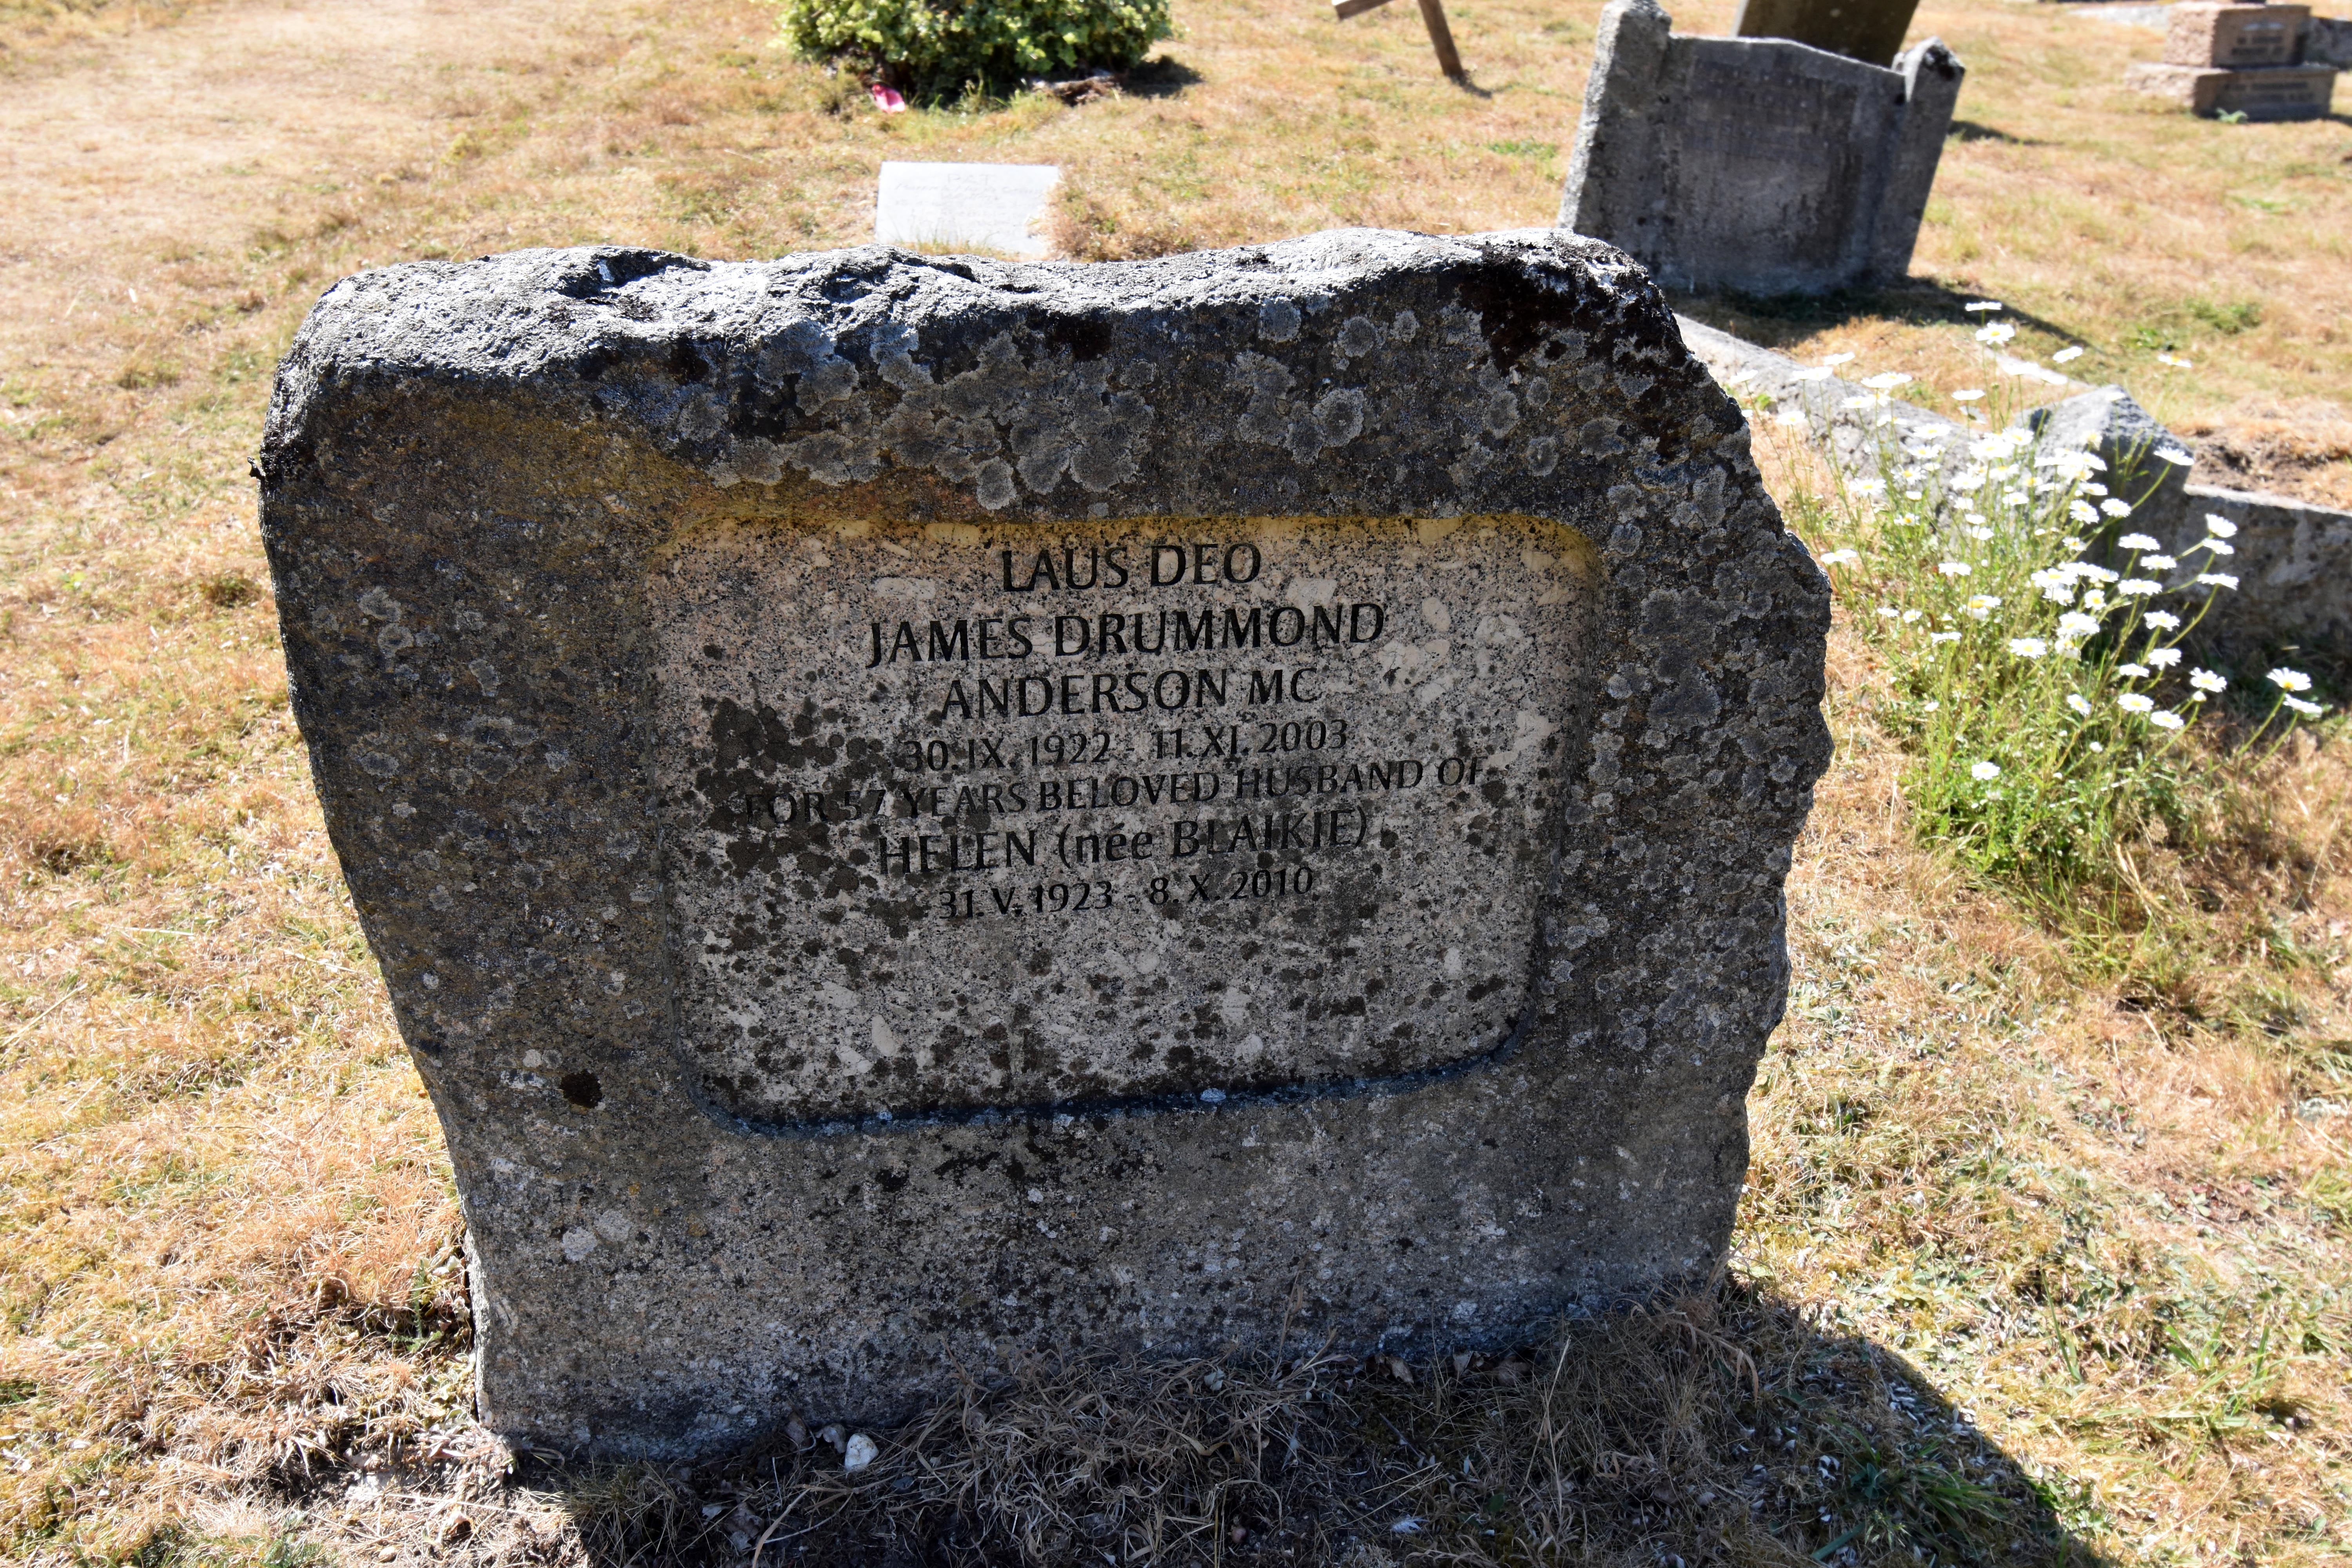
Overgrown gravestone of William Amery in the Baptist Church graveyard, Lustleigh, partially covered by ivy and brambles. Stone entrance gateway to the cemetery, Lustleigh, with wooden gate, slate roof, and steps leading through lush greenery. James Drummond Anderson MC gravestone in Lustleigh cemetery, inscribed 'LAUS DEO' with details of his long marriage to Helen. Wide view of Lustleigh cemetery on a hot, dry summer day with many graves, crosses, and open grassy areas under a clear blue sky.
William Amery gravestone – Baptist Church graveyard, overgrown with ivy and brambles. Cemetery entrance – stone gateway with wooden gate and steps, surrounded by summer greenery. James Drummond Anderson MC gravestone – “LAUS DEO”, beloved husband of Helen for 57 years. Lustleigh cemetery – wide view on a hot, dry day with many graves under a clear blue sky.
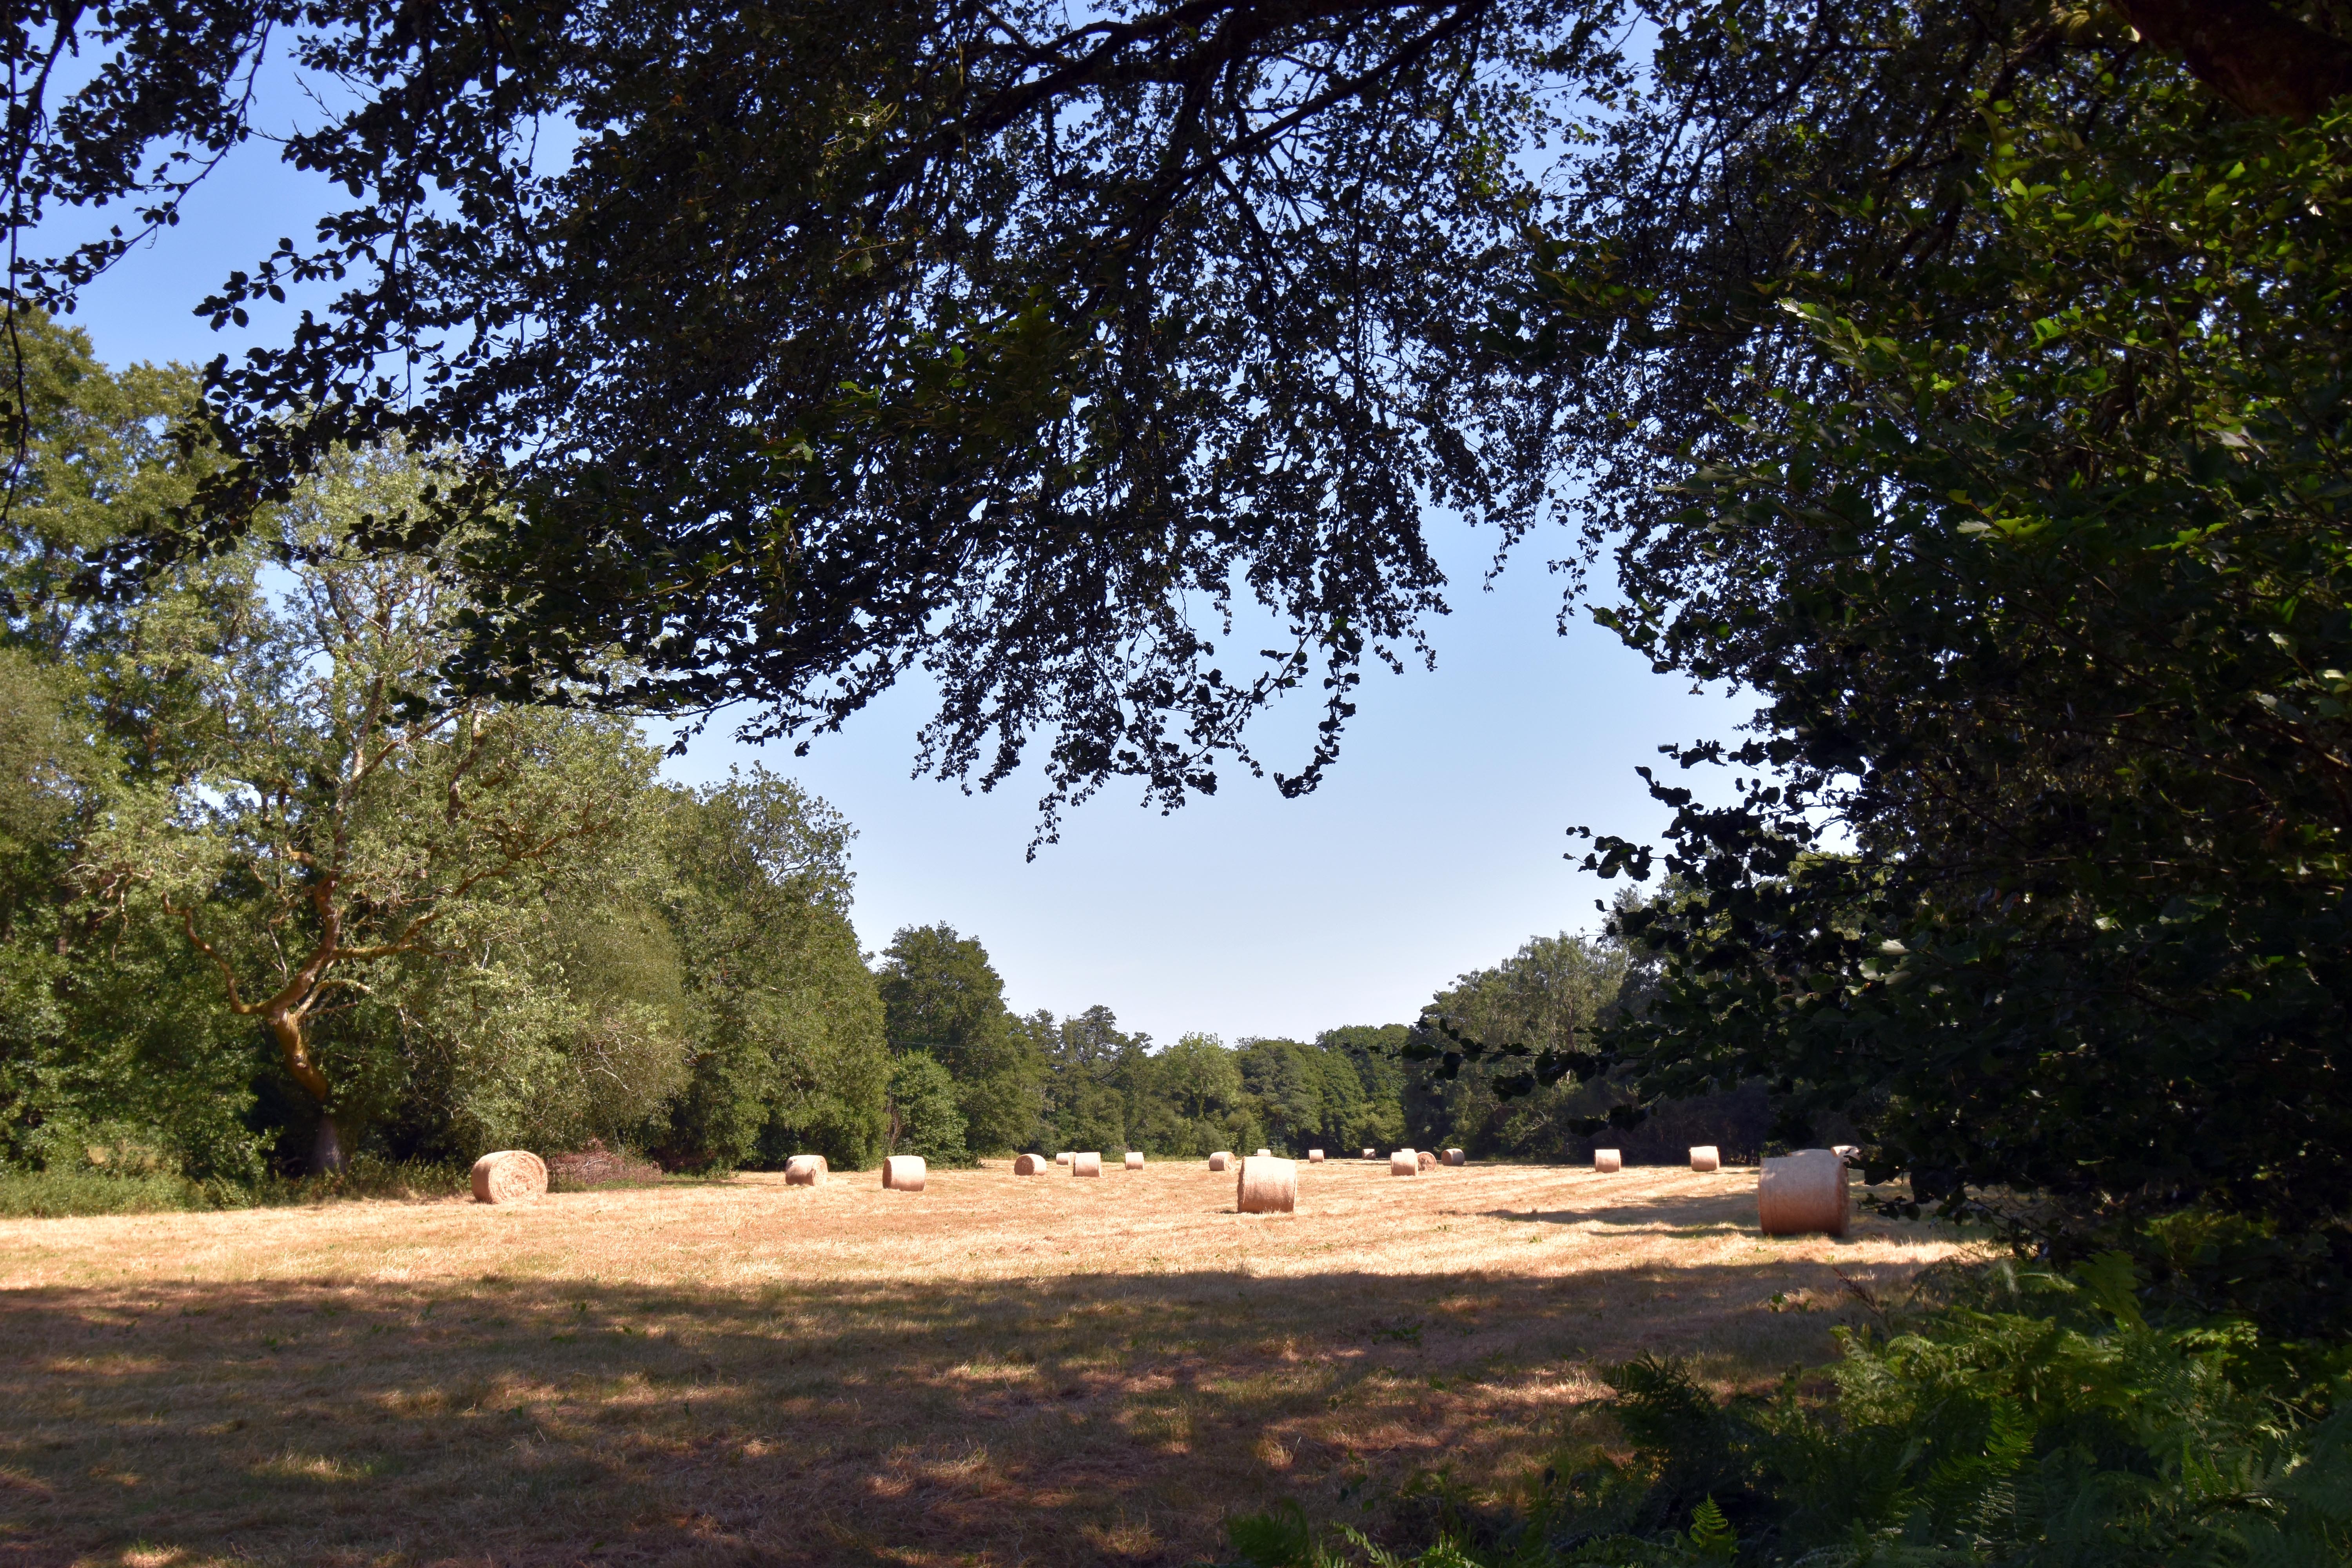
Commonwealth War Grave of Sergeant F. C. Bunclark DFM, Observer Royal Air Force, died 11th November 1942 aged 27, in Lustleigh cemetery. Celtic cross gravestone of Colonel Archibald Samuel Dunlop, Royal Artillery, in Lustleigh cemetery. Pastoral summer scene near Drakeford Bridge with hay bales in a golden field framed by overhanging tree branches. Stone bridge over the River Bovey near Drakeford, with clear water flowing underneath and Rupert the dog drinking from the river.
Sgt F. C. Bunclark DFM – Royal Air Force observer, died 1942 aged 27. Colonel Archibald Samuel Dunlop – Celtic cross gravestone, Royal Artillery. Pastoral scene near Drakeford Bridge – hay bales in a field under summer sun. Drakeford Bridge over the River Bovey – with Rupert drinking from the clear water.

Walks by the Westcountry Walker
Armed Forces | Art and Culture | Articles | Biographies | Colonies | Discussion | Glossary | Hiking | Home | Library | Links | Map Room | Sources and Media | Science and Technology | Search | Student Zone | Timelines | TV and Film | Wargames
Donate by Stephen Luscombe